It was pretty to see the snow covering our outdoor decorations and the grandsons were delirious because school was cancelled. Our daughter said they played outside until the last snowflake had melted. That's how excited children get when they don't have a lot of snow to play in. Our 3 year old grandson was so excited our other daughter said he screamed, "mom, it's Christmas." No, not quite yet.
If you are still working on your decorations, I have one more simple ornament you can make using sheet music. This is another origami ornament and is very easy. I found it on domesticali.typepad.com. The most challenging part is getting the two little points in the folds of the previous piece. It is harder on the smaller wreaths than on the larger ones. Just a little FYI.
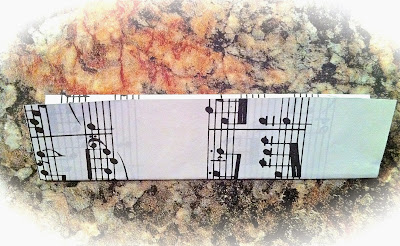
First, you need to cut strips of paper 4 cm x 2 cm. I used sheet music. You could use book pages, card stock, construction paper, or origami paper. Whichever you prefer. I cut mine with my paper cutter because it's easier. The bigger ornaments are 10 cm x 5 cm. You just want the paper to be twice as long as it is wide.
Lay a piece of the cut paper in front of you and fold it in half long ways. Keep the fold at the bottom, opening at the top.
Now, fold the paper in half, end to end.
Open the fold out and fold each corner down in a triangle.
Fold the paper together so you have the two points on one end. Still have the fold at the bottom, opening at the top. Make 8 of these beams.
Holding one of the beams, there will be an opening.
Put one point in each opening and push the beam in as far as it will go. Continue around the circle.
It can get a little tricky at the end of the small ones. They want to pop apart sometimes. So, take your time and go slow. Once you have all the beams together, gently work until you have a circle in the middle. I cheated and put a little spot of hot glue inside of each fold to keep the ornaments from coming apart. We have little hands that touch the Christmas ornaments. It's too much work for them to all fall apart.
I cut pieces of embroidery thread to use for the hanger, made a loop and hot glued it inside one of the openings. Then, I brushed a little Mod Podge on each edge and sprinkled them with white glitter. They sparkle so nicely in the tree lights. These would be lovely on a gift package also.
These are hanging on my pencil tree that has all hand made ornaments I have made through our many years together. The red and green sequined ornament next to the sheet music star was made 44 years ago for our first Christmas tree. I made 3 of them and still use them every year.
Here are some of the ornaments. There are paddle bead candy canes, pearl angels and trees, wire marble ornaments, snowflakes, paper and aluminum stars, crystal and button ornaments, and initials for our children made from bugle beads. Here are some close ups.
There are many more ornaments that I have made through the years, there just isn't room for them all on the tree. I love looking at them and remembering making them. I made the pearl angels and trees the year our son John was born 36 years ago this month.
I took our grandsons from room to room looking at our decorated trees on Saturday. We examined the ornaments, and I told them stories about them. Our 3 (soon to be 4) year old grandson looked in rapt wonder at each tree, asking questions. When we were done, he said "thank you grandma, for showing us your trees." Memory made - and it brought tears to my eyes. It was so sweet.
Perhaps you could make memories by trying an ornament project each year and adding them to your collection. Let the children or grandchildren help. Or let them make some for their tree. They will always remember where they were when they made them. There's nothing like Christmas memories.
Everyday Donna
Things to Remember:
Never worry about the size of your Christmas tree. In the eyes of children, they are all 30 feet tall.
Larry Wilde


