Wednesday is usually our volunteer day, but today we did volunteer duty of a different nature. It was Grandma and Pawpaw to the rescue. Our daughter had to chaperone a field trip for her 8 year old son's class, the 5 year old was at pre-K and that left the 18 month old home alone if we didn't show up. Now, we could not let that happen (haha), so we got up bright and early (and I do mean early) because we had to trek across town and be at their house by 8 am. Yikes, I have forgotten how much I dislike getting up at 6 am. Yay for retirement.
After she returned home from the field trip, we spent a little time conversing and went to pick up the 5 year old from pre-K. Well, you know Grandma and Pawpaw wanted to have lunch with everyone who wasn't in school, so we enjoyed a fun little lunch out and then made a trip to a fabulous place a friend had told me about that has outstanding home decor bargains and you know how I love a bargain. We will definitely be going back there again!
We returned to their house and got in our car to head back to the east side of Nashville where we live. On our way home, we made our usual Wednesday afternoon stop at our other daughter's house to visit with her and her two sons. The baby is 5 weeks old today. Wow, time flies. We spent some time playing with the 2 year old and Grandma held the baby for a good while, and then it was time to head to the little yellow cottage. Whew, Grandma was tired.
Of course, now it's time for dinner and what are we going to have? I wanted something different and easy. There was a tuna casserole I had pinned on my Pinterest board that I had been wanting to try so today was the day. I had all the ingredients, so tuna casserole it was. But, let me tell you, this is NOT the tuna casserole I was used to eating when we were growing up. Everybody's mom had a variation on a recipe and somehow the casserole was always topped with crushed potato chips and made with canned soup. Now, I have to say I always liked tuna casserole where most of my friends didn't. But, I like tuna - tuna salad, tuna casserole, creamed tuna, however anyone fixed it.
This recipe is from a blog called Mmm is for Mommy and I thought it sounded really good and there is not one can of soup in it. Yay! I did a little tweaking of my own and Dan declared this equivalent to fine dining. Yahoo, a keeper recipe to add to the repertoire.
I figured out the cost and I will tell you that this makes 4 huge servings, or you could serve smaller portions with sides and it cost less than $6.00 to make. Now that is a bargain for a delicious meal - and we have leftovers for lunch tomorrow. Even better!
There are no potato chips in this casserole, but there is bacon. Yum. Her recipe calls for sliced mushrooms and we are not big fans, so I added green peas which we love. If you like peas and mushrooms, hey add both. It won't hurt the taste in the least. I also added some worcestershire and fresh thyme which was a super addition and I topped it with sliced tomatoes. Trader Joe's had Roma tomatoes for 17 cents each this week and they were big, so I invested in a few and I am so glad I did. She also added 4 ounces of cream cheese, which I left out. The sauce was very creamy and I didn't want the extra fat. Feel free to add it if you want. Now, here is what you need for this recipe.
Ingredients:
1/2 pound rotini pasta, uncooked (I used tri-color)
4 slices bacon, fried crisp and crumbled (reserve 2 TBSP fat)
1 TBSP olive oil
2 TBSP reserved bacon fat
1/4 cup flour
1 TBSP dijon Mustard
1/4 tsp worcestershire
1 onion, diced
2 ribs celery, diced
1 garlic clove, minced
(1 cup sliced mushrooms)see explanation above
1 cup green peas - if you want to use mushrooms and green peas, use 1/2 cup of each
2 5 ounce cans Tuna in water, drained
1 1/2 cups chicken stock
1 cup milk
2 TBSP grated parmesan
1 sliced tomato
1/2 8 ounce block cream cheese (I left this out)
several sprigs fresh thyme, strip leaves from stem (or you can use dried)
salt and pepper
Cook the pasta according to directions and drain.
In a dutch oven, fry the bacon until crisp, remove bacon and drain. Add olive oil to bacon drippings. Saute onions, garlic, celery and mushrooms if you are using them in the bacon fat and olive oil. Cook until softened. Stir in dijon mustard and sprinkle with flour. Cook for a minute or so to get rid of raw flour taste. Whisk in chicken stock and milk. Continue to stir over medium heat until the sauce thickens. Add salt and black pepper to taste and add the thyme. Add the drained tuna and half the crumbled bacon. Add drained pasta and mix until all the pasta is coated with sauce. Top with grated parmesan cheese and remaining crumbled bacon. I then put a circle of tomatoes on top of the casserole and a little more parmesan cheese. It looked like this in the dutch oven.
Put the dutch oven (uncovered) in a 350 degree oven for about 30 minutes. Remove from oven and serve. Fantastic! You have protein, pasta, veggies, creamy sauce and so much flavor for under $6.00. Now, who can complain about that AND it is not like the tuna casserole you have experienced in the past. It is fresh and delicious.
I have to say I am ever so thankful to the creators of Pinterest. They are geniuses who have changed our lives forever! I could read a dozen cookbooks a week and never find a recipe I wanted to try. I find several recipes a day on Pinterest. I have found that most of the things from Pinterest are really good, just beware of mistakes in the recipes. I have found several - especially making baked goods. That is where cooking experience comes in handy. Sometimes, I look at a recipe and know it's not going to work, something has been left out or a measurement may not be right and I can fix it. Other than that, Pinterest rocks! Thanks Mmm is for Mommy or this inspiration. Hope you all give it a try. As Dan said, it's the equivalent to fine dining on a budget!
Everyday Donna
Things to Remember:
Is this chicken, what I have, or is this fish? I know it's tuna, but it says 'Chicken of the Sea.'
Jessica Simpson
Wednesday, March 21, 2012
Tuesday, March 20, 2012
Peeps - This One's For You Susan B.
Peeps. You know what they are right? - those little chicks and bunnies that are made from marshmallow and covered in colored sugar. You find them on the store shelves close to Easter. Do you love 'em or hate 'em? Is anyone indifferent to peeps? It doesn't seem anyone is indifferent. If you start a conversation about them, it seems you either love them or you really really dislike them. I am a disliker, a major disliker of Peeps as far as eating them goes, but there is something endearing about them and the great colors they come in. You immediately think spring and Easter and sunshine and lollipops and roses and any other other uplifting subject they have written songs about. But, do I ever think about eating them? NEVER!
This post is dedicated to my friend Susan B. and our friends from the Due North Productions family. We were a group of parents who worked together in the theatre and choir department at the high school our youngest son attended several years back. Susan was the choir director and we did anything and everything we could to help out. We had a lot of fun conversations about Peeps and I learned a lot about all the ways to enjoy Peeps (if you can). Some people like them when they get hard and crusty on the outside and some like them when they are soft and gooey. Someone said they liked to microwave them before eating. I, on the other hand, do not like them at all in any state of existence. Ugh. I even asked "the Easter Bunny" to please not put them or any jelly beans in my Easter basket when I was a kid. I am shivering as I type this, just thinking about eating them. Ewwwww
This crazy idea started with a bag of little marshmallow flowers I found at the Dollar Tree. They were so cute, I thought I could make something with them. But, they were so small I knew I needed something bigger to help fill in. Then, I had this crazy idea about making a colorful centerpiece for our table after looking at a large display of Peeps at Kroger. They come in such fun colors and there are not only chicks, but bunnies. Hmmmm, ideas began to formulate.
My creative process works a little contrary to the accepted norm on many occasions. I sort of work backwards sometimes, but it works for me. (That's a nice way of saying I start with no plan). I had these two little green baskets that are about 6 inches square, they sort of look like berry baskets and my thought was one of them would make a good container for a centerpiece. They also look really nice with the place mats I painted. So, there was my base. I put a piece of styrofoam in it and filled in around it with some paper shred I had. Next, I skewered some bunnies to start the "shape" of the centerpiece. I used wooden skewers like you would make kebabs with. I swear I did not harm a single bunny or chick in the process.
That's the way it started. Now, that looked a little plain and there was the issue of the skewers which I knew I would NOT like when I finished. Lots of plain wood sticks showing. Not good. So, I had another idea and got out a bunch of colorful mini cupcake papers I had in bright colors. I slid some up the skewer under one of the marshmallow flowers and I really liked the way it looked.
They looked like flower petals and added lots more color to the whole skewer/marshmallow effect and they would help fill in the centerpiece. I was on a roll. I started putting Peeps (the chicks and bunnies) on skewers and varying the colors of cupcake papers for a garden variety look. I trimmed the skewers to different lengths as needed. I also stacked some of the marshmallow flowers on top of each other in twos and threes for another variation. I kept working around the basket until I had it all filled in. It's a hoot! No, I guess actually it's a Peep. Anyway, it looks adorable in the center of the table.
You know, there is all kinds of research I found on the web about Peeps and what will dissolve them. It seems there is very little that will dissolve them, not even acetone. There are even pictures of different chemicals they have placed them in and the results of the tests. Do I want to eat these? No way. But, they get hard and crusty if you let them set out so I figure this thing would survive a nuclear holocaust. There will be nothing left but cockroaches and peeps. Can't you see some archeologist digging this centerpiece up some day and wondering what in the world it is and what precious materials it is made from? Now that makes me laugh.
I had to keep our two oldest grandsons from eating any of the centerpiece this weekend. That had not entered my mind when I made it, so I had to give them the left over Peeps from the boxes. Guess I know what to put in their Easter baskets because they loved them. Ugh.
My friends Don, Rick and Marge were here on Friday and they all took pictures of my crazy Peep centerpiece. Don called it a Peep tree and they thought it was the cutest thing ever. You just never know when you start a project where it will go. As for this one, it looks adorable in the center of the table, just don't make me eat any of it.
Everyday Donna
Things to Remember:
An annual "Peep Off" competition is held in Maryland on the first Saturday after Easter, when Peeps are greatly discounted, to see who can eat the most in 30 minutes. The first such event was arranged by Shawn Sparks in 1994, and had only six participants.[6] Dave Smith startedSacramento's record-holding (102 eaten) annual Peep Off after contacting Jack Eidsness, a participant in the first Peep Off, with a question about it, through Mr. Eidsness' Peep-themed website. Wikipedia
Now, how about that for an eating contest? 102 Peeps? Oh Em Geeee
This post is dedicated to my friend Susan B. and our friends from the Due North Productions family. We were a group of parents who worked together in the theatre and choir department at the high school our youngest son attended several years back. Susan was the choir director and we did anything and everything we could to help out. We had a lot of fun conversations about Peeps and I learned a lot about all the ways to enjoy Peeps (if you can). Some people like them when they get hard and crusty on the outside and some like them when they are soft and gooey. Someone said they liked to microwave them before eating. I, on the other hand, do not like them at all in any state of existence. Ugh. I even asked "the Easter Bunny" to please not put them or any jelly beans in my Easter basket when I was a kid. I am shivering as I type this, just thinking about eating them. Ewwwww
This crazy idea started with a bag of little marshmallow flowers I found at the Dollar Tree. They were so cute, I thought I could make something with them. But, they were so small I knew I needed something bigger to help fill in. Then, I had this crazy idea about making a colorful centerpiece for our table after looking at a large display of Peeps at Kroger. They come in such fun colors and there are not only chicks, but bunnies. Hmmmm, ideas began to formulate.
My creative process works a little contrary to the accepted norm on many occasions. I sort of work backwards sometimes, but it works for me. (That's a nice way of saying I start with no plan). I had these two little green baskets that are about 6 inches square, they sort of look like berry baskets and my thought was one of them would make a good container for a centerpiece. They also look really nice with the place mats I painted. So, there was my base. I put a piece of styrofoam in it and filled in around it with some paper shred I had. Next, I skewered some bunnies to start the "shape" of the centerpiece. I used wooden skewers like you would make kebabs with. I swear I did not harm a single bunny or chick in the process.
That's the way it started. Now, that looked a little plain and there was the issue of the skewers which I knew I would NOT like when I finished. Lots of plain wood sticks showing. Not good. So, I had another idea and got out a bunch of colorful mini cupcake papers I had in bright colors. I slid some up the skewer under one of the marshmallow flowers and I really liked the way it looked.
They looked like flower petals and added lots more color to the whole skewer/marshmallow effect and they would help fill in the centerpiece. I was on a roll. I started putting Peeps (the chicks and bunnies) on skewers and varying the colors of cupcake papers for a garden variety look. I trimmed the skewers to different lengths as needed. I also stacked some of the marshmallow flowers on top of each other in twos and threes for another variation. I kept working around the basket until I had it all filled in. It's a hoot! No, I guess actually it's a Peep. Anyway, it looks adorable in the center of the table.
You know, there is all kinds of research I found on the web about Peeps and what will dissolve them. It seems there is very little that will dissolve them, not even acetone. There are even pictures of different chemicals they have placed them in and the results of the tests. Do I want to eat these? No way. But, they get hard and crusty if you let them set out so I figure this thing would survive a nuclear holocaust. There will be nothing left but cockroaches and peeps. Can't you see some archeologist digging this centerpiece up some day and wondering what in the world it is and what precious materials it is made from? Now that makes me laugh.
I had to keep our two oldest grandsons from eating any of the centerpiece this weekend. That had not entered my mind when I made it, so I had to give them the left over Peeps from the boxes. Guess I know what to put in their Easter baskets because they loved them. Ugh.
My friends Don, Rick and Marge were here on Friday and they all took pictures of my crazy Peep centerpiece. Don called it a Peep tree and they thought it was the cutest thing ever. You just never know when you start a project where it will go. As for this one, it looks adorable in the center of the table, just don't make me eat any of it.
Everyday Donna
Things to Remember:
An annual "Peep Off" competition is held in Maryland on the first Saturday after Easter, when Peeps are greatly discounted, to see who can eat the most in 30 minutes. The first such event was arranged by Shawn Sparks in 1994, and had only six participants.[6] Dave Smith startedSacramento's record-holding (102 eaten) annual Peep Off after contacting Jack Eidsness, a participant in the first Peep Off, with a question about it, through Mr. Eidsness' Peep-themed website. Wikipedia
Now, how about that for an eating contest? 102 Peeps? Oh Em Geeee
Monday, March 19, 2012
Pancetta, Peas, Orecchiette Pasta and Cream Sauce! Perfect For A Busy Monday
Oh look, it's Monday - again. Monday, Monday, can't trust that day -- why oh why is Monday such a chore? Somehow, it just can be and I have been a busy bee today. I do hope you all had a fantastic weekend, we sure did. The weather is amazing right now, more like summer than spring. It was 80 today here in Nashville. The blooming trees are stunning and the grass is growing like crazy. Dan had to mow our yard for the second time already. And, today was grocery shopping day which is lots of fun when I get to go to Trader Joe's even though we have to drive to the other side of town! You may not think of grocery shopping as fun, but I rather enjoy finding new products that I want to try, especially when I have a specific recipe in mind and today I did.
Since it was so warm today, I didn't want anything heavy for dinner. I wanted something light and refreshing and summer like. There is a Jamie Oliver recipe I have been wanting to try that I had pinned on Pinterest. There is another very similar one from Huffington post that I had also pinned. So, I kind of combined the two and let me tell you, it is so delicious. We will definitely be having this again and again. And, the most important point thing, it is really quick and easy to put together which makes it a natural for Monday (or any day really).
The Jamie Oliver recipe uses mini shell pasta and bacon and the Huffington post recipe used orecchiette pasta which is kind of cup or bell shaped. When I was at Trader Joe's today, they had orecchiette so I went with it and I am so glad I did. It is a really nice chewy pasta that held the sauce beautifully.
Trader Joe's also had cubed pancetta in 4 ounce packages which was just perfect for this recipe. Otherwise, you have to cut bacon into lardons for the Jamie Oliver recipe and the pancetta had just the right flavor for this creamy sauce, not too smoky like bacon can be. It's just a matter of which you have on hand. And, it has green peas which is one of our favorite veggies. Yum. So, you have pasta, pancetta, green peas and one of the tastiest cream sauces I have ever eaten.
This recipe only took about 20 minutes to put together which makes it a fantastic Monday recipe. It also makes a large pan full and that means leftovers for lunches or another dinner for us. Yay! It says it serves 4, but those would be huge servings. You may not have as much left as we had. We enjoyed the pasta with a simple green salad and crusty bread and it was just right as Goldilocks would say. Here is what you need to make this recipe:
Ingredients:
1 pound shaped pasta - mini shells or orecchiette
2 Tbsp Olive Oil
2 Tbsp Butter
1 4 ounce package cubed pancetta or 10 slices bacon cut into lardons
2 cups frozen green peas
2 heaping TBSP sour cream
1 small bunch fresh mint, stems removed and minced (I don't care for mint, so I used fresh thyme)
juice of 1 lemon
1/2 cup grated parmesan cheese
fresh cracked black pepper
Cook the pasta according to directions. I made the sauce while the pasta cooked. This is how you make it.
Heat the olive oil and butter in a large saute pan. Add the pancetta (or bacon) and cook until crispy and brown, about 5 minutes. I added a lot of fresh cracked black pepper while the pancetta cooked. Add the frozen peas to the pan and cook just a bit until they start to thaw, then add the sour cream and herbs. Stir until everything is coated. (I added 2 ladles of starchy pasta water to the sauce before I drained the pasta). Drain the pasta and return it to the pan. Add the sauce to the pasta, squeeze the lemon juice over the pasta and stir to coat all the pasta. Add the parmesan cheese and stir again to coat all the pasta, stirring until all the cheese is melted and creamy. That's it - done! Ready to serve. Look at how this fabulous creamy sauce coats the pasta. Yummm.
When you have had a really busy or tough day and need something quick and easy to put on the table, this is your dish! It is inexpensive and super D-licious. This is also a meal that kids would love - pasta, peas, bacon, creamy sauce!!! Jamie Oliver said he makes this for his children all the time. Give this recipe a try. It is perfect for warm weather! I am already looking forward to left overs tomorrow. That makes Tuesday an easy day for me. Wahoo!
Everyday Donna
Things to remember:
A bee is never as busy as it seems; it's just that it can't buzz any slower.
Kin Hubbard
Since it was so warm today, I didn't want anything heavy for dinner. I wanted something light and refreshing and summer like. There is a Jamie Oliver recipe I have been wanting to try that I had pinned on Pinterest. There is another very similar one from Huffington post that I had also pinned. So, I kind of combined the two and let me tell you, it is so delicious. We will definitely be having this again and again. And, the most important point thing, it is really quick and easy to put together which makes it a natural for Monday (or any day really).
The Jamie Oliver recipe uses mini shell pasta and bacon and the Huffington post recipe used orecchiette pasta which is kind of cup or bell shaped. When I was at Trader Joe's today, they had orecchiette so I went with it and I am so glad I did. It is a really nice chewy pasta that held the sauce beautifully.
Trader Joe's also had cubed pancetta in 4 ounce packages which was just perfect for this recipe. Otherwise, you have to cut bacon into lardons for the Jamie Oliver recipe and the pancetta had just the right flavor for this creamy sauce, not too smoky like bacon can be. It's just a matter of which you have on hand. And, it has green peas which is one of our favorite veggies. Yum. So, you have pasta, pancetta, green peas and one of the tastiest cream sauces I have ever eaten.
This recipe only took about 20 minutes to put together which makes it a fantastic Monday recipe. It also makes a large pan full and that means leftovers for lunches or another dinner for us. Yay! It says it serves 4, but those would be huge servings. You may not have as much left as we had. We enjoyed the pasta with a simple green salad and crusty bread and it was just right as Goldilocks would say. Here is what you need to make this recipe:
Ingredients:
1 pound shaped pasta - mini shells or orecchiette
2 Tbsp Olive Oil
2 Tbsp Butter
1 4 ounce package cubed pancetta or 10 slices bacon cut into lardons
2 cups frozen green peas
2 heaping TBSP sour cream
1 small bunch fresh mint, stems removed and minced (I don't care for mint, so I used fresh thyme)
juice of 1 lemon
1/2 cup grated parmesan cheese
fresh cracked black pepper
Cook the pasta according to directions. I made the sauce while the pasta cooked. This is how you make it.
Heat the olive oil and butter in a large saute pan. Add the pancetta (or bacon) and cook until crispy and brown, about 5 minutes. I added a lot of fresh cracked black pepper while the pancetta cooked. Add the frozen peas to the pan and cook just a bit until they start to thaw, then add the sour cream and herbs. Stir until everything is coated. (I added 2 ladles of starchy pasta water to the sauce before I drained the pasta). Drain the pasta and return it to the pan. Add the sauce to the pasta, squeeze the lemon juice over the pasta and stir to coat all the pasta. Add the parmesan cheese and stir again to coat all the pasta, stirring until all the cheese is melted and creamy. That's it - done! Ready to serve. Look at how this fabulous creamy sauce coats the pasta. Yummm.
When you have had a really busy or tough day and need something quick and easy to put on the table, this is your dish! It is inexpensive and super D-licious. This is also a meal that kids would love - pasta, peas, bacon, creamy sauce!!! Jamie Oliver said he makes this for his children all the time. Give this recipe a try. It is perfect for warm weather! I am already looking forward to left overs tomorrow. That makes Tuesday an easy day for me. Wahoo!
Everyday Donna
Things to remember:
A bee is never as busy as it seems; it's just that it can't buzz any slower.
Kin Hubbard
Sunday, March 18, 2012
Shrimp A la Creole or Shrimp Creole
We do love our spicy food and Shrimp Creole (originally known as Shrimp A La Creole) is one of our long time favorites. I started making this recipe when we were first married 42 years ago. The recipe I use is from the Betty Crocker cookbook I received as a wedding shower gift. I have made a few tweaks to it over the years, but it is oh so delicious and easy to make.
I did a little research on Shrimp Creole and this is what I found. Creole cooking is a combination of French, Italian, African and Spanish cooking originating from the Louisiana Territory even before the Louisiana Purchase in 1803. Creole cooking is the original food influence in New Orleans.
Shrimp creole is a dish of Louisiana Creole origin (French, African and Spanish Heritage), consisting of cooked shrimp in a mixture of whole or diced tomatoes, onion, celery and bell pepper, spiced with hot sauce, and served over steamed or boiled white rice. Wikipedia
Even though Wikipedia doesn't mention the Italian cooking influence, other information said the use of tomatoes in their cooking comes from the large Italian migration that occurred in that area. Makes sense. Whoever is responsible, I salute you!
Before you start cooking your Shrimp Creole, make about 6 servings of white rice and let it cook while you make your sauce. The rice will stay warm in a covered pan if it finishes a little before the creole sauce.
Here is what you need:
1 large onion, diced
4 ribs celery sliced
1 large green pepper diced
2 cloves garlic minced
1 to 2 Tbsps olive oil
1 to 1.5 pounds shrimp shelled, deveined and tails removed (frozen works fine)
1 14 ounce can diced tomatoes
1 14 ounce can fire roasted tomatoes
1 8 ounce can tomato sauce
1 TBSP chili powder
1 tsp Worcestershire sauce
1/4 cup medium or hot taco sauce (or you can use Tobasco by adding it in drops until you reach the "heat" you want. Dan thinks Tobasco has too much vinegar for his taste, so I use the taco sauce)
Salt and pepper to taste (I never add salt as there is enough in the tomatoes and seasonings in the sauce, but I do add black pepper)
I make my sauce in an electric skillet because the temperature is easier to control. Place temp on 325 and add olive oil to pan. When hot, add onions and saute until translucent. Add celery and green peppers and saute. Don't overcook. I like them still somewhat crisp. Add garlic, tomatoes, tomato sauce, chili powder, and worcestershire sauce. Cook for 20/25 minutes until sauce starts to thicken. Add hot sauce. Add shrimp and cook just until pink, only takes a couple of minutes. If you are using frozen shrimp, throw them in still frozen and they will cook just fine. Turn heat off. This is how it looks in the pan. OH SO GOOD!
To serve, place white rice in the middle of a plate and spoon the creole sauce over the rice like in the picture above. Let me say, it's fantastic. When I am in a "spicy" mood, this is my go to dish. Most people think Mexican for spicy, but this is a fabulous change up from Tex-Mex. Yummmmmmy.
We have a green salad and warm crusty bread with our Shrimp Creole and my, oh my, what a delicious dinner. Next time you are having company and you want something different, easy, and delicious, give this recipe a try. If you have left overs, and this is my favorite part, put the rice in a large tupperware bowl, cover with sauce and you have the most delicious left overs ever. It reheats great in a microwave oven. I just place the amount we each want in individual serving bowls, cover with a paper towel and heat. Just as good the second time around! Mmmm Mmmmm Mmmmm Time to think Creole.
Everyday Donna
Things to Remember:
New Orleans food is as delicious as the less criminal forms of sin. Mark Twain
I did a little research on Shrimp Creole and this is what I found. Creole cooking is a combination of French, Italian, African and Spanish cooking originating from the Louisiana Territory even before the Louisiana Purchase in 1803. Creole cooking is the original food influence in New Orleans.
Shrimp creole is a dish of Louisiana Creole origin (French, African and Spanish Heritage), consisting of cooked shrimp in a mixture of whole or diced tomatoes, onion, celery and bell pepper, spiced with hot sauce, and served over steamed or boiled white rice. Wikipedia
Even though Wikipedia doesn't mention the Italian cooking influence, other information said the use of tomatoes in their cooking comes from the large Italian migration that occurred in that area. Makes sense. Whoever is responsible, I salute you!
Before you start cooking your Shrimp Creole, make about 6 servings of white rice and let it cook while you make your sauce. The rice will stay warm in a covered pan if it finishes a little before the creole sauce.
Here is what you need:
1 large onion, diced
4 ribs celery sliced
1 large green pepper diced
2 cloves garlic minced
1 to 2 Tbsps olive oil
1 to 1.5 pounds shrimp shelled, deveined and tails removed (frozen works fine)
1 14 ounce can diced tomatoes
1 14 ounce can fire roasted tomatoes
1 8 ounce can tomato sauce
1 TBSP chili powder
1 tsp Worcestershire sauce
1/4 cup medium or hot taco sauce (or you can use Tobasco by adding it in drops until you reach the "heat" you want. Dan thinks Tobasco has too much vinegar for his taste, so I use the taco sauce)
Salt and pepper to taste (I never add salt as there is enough in the tomatoes and seasonings in the sauce, but I do add black pepper)
I make my sauce in an electric skillet because the temperature is easier to control. Place temp on 325 and add olive oil to pan. When hot, add onions and saute until translucent. Add celery and green peppers and saute. Don't overcook. I like them still somewhat crisp. Add garlic, tomatoes, tomato sauce, chili powder, and worcestershire sauce. Cook for 20/25 minutes until sauce starts to thicken. Add hot sauce. Add shrimp and cook just until pink, only takes a couple of minutes. If you are using frozen shrimp, throw them in still frozen and they will cook just fine. Turn heat off. This is how it looks in the pan. OH SO GOOD!
To serve, place white rice in the middle of a plate and spoon the creole sauce over the rice like in the picture above. Let me say, it's fantastic. When I am in a "spicy" mood, this is my go to dish. Most people think Mexican for spicy, but this is a fabulous change up from Tex-Mex. Yummmmmmy.
We have a green salad and warm crusty bread with our Shrimp Creole and my, oh my, what a delicious dinner. Next time you are having company and you want something different, easy, and delicious, give this recipe a try. If you have left overs, and this is my favorite part, put the rice in a large tupperware bowl, cover with sauce and you have the most delicious left overs ever. It reheats great in a microwave oven. I just place the amount we each want in individual serving bowls, cover with a paper towel and heat. Just as good the second time around! Mmmm Mmmmm Mmmmm Time to think Creole.
Everyday Donna
Things to Remember:
New Orleans food is as delicious as the less criminal forms of sin. Mark Twain
Friday, March 16, 2012
Spring Is In The Air
This has been one crazy week. I am not sure it can all be explained, but TGIF is all I have to say. Whew, glad this one is over. It's been a lot of little things to deal with, you know how those weeks go. But, I did get to create some fun new things as I worked on getting spring decorations put up a little at a time.
Today was a particularly awesome day as my friends Don, Rick and Marge came down to visit. I LOVE visitors. They motored down so that I could take them to the store that sells Annie Sloan Chalk Paint. Don and Rick want to paint their dining room furniture and Don had called me to ask what I thought he should do. My immediate answer was the amazing ASCP and yes, it was worth a 2.5 hour drive to come down here and get everything they needed. We also got to eat Thai food at the Smiling Elephant AND have Jeni's Splendid Ice Cream. Now, if you ever head to Nashville, you must have Jeni's Splendid Ice Cream - it's a must! It was named one of the top 10 ice creams in America. We got to talk and laugh and had a spectacular day. I was sad when they left, but they will be back soon (because they are going to want to paint everything in their house)!
While we were out doing errands this week, I made a quick stop in Tuesday Mornings to see if they had something I was looking for. Do you do Tuesday Mornings? Great place for all kinds of wonderful household items at greatly reduced prices. I didn't find what I was looking for, but I did find this wonderful piece that, as soon as I saw it, I knew I wanted to use for my spring vignette. I always make a seasonal vignette on top of a cabinet in our entryway and this was the perfect thing! This was an awesome piece because it was totally different from anything I have used in the past and it reminded me of a church window or arbor of some kind. It is almost 4 feet tall and was only $6.00. You know the drill, just my price range! So I bought it and brought it home to live with us. This is how it looked.
It is sort of like willow ( not really sure exactly what material it is) and I loved it, except I didn't want it to be dark brown (of course). I gave it a light spray with some white spray paint I had and now it looks like this.
Much better. I had an idea of what I wanted to do with it so I went to work. First, I decorated a small grapevine wreath I had with some spring flowers. I used 1 branch of cherry blossoms, a pick that had some berries and a small pink hydrangea on it, and a small lavender bush. When I finished it looked like this.
It is so simple and sweet with just the right touch of spring. I was so pleased with the finished product. I attached it to the lattice by putting a couple of chenille stems through the back of the grapevine wreath and twisting them around the lattice.
Now, I wanted a banner or something with a poem or saying about spring. I searched and searched for just the right thing. I found a prayer from the Ute Tribe of Native Americans which really resonated with me. Ute means land of the sun and the state of Utah is named for their tribe. I took one line from the prayer and used it. I had a piece of upholstery fabric that was a loose weave in a cream color. I cut a square of it and decided I would stamp the saying on it with my wooden stamp set.
I used lavender acrylic paint instead of ink so that it would give me the look that I wanted. I made the letters uneven so it looked more hand made. Then, I stenciled a pink butterfly in the corner. I raveled the edges of the fabric just a little for a more hand made touch.
I tied the fabric to the lattice by placing some lavender yarn in each corner of the fabric and tied it in a small bow. When I put the "church window" on the cabinet, I was very happy with the way it looked and the prayer is so lovely and touching, that I keep reading it over and over. But, it needed something around the base to make it look more finished.
I used a large ceramic rabbit and a small ceramic bird which are both representational of spring and rebirth and the newness of life. I used another small lavender bush I had to fill in around the rabbit and tie all the colors together. Then I ran a lime green ribbon across the top of the cabinet to represent grass and the vibrant color of springtime. I have to say, I am very happy with the look. It is different from anything that I have used before and it is just perfect for this time of year. We will be able to enjoy this until it's time to decorate for summer.
It's a happy ending to a crazy week and doing creative things helps keep me centered. I keep going to look at this vignette because it is peaceful and calming. Peaceful and calming is something we all need more of. I hope you have a great weekend, and do something for yourself to make your life more peaceful and calming. You deserve it.
Everyday Donna
Things to Remember
Today was a particularly awesome day as my friends Don, Rick and Marge came down to visit. I LOVE visitors. They motored down so that I could take them to the store that sells Annie Sloan Chalk Paint. Don and Rick want to paint their dining room furniture and Don had called me to ask what I thought he should do. My immediate answer was the amazing ASCP and yes, it was worth a 2.5 hour drive to come down here and get everything they needed. We also got to eat Thai food at the Smiling Elephant AND have Jeni's Splendid Ice Cream. Now, if you ever head to Nashville, you must have Jeni's Splendid Ice Cream - it's a must! It was named one of the top 10 ice creams in America. We got to talk and laugh and had a spectacular day. I was sad when they left, but they will be back soon (because they are going to want to paint everything in their house)!
While we were out doing errands this week, I made a quick stop in Tuesday Mornings to see if they had something I was looking for. Do you do Tuesday Mornings? Great place for all kinds of wonderful household items at greatly reduced prices. I didn't find what I was looking for, but I did find this wonderful piece that, as soon as I saw it, I knew I wanted to use for my spring vignette. I always make a seasonal vignette on top of a cabinet in our entryway and this was the perfect thing! This was an awesome piece because it was totally different from anything I have used in the past and it reminded me of a church window or arbor of some kind. It is almost 4 feet tall and was only $6.00. You know the drill, just my price range! So I bought it and brought it home to live with us. This is how it looked.
It is sort of like willow ( not really sure exactly what material it is) and I loved it, except I didn't want it to be dark brown (of course). I gave it a light spray with some white spray paint I had and now it looks like this.
Much better. I had an idea of what I wanted to do with it so I went to work. First, I decorated a small grapevine wreath I had with some spring flowers. I used 1 branch of cherry blossoms, a pick that had some berries and a small pink hydrangea on it, and a small lavender bush. When I finished it looked like this.
It is so simple and sweet with just the right touch of spring. I was so pleased with the finished product. I attached it to the lattice by putting a couple of chenille stems through the back of the grapevine wreath and twisting them around the lattice.
Now, I wanted a banner or something with a poem or saying about spring. I searched and searched for just the right thing. I found a prayer from the Ute Tribe of Native Americans which really resonated with me. Ute means land of the sun and the state of Utah is named for their tribe. I took one line from the prayer and used it. I had a piece of upholstery fabric that was a loose weave in a cream color. I cut a square of it and decided I would stamp the saying on it with my wooden stamp set.
I used lavender acrylic paint instead of ink so that it would give me the look that I wanted. I made the letters uneven so it looked more hand made. Then, I stenciled a pink butterfly in the corner. I raveled the edges of the fabric just a little for a more hand made touch.
I tied the fabric to the lattice by placing some lavender yarn in each corner of the fabric and tied it in a small bow. When I put the "church window" on the cabinet, I was very happy with the way it looked and the prayer is so lovely and touching, that I keep reading it over and over. But, it needed something around the base to make it look more finished.
I used a large ceramic rabbit and a small ceramic bird which are both representational of spring and rebirth and the newness of life. I used another small lavender bush I had to fill in around the rabbit and tie all the colors together. Then I ran a lime green ribbon across the top of the cabinet to represent grass and the vibrant color of springtime. I have to say, I am very happy with the look. It is different from anything that I have used before and it is just perfect for this time of year. We will be able to enjoy this until it's time to decorate for summer.
It's a happy ending to a crazy week and doing creative things helps keep me centered. I keep going to look at this vignette because it is peaceful and calming. Peaceful and calming is something we all need more of. I hope you have a great weekend, and do something for yourself to make your life more peaceful and calming. You deserve it.
Everyday Donna
Things to Remember
Earth, Teach Me
Earth teach me quiet ~ as the grasses are still with new light.
Earth teach me suffering ~ as old stones suffer with memory.
Earth teach me humility ~ as blossoms are humble with beginning.
Earth teach me caring ~ as mothers nurture their young.
Earth teach me courage ~ as the tree that stands alone.
Earth teach me limitation ~ as the ant that crawls on the ground.
Earth teach me freedom ~ as the eagle that soars in the sky.
Earth teach me acceptance ~ as the leaves that die each fall.
Earth teach me renewal ~ as the seed that rises in the spring.
Earth teach me to forget myself ~ as melted snow forgets its life.
Earth teach me to remember kindness ~ as dry fields weep with rain.
- An Ute Prayer
Earth teach me quiet ~ as the grasses are still with new light.
Earth teach me suffering ~ as old stones suffer with memory.
Earth teach me humility ~ as blossoms are humble with beginning.
Earth teach me caring ~ as mothers nurture their young.
Earth teach me courage ~ as the tree that stands alone.
Earth teach me limitation ~ as the ant that crawls on the ground.
Earth teach me freedom ~ as the eagle that soars in the sky.
Earth teach me acceptance ~ as the leaves that die each fall.
Earth teach me renewal ~ as the seed that rises in the spring.
Earth teach me to forget myself ~ as melted snow forgets its life.
Earth teach me to remember kindness ~ as dry fields weep with rain.
- An Ute Prayer
Tuesday, March 13, 2012
How To Transform a $1.00 Place Mat
In my next life, I want to be a visual artist, a painter, a Van Gogh, Chagall or Monet. That is my wish. Hear that Universe? I'm putting in my order now. Van Gogh's Starry Night is my all time favorite painting. The colors and representation of the night sky humble me and make me so want to be able to do that. To make someone else look at what I painted, to see and feel moved in a place and way they can't really describe. But, it is not my gift. Yes, I can do simple things. I mean, I have watched my share of Bob Ross and I can make happy little clouds and streams with the best of them and perhaps that should be enough, but it's not.
It's sort of like writing. My daughter is an amazing writer. She can put words together in a way that breaks my heart and makes me laugh all at the same time. Me, I can write this blog and hope that my recipes and directions for crafts make sense to anyone who reads it. But, I am no "writer". I have read hundreds and hundreds of books. devoured them, enjoyed them, lived many other lives through the words I have read and traveled the world, but I could not write a book if I tried. Do you know what I am saying? It is frustrating to me. I try to paint, I try to write, but my skills are rudimentary at best.
Does it stop me? No. I keep plugging away and hope that one day true inspiration will strike and that "painting" will come to me or that hidden book/story will formulate in my mind and will leap out onto pages. Until then, it's craft time 101.
Last week I bought these really pretty place mats at, where else, Dollar Tree. My table sits 6, so I bought 6 place mats for a grand total of $6.00 plus tax. The tag said they were 100% paper which was interesting, but I loved the way they looked and they would be great for a springy looking table setting.
Of course, I knew that I would doctor them up somehow, just didn't know exactly how at the time.
I brought them home and looked at them for a week. No inspiration would come. I looked at them every time I went into my craft room, better known as the extra bedroom. Hmmmmm, what to do, what to do? Saturday, I determined it was going to be a craft-a-thon since I hadn't spent a whole day at home all week. It was cool, rainy and a perfect craft day - no place to go, nothing else to do. (I hate having to stop mid project.) I finished the mirror I wrote about yesterday and was so pleased with that project that I got out some of my acrylic paints, a few brushes, covered the table to protect it, determined to finish the place mats. This is what I came up with (see picture above), and they look adorable on the table!!
These plain green place mats had a texture somewhat like jute or burlap. The tag said they were 100% paper. Interesting. They did not lend themselves to lots of shading and detail. My idea was to paint spring flowers on them. Have you ever tried to paint a daisy and get it even? Somehow, they always get out of shape. Here's a trick. Use the bottom of a 12 ounce soda bottle. Paint the ridges on the bottom and stamp it on whatever you are painting.
Now, stamp.
See the pink spots it leaves? All I did was load a square shader brush and pull the paint toward the center to make my daisy and they are all perfectly even. I LOVE when that happens! Now, I wanted some dandelions - you know, the kind kids like to blow when they have gone to seed. White, airy dandelions, but I couldn't paint all the little details so I basically made a white ball. How? I found a small bottle in my spice cabinet that was the right size and painted the edge of the bottle white and stamped circles on the place mat.
Perfect circles. Yes! Easy peasey.
Next, I took a small stencil brush and loaded it with white paint and filled in the circle. Bob Ross would be so proud. Happy little dandelions.
Now, everything needed stems. I chose a blue color called Tahiti Blue and mixed it with a little green and painted stems and leaves and grass across the bottom of the mat. I chose blue so that it would show up on the bright green mat. Nice. Now, it needed filler and I wanted more pink and white so I made little flowers in clusters all over the grass using the end of one of my paint brushes. You just simply makes dots wherever you want them. I did white first and then filled in with pink.
Voila! I painted yellow in the centers of the daisies, sprayed it with clear acrylic spray and I was done. One down, five more to go. I simply followed the same pattern and procedures and now have 6 matching hand painted place mats. It was very restorative to my creative soul. It's not Van Gogh or Monet - Grandma Moses might be a closer description. Anyway, I LOVE them on our table. They are bright and springy and just what I wanted.
When I get the centerpiece and napkins made, I will show you pictures of the whole effect. Always look at things with "other possibilities" in mind. Nothing is just one thing. The possibilities are endless. Try your hand at painting on anything. You may discover a new talent you didn't know you possessed. I'm still plugging.
Everyday Donna
Things to Remember:
‘Things don’t change. You change your way of looking, that’s all.
Carlos Casteneda
Monday, March 12, 2012
My Bargain Mirror and Duck Egg Blue Paint
Some people keep a queue of movies on their Netflix account, movies lined up that they want to view. You can keep a queue on you printer, jobs waiting to be printed. Me, I keep a queue of projects that I want to do - crafts, sewing jobs, things to be painted, furniture to be rearranged, new recipes to try - a running list of things I want to get done. Do you keep a project queue? My list seems to never end. The day it does, will be my last day on earth. I will probably leave a list for Dan, bless his sweet heart.
We moved into the little yellow cottage a year ago January 29 and we love it here. Moving led to a whole new list of projects (of course). One of the things on my wish list was a mirror for the wall next to the fireplace, but nothing had struck my fancy. Also, I am cheap and there had been nothing that had struck my fancy in my "price range." A few weeks ago, we were doing errands and I made a quick sashay through Kirkland's. Do you do Kirkland's? They have home accessories and sometimes you can come upon some really great bargains. There was the time I found a bunch of toss pillows for $5.00 each. Now that is a bargain and fits my "price range". Yes, I do love a bargain.
As I wandered around the store, I saw a stack of mirrors that had been marked down. Like a fly to a picnic, I zoomed over to the stack and started looking through all of them. Lo and behold, in the stack was exactly what I had been looking for and it was marked down to $20.00! Woohoo, that was my "price range". Was it perfect? No, the size was right, the price was right, the color was all wrong, but I knew that could be easily fixed. Just a little paint and some wax and tada! I would have the perfect mirror.
The mirror was a funny kind of no color beige. My picture isn't great, but it looked like this.
Here's a close up.
I did like the dark piece that went around the mirror. It has some goldish flecks in it that gave it some depth. But the outside wood was the most bland color you can imagine. So, I told Dan, Dan, the Painter Man, that we had a project to add to the queue. He was ecstatic. (not so much)
I also have a new love and that is Annie Sloan Chalk Paint. Now, it is not like chalkboard paint - don't confuse the two. Her paints are created to replicate historical colors and when you paint, it is a little gritty, but wow, is it awesome. You can get really beautiful colors by layering them over each other, or using a single color. Then, you wax the paint with her clear wax for one look and to add additional depth and contrast, use the dark wax over the clear wax. This paint will make anything look awesome.
I did my bedroom furniture a while back and I was hooked! It is not cheap paint, about $40.00 a quart, but you do not have to prime when using it aaaaaaaand, it goes a long, long way. I did an armoire and three nightstands with one quart of paint. Now, I have the itch to paint everything.
Anyway, back to the mirror. I wanted my new mirror to be duck egg blue which is one of Annie Sloan's fabulous color choices. You can go to anniesloan.com to see the colors and all the wonderful effects you can get with her paint. The paint has been on the market in Europe for 20 years, but is relatively new in the states. You can order it on line, but I was lucky enough to find a wonderful little shop that sells it in our area.
Well, I did a second day of volunteer work last week, so Dan painted the mirror in the blue color for me. He is a fantastic painter and never has to tape anything to keep from getting paint all over the place. I wanted to keep the dark section in the middle of the frame, so paint he did and I was so excited when I got home and saw the mirror. Fantastic!
I let it dry a couple of days, and then I waxed the frame. This is the base color before wax.
This is what happens when you add the clear wax. You can see where the wax ends if you look closely.
It adds a beautiful patina to the paint and softens the color.
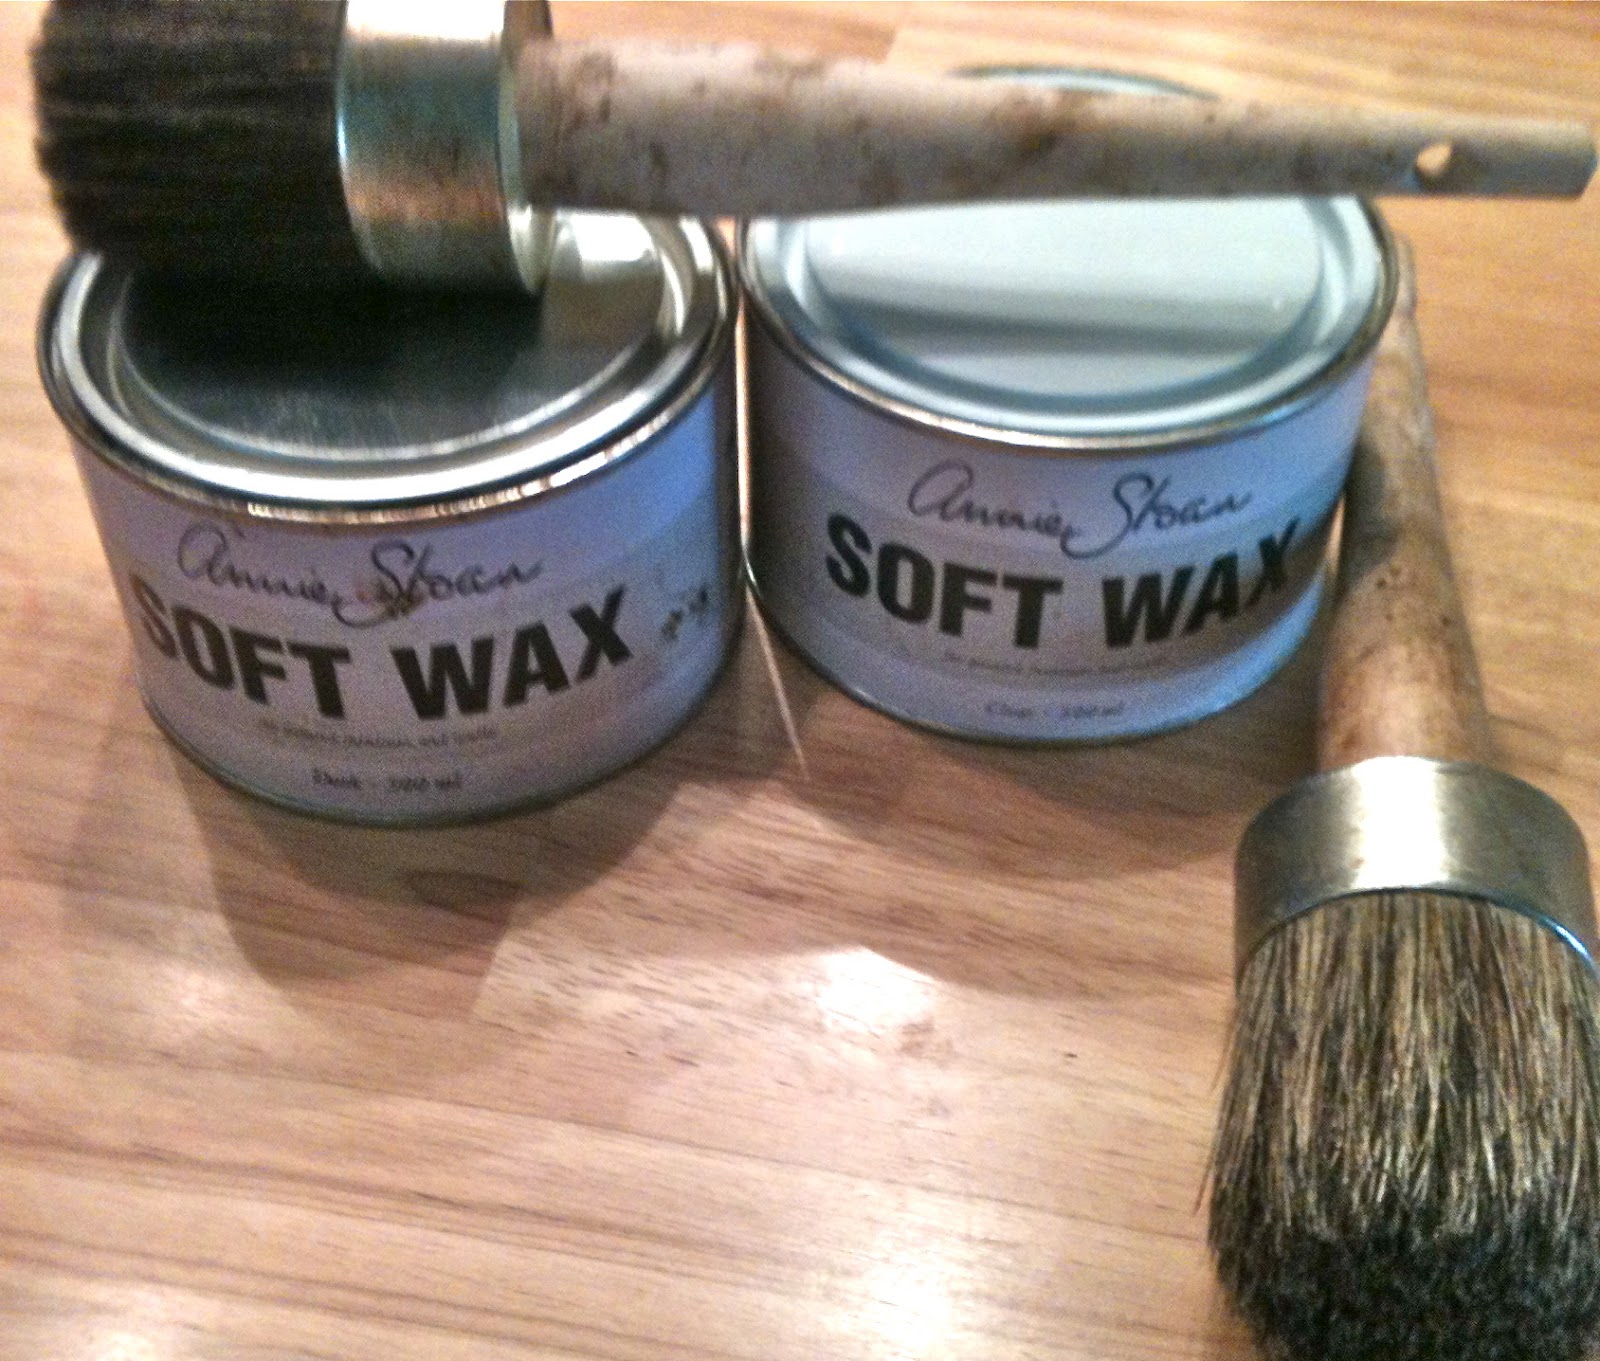
You can see the demarcation line where I stopped the wax for the picture. The wax comes in cans like this.
You also use these wonderful big brushes to apply the wax which is very soft and easy to apply. One brush is for clear, the other is for dark. You apply the wax to an area and then buff it with a lint free cloth. What an amazing difference it makes to the finish. After applying the clear wax, I added dark wax. This is how it looks when you apply it:
Then, you buff it and it looks like this - giving the piece an old patina that is gorgeous in our shabby chic house.
Again, not a great picture. Sorry. I am not much of a photographer, but you get the idea. Should have moved the lamp for the picture. I'll try to do better next time.
It is so amazing what a little paint can do. It changes the whole personality of a piece. Don't you love when that happens? The mirror is just perfect next to the fireplace. Exactly what I wanted. The blue color picks up colors in a framed poster I have of The Bluebird Cafe at the other end of the room. Donna is a happy girl and very appreciative of Dan's contribution to this project. I can tell you, there is more duck egg blue paint in my future (and Dan's). Love you Dan.
Everyday Donna
Things to remember:
Creativity is a drug I cannot live without. - Cecil B. DeMille
Subscribe to:
Posts (Atom)