Showing posts with label garlic. Show all posts

Monday, July 14, 2014

Sufferin' Succotash - Fresh and Delicious

When our youngest son was about 5 years old, I made lima beans for dinner.  He sort of came unglued and asked why we were having June bugs for dinner.  He was NOT interested in eating them for any reason.  I had to explain they were not June bugs, but lima beans and he was fine with that.  Quite relieved, actually.

We are from Indiana, and what we call June bugs are green beetle type bugs that appear in the summer.  We tied thread to them and you could fly them around for entertainment.  They were shaped like a lima bean and sort of the same color.  Hence, Tyler's consternation with what we were having for dinner.

You may or may not like lima beans.  I have always liked them.  Growing up, we ate what my mother put on the table, or we went hungry.   There were a few things I didn't like, so I didn't eat them.  After becoming an adult, I discovered that is was more the way the item was prepared than the item itself.  Squash was in that category.  My mom boiled it and it looked like scrambled eggs in the bowl.  I love it now, because I fix it a different way than my mother did.

We were at the farmer's market on Saturday, and one of the vendors had fresh lima beans - already shelled!  Yes!  I had already purchased lots of other fresh vegetables - corn, green beans, cucumbers, tomatoes - and I wanted a new and interesting way to fix the lima beans.  I found this recipe on Epicurious for succotash made in a slightly different way than what we had growing up.  Our succotash was corn and lima beans, nothing outstanding.  This recipe is REALLY good.  Here is what you need:

2 TBSP extra virgin olive oil
1 1/2 cups chopped onion
salt
1 large garlic clove, minced
3 cups chopped fresh tomatoes (about 1 1/2 lbs)
2 1/4 cups corn kernels cut from 4-5 ears of fresh corn
2 cups fresh lima beans or 10-12 ounce box frozen lima beans
3 TBSP thinly sliced fresh basil

I added some freshly grated parmesan cheese.  YUM!

First, heat the oil in a large skilled over medium heat.  Add the chopped onion and sprinkle with salt.  Saute' until soft and translucent, about 5 minutes.  Add the minced garlic, stir until fragrant - about 1 minute.  Add the tomatoes, corn, and lima beans.  *This recipe called for no liquid, but I added enough to cover the bottom of the pan about 1/2 way up the vegetables.  The other vegetables didn't produce enough liquid to cook the beans.*  Reduce the heat to medium low, cover, simmer until the lima beans are tender, about 20 minutes.  Stir occasionally.  Season with salt and pepper.  Add the sliced basil.

I added some freshly grated parmesan cheese to each serving.  This is DELICIOUS!  There are so many layers of flavor rather than just boiled corn and lima beans.  Food is so much more interesting than when we were growing up.  Gotta love it!

You might want to give this a try for different and wonderful summer fare.  I think you could add some browned sausage or ground beef and you would have a fabulous one dish meal!  We all loved this recipe.  Hope you give it a try.

Everyday Donna

Things to Remember:

Succotash is a very southern staple, but originated with Native Americans.  Just a little FYI.  donna


Monday, December 23, 2013

Creamed Greens With Shallots - Yum!

It's HERE!  It's officially crunch time.  Today is Festivus ( you know, for the rest of us) and tomorrow is Christmas Eve.  Do you celebrate on Christmas Eve or Christmas Day or both?  I mean presents, you know. We usually do presents on Christmas Eve so our children can do "Santa" on Christmas morning with their children.  We will have dinner tomorrow evening at our daughter's home.  She is preparing traditional Lebanese food and I am so excited.  If you have never eaten Lebanese food, it's so good. Christmas dinner will be at our house on Christmas Day.  Our youngest son is bringing several friends who could not go home for Christmas.  It should be pandemonium and so much fun.

On Thanksgiving, I tried a Martha Stewart recipe for creamed greens that was simply spectacular!  It was a major hit so we will be having it again on Christmas Day by request.  Do you like greens?  You know, turnip greens, kale, collard greens, mustard greens, spinach?

Growing up there was always a controversy in our house.  My dad loved turnip greens and my mom didn't.  Mom liked spinach and dad didn't.  We were just confused.  No kid can understand why anyone would like greens of any kind.  Seriously?  Yuck.

Things change when you get older - hopefully.  I happen to love greens of all kinds, especially with some vinegar added and some hot sauce, braised with some bacon, ham, or fatback.  Yummmmm!

Kale seems to be the new food darling right now and it is so good for you - full of antioxidants and nutrients.  The only thing with kale is it is kind of chewy if not cut in really small pieces before cooking.  Other greens wilt down a little more and are easier to chew.  The upside is all greens are full of iron and vitamin B12 which are hard to get in most other foods.  We benefit from eating as many greens as we can, unless you are on medications to thin your blood.  Then  you should consult your doctor.

Here is what you need to make this recipe:

2 large bunches turnip greens
1 large bunch kale
1 large bunch collard greens
6 TBSP butter
2 large shallots, peeled and thinly sliced
3 garlic cloves, minced (1 TBSP)
2 TBSP AP flour (I substituted 1 TBSP cornstarch for gluten free)
1 1/2 cups milk
1/2 cup heavy cream
pinch of nutmeg
pinch red pepper flakes
3/4 cup dry white wine or chicken stock
coarse salt

First, remove the stems from the collard greens and kale.  Chop the leaves into bite sized pieces.
Heat a large saute pan over high heat (I used my electric skillet to saute the greens).  Add kale, collard, and turnip greens, 1 tsp salt and wine or chicken stock.  Cover and cook until greens wilt, about 2 minutes turning occasionally. (You will start with a huge mound of greens and will end up with what looks like a small amount.  Don't be alarmed.)   Reduce to medium and cook, turning greens until almost tender - about 15 minutes.  I used long tongs to turn the greens.  Remove cover and transfer greens to a bowl.

Add 4 TBSP butter to pan, melt on high heat.  Add shallots and garlic.  Saute until softened, about 3 minutes.  Return greens to saute pan.  Remove from heat.

Melt remaining 2 TBSP butter in a saucepan over medium high heat.  Add flour (or cornstarch) and whisk to incorporate.  Add milk and cream, slowly whisking until sauce thickens slightly and coats back of a spoon - about 2 minutes.  Add nutmeg and red pepper flakes.  Season with salt.

Stir sauce into greens and cook over medium heat until warmed through.

If not serving immediately, cool completely then refrigerate.  Reheat over low heat before serving. Transfer to a bowl and serve.  Double Delicious is all I can say.

A minor Christmas miracle occurred today.  I actually have all my Christmas gifts wrapped before Christmas Eve for the first time EVER!  Miracles do happen every day.  Now, it's time to begin preparations for Christmas dinner.  

We are having Cornish Game Hens and roast beef for the carnivores and spinach stuffed manicotti for the vegetarians.  Sides are yet to be decided.  I know there will be creamed greens and wild rice.  Desserts are always a toss up.  Have you set your menu yet?

Merry Christmas and Happy Holidays to you one and all.  Thanks for reading my blog and I will return after Christmas.  Let the fun begin.

Everyday Donna

Things to Remember:

It came upon a midnight clear,
That glorious song, of old
Of angels bending near the earth,
To touch their harps of gold.


Wednesday, November 13, 2013

Barbecued Beans and Greens (I Added Sausage- Yum)

 Oooh, it has suddenly gotten cold here in Nashville.  It was below 30 this morning and that meant time to put the flannel sheets on the bed.  One thing led to another, and I ended up cleaning the whole house.  I don't know about you, but that leaves me with a great sense of accomplishment.  I even got my closet all organized (which had needed to be done since we moved in here at the end of July).  That sound you hear?  That's me exhaling a giant sigh.  I just love finally getting things done.

Now that cold weather is really upon us - and it is cold in most of the midwest - don't you wish you had some new recipes for tasty comfort foods that are easy to make?  Well, I've got one for you today.  This recipe is SO good and really easy to make.  Our daughter Holly gave me this recipe after she had it at a party for parents of students at her sons' school.  She told me it was one of the best things she had eaten in a long time, and I have to agree with her!  Even her boys like it and they are most suspicious of new things if you know what I mean.

This recipe is made with  cannellini beans, and kale.  As you may know, kale is the new darling of the health food world and with good reason.  It is full of flavonoids and antioxidants.  Kale is good for reducing cholesterol and helps detoxify our systems.  You can read all about the great health benefits of kale here http://www.whfoods.com/genpage.php?tname=foodspice&dbid=38.

I added a pound of browned breakfast sausage just to have a one dish meal.  This recipe would be just as good without the sausage, believe me.  The flavors are amazing.  I can see the skeptical look on your face from here.  Beans and greens?  Barbecue sauce?  Seriously?  You are going to have to trust me on this one and give it a try, just so you will know how good this really is.  Yummmmmmo is all I can say.  Here is what you need:

2 cans cannellini beans, drained and rinsed (white kidney beans are the same thing)
8 cups chopped kale  (1 large or 2 small bunches, stems removed, chopped and blanched)
2 cloves garlic, minced
1 medium onion, chopped
1/2 cup barbecue sauce (they recommend Stubbs, I used Sweet Baby Rays - what I had and it's great)
2 tsps hot sauce  (I used Tapatio)
1/2 cup warm water
2 Tbsp cider vinegar
2 Tbsp dijon mustard
1/4 tsp salt
1 Tbsp olive oil
1 lb. breakfast sausage browned, optional

Preheat oven to 350 degrees Fahrenheit

To blanch the kale, remove the stems, chop in small 1-2" pieces,  and place in a steamer basket over boiling water in a pan big enough to hold all the greens.  Cook for just a few minutes.  Kale can be rather chewy, so make sure you cut it in small bite sized pieces.  Mine was cut a little big and next time I will cut it smaller.  It will just make it easier to eat.  That is my only tip.

Heat the olive oil in a large skillet over medium high heat.  Add the onion and saute for about 6 minutes until soft and translucent.  Add the garlic and saute another minute or so.  Add the blanched, chopped kale and cook for a few minutes.  Add the remaining ingredients and mix well.  

If you are using sausage, brown in a separate pan and add to the above mixture.

If not adding sausage, place everything in a 9" casserole and bake covered for 45 minutes.  If adding sausage, place in a 9 x 13 baking dish, cover and bake for 45 minutes.

Remove from the oven and serve.

This is SOOOO good.  You get protein, greens, fiber, and deliciousness from the sauce.  Serve with some hot bread and you are good to go.  The sauce is so good that I will use this for my baked beans from now on.  Amazingly good.

If you want to serve this as a side dish, leave the sausage out and make as recommended.  Just.  Plain.  Awesome.

I really like recipes that are recommended by others who have actually made or eaten them.  Sometimes choosing recipes can be a toss of the dice.  They sound good, but don't always turn out the way you hoped.  Give this one a try.  It is approved by 3 picky small boys and their Pawpaw.  Thanks, Holly!

Everyday Donna

Things to Remember:

There are two types of people;  those who eat kale and those who should.  Bo Muller-Moore


Monday, November 4, 2013

Hoppin John - Oh So Good

Good Monday friends.  Hope you survived the fall back.  Our daughters, who have young children, are suffering the time change with children getting up really early according to the new clock setting.  I must laugh because we have been there and certainly done that.  They just don't remember what it was like because they were the small children.  What goes around....as they say.

Today, I am sharing a recipe for Hoppin John.  My son, John, taught me how to make this years ago and it is absolutely wonderful.  Hoppin John is a combination of rice and black eyed peas and other goodness like bacon and onions and bell pepper.

My research tells me they are not sure where the name comes from, but Hoppin John was mentioned in cookbooks as far back as 1847.  Chances are, this was a dish made by slaves since there are similar dishes eaten in Africa.

Hoppin John is often served on New Year's Day in the south as a symbol of good fortune for the coming year.  The black eyed peas stand for coins.  Sometimes a few coins are placed under the plate of guests.  Corn bread is served for the color of "gold" and some kind of greens - like turnip or collards - which stands for money, are also served. Supposedly, if you eat this you will have good fortune and prosperity throughout the year.

I don't want to wait until New Year's Day to eat this delicious dish.  It is easy to make and very nutritious.  I promised my friend Linda, who lives in Texas, that I would post this recipe today.  She LOVES black eyed peas and wants to make this recipe.  Here is what you need:

6-8 slices of bacon, cut crossways
1 medium onion, diced
1/2 red bell pepper, diced
2 cloves garlic, minced
2 cans black eyed peas, drained and rinsed*
2 cups rice
4 cups low sodium chicken broth
salt and pepper to taste

In a deep pot, brown the bacon until crisp.  Drain most of the bacon fat off, leaving enough to brown the onions, bell pepper and garlic.  When the onions become translucent, add the garlic, bacon, drained black eyed peas, the rice, and chicken broth.   Cook until the rice is done and most of the liquid has been absorbed.   Stir several times so the rice doesn't stick.  Add salt and pepper if needed.  I didn't add any salt.

*I used Bush's black eyed peas with bacon and jalapeno to add a little kick.  They are not hot, just have a little more flavor.  Try it if you like a little something extra.

This can be a complete meal if you wish, or served as a side.  Delicious!  It also reheats well.

If you are looking for some new winter recipes, this one is a good one to try.  It is easy, nutritious, and delicious.  Remember to serve it on New Year's Day for extra good fortune in the coming new year.  We can all use more good fortune!

Everyday Donna

Things to Remember

“How people could actually get themselves all worked up about saving the grizzly bear of the Rockies, and sit calmly by while such a magnificent dish as South Carolina Hoppin' John faces extinction, was more than I could ever understand.”

Sheila Hibben (1888-1964)


Tuesday, October 22, 2013

Baked Pear Spinach Salad With Mascarpone, Cashews, And Champagne Vinegar Dressing


Here it is Tuesday, October 22nd already.  How did this happen?  Where is it going?  Why am I not ready for cold weather or the fact that I had to put on closed shoes on Sunday because it suddenly got cool?  Bye bye sandals until next spring.  Sigh.  It makes me so very sad when sandals have to go.  My feet are not very happy.  I'll be waiting until the first warm day to drag them back out.  Believe me.

One of the really nice things about fall though is the abundance of tree fruit like apples and pears.  YUM!  I like apples, but I LOVE pears.  Dan is not a fan.  He doesn't like the texture which to me is unfortunate, but to each his own.

My daughter and I were talking about pears last week and she mentioned she had baked some.  Baked pears?  Why had I never thought of that.  When I got home, I headed straight to the world wide web and researched some baked pear recipes.  This is one I created by combining several things together for this fabulously delicious salad for dinner.  (The dressing recipe is my own.)  Are they good?  Let me count the ways.  My, oh my.  Here is what you will need:

Pears - as many as you want to bake (I used Bartlett)
1/2 to 1 stick butter
1 container Mascarpone cheese
Cashews, rough chopped (I used about a cup)
Home made Champagne Vinegar Dressing - recipe below

To check if pears are ripe, push around the stem to see if it's soft.  If so, they are good to go.  You want ripe pears for baking.

First, if you have never baked pears, this is how I did mine.  I used Bartlett pears and cut the pears in half, scooping out the core in each half.  I used a teaspoon to core the pears.  You can bake 2 halves, or as many as you want.  I did 3 pears the first time which was 6 halves.  Sunday, I did 5 pears for 10 halves.  I melted a half stick of butter in a baking dish for the 6 halves and a whole stick for the 10 halves.  Preheat the oven to 350 degrees Fahrenheit.  Put the butter in an appropriate sized baking dish and melt the butter in the oven.  As soon as the butter is melted, remove the baking pan from the oven and coat the pears in the melted butter.  I rolled them on the skin side, then placed them cut side down in the butter.  Bake for about 45 minutes until they are fork tender.  Sunday, I baked these and this is how they look when they come out of the oven.  Heavenly.
Now, turn the pears over to expose the cut and cored side.  Place large dollops of mascarpone cheese in each pear half and stick them back in the oven for about a minute or two until the cheese melts.  Don't let it all run out of the pears.  It's the really good part.
If you are not familiar with Mascarpone cheese, it is an Italian cheese that sort of has the consistency of cream cheese but tastes like whipped cream.  Double yum.

I decided I wanted salty and sweet to go with the fresh spinach, and I had a can of cashew halves on hand.  I rough chopped them and sprinkled them over the melted mascarpone cheese.  I put several hands full of fresh baby spinach on salad plates and put a pear in the middle of the spinach.  I sprinkled more chopped cashews on the spinach.  Now to make the dressing.  I don't always measure when making dressing, but this is pretty close and you may want to adjust it to fit your taste.  It is sooooooo good, especially the tanginess with the sweet and salty.  Yummo.

Champagne Vinegar Dressing

Finely mince about 1/4 of a small shallot, super fine.

Using a large clove of garlic, make a paste out of it by putting about 1 to 2 teaspoons of salt on a cutting board and mashing the garlic with the flat side of the knife.  Work the knife back and forth, pressing and mashing until you have a paste made from the garlic clove.

In a bowl, pour about 1/2 cup good quality extra virgin olive oil in and add the shallot and garlic paste.  Add about a tablespoon of Dijon mustard. (two big squeezes) Add the juice of one lemon and two big splashes of champagne vinegar (probably about 2 TBSP).  Add one small pinch of salt if needed and fresh cracked black pepper.  Whisk until combined and drizzle over the spinach and the pear.  Serve.  Consume.  Just try to savor each bite.  Delicious.  (The dressing is so good I could probably drink it with a straw.)

This is such a pretty salad to present with whatever entree you are serving.  Perhaps you will just want to eat the salad with some good crusty bread.  Or, maybe you would prefer the baked pear without the spinach and dressing and consider it dessert.  It all works and it is wonderful any way to choose to eat it.  Truly.  They also keep nicely in the refrigerator (covered) and can be eaten the next day.  I ate mine cold and it was delish!

Sometimes things just come together in an oh so right way.  If you like pears, this is a great way to enjoy them.  Yes indeedy.

Everyday Donna

Things to Remember:

Pears have been cultivated and enjoyed for thousands of years.  Homer referred to them as a "gift from the gods" in the Odyssey.  healthdiaries.com

pear


Thursday, October 10, 2013

Loaded Chicken and Potato Casserole Is Superb!

Ever have those days when you are tired of making the same old recipes and  you want something different - something delicious?  You look in the refrigerator to see what's there to use.  Looking back at you are three boneless, skinless chicken breasts.  We all know how it goes with chicken.  It can be fabulous or it can be totally blah.  I wanted fabulous.

I had pinned this recipe on my Pinterest board some time ago because it sounded amazing.  Tonight was the night to give it a try.  I actually had all the ingredients for once.  No trip to the grocery was necessary.  Yay!

This recipe is like a big loaded baked potato with some slightly spicy chicken.  When I say spicy, I mean just a hint.  You could make it much more spicy if you preferred, but our grandsons were coming over so I went with the recipe as written.  It was perfect.  Here is what you need.

3 boneless, skinless chicken breasts cut in approximately 1 inch cubes
6-8 medium russet potatoes, cut in 1/2 inch cubes
1/3 cup live oil
1 1/2 tsp salt
1 tsp black pepper
1 TBSP paprika
2 cloves garlic, minced
2 TBSPS hot sauce (I used Tapatio)

Topping

2 cups grated cheese - cheddar, jack,  or pepper jack (I used Monterrey Jack)
1 cup crumbled bacon  - about 1/2 pound (fry crisp and crumble)
1 cup diced green onions - whites and greens

Preheat oven to 400 degrees Fahrenheit.  Spray a 9 x 13 baking dish with cooking spray.

Mix the salt, pepper, paprika, garlic, and hot sauce together.  Add the cubed chicken and potatoes, stir to coat.

Pour into the prepared baking dish and spread it out evenly.  Cook for 55-60 minutes, stirring EVERY 20 minutes.  Fry the bacon while the casserole cooks.  Set aside until cool.  Crumble.

Once the chicken and potatoes are fully cooked (potatoes fork tender), remove the casserole from the oven.  Top with cheese, bacon, and onions.  Return to the oven and bake until the cheese melts.  Took about 5 minutes.

Remove from oven and serve.

I put some sour cream on the table to add to the dish if wanted and extra hot sauce.  This is a dynamite recipe, is so easy to make and could easily be halved and baked in a 9" casserole if you wanted.

Thanks to Singing Through the Rain for this recipe.  Everyone LOVED it.  We will be having it again and it reheats very nicely in the microwave.  Great leftovers for lunch the next day.

Give this recipe a try the next time you want something truly superb and easy to make.  Add a green salad and you are good to go.

Everyday Donna

Things to Remember:

Try one new recipe a week just for some variety in your dinner routine.  They are not all keepers, but when they are it is great to have something new to add to the rotation.  donna


Tuesday, September 10, 2013

Cheesy Macaroni With Chicken and Spinach

Do you have picky eaters in your family, especially children who are suspect of any food that has the color green to it?  Will they eat salad, or raw vegetables of any kind?  We were fortunate.  Our children were all adventurous eaters who loved crudite, salad, most every vegetable.  One of them didn't like green peas, and one of them didn't like lima beans.  Other than that, they would eat about anything.

Our grandsons on the other hand, do NOT fall into that category.  We have two who are pretty good eaters, two who are middle of the road, one who is only 18 months old and finding his way in the food world with a few texture issues and one who is suspect of any and everything that isn't "white".  Do you know what I mean?  He likes chicken, pasta, cheese, eggs, he will eat shrimp oddly enough, fish, turkey, rice - do you see the pattern here?  He just turned 10 and he has been like this since he was a little bitty fella.

I have seen him gag and retch at things his mother would make him taste and it was downright comical at times.  When he was about 4 his mother made him taste canteloupe during dinner.  I truly wish I had a video of his facial contortions, his gagging, shivering, and complaining.  Yes, he would literally shiver every time he got the canteloupe close to his mouth.  After probably 20 minutes, he finally licked it and I thought his dinner was going to end up on the table.  You know that "pre sound" that comes with regurgitation?  Yep, that's the one.  It still makes me laugh to think about it.  To our daughter's credit, she makes him try.  The pronouncement is usually, thanks, but I'll pass.

Their pediatrician said these are what they call "the white" kids who are suspect of colored foods and they think it is an evolutionary thing from the hunter/gatherer times when men did not always know which foods were edible.   Makes sense, but it does not make feeding such children easy.

All that was to say H will eat this dish AFTER he picks the spinach out.  He loved it otherwise and so did the other boys.  It is cheesy, and filled with chicken and pasta.   Perfect.  I added the spinach for some color and extra nutrition.  H is the only one who picked the spinach out, so you might luck out and get your family to eat it with the spinach.  You never know.

I made this dish using one of the herbed chickens I wrote about in my blog on August 19.  You can find the recipe there.  Or, you could use a rotisserie chicken from the grocery or cook the chicken breasts like in the recipe.  It is a great way to use leftover chicken.  The original recipe came from AllRecipes.com.  Here is what you need:

3 TBSP butter
salt and pepper
1/2 pound pasta (penne, fusilli, or bow tie, cooked al dente)
2 - 3 boneless skinless chicken breasts or leftover chicken from a rotisserie or roasted chicken
1/4 cup + 1 TBSP flour
3 cloves garlic, minced
3 cups milk
3/4 cup shredded mozzarella (I used one ball of fresh mozzarella from Aldi's)
3/4 cup grated parmesan cheese
2 cups fresh baby spinach

Preheat oven to 400 degrees Fahrenheit.  Spray a 9 x 13 baking dish with cooking spray.

Cook pasta in boiling water just until al dente, drain and put aside.

If you are cooking chicken breasts, season the chicken with some salt and pepper and put some olive oil in a medium skillet.  Cook the chicken until it is no longer pink.  Remove and let sit for about 5 minutes.  Slice thin.  Put aside.

In a medium pot, melt the butter and add the flour and garlic.  Cook about 1 minute to cook out the raw flour taste.  This makes your roux for the sauce.  Gradually add the milk, whisking continuously until thick.  Stir in the cheese and whisk until melted and sauce is smooth.  Remove from heat and add the pasta.  Pour into the prepared baking dish and add the chicken.  Add the fresh spinach and stir to incorporate the chicken and spinach.

Bake uncovered for 25 - 30 minutes until golden and bubbling.  Remove from oven and serve.

This is soooooooooo good.  The sauce is amazing with the mozzarella and parmesan.  One of the best mac and cheese type recipes I have found.  Yum.  Yum.  Yum.  The only thing I might add next time are some crushed red pepper flakes for just a little zing.   Feel free to leave the spinach out if you have eaters who are suspect of green things in their food.  Or, add some broccoli if they would prefer that, or green peas.   Spinach was just my addition and we loved it.  Next time, I might try another vegetable.

Serve this with a nice green salad and you have a complete meal.  Oh, maybe some crusty bread too.  Oh yeah.

This recipe is super easy to prepare, especially if you have some chicken on hand that is already cooked.  It reheats beautifully.  We had leftovers the next day and it was just as good as the first day.
Give this recipe a try.  I think it will be quite a hit.

Everyday Donna

Things to Remember:

Dude, macaroni and cheese if the food of the gods!  Haley James Scott


Monday, August 26, 2013

Chicken Breasts With Greek Yogurt And Parmesan Cheese

 How can it possibly be August 26th?  WHERE has the summer gone?  Oh, I remember.  We were packing and moving and then unpacking and putting it all away.  That's where the summer has gone.  It is truly hard to believe that it will soon be September, the last big hurrah of summer, Labor Day will be over,  and fall will be on it's way. That is okay by me actually!  I do love fall.

Today, I am going to talk about recipes, and sites like Pinterest and Food Gawker, and now Facebook is being flooded with recipes with everyone sharing them over and over.  There is one particular recipe that may be shared more than any other and the picture is beautiful and looks so good that of course everyone wants to try it, including me.  That recipe is for this chicken made with yogurt and parmesan cheese.

I have several trepidations about Pinterest and the first one is that people pin recipes and craft DIY's without going to the original source.  Many times, they are simply pictures with no recipe or instructions on how to make said DIY.  Lots of times when you go to the original site, they will tell you the site has been reported as suspicious so I stay away from those.  I always, always try to go to the original site before I pin something so that later, when I want to try the recipe or craft, it will actually be usable.  I wish everyone did that so they would not be disappointed when they later find there is no recipe or instructions.

Let's talk about this chicken recipe.  I decided I would try it.  It is very simple.  Boneless, skinless chicken breasts, some yogurt, parmesan cheese, garlic powder, black pepper, and salt.  Baked.  The picture shows this beautiful brown chicken that makes your mouth water.  As Chef Anne Burrell of the Food Network always says, "Brown food tastes good."  It surely does.  And, here is the conundrum.  When you make this recipe, it is NOT brown, not even close.  It is pale and anemic looking and not very appetizing actually.  I was distraught.   I don't like pale, anemic food.  To me, it is very unappetizing.   I had to come up with a solution fast.  (Perhaps they had used a torch to brown the chicken for the picture?  I don't know.  Mine sure didn't look like the picture.)

What would make it brown?  Bread crumbs!  So I covered the chicken breasts with some Italian seasoned bread crumbs and put them back under the broiler for a couple of minutes just to brown them up a bit.  It helped.  As you can see in the picture, it still isn't very brown.

Now, the reality is the chicken is delicious.  It was tender and moist.  (I know, gross word, sorry)  It was SOOO flavorful.  Dan, who does not care for yogurt or parmesan cheese LOVED this chicken.  Really loved it.  I even used the left overs for sandwiches made in pita pockets the next day.  Yum.

We enjoyed this chicken with mashed potatoes and heirloom tomato salad.  The acidity and color of the tomatoes was a fabulous compliment to the pale chicken and potatoes.  We eat with our eyes too and I like some color on my plate.  Don't know about you.

Here is what you need to make this chicken recipe:

3 or 4 boneless, skinless chicken breasts (mine were very large, so I used 3)
1 cup plain greek yogurt
1/2 cup parmesan cheese
1 tsp garlic powder (I prefer fresh garlic to garlic powder, so I used 3 cloves, minced)
1 tsp salt

Spray a baking dish with cooking spray.  Place the chicken breasts in the dish and cover with the yogurt mixture.  *My suggest - sprinkle with bread crumbs now if you want brown chicken.*

Place in a 375 degree oven for 40-45 minutes until the chicken is no longer pink in the middle.

I placed mine under the broiler for about 2 minutes to brown the bread crumbs.  Remove from the oven and let sit for a few minutes and serve.


Yes, this recipe is worth making.  It is easy and delicious.  I have made it a second time it was so good, but I did use the bread crumbs because it still wasn't brown.  Still used the broiler after baking them to brown up the bread crumbs.

Bread crumbs or no bread crumbs is your choice.  If you try this recipe, let me know if yours comes out all golden brown.  I would be interested in knowing.

Everyday Donna

Things to Remember:

Sometimes you have to "doctor" a recipe to make it what you want it to be.  donna


Monday, May 13, 2013

Grilled Honey Garlic Pork Chops With Grilled Pineapple


It's Monday once again and I am hoping you had a wonderful weekend celebrating Mother's Day.  My day was fabulous, spending time with Dan, our children, grandsons, and sons in love who live in Nashville.  We certainly missed our son, daughter in love, and grandson who live in New York City.  I did get to talk with John and Roman.  Hopefully, we will get to spend some time together soon.   We enjoyed a lovely brunch on the porch of the West End Cafe.  The weather was spectacular.

Both of our daughter's were promised some "me" time by their husbands which they got to enjoy together.  They both have busy, busy lives and those of us who are past the years of young children, school, teams, jobs, and so many activities it can make your head spin, know how much a little "me" time is appreciated.  I know I'm prejudiced, but our daughters and daughter in love are all wonderful, caring mothers and certainly deserve every second of peace and quiet they can eek out of their hectic schedules.

My Mother's Day was spent doing nothing but enjoying time with family and whatever else I chose to do for the rest of the day which was a whole lot of nothing.  If you know me, you know I don't do a whole lot of nothing well.  I am really working on staying present, not being busy, busy all the time.  I spent most of the afternoon on the deck enjoying the weather (which was amazing) and putting together some craft projects I have been working on.  Creating is the best way I know to spend a day.  It was an absolutely wonderful afternoon.  We should all do more of a "whole lot of nothing" whenever we can.  Adding beauty to our lives and the world by creating is so good for the soul.

Then, of course, it's the reality of Monday once again.  Time for routine and all the things that need to be done to keep life flowing.  Our 2.5 year old grandson came and spent time with us this morning while his mother went to write.  It was very cool this morning, so we played some games indoors until it was warm enough to go outside.  It was another fantastically gorgeous day.  Look at this picture of me leaning on the deck rail watching Adrian and Pawpaw playing baseball.  The sky looks photoshopped, but it isn't.  That is how the sky looked today.  Simply beautiful!
After Holly picked Adrian up, we had lunch on the deck and then I spent the afternoon working on my projects.  It was cool enough that I had to wear a light sweater, but that was okay.  These are the days we live for.  Dan mowed the grass, I crafted.  Fair enough don't you think?

Before I knew it, it was 4:30.  Then the proverbial question arises, what's for dinner?  Ugh.  No idea.  Time to stand and stare in the refrigerator.  My first thought was chicken, but there were pork chops.  Yes, pork chops!  Quick.  Easy.  Perfect.   Grilled pork chops - even better.  No turning the stove on and we can stay outside some more.  This is a simple recipe from Allrecipes.com with an easy marinade that is delicious.  The chops sort of have the flavor of Asian barbecue.  Yum.  Here is what you need:

6 pork chops
1/4 + 1/8 cup honey
3 Tbsp soy sauce
4-6 garlic cloves, minced (depends on how big they are)

Mix the honey, soy sauce, and minced garlic in a small bowl.  Lay the pork chops in a shallow pan.  Pour the marinade over all the chops and turn to make sure both sides are coated.  Let sit for 15-30 minutes.  Grill until the juices run clear and the centers are no longer pink.  Look how beautiful they are  ( and tasted even better).
For the grilled pineapple, cut a fresh pineapple into quarters, remove the core and the fruit of the pineapple by running a knife between the outside skin and the fruit.  Rub a little olive oil on the pineapple so it won't stick to the grill.  Grill on each side until the pineapple begins to caramelize.  Remove and drizzle with just a little honey.  BEST PINEAPPLE EVER!
I cut the pineapple into small wedges and put 3 or 4 pieces on a pork chop when serving.  Deeee-licious.  Tomorrow, I will make a mango, pineapple salsa with the left over pineapple (if there is any).
Mm mm mmm.  Wish you could taste it.

Everything we had for dinner was cooked on the grill.  One of the things I love best about warm weather - cooking and eating out of doors.  The weather is perfect right now and it is so relaxing.  Makes it easy to just "be" and breathe in, breathe out.   No hurry, no worry.  Tomorrow is supposed to be much warmer, so hopefully we will spend as much time out of doors as we can.  There are more flowers to plant before it rains again.

If you don't have an outdoor grill, you could make these pork chops and the pineapple on a stove top grill.  Quick.  Easy.  Delicious.  As for the grilled pineapple - if you've never had it, it's a must try!

Everyday Donna

Things to Remember:

Where the pineapple got it's name:

Christopher Columbus discovered this fruit in 1493 during his second voyage when he landed on the island of Guadaloupe and brought it back to Europe.  He called it "pina de Indes."  (pine of the Indians)
 When European explorers discovered this tropical fruit in the Americas, they called them "pineapples" (first so referenced in 1664 due to resemblance to what is now known as the pine cone).  Wikipedia


Tuesday, April 16, 2013

Beer Brined Pork Chops - Grilled


Another beautiful day in middle Tennessee!  Yes!!  We got lots of projects accomplished today and that makes me one happy camper.  Now that the weather has warmed up, we can do lots of things for our out of doors summer living space.  Wait until you see the project I have been working on.  You are so going to want to do this!  That's my teaser for today.  Just keep checking back.  I will write about it soon.

Anyway, let's talk about these delectable pork chops that I made on Sunday evening. Dan LOVES pork chops and oh my, are these ever good.  Have you ever brined any meat?  A turkey?  Anything?  Let me tell you what it does if you have never tried brining.  It makes meat super juicy, tender, and oh so flavorful.  The meat absorbs the salt and the beer helps tenderize the meat while adding a nice caramel flavor when the meat is cooked.  (Brining makes turkey absolutely amazing if  you have never tried it.)  This is something you will definitely want to do the next time you make pork chops.  These were like butter, you could cut them with your fork.  Yum.

We enjoyed these with grilled cabbage (which is the best cabbage I have ever eaten and I really like cabbage).  And, it doesn't smell up your house while it's cooking.  That's even better, right?  The other side dish we enjoyed were sour cream mashed potatoes.  Holy cow, it was a good dinner.
Doesn't the sight of that make your mouth water?  Doesn't it make you want to rush out and buy some pork chops right now?  Or maybe make some grilled cabbage - with bacon?  I wish you could have enjoyed this meal with us.  It was fabulous if I do say so myself.  Dan is still talking about it.

The pork chops are quite easy to do.  Here is what you need.

6-7 bone in pork chops about 1 inch thick
1 12 ounce can of your favorite beer (I used whatever my son had here, don't drink it myself)
1/4 cup brown sugar
2 Tbsps. salt
fresh cracked black pepper
3 large garlic cloves, minced
Old Bay seasoning

Put the beer in a bowl and add the salt and brown sugar, stirring until the sugar dissolves.  It will make the beer quite foamy, so don't be alarmed.  Put the pork chops in a large zip lock bag or a glass container big enough to hold everything.  Pour the beer mixture over the chops, making sure they are all covered.  Mince the garlic cloves and scatter in the liquid.  Crack some black pepper over all the chops.  If the chops won't stay submerged, put a plate on top of them for weight and put in the refrigerator for about 2 hours.  I turned mine a couple of times, just to make sure they were evenly brined.

When you are ready to grill the chops, remove the chops from the liquid and discard it.  Lightly sprinkle both sides of the chops with some Old Bay seasoning, or any seasoning that you really enjoy.  Cook them on the grill until the meat is no longer pink and juices run clear.  Remove them from the grill and let them sit for a few minutes before serving.  That way, you don't lose all the juice when you cut into them.  We will definitely be making these again and again!

As for the grilled cabbage, come back tomorrow night and I will share my version with you.  Fabulous.  That's all I can say.

I don't know about you, but I am always on the lookout for different ways to prepare meats.   It gets boring having the same meals over and over (especially after 43+ years).  The base for this recipe came from McCormick.com and I added a few things to it.  Don't be afraid to experiment with your recipes.  I added the garlic and Old Bay because I like the flavors.  It worked and is a keeper for us.  Try any spice mixture you like when you make these.  Just know that the beer and the brine will make the pork chops super tender, flavorful and juicy.  Give this recipe a try and let me know what you think.

Everyday Donna

Things to Remember

“There is poetry in a pork chop to a hungry man.”  Philip Gibbs (NY Times 1951)


Wednesday, April 10, 2013

Grilled Chicken With Lemon, Thyme And Some Other Good Stuff


Wow, it was a lovely day today.  Sunny, 80 degrees, balmy breeze - perfect weather.  We ran errands all afternoon and got home later than usual.  This is what we have been waiting for all winter.  These are the nights I don't mind cooking a late dinner because we can grill.  Oh yeah.  It was so lovely out of doors.   We ate on the deck and I really didn't want to come inside.

For dinner I made these delicious grilled chicken breasts that are marinated with fresh lemon juice and thyme with some red pepper flakes for a little heat and garlic for depth of flavor.  All of this is added to some good extra virgin olive oil.  Yum.  The recipe is from foodandwine.com.  The lemon and thyme give the chicken such a nice, bright citrus flavor which is perfect for warm weather.  It would be fabulous sliced and served on a beautiful green salad if you are watching your calories.  It would also be wonderful sliced and served as a sandwich.

Here is what you need:

4 boneless, skinless chicken breasts
2 Tbsp fresh lemon juice (I zested one lemon and added the zest to the marinade)
1/4 tsp dried thyme (I used 5 sprigs fresh thyme)
1/2 tsp red pepper flakes (add more if you like more heat)
1 clove garlic, minced
1/4 cup extra virgin olive oil
1/4 tsp salt
1/4 tsp black pepper

Mix the lemon juice, lemon zest, thyme, red pepper flakes, minced garlic, extra virgin olive oil, salt and pepper in a bowl.  Put the chicken breasts in a gallon sized zip lock bag and add all the marinade.  Squish it around until all the chicken is coated in the marinade.  Put the bag in a bowl in case it leaks and put in the refrigerator for at least 1/2 hour.  I moved it around a few times to make sure everything was good and coated with the marinade.  After 1/2 hour, remove the chicken from the marinade and grill until the juices run clear and there is no pink in the middle of the chicken.  Remove from the grill.  Let sit for a few minutes before serving.  Delicious.  If you don't have an outdoor grill, you can use a stove top grill also.
I added a twist of fresh lemon slice to the top of each breast when serving so that we could add a little more lemon flavor by squeezing some fresh juice over the cooked breast.  It's not necessary, but it also looks pretty.

Now is the time to start building up some new recipes for summer grilling season.  Give this one a try.  It's quick, easy, no unusual ingredients and it is SOOOOOOOO good.  It is also pretty low calorie.

Don't know about you, but I am beyond happy for this weather to finally make its appearance.  It was a long winter.

Everyday Donna

Things to Remember:

“Never throw away squeezed lemon, but keep them for the day by the sink. Then you can use them to remove fish, onion or garlic smells from your fingers. Or you can stick them on your elbows while you are reading a book, to soften and whiten your skin.”   Jennifer Paterson, Two Fat Ladies Obsessions


Monday, March 4, 2013

Sausage and Cheese Grits Casserole - Delish!

Hooray, it's Monday!  Yes,  you read that right.  Hooray, it's Monday!  I know not many people feel that way and you may think I have totally lost it, but the SUN shined all day today.  The sun.  It's still up there.  Thankfully.  I was beginning to wonder.  And, the temp got up into the low 60's.  Did you hear me?  The low 60's.  And, I didn't have to wear a coat.  NO COAT.  NO SNOW.  NO CLOUDS.  NO GRAY.  Sun, glorious sun with hope that spring cannot be far behind.  Yahoooooooo!   And my BFF was here for a doctor's follow up appointment from her surgery in November and we got to have lunch together, and talk, and drink coffee.  Just like old times.  Sigh.  It has been a truly good Monday.

Enough about me, how about you?  How was your weekend?  Your Monday?  Hope it was fabulous.  Simply fabulous.  Hope you expressed gratitude.  Monday's are always Gratitude Monday's.   My friend Don called me early this morning to share his gratitude list and it included me for being his friend.  Now, how can you have a bad Monday when that happens?  You absolutely cannot have a bad day.  Ever.  When someone says they are thankful you are in their life, well it just rocks.  Thanks Don, love you too!  We met in my costume shop when he came in one day and have been fast friends ever since.  Don't you love when that happens?  I sure do.

Now, about that picture above.  Let's talk about it.  It is a recipe I made a couple of Sundays ago for dinner.  Yes, dinner.  It can also be a breakfast casserole, but don't you like breakfast for dinner sometimes?  We do.  Also, it is gluten free and I made it for company.  Our son in love has Celiac and their family was coming for dinner, so I gave it a try.  It's a keeper.  I found the recipe on plainchicken.com which is one of my favorite sites to peruse every few weeks for new recipes.  She always has simple, but delicious recipes and I haven't made one yet that we didn't love.

So let's talk about grits.  Do you like them?  Don't know?  Haven't made them or eaten them?  They are a mostly southern dish and we LOVE them.  They are somewhat like polenta (if you like polenta, and we do), extremely delicious, and easy to make if you use the quick grits.  Here is some information from Wikipedia on grits.


Grits refers to a ground-corn food of Native American origin, that is common in the Southern United States and mainly eaten at breakfast. Modern grits are commonly made of alkali-treated corn known as hominy.
Grits are similar to other thick maize-based porridges from around the world such as polenta or the thinner farina. "Instant grits" have been processed to speed cooking.
The word "grits" derives from the Old English word "grytt," meaning coarse meal.[1] This word originally referred to wheat and other porridges now known as groats in parts of the U.K.  Wikipedia


This casserole is extremely tasty.  Even our oldest grandson, who may be one of the pickiest eaters on earth ate it.  Okay, that rates as a minor miracle.  I mean, it's got tons of cheese and sausage, some herbs, eggs, and grits.  What's not to like?  Here is what you need to make this casserole.

2 pounds sausage (regular, hot, or some of both)
4 cups water
1 1/4 cups quick cooking grits, uncooked
4 cups (1 pound) shredded sharp cheddar cheese (I used two 8 ounce blocks and grated it myself - cheaper and tastes better than pre-grated)
1 cup milk
1/2 tsp dried thyme
2 cloves garlic, minced
4 large eggs, lightly beaten
paprika

Brown sausage in a large skillet, stirring until it crumbles.  Drain well if needed and set aside.

Bring water to a boil in a large saucepan, stir in grits.  Return to a boil.  Cover, reduce heat and simmer 5 minutes, stirring occasionally so the grits don't stick.  Remove from heat.  Add cheese and next 3 ingredients, stirring until cheese melts.  Stir in sausage and eggs.

Spoon mixture into a lightly greased 9 x 13 x 2 baking dish.  Sprinkle with paprika.  Bake, uncovered at 350 degrees F for 1 hour or until golden and heated through.  Let stand 5 minutes before serving.

To make ahead:

Prepare grits mixture as directed above, but DO NOT bake.  Cover and chill overnight.  Remove from refrigerator; let stand while covered for 30 minutes.  Uncover and bake as directed.

This recipe is gluten free as long as your sausage has no gluten in it.  Check the label!    I would have liked all hot sausage, but we have little ones eating and I didn't want it to be too spicy for them so I used 1 pound of mild and 1 pound of hot sausage.  It's your choice what kind of sausage you use.

Other than that, this is an awesome casserole to serve for breakfast, brunch, lunch, or dinner.  We enjoyed it with zucchini/potato cakes, fresh fruit, salad and some fabulous buttermilk, cheddar, olive bread that I baked.  I will share that recipe with you later.  Yum.

Next time you want something easy but different, give this recipe a try.  It's truly cheesy goodness.  Enjoy the rest of your Monday, you've still got time.

Everyday Donna

Things to Remember:


Tuesday, February 26, 2013

Enchilada Casserole With Home Made Red Sauce


Last night I wanted Mexican for dinner.  I was cooking, so it was my choice right?  Right!  If you follow this blog, you know my love for Mexican food and flavors.  They are my favorite, hands down anytime.

I had all the ingredients to make enchiladas which are also my favorite next to tamales.  I have never had the gumption to make tamales as they are quite a process, but one of these days I'ma gonna do it.  Really I am.  You will be the first to know if and when I do.

Enchiladas are also a process.  Have you ever tried to fill and roll corn tortillas?  They split unless you heat them in hot oil or you can dip them in the warm red sauce before you roll them.  It is messy and I am not very proficient at this technique or very patient. (Uh oh, cat's out of the bag).   If you don't do one of these two, then your enchiladas are cracked and all the filling is spilling out and they don't look very pretty.  Remember, I am not a chef nor have I ever worked in a Mexican restaurant, so I go for the easy way - better known as my way.  Hey, it works!  If you love enchiladas too, you are going to be SO happy I showed you my fake enchilada recipe.

I do make my red sauce from scratch.  It is a recipe from Allrecipes.com and it is easy, takes 10 minutes and is fabulous!  Doesn't take much longer than opening a can of prepared sauce and heating it up.

Here is what you need for the sauce:

1/4 cup vegetable oil
2 TBSP flour
1/4 cup chili powder (I use Mexene which is my personal favorite)
1 8 oz can tomato sauce
1 1/2 cups water
1/4 tsp cumin
1 clove garlic, pressed or minced super fine
salt to taste

Heat oil in a skillet or deep saucepan over medium high heat.  Stir in flour and chili powder, reduce the heat to medium.  Cook until lightly browned, stirring constantly so the flour doesn't burn.

Gradually stir in tomato sauce, water, cumin, and garlic until smooth.  Cook over medium heat approximately 10 minutes or until thickened slightly.  Season with salt to taste.

This sauce is as good as any you will get in a restaurant.  We LOVE it.  Now, to make the enchilada casserole, here is what you need.

12 corn tortillas (use flour if that is your preference, but enchiladas are made with corn tortillas)
2 pounds ground beef
1 large onion, diced
2 cloves garlic, minced.
2 packages taco seasoning
1 8 oz block cheddar cheese, grated

Brown the ground beef and onions in a large skillet.  Add taco seasoning and garlic. Mix thoroughly.   Drain ground beef if necessary.  (I use grass fed local beef and there is nothing to drain.)

Now to assemble the casserole.  You need a 9x13 baking dish.  Line the bottom of the dish with 6 corn tortillas.
Cover the tortillas with the browned ground beef mix.
Cover the ground beef with 2/3s of the grated cheese.
Drizzle with some of the red sauce.  Now, cover this with 6 more corn tortillas.  (Forgot to take a picture, oops).

Pur the remaining red sauce over the corn tortillas.
Look how beautiful that red sauce is and it tastes absolutely divine!

Sprinkle the remaining grated cheese over the red sauce.  If you want more cheese, go for it!
Bake at 350 degrees for about 30 minutes, or until the cheese is melted and the sauce is bubbling.  Remove from oven and serve!

We had 4 grown men here for dinner last night and me.  This casserole got RAVE reviews.  Get that?  RAVE reviews!  Dan declared it better than our favorite Mexican restaurant's enchiladas which is quite a compliment.  We had this with black beans and Mexican rice.  Delicious.

Give this recipe a try the next time you are hungry for South of the border/Tex Mex flavors.  It will hit the spot.  You could easily halve this if you wanted, just use half the red sauce and refrigerate the rest for another meal.  Yum.  Yum.  Yum.  All I can say.

Everyday Donna

Things to Remember:

When cooking, sometimes it is okay to do things a little differently, especially if the end result is basically the same, takes less time and is easier to accomplish.  That's my philosophy.   donna


Monday, February 18, 2013

Potatoes Au Gratin With Harp Accompaniment

Hello everyone!  Sorry to have been absent for a while.  Dan and I had the totally creepy crud, the kind that lasts for a week and then takes another week to recover.  Whew.  I hope we don't ever have that again.  It was NOT fun, but we are on the mend.

In the meantime, I have undergone two laser procedures for my glaucoma.  Last week I had the left eye done and today the right eye.  I have had glaucoma for 30 years and am on maximum medications and my pressures won't stay down where they would like them to be.  So, they zapped each eyeball with a fancy little laser (the procedure is called an SLT).  The purpose is to create new drainage pathways.  It took about 5 minutes for each eye.  My eye felt a little irritated for a couple of days, and then it cleared up.  Today, the pressure in my left eye (first eye done) had dropped 7  points in one week.  The pressure usually runs about 23/24 with 4 medications twice a day which is way higher than they would like it to be.  Today, after just one week, the pressure was down to 16!!  Hip, hip, hooray!!  My pressures have not been in the teens for 20 years.  So grateful for the miracles of science and Dr. Bergman.  : )  I will return in six weeks for pressure checks and then my medications will be adjusted, hopefully eliminating  a couple of them!

Now that we are on the mend from our bout of creepy crudiness and our appetites are beginning to return, I had the in town family over for dinner last night.  Do you every get a craving for something and you just have to make it?  Mine was potatoes au gratin. Had to have them.  Cheese, potatoes, onions, creamy goodness.  Yum.  I made a 9x13 pan and there were absolutely none left.  Not.  One.  Bite.  Soooooo good and not hard to make at all.  Here is what you need.

4 pounds of russet potatoes, peeled and thinly sliced
2 tablespoons of butter
2 cups whole milk
1 small onion, minced
1 large clove garlic, minced
1 heaping tablespoon corn starch
8 ounce block of cheddar cheese, grated
1/2 tsp salt
lots of fresh cracked black pepper

Preheat oven to 400 degrees Fahrenheit

Peel potatoes and slice about 1/4 inch thick.  Mince small onion and add to potatoes.  Mince clove of garlic.  Add butter to deep saucepan and melt at medium temp.  Add 2 cups of milk, heaping tablespoon of corn starch, minced garlic, salt, and lots of black pepper.   Stir until milk begins to simmer.  Add all of the grated cheese.  Mix until cheese is melted.  Remove pan from stove.

Grease a 9 x 13 baking dish.  Add potatoes and onions.  Pour sauce over potatoes, should just barely cover potatoes.  Cover with aluminum foil and put in oven for 20 minutes.  Remove the foil and continue to bake for an additional 35/40 minutes until the potatoes are fork tender and the cheese has started to brown.  Remove from oven.  Serve.

These are SOOOOOOOOOOO delicious, you really need to make some as soon as you can.  They are good with any meat.  We had them with grilled barbecued pork chops and grilled asparagus.  Yum.  Yum.  Yum.  

If you know me at all, you know I never met a potato I didn't like and these are one of my most favorite ways to enjoy them.  What's not to like?  Seriously?  Cheese, potatoes, onions, deliciousness.  Is your mouth watering?  Mine is and there are no left overs.  (Insert sad face here).  Guess you know what that means.  Will have to make some more sometime soon.  Give them a try.  You can cut the recipe in half if you don't want to make such a huge pan of them, but you will be sorry later.  They are worth the effort.  Enjoy.

Everyday Donna

Things to Remember:

My friend Ken is staying with us for a bit while he gets settled in Nashville.  He is a harpist and he is practicing while I type this.  He plays so beautifully.  What a treat, our own personal harpist.  Wish you were here to enjoy.  Haven't felt this peaceful in a while.  Thanks Ken.


Wednesday, February 6, 2013

Mas Taco Por Favor's Chicken Tortilla Soup Recipe - Did I Say Fabulous?

We've both been a bit under the weather.  Hacky cough, headache, scratchy throat.  Not feeling terrible, just not great.  The sneezing and runny nose can stop anytime.  Hopefully it will resolve itself soon, and I do hope SOON.  Dan and I have been really healthy for years, but since the grandsons are in school, we seem to come down with a lot of little colds which they bring home from school.  They are all hacking and coughing too.  Springtime can't come fast enough.

Science has found that chicken soup is good for colds and congestion.  This soup I am writing about today is just good for the soul!  Our daughter kept raving about the chicken tortilla soup from a local restaurant called Mas Tacos Por Favor.  This is not your average Tex-Mex place.  It is a little hole in the wall decorated with mis-matched chairs and wobbly tables.  You have to place your order at a window and pray that you find a seat because the place is always packed.

Mas Tacos Por Favor has been written about in many culinary magazines and in the New York Times on June 18, 2012.  Their menu is written on a chalk board and changes every day.  Their tacos are things like braised pork and red mole in la manana, or fried avocado, pulled pork, cast iron chicken and quinoa.  Merciful heavens their food is good.  But, the chicken tortilla soup is divine, their shining star.  Simply heavenly.

I took my chances and googled Mas Tacos chicken tortilla soup and miracle of miracles there was an online recipe in Bon Appetit magazine.  The tortilla soup gods smiled on me with great favor!  Full, rich flavor tasting of lime juice and clear, tasty chicken broth is the base for this soup.  It is topped off with grilled corn, avocado slices, cherry tomatoes, queso fresco and more lime juice.  It has a spicy taste from chipotle chiles and just a bit of jalapeno.  Not too spicy, but just right in my estimation.

Here is what you need to make 8 servings:

1 4 pound chicken
1 onion, quartered
1 carrot, peeled, chopped
5 garlic cloves, smashed
2 dried chipotle chiles
1 jalapeno (with seeds), halved lengthwise
7 cilantro sprigs
3 tablespoons (or more) fresh lime juice
vegetable oil
5 corn tortillas, cut in 1/2 inch strips
2 ears of husked corn, or 2 cups frozen, thawed corn kernels  (I had to use frozen corn)
Chopped fresh cilantro, halved cherry tomatoes, avocado wedges, queso fresco or mild feta, lime wedges.

I didn't have any chipotle chiles on hand, so I used a can of green chiles.  Just a little different, but not the end of the world.

Bring the whole chicken, onion, carrot, garlic, chipotles, jalapeno, and 16 cups water to a boil in a large pot; skim foam from surface.  Reduce heat to medium and simmer, skimming the surface frequently until chicken is cooked through, about 1 hour.

Transfer chicken to a plate.  Strain broth into another large pot.  Return chiles to broth if a spicier broth is desired.  Discard remaining solids.  Shred Chicken meat; discard skin and bones.  Transfer chicken meat to a medium bowl and set aside.

Meanwhile, set pot with strained broth over medium heat and add cilantro springs.  Bring broth to a simmer; cook until reduced to 8 cups, about 1 hour.  Discard cilantro sprigs and chiles if using.  Stir in 3 TBSP fresh lime juice.  Season with salt, pepper, and more lime juice if desired.  Add chicken to broth.

DO AHEAD:  can be made 2 days ahead.  Chill until cold, then cover and keep chilled.

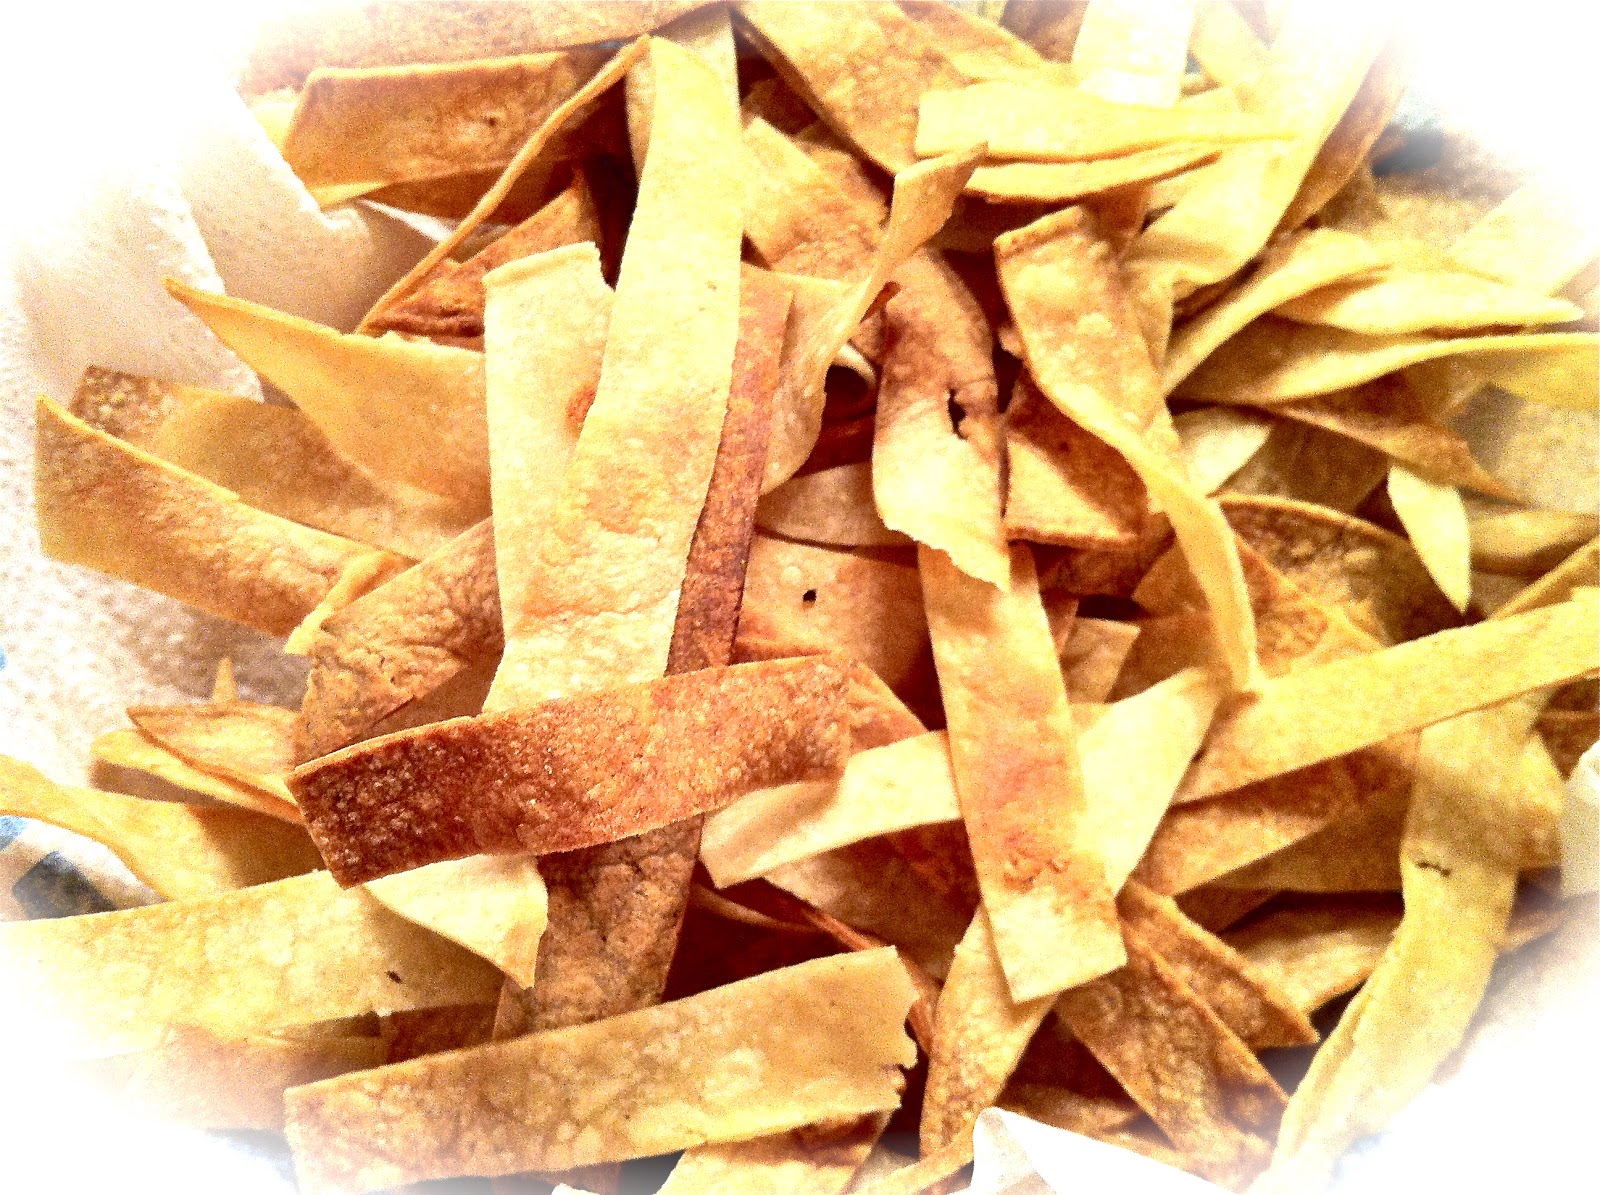
Attach deep fry thermometer to the side of a large cast iron skillet or other heavy skillet.  Pour oil into skillet to a depth of 1 inch.  Heat over medium heat until thermometer registers 350-360 degrees.  Working in batches, fry tortilla strips, turning occasionally until crisp and golden brown, 2-3 minutes per batch.  Using a slotted spoon, transfer to paper towels to drain.  Season with salt.

(I baked my tortilla strips.  Drizzle with oil, toss until coated and put on a baking sheet at 400 degrees.  Stir on occasion to make sure they brown on all sides).
Cook the corn over a gas flame or under a broiler, turning occasionally until charred in spots.  (You can use your outdoor grill too).  Let stand until cool enough to handle  Cut kernels from cobs in strips.   Discard cobs.  (Alternatively, cook kernels in a large skillet over high heat until charred in spots).

Rewarm broth with chicken.  Divide soup among bowls.  I put the corn and tortilla strips in the bowl and then put out plates with toppings because not everyone likes all of them.  (You know who I'm talking about, right?)  We had cherry tomatoes, avocado slices, queso fresco, cilantro and lime wedges. YUUUMMMMMMMMMMMMMMM!

This soup is heavenly.  Divine.  Amazing.  Fabulous.  Incredible.  Awesome.  Flavorful.  Tasty.  Scrumptious.  Is that enough adjectives?

I had never thought of eating avocados in a hot soup broth, but boy oh boy, are they good!  It's all good and will do wonders for a stuffy head.  It's not really hard to make either.  You don't even have to wait until you have a stuffy head to enjoy this fabulous concoction.

If you are ever in Nashville and want some spectacular food, head straight to Mas Tacos Por Favor at 732 McFerrin Avenue in east Nashville.  They are open 11-4 Tuesday through Saturday and I don't know about evenings.  They also have a food truck that makes appearances from time to time around town.  Mas Tacos is owned by Teresa Mason and she certainly knows her stuff when it comes to delicious food.

Give this soup a try.  No, it's not like the chicken tortilla soup you get other places - it's so much better!

Everyday Donna

Things to Remember:

A Jewish woman had two chickens. One got sick, so the woman made chicken soup out of the other one to help the sick one get well.   Henny Youngman