Showing posts with label DIY. Show all posts

Tuesday, July 24, 2012

A Thoughtful Gift You Can Make


Recently my friend Linda and I were talking about crocheting (which we both do) and she was hunting for her crochet hook (which we all do), so I decided I would make her a crochet hook caddy so she would be able to find her crochet hooks whenever she needed them.  I am also making one for myself because I am always hunting for just the hook I need and they are everywhere - in boxes, in my bag of yarn, in my paint brush caddy - yes, I know, go figure.  It's worse than trying to find my cell phone.

I asked Linda what her favorite colors were and she told me yellow and lavender.  I also happen to know that she loves all things "beach" because she spends time with her sister at her beach house.  We talk about craft projects and things she can make with shells from time to time and she does a fabulous job.  So, my little surprise project was under way.

Linda and I go WAAAAAY back to high school.  We are both Bosse Bulldogs, class of 1966.  Yes, you read that right.  We are both grandmas, but we are still young in spirit.  Linda lives in Texas and I live in Tennessee.  When our oldest daughter was living in Dallas, I would get to see Linda for a lunch when we visited Holly and her family.  Now, Holly lives in Tennessee and I don't get to see Linda as often as I did.  But, we do talk online and on the phone and hopefully, she is coming to visit next year.  Yeehaa, as they would say in Texas.  Boy, are we going to have some fun.  Anyway, I am getting totally off the subject.  Today is Linda's birthday, and I wanted to feature this little project I made for her.

Even if you are not the world's best seamstress, you can make one of these.  It is just simple machine sewing and is really not hard.  I just made it up as I went.  You will need 3 fat quarters in your favorite colors (or fabric scraps if you have them) and a 9 x 12 piece of felt and some ribbon.  That's it.   I can hear you asking why I used felt.  Simple.  Because I wanted the caddy to have more body and it would enhance the quilted look I planned to use to finish the caddy.  

I tried to find some "beach" fabric here in Tennessee, but had absolutely no luck, so I went with stars which are my favorite and very symbolic of Texas.  The inside pieces looks like water color swirls in yellow and lavender.

Here is how I started out.  Fat quarters are 18 x 21 inches.  I laid the two yellow pieces with the right sides facing.  I then placed the felt piece 1/2 in from the top and left edges of the fabric and cut the right and bottom seams 1/2 from the edge of the felt.

Pin the felt to the wrong side of the cotton fabric and stitch just inside the edge of the felt, leaving about a 4 or 5 inch opening in the bottom so you can turn the piece.  I used clear nylon thread so I didn't have to keep changing colors.  
Trim the corners at an angle so you will have nice points when you turn this piece.
Now, turn the piece right side out.  Turn the unstitched opening to match the rest of the seam line, press, and stitch shut on the right side of the fabric.
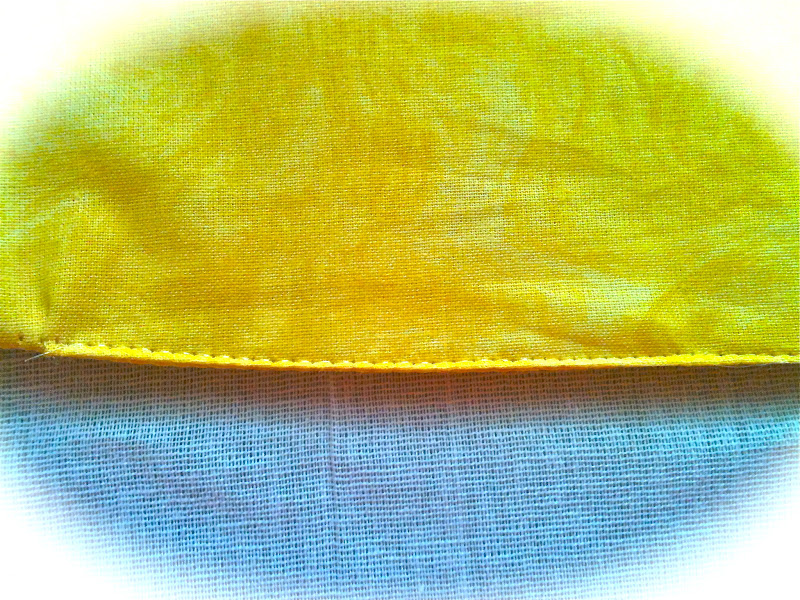
Now, you are going to cut the pocket that will hold the crochet hooks.  Lay your "pocket" fabric (which was the lavender in my case) at least 1/2 way up from the bottom of the piece you just finished. Allow 1/2 inch seam allowance on the top, bottom, and both sides and cut a rectangle from the fabric.  Fold each seam allowance under 1/4 inch two times so you will not have any raw edges.  Press.


Stitch the top edge of the rectangle all the way across.  Turn and pin to what will be the inside of your hook caddy.  Stitch down one side, across the bottom and back up the other side.  Now, take your smallest hood and place it inside the pocket next to the left seam.  Measure, allowing enough room to slide the hook in easily.  Mark the seam with a disappearing sewing marker if needed.  I just free stitched mine.  On the right hand side, place your biggest hook and do the same thing.  Now, make several small pockets on the left, more medium sized pockets in the middle (because most of us use yard hooks which are medium sized) and then allow a couple of large pockets for big hooks like a P or a Q on the right side.  Stitch each seam from the top of the pocket to the bottom, sewing in a straight line.  This gives you a really nice quilted effect on the inside and outside of the caddy.  

Cut two 12 inch pieces of ribbon and sew them to the right side of the caddy just above the pocket.
Roll your caddy from the left to the right and tie one piece of the ribbon around the outside of the closed caddy and tie a bow using the remaining ribbon.  You will probably have to trim your ribbon so it with be the same length when tied.  Ta da!  You are finished.  Now, you can organize all your crochet hooks easily and keep them in one place.  You can carry them with you in your purse or project bag and they are easily at hand when needed.  

Linda said she was going to take hers to the beach so she could work on projects while relaxing.  That was my hope when I made this.  Now, I have to get busy and finish mine.  Crochet hooks are calling.

This project is quick and easy.  You could also use the same process and make crayon or colored pencil carriers for your grandchildren.  I always try to have crayons with me when we go out to eat just in case the restaurant doesn't have them.  Your children would love you for this thoughtful gift.  And, if you start now you can have a bunch of these made in time for Christmas.  All those crafters and kids in your life will be so grateful for such a thoughtful gift that can be personalized individually.  

Happy Birthday Linda.  Hope your day was great and that you are enjoying your crochet hook caddy!  Now,  everybody get busy and give this project a try.  

Everyday Donna

Things to Remember:

Every gift from a friend is a wish for your happiness.
Richard Bach


Friday, September 23, 2011

A Festive Fall Banner For Your Home

It's Friday and the first day of Fall!  What a great end to a week that simply flew by.  Perhaps it's because this has been fall project week here at the "Little Yellow Cottage."  Today, I finished the mantel and am  very happy with the results.  My project for today was creating the banner on the front of the fireplace.  It was so easy to make and adds such a festive look to the living room.

Remember, I am in my burlap phase, so today I used natural burlap for my pennants.  This is such an easy no-sew project.  Although I do sew and could have made these by sewing them over the sisal string, I made them with hot glue to show you how you can make this without threading a needle.

All you need for this project is some burlap in the color of your choice, a hot glue gun and glue sticks, artificial fall leaves, small pine cones, berries and artificial acorns (unless you have access to real acorns), some  small rocks, and a moss roll from the Dollar Tree.  This is a strip of moss on a web backing that can be cut and glued to most anything.

The first thing I did was measure a piece of sisal string on the mantel to know exactly what length I needed.  Next, I created my pattern for the pennant.  I drew a 12 inch square on a piece of brown craft paper.  Mark the center of the bottom line which would be at 6 inches.  Take a ruler and draw a diagonal line from the top two corners of the square to the center point on the bottom line.  You have your pennant shape.
Cut out the pennant along the lines you have drawn.  This pennant will have a 12 inch top which is rather large for indoor use.  I carried this pattern piece over to the fireplace and held it up to determine the size that I would want to use.   I made a crease on the edge of the paper where I wanted the top to be for the size pennant needed.
The pennant had to be cut down, so I folded the top over a straight edge, in this case a ruled, and creased it along the top.

Now, all you have to do it cut it straight across and you have the size pattern piece needed.  No drawing and re-drawing of patterns.  This can be reduced to a tiny little pennant if that is the size needed -  simple and easy.

Next, I folded the burlap and pinned the pattern on to start cutting my burlap pieces.  You can minimize waste by laying the pattern one way when cutting, then turning it the opposite way to cut the next piece.  This leaves practically no waste to the fabric.
I cut 12 pieces of  burlap for the banner that I would use across the front of the fireplace.  It is better to have a few extra than to find youself short and have to go back and cut more.  Next, I covered the table to protect it from any hot glue that might seep through the porous burlap.  I took my first piece of burlap and starting laying out pieces on it to get the look I wanted.  Each pennant I made is different, but you could make yours all the same if that is the look you wanted.

Here are some close-ups of a few of the finished pennants.  I  would lay down a leaf or two, some pinecones or acorns, until I'd get the look I wanted.   Then, I would glue them to the burlap. 


The pennants can be decorated an any way you choose.  After I finished all 12 pennants, I began gluing them over the sisal string.  First, I found the center of the string and marked it with a pin.  I laid the finished pennants out in the order I wanted them to hang on the twine.  I laid the first pennant face down on the table and placed the twine about 1/2 inch down from the top.  I ran a bead of hot glue along the top edge of the pennant and turned it over the twine and pressed it down.  Be sure and use something besides your finger to press the edge down because the glue is hot and may seep through the burlap resulting in a burn. 


 Next, I placed another pennant piece on the other side of center and followed the same procedure.  I used my finger to space the pennants so they would be equidistant apart.  I continued gluing until I had 10 pennants on the banner and had just enough twine left to tie the banner to the mantle.  That left two extra pennants which was great.  I found another place to use them.

I placed a clear push pin in the center of the mantle and one on each end.   I took the banner to the mantle and hung the center over the push pin and tied each end to the other push pins.  Finis!  (done)  I had to stand and look in admiration, it was just what the mantle needed,

The top of the mantle is decorated with gourds, pumpkins and Indian corn.  There are also some adorable paper doily pumpkins.  (There will be a DIY for these next.)  Now, were are all ready to settle down for an enjoyable autumn in our new home.  It has been a long time since was have had "firsts" in a home and it is rather exciting. 

This is a fun and easy project for any weekend crafter.  The banner can be hung anywhere you would like and adds so much color and pizzazz to a room.   What a fun way to welcome fall into your home.  What do you plan to do to decorate for fall?  

Everyday Donna

Things to Remember:

Reach high, for stars lie hidden in your soul. Dream deep, for every dream precedes the goal." ~ Pamela Vaull Starr


Thursday, September 22, 2011

Other than Christmas, do you change the accessories in your home to fit the season - spring/summer flowers and accessories for spring/summer, fall accessories for fall and holiday decorations for the winter holidays?  I always have and probably always will because I like it that way.  It just makes sense to me that the inside decor matches the season of the out of doors.  OCD?  Probably.

Since today is the last official day of summer and fall is rapidly approaching, I have been working on making the transition indoors.  All the summer decorations are being changed for fall decorations as I create them.  Our new home, the little yellow cottage, is getting all new decorations because creating is a very joyous experience for me.  Yes, there are pumpkins and pots of mums sitting on the deck waiting for their assigned places out of doors, but first I want to finish the interior.  First things first - that's the way I like it.  

At the moment, I am in my burlap phase.  All artists go through phases and this is mine at the moment.  First, it's inexpensive and second, it has so much potential.  I bought two yards of red burlap when I made my fall wall hanging knowing I would use it for something.  I liked the wall hanging so much, I decided to make a runner for the table out of some of the remaining fabric.  The runner is 18 inches wide and two yards long.  The edges are unfinished and there are painted stencils going down the center of the runner.  Easy, inexpensive and creative.  

I thought about what I wanted on the runner and the thought of being grateful kept running through my mind.  So, I stenciled the phrase "Always Giving Thanks" in the middle of the runner as we try to always live in a state of gratitude.  I wanted the runner to be used through Thanksgiving, so I went with a fall harvest/cornucopia look.  Brown craft paper is great for inexpensive stencils that will only be used a couple of times, so I traced some of the artificial fall leaves I have on hand, cut an apple in half and traced it, googled images of acorns and drew one, and drew a small pumpkin.  I cut the center out of all the drawings to make stencils.  Quick and easy - my two favorite words.  If you don't feel comfortable drawing stencils, just find images on your computer and print them out.  The grapes were made with a round foam one inch "stomp".  It makes perfect circles and gives the bunches of grapes depth and dimension.  


Paint colors used were pumpkin orange, santa red, leaf green, hunter green, chocolate brown, dandelion yellow, purple pearl, eggplant and black.  All you need are the little bottles of acrylic paint available in any craft store.  Other supplies needed are a stencil brush, thin liner brush, foam stomp, and something to cover your table so you don't get paint on it.  I used a plastic trash bag.

Start by pinning a stencil to the runner with some straight pins.  I did leaves first, then acorns, grapes, apple, and pumpkins.  Start on the outside edge of the leaf stencil with whatever color you want to use and paint the outside 1/3 of the leaf one color.  Work toward the center of the leaf with a second color and complete the center with a third color.  If you start with orange, work to red then yellow.  You want the colors to be as natural as possible.  Nothing is ever just one color.  Don't be afraid to mix colors, it gives you depth, texture and dimension.

The brown leaf above was started with brown, then green and the center in yellow.  It makes everything much more interesting that way.

The grapes were done with the eggplant paint on the top part of the cluster and then the purple pearl was used on the bottom to give contrast.  The apple was painted yellow and then shaded from the top down with red.  The pumpkin was painted solid orange and the stem was done in brown and highlighted with dark green and yellow.  After all the paint was dry, I went back with the little linter brush and added veins to the leaves and lines were added to the pumpkins. All the stems were highlighted with green or yellow.  The acorns received a little shadow under the "cap" to show separation and depth.  Don't be afraid to trust your instincts.  I am not Monet or Van Gogh, but I love the way my runner turned out!

Stenciling is very easy.  Just make sure the stencil is snug to the fabric using pins or tape.  Use an up and down pouncing motion.  I like to work from the outside in, that way you get nice crisp edges.  Remove the stencil once the paint is partially dry.  I would complete one object, then move on to the next image I wanted to place on the runner.  

This is an easy and inexpensive project.  You can choose whatever design you want to put on your runner.  We now have a lovely table runner and the adorable candy corn tea lite holders from last night's post.  It's going to be a good fall!  


What could be more fun than creating your own personal table runner to use in your home or to give as a gift?  Give it a try, you can do it!  And, you will feel so satisfied knowing you created something lovely and meaningful out of something as humble as burlap.  Get that creativity out and use it as often as you can!  

Everyday Donna

Things to Remember:

Gratitude is an Attitude!


Monday, September 19, 2011

Starry, Starry Night

 For my part  I know nothing with any certainty, but the sight of the stars makes me dream.  
Vincent Van Gogh


What makes you dream?  What fills you with wonder?  What takes your breath away?  For me, it is the night sky filled with uncountable stars and planets twinkling in the inky blackness of nighttime.  When did I fall in love with the night sky?  In 1960 while traveling to Arizona with my family - I was not quite 12 years old.  We traveled all night and my dad was driving.  My mom and sister slept in the back seat while I stayed awake to keep my dad company.  We were traveling route 66 in my dad's first brand new car, his red and white 1960 Chevrolet Impala.  We had the windows down and the cool night air stirred something in me as I raptly gazed at the glory of the night sky.  If you have never been in the desert or far away from the city without all the lights interfering with the wonder of the night sky, you have not lived.   You have not experienced the night sky.  As long as I live, I will never forget that night as I gazed intently at the innumerable lights twinkling and flashing in the sky.  I started to count the shooting stars which flashed across the sky with regularity leaving glowing trails behind them.  Some were short bursts of light while others seemed to cross the entire sky.  I watched the changing positions of the constellations as we traveled, knowing this was a night I would never forget.  As dawn approached and the sky lightened, I was thankful that I had gotten to experience a most unforgettable night.

For those of you who know me or have been in our home, you know my love of stars, or the shapes we use to represent the heavenly bodies.  My home is filled with stars.  My son-in-love teases me about all my stars, but they represent wonder and awe to me and what inspires me.  To me, the mystery of the universe is just a reminder of where we came from and the place we will return to some day, becoming one with the divine.

The first picture shows a project I just finished for our guest bedroom and I chose a quote from Vincent Van Gogh about the stars.  We are all familiar with his painting Starry Night which is my most favorite painting.  Van Gogh understood the glory of the night sky and was able to express it in his painting in a truly inspiring way.  The wall hanging is from an inspiration I found on a blog site called The Lettered Cottage.   She took her inspiration from a picture in a Pottery Barn catalog and that hanging cost hundreds of dollars.  This one can be made for waaaaaaaaay less.  Check out her blog for some great inspiration.  As soon as I saw the picture of her hanging, I knew it was exactly what I wanted for the guest bedroom.  The wall had been empty since we moved here.  I just hadn't found the "right" thing to put there.

We made a trip to Home Depot to purchase the materials we needed for the hanging which is a take off of an antique drying rack.  We purchased two 1x2's and a package of lattice strips that are used for replacements when they break.  The lattice strips were 72 inches long and there were 10 in the package.   The 1 x 2's were 8 feet long which is enough to make the frame and he cut the lattice strips in half.  The materials were less than $15.00.

Dan built the frame which he made 25x36 with a reinforcement strip down the middle.  It looks like this.
Next, he cut the strips to the length needed to fit the frame (36 inches) and attached them with small finishing nails.  He pre-drilled the holes before hammering the nails in so the thin lattice strips would not split.


 We laid the strips out so we knew how many it would take to cover the frame and then he worked from the top and bottom edges to the middle so there would not be a gap at the bottom if the spacing was off just a bit.  We used a "shim" to measure between the strips so they would be evenly spaced.
 This is how the finished hanging looked before painting.  I chose a dark red paint for the color since red is the accent color I use throughout the little yellow cottage.  And, red just makes me happy.  It took one can of spray paint to spray the front and back plus the frame.  I did not spray it heavily as I wanted a rustic look.


After the paint  dried, I went over the entire surface with fine sandpaper because I did not want any shine to the paint and to give it an aged look.  The strips are 1.5 inches wide, so I used a 1 inch stencil to place my quote on the boards.  After deciding how I wanted the words to be placed so they would fill the space,  I went to work with my small stencil brush and white acrylic paint.
The first picture shows the guest room with it's fabulous new "headboard" of stars and a truly easy and inexpensive hanging that is very personal to me.  I am hoping our guests will enjoy the quote from Vincent Van Gogh and that they will dream beautiful dreams, finding inspiration in his words.

What makes you dream?  What inspires you?   What takes your breath away?  For me, it is the stars.

Everyday Donna

Things to Remember:

You may not be a Picasso or Mozart but you don’t have to be. Just create to create. Create to remind yourself you’re still alive. Make stuff to inspire others to make something too. Create to learn a bit more about yourself.” Frederick Terral