Showing posts with label burlap. Show all posts

Wednesday, January 29, 2014

Make A Burlap Valentine Heart To Hang In Your Home

 Are you staying warm where you are?  I.  Am.  Over.  This.  Weather.  Bring on springtime.  I want flowers and green grass and warm sunshine.  I don't want to wear a coat, a scarf, or gloves any more.  Done.  Through.

Yesterday, I worked on this Valentine heart wreath made from burlap.  I happen to love burlap even though it sheds a lot and the little fibers get up your nose (which is really fun with a cold).  Burlap is inexpensive and relatively easy to work with.  Even though this burlap looks very red, it is actually a little darker.  Reds just seem to be hard to photograph.

I found some red burlap at Wally World a couple of weeks ago and bought two yards.  Red is not always available, so I always buy extra when I find it.  I seem to use a lot of it for some reason - perhaps because I like red and it is an accent color in my home.

I have this old piece of wood that hangs on the wall in our dining area that I use as sort of a gallery to keep from putting lots of holes in the wall.  It works out very well, and is an interesting art piece in and of itself.  It must have been part of a door at one time.  We found it at our favorite second hand store here in Nashville.  I like to hang interesting things on it.  This wreath is the perfect piece and may stay there after Valentine's Day - at least until spring.

For the wreath form, I used some 16 gauge wire that I bought at Christmas time to make the coiled wreath that you can find on my blog.  It is the one filled with yarn balls and Christmas ornaments.  This wire is sturdy and easy to shape at the same time.  You could use a coat hanger, but the heavier ones can be hard to shape and those awful white ones may be too flimsy.  I found this wire at Home Depot.  I just sort of formed the size I wanted and cut the wire and twisted the bottom.  The wire shape is about 14 x 14.
The form does not have to be perfectly shaped because you are going to cover it with the burlap ties.  Don't fret if the wire is wavy.

It is easy to cut strait lines in burlap because of the loose weave.  You simply pull a thread all the way across and cut in the open space that is left.
Pull a thread and try to pull it all the way across without breaking.  Go slow and good luck.  If the thread breaks, just simply find the break, pull out the lose end and go from there until you get all the way across the width of the burlap.  This burlap is 45 inches wide.
See the open space?  Just cut all the way across and you have a nice straight strip.  Make your strips the width that you want.  I made mine 1.5 inches.  That width works nicely with this project and is not too hard to tie.  If you make thinner strips, the burlap sometimes comes apart when tying and wider ones are hard to tie.  Guess how I know that?

I used about a half yard of fabric for this wreath.  I cut strips 4 at a time and then cut the strips into about 7 inch lengths.  These are easy to tie and not too long.  If you need more strips, cut a few more.  This way, you don't waste a lot of the burlap if you don't use it.

Take one of the 7 inch strips and tie an overhand knot around the wire form.  If you are not familiar with knots, that is just like you would tie the beginning of a shoe lace.  One tie is good and it will hold in place on the wire.  Push the ties as close together as you can.  Just keep filling in around the form, turning your knots in different directions so the wreath will look full when finished.  That's all you do.  Simple as can be.


This wreath should probably be an indoor wreath unless your door is covered by a roof that would protect it from snow and rain.  Otherwise, you may have a very sad and limp wreath.  That's just FYI.

This wreath is so cheerful and it adds a lot of color and texture to the room.  It could be made out of any color burlap or any shape for that matter.  It doesn't have to be just for Valentine's day.  I may leave this one up for a while.   I can remove the little banner below it and it is just a pretty wreath.

You could make this and use felt, ribbon, or fabric.  It would cost more, and make take more strips of ribbon or fabric, but would be just as pretty.  Your choice.  If you have scraps available, use those by all means.

You could also make these wreaths in different sizes, even quite small for gift giving.  As long as you can make a heart shape out of the wire, you can cover it with the burlap.

Add some color and whimsy to your home during these dull, gloomy winter days.  Even if you are not a big Valentine's fan, how could this beautiful heart not cheer up a room?   Have fun with this project.  I sure did.  It  only took about an hour to complete.  Easy.  Peasy.

Everyday Donna

Things to Remember:

Without Valentine's Day, February would be...well, January.  Jim Gaffigan


Tuesday, December 17, 2013

My Different Burlap Christmas Trees

 Oh Christmas tree, Oh Christmas tree, how lovely are thy branches.  There are many representations of the traditional Christmas tree.   You may have a huge evergreen tree decorated with lights and ornaments, or it may be a Charlie Brown tree.  It could be shiny aluminum with a color wheel that rotates casting different colored lights on the tree.  Perhaps, you have improvised something on your wall because you have no room for a full tree.  I have seen trees made from old ladders and decorated that are amazing.   Everyone likes something different.

One of the most beautiful trees I ever saw was years ago when I was doing direct sales and was conducting a party in a home where their tree was a sapling that had been cut in the woods.  The tree was totally wrapped in cotton so that it looked like a completely snow covered tree.  There were lights and ornaments hanging from the limbs and lots of icicles.  The sapling reached the ceiling and it was so beautiful I wish you could have seen it.  The hostess told me this has  been her family's tradition for as long as she could remember and she had continued it.  I know it was a lot of work to do all the wrapping, but it was one beautiful tree.

One night I was about to doze off, when a vision of some burlap Christmas trees came into my head.  It may sound strange to you, but things like that happen to me right before I go to sleep, or when I am in the shower and not thinking of any particular thing.  The trees were simple and lovely.  This is my interpretation of what I envisioned.   They are very primitive which is something I really, really like.

I didn't know how I was going to make them because they needed a form - a support.  So I went to Michael's and wandered around.  I found some wooden squares in the craft section that were $1.00 each.  I bought 3.  Then I found some dowel rods for $.59 each.  I bought two because I knew I could cut them to different lengths.  I had a package of styrofoam cones at home that I thought could work to complete my "form."  I found a package with cut dowel rods at Wal Mart that would make the final shape work.  There were 8 in a package, so I bought two because I didn't know how many I would need.  I used them all.
Dan drilled a hole in the center of each base that would hold the biggest dowel rod for the center of the tree.  To find the center, simply draw a straight line from corner to corner that intersects like an X.  That is  your center.  I held the big dowel rod up and marked where I wanted them cut to make different heights.  Dan cut those for me.

I hot glued the big dowel in each base.  Then, I cut a styrofoam cone in thirds and placed a piece on the top of each dowel.
This is what the first one looked like.  Then, I painted the cones with some brown paint so the cone wouldn't show through the burlap.  I pushed the shorter dowels into the bottom of the styrofoam at quarters of the styrofoam and then filled in between with more rods.  I put hot glue at the base of each dowel so it would hold in the styrofoam.  I painted the base, center, and all rods with some light brown paint.
For the first tree, I cut two long rectangles of burlap.  Make them at least twice as long as the width of the tree and long enough to cover the spokes of the tree when gathered at the top.   Add several inches.  You can always cut it off if it is longer than you like.  Next, I  stitched the side seams together with a tapestry needle and some yarn using a running stitch.
Now, you have a big circle of fabric that is open at the top and bottom.  Using the needle and yarn, I gathered the top edge of the circle using the same running/gathering stitch pulling it as tight as I could get it until I reached the beginning stitching.  I wrapped the yarn tightly around the gathered top several times to hold the "tree" shape and tied it.  I then dropped the burlap over the wooden form.    It was a big puff of fabric with a top knot.  

To make the tree shape, I did an overhand whip stitch with the yarn by attaching the bottom few inches of the burlap to the wooden spoke, then continued the rest of the way up catching only the fabric.  You will have as many seams as you have spokes as well as the two side seams.  Now it looks like a primitive tree.  
It took a little time, but it is so precious and worth every stitch.  Charlie Brown's tree has nothing on this one.

The next tree was made by cutting strips of burlap and tying each piece to a spoke until the dowel was covered.  Next, you progress to each additional spoke until they are all covered.  Continue by cutting longer pieces of burlap and wrapping and tying it around the styrofoam cone.  The last few pieces are hot glued to the top of the styrofoam so that it stand up like the top of a tree.  I folded each strip in half and ran hot glue along the fold, then pushed it against the styrofoam.  Remember, hot glue will come through the burlap, so I used a glue stick to push the burlap so I didn't burn my fingers.  
Oh how I love this tree.  Don't ask me why.  It's kind of pathetic looking, but it has character and to me it is representational of our indomitable spirits.  We are all beautiful in our own way.  

The last tree was made with a piece of burlap ribbon.  I hot glued it to the top of the styrofoam and just swirled it around the wooden dowel rods, adding a little hot glue in places to help it keep it's shape and not all fall to the bottom of the tree.  

This tree was fast and easy.  The other two took a little time, but they were so fun to make.  They all have their own personality just like each of us.  If you made 10 or a 1,000 of these trees, each one would be slightly different.  That is the part about crafting and handwork that I love.  Everything is unique and individual.  Manufactured things can be beautiful and they will certainly have much more uniformity.  That is not what I wanted.  These trees were a vision.  I could no more explain to you where that vision came from than I could explain the universe, but it is more than a joyous occasion when it happens.

I am going to enjoy these trees for years to come and they will always be a reminder of inspiration, how it comes, and the result of such inspiration.

You could use colored burlap to make these trees or you could add some paint with a brush keeping the primitive look, spray snow, lights, whatever you wanted to make them "yours."  I thought about wrapping lights under the trees and letting them shine through the burlap.  Maybe I will do that next year for a different look.  The options are endless.

Give this project a try and see what you can create.  These could be made very small using toothpicks or as big as you want.  Be creative.  Use your imagination.  Let me know if you make some of these trees.  I would love to see pictures.

Everyday Donna

Things to Remember:


Oh Christmas tree, Oh Christmas tree,
You'll never be unchanging!
A symbol of goodwill and love
You'll ever be unchanging
Each shining light
Each silver bell
No one alive spreads cheer so well
Oh Christmas tree, Oh Christmas tree,
You'll ever be unchanging


Tuesday, October 8, 2013

How To Decorate Potted Plants With Burlap


 Yesterday was a perfectly gorgeous fall day and we spent most of it working outside.  I worked on Halloween decorations and Dan painted our new chairs.  (I am so excited about them, can't wait to show you.)  These are the days that inspire me and my creativity soars.

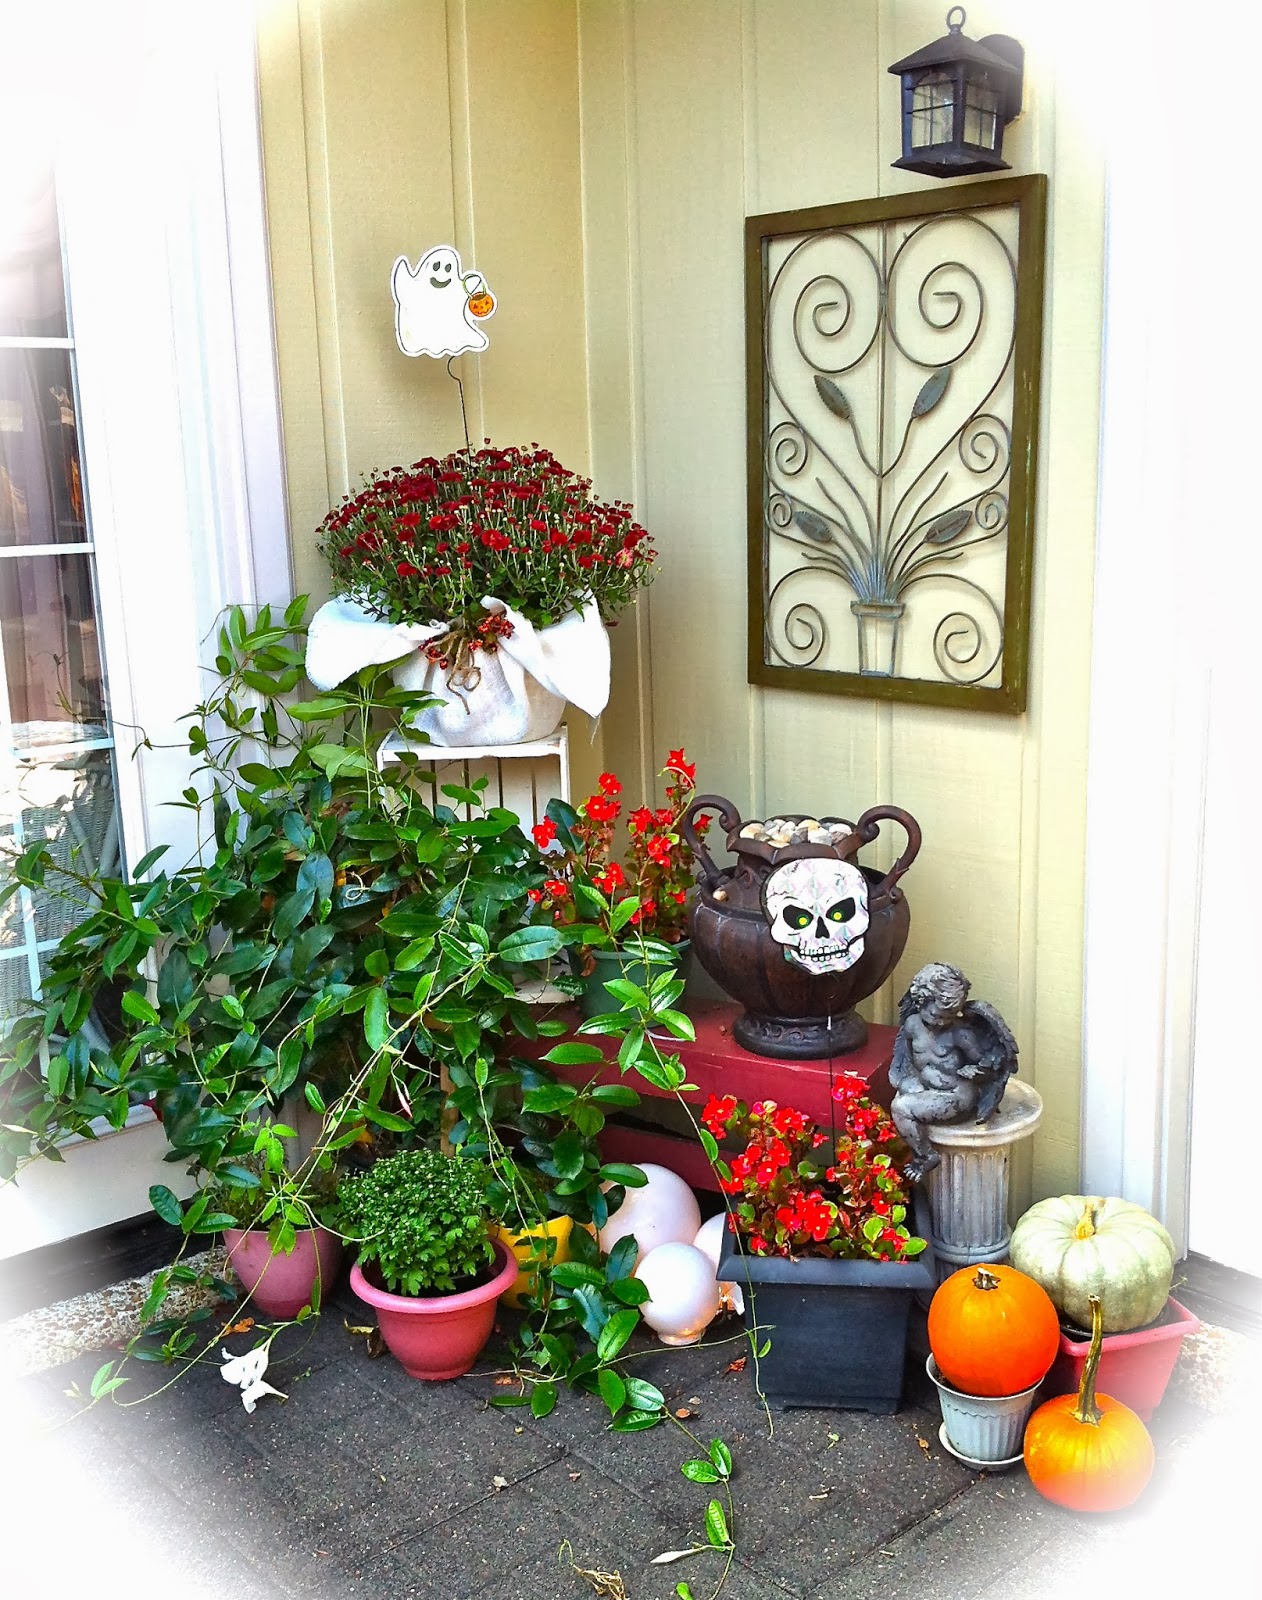
I had purchased some fall mums to replace some of my waning summer plants.  You know how potted plants look when you buy them - plain.  Just plain.  We have no in ground planting space on our patio, so everything is planted in pots.  I like for things to look as much like a garden as possible.  This is how the patio looked in summer.
Many of the plants are fading and it was time to go with fall plants.  Mums are great flowering fall plants and they are readily available this time of year.  There are also plenty of pumpkins available which will last until Christmas if they are not carved.
Plants come in utilitarian pots and I have been known to use them that way, but not on our patio.  Big planters and baskets are expensive.  I am a "make do" kind of girl.  So, I had an inspiration to cover the pots with burlap which is inexpensive, comes in colors, and will withstand lots of water if it rains.  It also has a very fall look to it.

I spent many years working as a floral designer and have covered literally thousands of potted plants with pot foil.  You know that stuff florists use when you receive a potted plant?  It is shiny, comes in different colors,  and usually has a bit of a brocade look to it.  It is sealed on the inside to be waterproof.  I'm here to tell you I can cover potted plants in my sleep.  Then, they are usually decorated with a big bow.  I can make those in my sleep too.  Mercy me the hours I have spent covering pots and making bows.  Whew.

I wanted to jazz up the patio for fall/Halloween and didn't really want plain black pots.  Burlap was the answer and I happened to have a couple of yards on hand.  Pot sizes are measured in inches.  The pot in the picture above is a 10 inch pot, I had two  8" pots of mums and two 6" pots of mums.   Here is how to cover a potted plant.

You will need burlap and some wooden skewers to use with the burlap.  Remember, this is for outside use.  The burlap is not waterproof like pot foil and will leak if you water an indoor plant.  You will need a plastic saucer under the plant if you do this for indoor use.

 I also used jute twine in place of ribbon.  I just really like it because it is rustic looking.  Feel free to use ribbon if you prefer.  I also had some fall berries that I got at the Dollar Tree and added those as a little something extra.  Here is what you do.

Set your pot on the burlap and pull up the burlap on each side until you know the pot will be covered.  I couldn't do that and take a picture at the same time.  Hope you understand what I mean.  You should have a large square when finished.  Then, pull a thread horizontally and vertically so you can cut the burlap straight.  Just grab a thread on the side of the burlap where you need to cut and pull it all the way across.  You will have an opening between the threads that allows you to cut the fabric straight.
Now, set the pot in the middle of the burlap square.  Pull the front side up to the edge of the pot with just a little overhang, and put one of the wooden skewers through the burlap to hold it in place.
Do the same on the back side of the pot half way around.  Now, do the left and right quarter sides.  You will have 4 skewers in the pot.

Next, cut a long piece of jute twine, more than enough to go around the pot and tie in a bow.  Pull the extra burlap up close to the pot and wrap the twine tightly around the pot and tie it behind the front skewer pulling the twine as tight as you can get it to hold the burlap up on the pot.
Tie the twine in a knot around the skewer.

Next, I cut some stems of the berries and tied them with the twine, then made a shoestring bow.  The finished pot looks like this.
You wil have 4 corners that hang down like in the picture.  Doesn't that look better than a plain black pot?  A yard of burlap is $2.97 at Wal Mart and one yard will cover a 10 " pot with left over fabric and a yard will cover two 8 " pots with a little left over.  I used the extra white to cover my small 6" mums.  They are purple and I can't wait for them to pop!
I used natural burlap to cover the two 8" mums.
I placed some pumpkins around the patio and carport, hung my Halloween wreath and added the ghost and skeleton reflectors I got at Michael's for a whopping 50 cents each.  They look so cute in the pots!

Here is a picture of the little corner garden on the patio.  Everything is in pots, so it is easily changed with the season.  Can't wait for Christmas!
The white globes in the middle have white Christmas lights in them.  They are so pretty at night.
You can add extras to the pots like the Happy Halloween sign, the reflectors, cat tails, wheat - just use your imagination.  They add another level of interest to the potted flower.

Tomorrow, I think I may go get some pansies to replace the begonias around the patio because they won't last through the winter.  Pansies will bloom here most of the winter.  They like cool weather.

Have you decorated for fall or Halloween?  If you haven't started yet, give this inexpensive way to cover your pots a try.  It really is easy and makes them look so much better!  Have fun!!

Everyday Donna

Things to Remember:

A garden is a delight to the eye and a solace for the soul.  -- Sadi


Wednesday, September 18, 2013

When Life Gives You Burlap


 Everyone has some rough patches in their life - just like burlap.  Some days are satin, some days are burlap.  Know what I mean?  Burlap is a rough fabric, unpleasant to feel, it ravels apart, just like life.  When you work with it, little fibers fly everywhere, they get up your nose and in your eyes, irritating them both.  BUT, it is a very utilitarian fabric used for many purposes.  It is breathable, can get wet over and over and dry out to be used again.  Know what that feels like? Have you had days like that?   I sure have.

Burlap is used to make bags for carrying, for shipping goods like potatoes and coffee, to cover the roots of trees for planting, to cover cement so it doesn't dry out too fast, and to make sandbags to use when rivers threaten to overflow their banks and floods cities and towns.  Burlap is strong and resilient, just like we can be when needed.

Burlap is made mostly in India and Bangladesh from the covering of jute and hemp plants.  No one seems to know the origin of the word burlap.  Burlap is a term used in the United States and Canada for what is known as Hessian cloth to the rest of the world.  The term Hessian cloth comes from the fact that Hessian soldier's uniforms were made from what we call burlap.  Oh, those poor men.  I cannot imagine the misery of wearing this cloth.  I have used it in costuming and it is not pleasant for the costumer or the wearer of said costume.  My first memory of burlap is bulletin boards covered with it in school.

Burlap is inexpensive and that is why it is so useful for many, many things.  Today, burlap is the darling of the craft world.  You will see it made into so many things.  While working on this project yesterday my thought was ---- When life gives you burlap - CREATE!  We don't have to settle for the rough patches, for the irritations, for the unpleasantness.  If we put our hearts and minds to work, we can make truly beautiful things from the "burlap" in our lives.  Yes, we can and that is what I did yesterday.  I had some burlap to use and I made fall pumpkins.  As I worked on them, the more beautiful they became.  I did not fight the burlap, I let it show me where it wanted to go and what it wanted to become.  I cleared my mind and let the creation happen.  We can do that with out lives.  Accept things for what they are, don't fight it, go with the flow and the result can be something totally unexpected and beautiful.

So, here is how I made these pumpkins.  I had a yard of natural burlap and I wanted some fall pumpkins to use around the house.  Many years of sewing experience help and I was going to sew them when I realized that most people don't sew.  To make it easier, I hot glued them together so anyone could make a pumpkin if they so desired.  Here is how I did it.

First, I doubled the burlap and cut out a pumpkin shape the size I wanted.  Make it bigger than you want the finished pumpkin to be because the seams will make the finished product smaller than what you started with.
Next, I cut sections through both pieces that look like the sections of a pumpkin.  You can draw them if you like, I just cut.

Then, I separates the two pieces leaving them in the order they were cut.  Now you can make 2 pumpkins.  You will be working with an inside curve and an outside curve.  No, we are not talking baseball, but a sewing term.  Think of a smile and a frown.  The frown is the outside curve, the smile is the inside curve.  You are going to glue the sections together in this manner.  You may think they won't fit, but be patient and ease the two pieces together, gluing a little at a time and working the pieces together.

I started at what would be the top of the pumpkin and worked in about 4 inch sections.  Place a bead of hot glue about 1/2 inch down on the left piece, or inside curve.  Ease the outside curve to fit.  Let your glue sit just for a few seconds so it is not too hot.  Remember, burlap is porous and the glue will come through the fabric and burn your fingers.  Keep a bowl of cold water handy to dip your fingers in should you burn yourself.

When you finish, the pumpkin will look like this.
Then, you need to stretch it and pin it to a flat piece of burlap.  This will be the back of the pumpkin.  Cut it about 1/2 inch bigger than the seamed piece.
Now, hot glue the edges together about 1/2 inch in working your way around the pumpkin.  Leave an opening big enough for your fist to fit through at the top and bottom.

For the standing pumpkins (mine are 10x12 finished), you will need to weight them for them to stand so you will cut a gusset (another sewing term) about the size and shape of a big baked potato.  If you are making smaller pumpkins, cut the gusset a size that will fit.  Then, you are going to glue them to the opening on the bottom of the pumpkin.
It will look like a puppet's mouth.  Now, paint the pumpkin.  I used orange acrylic paint and a sponge brush.  I literally just scrubbed some paint roughly between each section of seams and on the back and bottom.  I didn't want it to look too perfect, but with more character.  The paint dries quickly.

While the paint dried, I made the stem by cutting a piece of burlap and rolling it, gluing the seam down and the top of the piece.  I made it about 4 inches long.  Then, I twisted some wire around a paint brush handle and glued it to the "stem."

Now, it's time to "stuff" the pumpkin.  First, I filled a quart sized ziplock bag about 1/3 full with dried beans for weight.  You could use rice also.
Be sure and let all the air out of the bag and then zip it shut.  Put the bag in the top opening of the pumpkin and let it drop to the bottom.  For stuffing, I used plastic bags.  Do you have mountains of them that you save from the store and never know what to do with them?  Well, they make great stuffing for projects like this.  Just wad them up one at a time and push them into the pumpkin until it is full to the top.

Now, you are going to glue the stem on and glue the opening shut.  Time to decorate the pumpkin.

I got the berries and the raffia at the Dollar Tree.  I cut some raffia and tied a knot in it and glued it to the top of the pumpkin.  Then, I pulled a leaf off the berry bush and hot glued it over the raffia.  Next, I pulled some of the berries off and glued them to the leaves.  Done.

Here are some of the sitting pumpkins.


I also made a hanging pumpkin for out back gate that is 14x16.  For this, you don't need to make the gusset on the bottom and use only plastic bags to stuff it.  No beans necessary.  Just glue all the way around leaving an opening at the top to stuff it.  I made a hanger for the back with some floral wire.
This is very light weight so it doesn't take much of a hanger.  Here is how it looks on the gate.

And that was my day of creating with burlap.  I didn't know where I was going (just like life), but I stopped and got quiet and the ideas began to flow.  The answer came.  I went from a piece of burlap to these gorgeous pumpkins that made me so very happy.  I love the texture of them, the color, the seams, the fact that they represent fall and all things beautiful.  They can be used again and again.  They are burlap, not satin, but they are beautiful just like every life on this earth.  They irritated my eyes and nose, covered me with fibers and made a mess, but the result was so worth it.  Everyone should work with some burlap.

Everyday Donna

Things to Remember:

When life gives you burlap, you can make something beautiful from it.  donna


Monday, November 12, 2012

Santa's Belly and Harvest Angel Candles Made For Cheap!

Happy Monday one and all.  Today is the official day to celebrate Veteran's Day, although yesterday was the actual date of the Armistice ending World War One on the eleventh day  of the eleventh month at the eleventh hour.  Thank you to all who have served and are serving so that we may live free.  I pray peace on our world that war shall be no more.

Now, for a really scary update in case you haven't thought of it in these terms -- THANKSGIVING IS NEXT WEEK!!!  EEEEEEEEEEEEEEEEK.  That means Christmas is right around the corner  (actually 43 days from today) and if you are working on project for gifts, it is time to  get with it.  Since I have been busy making Halloween costumes for the grandsons, and crafts for the Elves' Faire at their school, I am a bit behind on my own projects.  So yesterday, I began in earnest.

If you have neighbors, co-workers, friends, or distant family that you like to remember at holiday time but don't have a huge budget (that would be us), or you like to have a hostess gift to take when going to parties, here is just the project for you that will cost you very little!

These are made using saints (or devotional) candles that I bought at The Dollar Tree.  Saints candles are usually decorated with the likeness of Saints and are very colorful.  These candles come in plain glass and you can do innumerable things with them.  They are only a dollar each.  My.  Kind.  Of.  Price.
This is a blank slate, a palette you can do anything with.  I decided to make "Santa's Belly's" out of these candles.  When I say Santa's Belly, what do you think of?  Red coat, black belt, big buckle - right?

You can buy 9x12 sheets of felt for $.25 or $.35 at JoAnn's or Michael's.  I had two red sheets and one black that I used for this project.  That is a total of $.75 for felt.  Cheap enough, right?  You need a little hot glue, some cardboard (like from a cereal box), white glue, some glitter and I decided to use these cute little snowflakes from a garland that I bought at Hobby Lobby for half price at $1.50.  I got ALL these snowflakes which is so much cheaper than buying them in small individual packages.  You just have to cut them apart.  Easy peasy.
Fold the sheet of felt in half long ways and cut.  This will wrap around the candle with some left over and you have enough for two candles from one sheet.   Place the felt in the middle of the candle, leaving some of the glass exposed at the top and the bottom.  Run a bead of hot glue down the glass, and press one end of the felt to it.  Now, tightly wrap the felt around the candle holder so that you have a bit of felt overlapping your original glued edge.  Trim any excess felt, run some glue down the edge of the glued felt and press the seam down until it holds.  You want a very slight overlap.

Cut across the 9" end of the black felt sheet about 1 inch from the end.  This will be the belt for your Santa. Place the black felt strip in the middle of the red felt and glue one end over the seam.  Wrap the strip around tightly, cut off any excess and glue the felt so it overlaps the first edge you glued down.  If you have some black ribbon on hand, feel free to use that in place of the felt.

Now, to make the belt buckle.  Cut a rectangle of cardboard about 1.5 x 1 inch.  Spread some white glue or Mod Podge on one side of the cardboard and sprinkle with glitter.  Glue the "buckle" to the center front of the belt.  This is when I decided to add one of the small snowflakes for a little extra decoration. I put a little hot glue on the back of the snowflake and center it on the belt buckle.

I plan on giving these to everyone who comes for Thanksgiving.  I also made some burlap angels that look like this.

I used some burlap ribbon that I had left from my Thanksgiving decorations.  I did the same thing with the burlap that I did with the felt.  After you glue the burlap to the middle of the candle, make some wings.  Cut a 10 inch piece of burlap ribbon and twist it in the middle like this.
I put some hot glue on the inside of the twist to hold the shape of the wings.  Put hot glue in the center of the "twist" and press the wings to the top of the burlap in back over the seam.  Now, shape the wings using your scissors.  I kind of cut an arch from the bottom, angling in to the top so they look like wings.  Use your judgment.
Wrap some sisal twine around the middle and tie in a bow.  I glued a couple of snowflakes to the bottom of the twine for weight and decoration.  Look how pretty this havest angel looks on my mantle. Here is another on the book case inside our front door.
These harvest angels look so beautiful with my thanksgiving decorations.  I will be giving these on Thanksgiving also as they will transition to the Christmas holiday season with ease.

Now, lets talk economy here.  The candle cost a dollar, half a piece of felt was 17.5 cents maximum, a little hot glue, glitter, and cardboard, say 10 cents.  The snowflake cost about a penny.  Same for the angel.  For less than $1.30 you have a beautiful hand made gift to give and everyone loves candles (these are unscented by the way).  All you have invested is a minimum of money and a little time to let someone know you are thinking of them.  How awesome is that?

If you want to buy these candles, they are in the section with all the vases and candle holders at The Dollar Tree.  I am sure they can be found elsewhere, just not positive where.  If you find them other places, please let me know so I can tell my readers.

Have fun with these projects, and maybe you will come up with some ideas of your own.  Let me know how it goes.

Everyday Donna

Things to Remember:

A handmade gift says I was thinking of you.


Monday, August 20, 2012

Transition To Fall Wreath

Greetings friends!  Hope your weekend was enjoyable.  The weather was absolutely stunning this weekend.  I am ever so ready for some cooler days and fallish nights.  You can tell by the position of the sun that summer is waning.  It gets dark just a little earlier and the evening is just a bit cooler which tells us autumn is on the way.  For that, I can say hooray!  School is already in session even though a bit of summer remains.  Things are so different now, since we didn't go back to school until after Labor Day and that was the official end of summer.  It must be hard to know there are still warm summer days remaining when you could be swimming and biking and skating and playing to your hearts content instead of sitting in a classroom.  Yep, I'm showing my age.

The moment the last sky rocket faded in the closing ceremonies of the summer Olympics, I was ready to be done with my summer Americana theme.  I truly enjoyed having the red, white and blue decorations in and on the house, but it was time for a transition to fall.  For me, it's not quite time for pumpkins, gourds and colored leaves, but I wanted late summer colors that could transition to all the glorious colors of fall.  I happened upon some dark red silk hydrangeas at Old Time Pottery and I decided that would be my transition "base".  I didn't want to spend a lot of money for this wreath, so I found some sun flower bushes in yellows and oranges and some dark red poppy bushes at the Dollar Tree that would blend very nicely with the dark red hydrangeas.

There was a piece of natural colored burlap in my fabric stash left from another project that I used to wrap a 14 inch straw wreath.  I cut 2 inch wide strips and pinned the burlap to the wreath with greening pins, wrapping it around until the wreath was completely covered.

There were a bunch of fuzzy green carpals (the pods that fall off magnolia trees) under the magnolia tree that added a nice natural look to the arrangement.  All that "weedy" looking grass you see in the picture is actually from a piece of bamboo that had been growing in our daughter's yard.  They had cut some of the bamboo because it grows very rapidly and can become very invasive.  It was laying in a pile and I was very attracted to the weediness of the leaves, so I brought some home.  Those dried leaves were the perfect addition to my late summer wreath.  Don't overlook anything in your yard this time of year.  Most of it dries nicely and can be used for many projects and the cost is perfect - free!


I cut all the flower stems and arranged them as I wanted them on the wreath and proceeded to glue them down with hot glue.  The bow was made with remaining burlap strips.  Easy peasy.

As soon as it was finished, I hung it on the front porch.  Ahhhh, so refreshing to see something different.  Bye bye USA and Americana Star.  I enjoyed you for the summer, but it's time to move on.  Now, I am in the process of changing everything in the house a little at a time as I complete each project.  Wait until you see the next project.  I have to tell you, I am in love with it!  Hope you'll check back tomorrow.

Everyday Donna

Things to Remember:

Summer days driftin’ away-  
song Summer Nights, Grease