Monday, March 12, 2012

My Bargain Mirror and Duck Egg Blue Paint

 Some people keep a queue of movies on their Netflix account, movies lined up that they want to view.  You can keep a queue on you printer, jobs waiting to be printed.  Me, I keep a queue of projects that I want to do -  crafts, sewing jobs, things to be painted, furniture to be rearranged, new recipes to try - a running list of things I want to get done.  Do you keep  a project queue?  My list seems to never end.  The day it does, will be my last day on earth.  I will probably leave a list for Dan, bless his sweet heart.  

We moved into the little yellow cottage a year ago January 29 and we love it here.  Moving led to a whole new list of projects (of course).  One of the things on my wish list was a mirror for the wall next to the fireplace, but nothing had struck my fancy.  Also, I am cheap and there had been nothing that had struck my fancy in my "price range."  A few weeks ago, we were doing errands and I made a quick sashay through Kirkland's.  Do you do Kirkland's?  They have home accessories and sometimes you can come upon some really great bargains.  There was the time I found a bunch of toss pillows for $5.00 each.  Now that is a bargain and fits my "price range".   Yes, I do love a bargain.

As I wandered around the store, I saw a stack of mirrors that had been marked down.  Like a fly to a picnic, I zoomed over to the stack and started looking through all of them.  Lo and behold, in the stack was exactly what I had been looking for and it was marked down to $20.00!  Woohoo, that was my "price range".  Was it perfect?  No, the size was right, the price was right, the color was all wrong, but I knew that could be easily fixed.  Just a little paint and some wax and tada!  I would have the perfect mirror.

The mirror was a funny kind of no color beige.  My picture isn't great, but it looked like this.
Here's a close up.
I did like the dark piece that went around the mirror.  It has some goldish flecks in it that gave it some depth.  But the outside wood was the most bland color you can imagine.  So, I told Dan, Dan, the Painter Man, that we had a project to add to the queue.  He was ecstatic.  (not so much)

I also have a new love and that is Annie Sloan Chalk Paint.  Now, it is not like chalkboard paint - don't confuse the two.  Her paints are created to replicate historical colors and when you paint, it is a little gritty, but wow, is it awesome.  You can get really beautiful colors by layering them over each other, or using a single color.  Then,  you wax the paint with her clear wax for one look and to add additional depth and contrast, use the  dark wax over the clear wax.  This paint will make anything look awesome.

I did my bedroom furniture a while back and I was hooked!  It is not cheap paint, about $40.00 a quart, but you do not have to prime when using it aaaaaaaand, it goes a long, long way.  I did an armoire and three nightstands with one quart of paint.  Now, I have the itch to paint everything.  

Anyway, back to the mirror.   I wanted my new mirror to be duck egg blue which is one of Annie Sloan's fabulous color choices.  You can go to anniesloan.com to see the colors and all the wonderful effects you can get with her paint.  The paint has been on the market in Europe for 20 years, but is relatively new in the states.  You can order it on line, but I was lucky enough to find a wonderful little shop that sells it in our area.

Well, I did a second day of volunteer work last week, so Dan painted the mirror in the blue color for me. He is a fantastic painter and never has to tape anything to keep from getting paint all over the place.  I wanted to keep the dark section in the middle of the frame, so paint he did and I was so excited when I got home and saw the mirror.  Fantastic!

I let it dry a couple of days, and then I waxed the frame.  This is the base color before wax.
This is what happens when you add the clear wax.  You can see where the wax ends if you look closely.
It adds a beautiful patina to the paint and softens the color.

You can see the demarcation line where I stopped the wax for the picture.  The wax comes in cans like this.
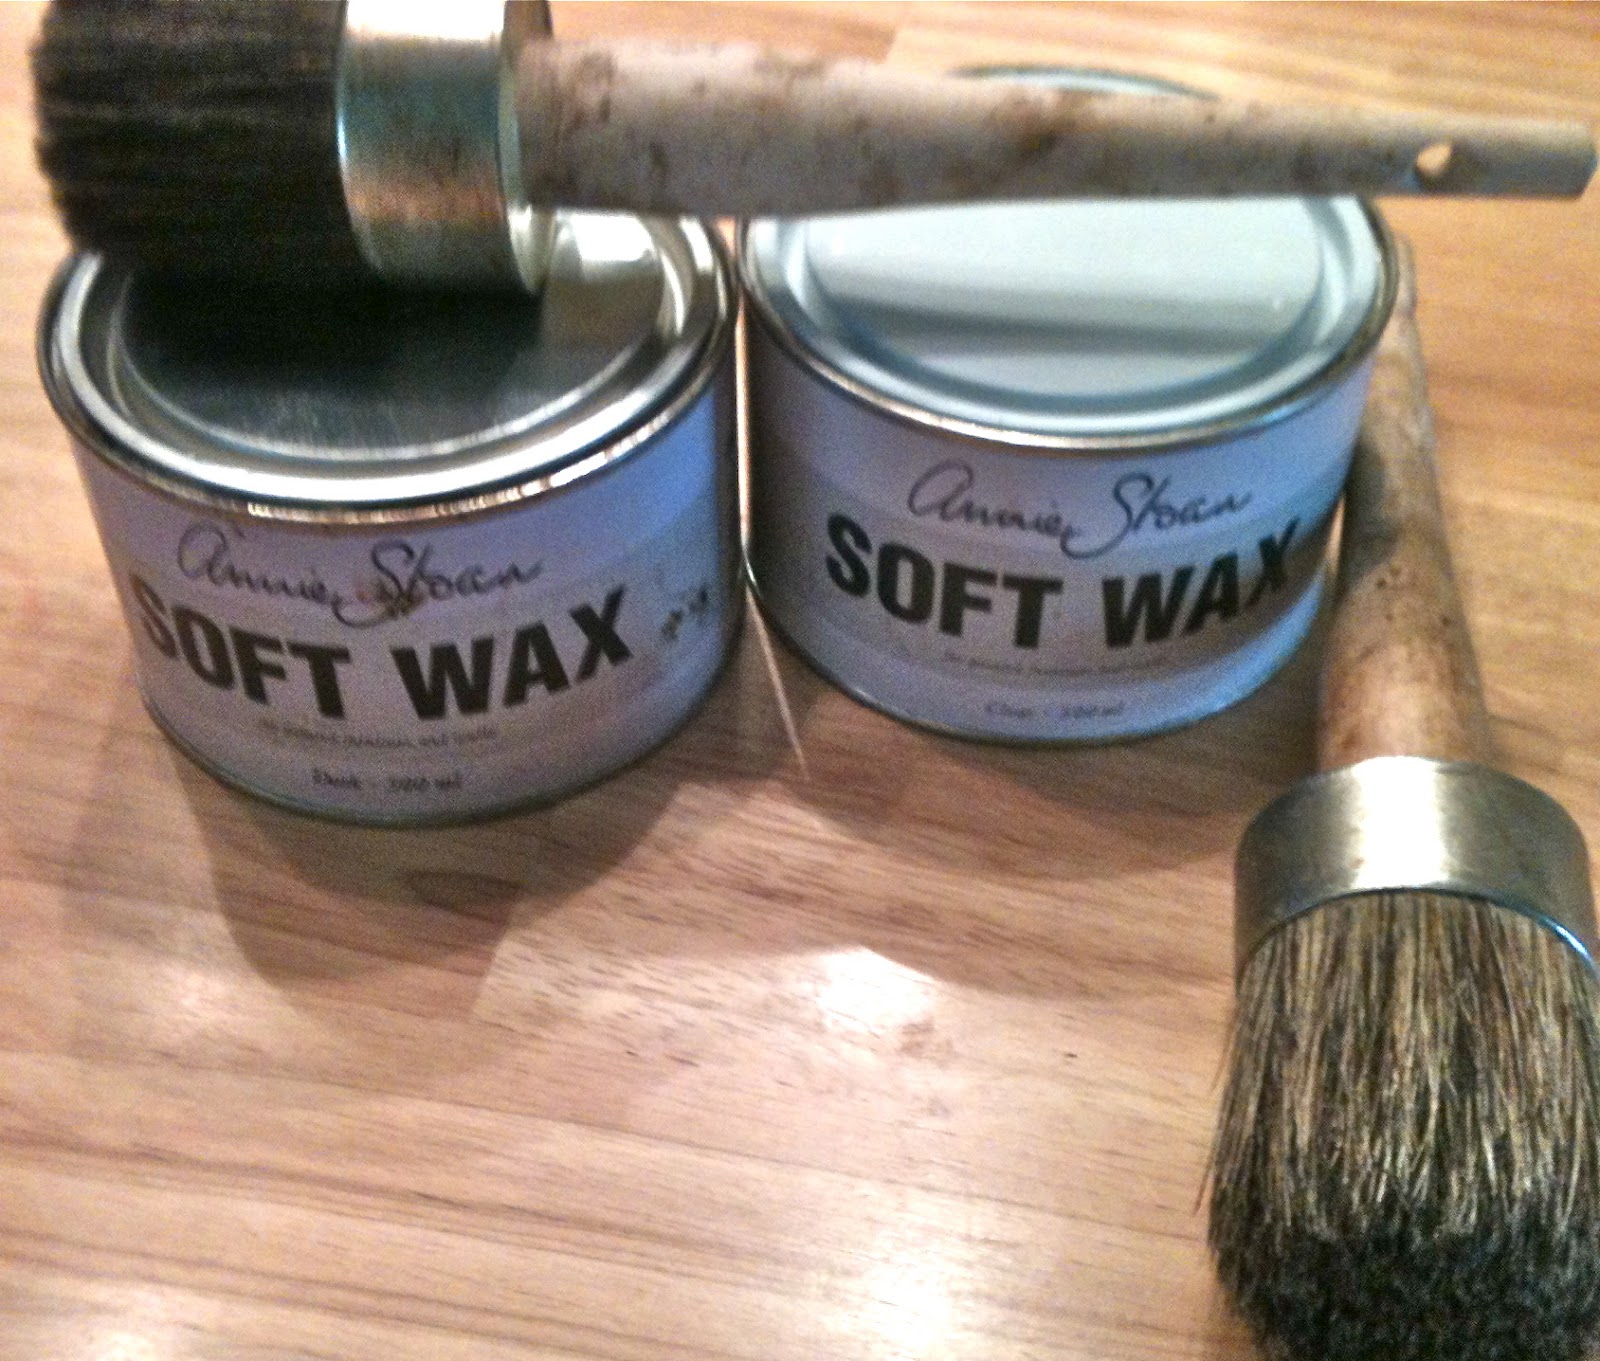
You also use these  wonderful big brushes to apply the wax which is very soft and easy to apply.  One brush is for clear, the other is for dark.  You apply the wax to an area and then buff it with a lint free cloth.  What an amazing difference it makes to the finish.  After applying the clear wax, I added dark wax.  This is how it looks when you apply it:
Then, you buff it and it looks like this - giving the piece an old patina that is gorgeous in our shabby chic house.
Again, not a great picture.  Sorry.  I am not much of a photographer, but you get the idea.  Should have moved the lamp for the picture.  I'll try to do better next time.  
It is so amazing what a little paint can do.  It changes the whole personality of a piece.  Don't  you love when that happens?  The mirror is just perfect next to the fireplace.  Exactly what I wanted.  The blue color picks up colors in a framed poster I have of The Bluebird Cafe at the other end of the room.  Donna is a happy girl and very appreciative of Dan's contribution to this project.   I can tell you, there is more duck egg blue paint in my future (and Dan's).  Love you Dan.

Everyday Donna

Things to remember:

Creativity is a drug I cannot live without. - Cecil B. DeMille

Thursday, March 8, 2012

You Put The Lime In The Coconut - You Mix It All Up

It was a gloomy, downpour kind of day all day.  As in DOWNPOUR,  toad strangler, gully washer.  At least it wasn't cold which made it more bearable.  Had I not had commitments today, it would have been a "read a book take a nap kind of day," but that didn't happen.  


Since we have one car, Dan dropped me off at Sophia's Heart today and he came home to take care of business things.  Fortunately, he picked me up at the front door when my day was over because there was a deluge right as I left the building.  When I got in the car he was playing one of my favorite Jimmy Buffett cd's.  Listening to the island style music made me wish I was on a beach somewhere with sand between my toes, sun on my face, breeze in my hair.  One of my most favorite places to be.  Walking in the house,  for some reason I had this song running through my head even though it's not a Jimmy Buffett's song:


"Bruder bought a coconut, he bought it for a dime,
His sister had anudder one she paid it for de lime.

She put de lime in de coconut, she drank 'em bot' up"


Singing that song made me want something tropical, so I baked a lime coconut cake.  Yum.  And I made lime buttercream icing with coconut.  Yum Yum.  We had it for dessert and it is so good.  There is something about the flavor of lime that resonates with me.  Lime, coconut, pineapple - the good flavors that make you think sunshine, sand, and ocean.  I think I need to go to the ocean soon.  Add that to the list.


This is a "from scratch" cake, but it's quite easy.  Here is what you need:


2 sticks (1 cup) butter, softened
1 1/2 cups sugar
3 eggs
zest of 2 limes
1/4 cup lime juice (took both limes)
1 tsp vanilla
1/4 tsp salt
2 1/2 tsp baking powder
2 1/2 cups cake flour (I use Swans Down)
1 1/4 cups coconut milk (most of a 14 ounce can)
1 cup sweetened coconut


Preheat oven to 350 degrees F.  Grease and flour 9 x 13 pan.


Sift the cake flour, baking powder and salt together in a bowl.  Set aside.


Beat the 2 sticks of butter with a mixer until light and fluffy.  Add the sugar and beat again until light and fluffy.  Add eggs, one at a time and beat again thoroughly incorporating eggs.  Add lime zest and juice.  Mix thoroughly.  Add 1/2 of the cake flour mixture and mix, but do not over mix.   Add 1/2 of the coconut milk.  Mix.  Add remaining cake flour mixture.  Mix.  Add remaining coconut milk.  Mix.  Add 1 cup sweetened coconut and mix one last time.  Batter is thick, don't be alarmed.


Pour batter into prepared cake pan and bake for about 30 minutes or until toothpick inserted in center comes out clean.  Remove from oven as soon as it's done and let cool.


Icing:


1 stick butter, softened
zest of one lime
juice of one lime
2 - 3 cups powdered sugar


1 cup tinted coconut


Beat the stick of softened butter until light and fluffy.  Add about 1/2 cup powdered sugar and mix.  Add lime zest and mix in.  Add a little lime juice.  Continue adding powdered sugar and lime juice until you have spreading consistency.   Ice cake.  Remember, I don't like a lot of icing.  If you want more icing, double the recipe.  


How to tint coconut.


Use a gallon zip lock bag and put 1- 2 cups of shredded sweetened coconut in the bottom of the bag.  Lay the bag on it's side on a counter top.  Put a few drops of desired color on the inside of the bag - on the plastic, not on the coconut.  Zip the bag and shake.  Tada!  Coconut in whatever color you chose.  Takes just a few seconds to do and it looks so festive.  Sprinkle over the top of the cake.


I have to say, this dessert hit the spot.  There is something so special about lime and coconut together.  Almost made me feel I was on a beach somewhere with water lapping at the shore line.  Unfortunately, that water sound was just the rain pouring down.  Maybe someday soon we will mosey on down south and spend a few days with our toes in the sand, feeling the rays on our face and listening to that glorious sound of waves returning to the shore over and over again.  Ahhhh, I can hear them now.  


Everyday Donna


Things to Remember:


If life gives you limes, make margaritas.”  Jimmy Buffett  (or maybe a cake)


P.S.  Dan just came back for a second piece of cake.  It's confirmed.  Super good.


Wednesday, March 7, 2012

Chocolate Cupcakes With A Rolo In The Middle AND Nutella Icing !

No jelly beans and no peeps for me, but I do LOVE a good chocolate cupcake.  I mean, seriously, who doesn't?  And what could make a chocolate cupcake even better?  A surprise in the middle.  A really super fantastic surprise baked right in the middle.  A super fantastic Rolo candy surprise baked in the middle.  Yes, a Rolo candy - one of the world's best candies as far as I am concerned - baked right in the middle of a heavenly, super moist chocolate cupcake.  And what can make it even better than that?  Why, Nutella frosting on the top.  Uh huh.  That's right.  Nutella buttercream frosting.  Now THAT is what I call a cupcake!

Today was our volunteer day.  We spend Wednesdays working at Sophia's Heart here in East Nashville.  It is a wonderful organization that provides transitional housing for people who have lost their homes through unfortunate circumstances and also has an outstanding arts program for young people in the neighborhood.  Check out their web site for information.  It is a very worthwhile organization that could use lots and lots of help, especially financial.

After our day at Sophia's Heart, we stopped by our daughter's home to visit with the new baby who is 3 weeks old today.  He is so alert and strong and of course, very handsome.  He already holds his head straight up when you put him on your shoulder.  (He's gonna be a bruiser.)  Everyone is doing great and we are so thrilled to have him in our family.  They don't stay babies very long so we try to enjoy every moment with them we can.  It's great to have 5 out of 6 grandsons living within a few minutes driving time.  We are soooooooo lucky to be able to live in the same town with them (and their parents too).

After we got home this evening, I didn't know if I wanted to sit down and write an entry for my blog.  Grandma was tired.   When I walked through the kitchen, turned on the light and saw the cake plate of yummy cupcakes sitting there, I realized that the recipe needed to be shared.  Dan made some coffee, I got myself a cupcake and started to write.  This recipe is fantastic and you really should try it as soon as possible!  Here is what you need:

Cupcakes

1 devils food cake mix (I use Aldis)
1 small package instant chocolate pudding
4 large eggs
1 cup sour cream
1/2 cup water
1/2 cup vegetable oil
24 Rolo candies, unwrapped

Icing:

1 stick butter (softened)
1/2 cup Nutella
2 cups powdered sugar
1 TBSP milk

Preheat oven to 350 degrees.  Makes 2 dozen (24), so line pan(s) with cupcake papers accordingly.

Mix all the ingredients for the cake in a large mixing bowl at medium speed on your mixer.  Mix thoroughly, but do not over mix the batter so cupcakes will be light and not tough.  Fill each cupcake paper 2/3 full of batter.  I use a heaping 1/4 cup measure and that is just about right.  Now, push one Rolo candy into the center of each cupcake.  As the cake bakes, it will cover the Rolo, though you may have a slight dimple in the middle of the cupcake.  That's okay, you will cover it with frosting.  Bake for about 20-23 minutes or until a toothpick inserted in the cake comes out clean.

Let the cupcakes cool while you prepare the frosting.

To make the frosting, set your mixer on medium and mix the softened stick of butter until light and fluffy.  Add 1/2 cup Nutella and mix until it is all incorporated and light and fluffy.  Add one cup of powdered sugar at a time and mix until incorporated.   Icing will be rather stiff, so add just a little milk a few drops at a time until the icing is of spreading consistency.

You can spread the icing with a knife.   I decided to pipe it in the center of each cupcake because I don't like tons of icing.  It also looks pretty that way.  If you like a lot of icing, you might want to double the icing recipe.  To pipe,  cut the corner off a gallon zip lock bag, place a piping tip of your choice through the corner, fill the bag with icing and pipe whatever design you want on each cupcake.

These are DELICIOUS!!!!!  The cupcake recipe is off the Aldi's devil's food cake mix and it is super moist and chocolaty.  I decided to add the Rolos to the middle for a "little surprise" and because I really, really like Rolos.  When you bite into the cupcake, the rich little chocolate nugget in the middle is awesome and the ooey gooey caramel in the middle of the candy is the bomb with the texture and flavor of the cupcake!

Our 8 and 5 year old grandsons were here to help make these cupcakes (and great help they were).  They got to pipe icing on their very own cupcakes which made them very happy indeed.  It's the little things you know.  They declared them excellent cupcakes and we had so much fun making and sharing them.  As for Dan, well he has certainly eaten his fair share!  I think they are a hit.

Give this recipe a try.  I so enjoyed eating my cupcake while I typed.  What a fabulous ending to a great day.  Sigh.

Everyday Donna

Things to Remember:

Live, love, laugh and eat cupcakes!

Tuesday, March 6, 2012

What Can You Do With Jelly Beans Besides Eat Them?

Did you ever wonder what you could do with jelly beans besides eat them?  First off, let me say that I am not a fan - never have been, never will be.  They are so pretty to look at, but that is a trick!  Never be fooled by the way something looks.  It doesn't mean it will taste good.   I finally asked my mom to stop putting them in my Easter basket when I was a child.  Ugh.  Do you like jelly beans?  Does anyone really, besides my mom?

These days there are so many different kinds of jelly beans than the ones we grew up with.  There are so many colors and flavors, but that doesn't change my opinion one little bit.  My mom was the only person I knew who loved even the black licorice jelly beans.  She would pick them all out of our Easter baskets and the bowl on the table and eat them.  She was welcome to every jelly bean in the basket as far as I was concerned, didn't care what color it was.  Ew, and then there were peeps.  That's a whole new subject.  Double ugh.

Anyway, I had some styrofoam balls in my craft stash and these cute little flower pots from the Dollar Tree.  I think they are actually starter seed pots, but they are so cute.  Those pots and styrofoam balls just kept looking at me, saying do something with me.  After a little study, I came up with the idea to cover the balls in something "Easterish" because I am changing all my decorations over to a spring theme.  We were at the grocery store and I was perusing all the Easter decorations and there were these sacks of really pretty jelly beans.  Loved the colors.
Look how pretty they are - peach, pink, yellow, turquoise, green and lavender.  They look pretty enough to eat, so I tasted one.  They're still gross.  But, the colors have certainly improved.  I bought a couple bags and brought them home  thinking I will come up with a use for them - and then it came to me.  I decided to make little topiaries.  Those would look so springy.

First, I painted 3 of the little pots sort of a white wash and that was accomplished by watering down some white acrylic paint and lightly brushing it on the pots and letting them dry.  Next, I cut two 4 inch styrofoam balls in half and shaved 3 of the halves down a little so they would fit inside the pots.  I ran a bead of hot glue around the edge of the styrofoam next to the pot to hold it in place.

I had a quarter inch dowel rod that I cut in several pieces about 7 inches long.  I pushed one into the center of each styrofoam ball in the pots and hot glued them to keep them steady.  Then, I dabbed some green acrylic paint on the styrofoam and painted the stick green to look like a flower stem.  I used a small foam brush to do this.  (Only use acrylic paint on styrofoam.  Any paint with solvents in it can disintegrate the styrofoam.)


Next, I painted 3 styrofoam balls with pink acrylic paint and let them dry.   Center a ball on the top of each stem and gently push it onto the stem.  Hot glue around the base of the ball where it meets the stem to keep it in place.

Now, the real fun begins.  Dump all the jelly beans in a bowl so it is easy to see all the colors.  Fire up your hot glue gun and go to work. (Be careful and don't burn yourself)   I placed a row of the jelly beans around the center of the styrofoam ball north to south.  Place a dab of hot glue on the bottom of each jelly bean and hold it in place until the glue dries.  I started in the center top and worked down one side, then the other.  If you don't like slightly tedious work, you are in trouble.  lol
This divides the ball in half.  Now, you want to quarter the ball by diving the ball in half the other way.  Start at the center top and glue the jelly beans in the opposite direction.
See how you now have quarter sections between the rows?  This is where you will work next.  I randomly alternated my colors, but you can make them all one color if you prefer - it will just take more jelly beans.  I started at the top and filled in the first row around the top.  I actually placed each jelly bean I planned to use before I glued it to make sure it fit the space.  Continue with each row working top to bottom, keeping the jelly beans close together.  You want to fill in as much space as possible.  Every once in a while, you will come to a place where the jelly bean won't be small enough, so I would find the biggest jelly bean I could to fill in two spaces and kind of turned it side ways to fill in the space.  

Keep working left to right (or vice versa) filling in each row until you get to the bottom.  I then laid the topiary on it's side and filled in the bottom spaces.  Using this method made it much easier to see what I was doing.  Finish by pulling off all the "glue webs" like you see in the picture.

This is where I discovered the problem.  Yup, a bit of a problem.  These puppies are quite top heavy and don't want to stand up when jarred.  So, here is what I did.  I used some double sided tape on the bottom of the pots to hold them in place on the stands I am using.  A better solution (and what I will do next time) is to use a slightly bigger pot and put some rocks under the styrofoam for some weight.  Or, you can use a smaller styrofoam ball.  It's up to you.  It's not the end of the world, but I just didn't want them falling over every time we walked by the table they are sitting on.  Should have thought of that, but who knew how heavy jelly beans would be?  Duh

I had some green and yellow shred and stuffed it in the tops of the pots for a kind of "Dr. Seuss" grass effect.  I LOVE the way it looks all crazy and sprouty.  If you want a more finished look, you could place some moss over the styrofoam and fake leaves on the stems.  I just like the more whimsical look.  They are jelly beans after all.

Now, isn't that adorable?  The topiary is so festive and springy and will be so much fun to look at.  The grandsons are going to love them.  Who knew jelly beans could be so cute?  Almost makes me want to eat one.  Almost.

Everyday Donna

Things to Remember:

No jelly beans were harmed in the making of this project.  I used approximately 1 and 2/3 bags of jelly beans.

Monday, March 5, 2012

Salisbury Steak - Total Comfort Food

Happy Monday to all.  Everyone's favorite day of the week right?  Not so much?  Why is that?  Why is Monday so hard?  Even songs written about Monday give it a bad rap.  You never hear "hip hip hooray, it's Monday!"  It's things like Monday, Monday, can't trust that day.  Guess it's because the weekend is over and it's back to the grind.  Maybe we need to start an "Up With Monday" group or something.

Today was a perfectly lovely Monday here in middle Tennessee and I really have no complaints.  Hope your Monday was the same.  We did some errands and enjoyed the sunshine, even though it was a little cool.  I will take that ANY day over all the scary storms we had on Friday, yes indeed.  My heart goes out to everyone who lost so much.  It is just another reminder not to put stock in "things", but in those you love and care about.  Things can be replaced.

Sunday was a great day, because Sunday evening we got to watch our oldest daughter on 60 Minutes which was really awesome!  She had all the family members living here over to her house for a 60 Minutes party.  It was really interesting trying to watch with 4 little boys running around screeching and playing while the baby hung on to his mama because he had not heard so much noise in his 2 and a half weeks here in this world.  Actually, I am not sure I had heard anything like it in my  63 years.  haha  We all saw bits and pieces as we could and enjoyed each others company.  After we got home, we watched in online and actually got to see the whole story.  It was still fun watching all the little boys play.  Shows how unimportant things are to little guys who are just enjoying life.  We could probably all learn a lesson here.

After we got home this afternoon, I spent some time on a project I have been working on and then it was  that "what are we going to have for dinner?" moment that arises like some big surprise.  Not.  I don't always plan meals ahead, do you?   Sometimes I wake up in the morning and know what I want to make for dinner, other times it's the very last thing I want to think about.  Today was one of those days.

While I worked on my project, I thought - Salisbury Steak!  I want Salisbury steak.  It is one of my favorites from childhood.  I'm weird I know.   I loved salisbury steak in the school cafeteria - probably the only one in the world.  I even like it in a TV dinner now and then and I LOVE it home made.

Ever wonder were the name Salisbury Steak comes from?  It is named for an American physician by the name of Dr. J. H. Salisbury.  He created the steak to use in a low carbohydrate weight loss diet and the term Salisbury Steak has been in use since 1897.  Yeah, it's been around a while and it's Worcestershire sauce that gives it it's distinct flavor.  Worcestershire sauce has been around since 1853.  Wow.  Talk about staying power!

This is how I make this delicious comfort food.  Here is what you need:

2 medium onions, dice 1/2 onion and cut the remaining 1.5 onions into rings
1.5 pounds ground beef (80/20)
1 cup Italian bread crumbs
1 TBSP Worcestershire sauce
1 large egg
4 ounces (1/2 an 8 ounce pkg) baby bella mushrooms, stemmed and thinly sliced
salt and pepper
1/4 cup all purpose flour
1 32 oz box beef broth
2 TBSP vegetable oil

Place the ground beef, bread crumbs, worcestershire sauce, and egg in a bowl and set aside.  Put 1 TBSP vegetable oil in a large saute pan.  Add the 1/2 diced onion and cook just until translucent.  Remove pan from heat and put cooked onion in bowl with ground beef mixture.  Add about 1 tsp salt and black pepper.  Thoroughly mix, incorporating all ingredients.  Form the ground beef mixture into 6 oval patties.

Slice remaining 1.5 onions into rings.  Remove the stems from the mushrooms, wipe clean and thinly slice.  Set aside.

Put the patties in the large saute pan and cook about 4-5 minutes on each side and remove from pan.  They will not be done at this point, but you will finish them in the gravy mixture.

Drain off all but 2 Tbsp of the fat from the pan.  (I didn't have to drain any, meat was that lean)  Add 1 Tbsp vegetable oil to remaining fat in pan, keeping all the bits from browning the patties (that is LOTS of flavor). Add onions and  mushrooms and saute until onions are translucent.  Add the 1/4 cup all purpose flour and stir into the onions and mushrooms and cook about 2 minutes to get rid of the raw flour taste.  Add the box of beef broth and bring to a boil.  Reduce heat to medium and place the patties back in the gravy mixture and cook for 10-15 until the gravy thickens.    You are ready to serve!

We had mashed potatoes and roasted carrots with fresh thyme to accompany our delicious Salisbury steaks.  YUM  This made for a great Monday supper - it just hit the spot and did not fail my comfort food craving.

We all have those "favorites" we go to when it comes to food.  There are foods that take me to a certain place just like a song can.  Food memories play such a special part in our lives - likes and dislikes.  Sometimes it is something as simple as a piece of toast, or as complicated as a Thanksgiving dinner.

I hope you will try this recipe when you are looking for "comfort" food.  It is really, really delicious and easy to make.  It won't be rubbery like cafeteria food or TV dinners can be (even though I like them both).  It is tender and flavorful and the onion/mushroom gravy is spectacular.  Salisbury steak day was always a good day in the school cafeteria for me, especially if it was Monday - a lifetime food memory.

Everyday Donna

Things to Remember:


"Food is the most primitive form of comfort."

Author: Sheilah Graham

Thursday, March 1, 2012

Honey Lime Chicken - To Die For!

What a day, what a day, what a nearly perfect day!  March 1 and the weather is absolutely glorious here in middle Tennessee.  Actually, I would call it perfect weather.  Sun, gentle breeze, and the flowering trees are all beginning to bloom.  There is a riot of color everywhere which is so nice to see after the dullness of winter.

Today, we made a trek across town to visit the good old insurance man to sign Dan up for all the Medicare supplements.  Forms, forms and more forms.  Yup, he starts receiving benefits on April 1.  I am not sure sometimes how he can possibly be eligible for Medicare.  Where has the time gone?  I met him when he was 17 and I was 15 and it has all gone by in a flash!  One day we were going to the prom and today he is signing up for Medicare.  So, all of you younger people remember to savor every moment because it won't be long and you will be asking where has it gone?

On the upside, because it was such a fabulous day weather wise I pronounced that supper would be cooked on the grill.  Yes!!  Everything done out of doors and let me tell you, this recipe is a KEEPER!  I found it on one of my favorite web sites, PlainChicken.com.  Most every recipe I have made from her site has been excellent.  I thought I would pass this one on to you so you can try it too.   We had this delicious honey lime chicken with grilled vegetables and if I had just had an ocean and some sand right outside the door, it would have been like eating at the beach!  Oh, I need to go to the beach.

Anyway, here is what you need:

4 chicken breasts (I use boneless, skinless)
1/2 cup lime juice (it took 3 whole limes)
1/3 cup oil
3 Tbsp honey
1 tsp dried thyme
1 tsp dried rosemary
3 cloves garlic mashed
1/2 tsp black pepper

Mix the lime juice, oil, honey, thyme, rosemary, garlic cloves and black pepper in a bowl.  Put the chicken breasts in a gallon sized zip lock bag and pour the marinade over the chicken.  Squeeze out the excess air as you zip the bag and knead it over and over to make sure all the chicken has been covered with the marinade.  Put the bag in a container (in case of leaks) and marinate in the refrigerator for 4 - 6 hours.  (I knead it again from time to time, just to make sure all the chicken gets it's chance in the pool.)  Put the chicken on the grill and cook until juices run clear.  The marinade allowed the chicken to take on a beautiful color and lots of nice grill marks.    All the chefs on the Food Network say grill marks are very important.  Whatever.  I always thought it mattered if it tasted good.

Fantastic!  All I have to say.  The chicken was super tender and oh so tasty.  Dan and I decided it would be nice to save back a little of the marinade before adding it to the bag to use as a dipping sauce for the cooked chicken because the flavors are so good.  I'll do that next time and there will be many next times with this recipe.

I actually cheated and did 6 chicken breasts because that's how many I had and there was plenty of marinade for all of them.  Now, we have extra chicken for tacos - yippee -  another one of our favorites.  This yummy chicken would also be fantastic on a green salad.  Since tomorrow is Friday, and cleaning day, it will be an easy food day because I cooked ahead.  Yes!  Don't you love when that happens?  I sure do!

Here's hoping you have a wonderful weekend.  Hope you have great weather and you have a new recipe to try!   I really think you are going to like this one.  Now, if I just had that ocean and sand outside the door, it would really be perfect.

Everyday Donna

Things to Remember:

It is very important that when you put something on the grill, you leave it in place to cook. If you move it around too quickly, chances are it is going to stick.
Bobby Flay

Wednesday, February 29, 2012

Fried Polenta With Sauteed Spinach And Lardons Of Bacon

Do you ever get tired of the same old side dishes over and over?  Corn, peas, beans and carrots fixed 5 different ways to Sunday.  And of course, potatoes and rice done to death.  Sometimes I just want something different, with a little punch of flavor - a hint of spice or heat.  I whipped this up one night to go with a pasta dish we were having and it was such a hit, I have continued to make it.

We do love spinach in our household - baby spinach to be exact.  I often saute' it with garlic and olive oil to serve as a side.  We also eat a lot of fresh spinach in salads which is super delicious.  But, this dish is something different and is excellent served with pasta.

Do you ever use polenta?   Polenta is made with ground yellow or white cornmeal (ground maize), which can be ground coarsely or finely depending on the region and the texture desired.   Wikipedia   You can buy it in tubes like in the picture below and you can get it in different flavors.  For this recipe, you just want plain old polenta.  Delish!

 We love it sliced and  fried all crispy and brown around the edges and topped with something delicious.  Just slice it in rounds and fry in a pan with a little oil.  I use olive oil for this recipe.

 Growing up my mom used to fix what we called fried mush and topped it with maple syrup for breakfast.  Well, mush meet polenta.  Same thing, just a much fancier name.  Polenta - has a nicer ring to it doesn't it?  We had polenta for dinner.  Yes.  We had mush for dinner.  Nope.

Actually, polenta was considered peasant food in Italy just as mush would have been considered poor man's food here in the good old USA.   My research tells me that mush was a southern staple, so that explains why my "Kentucky" side of the family ate it.  Polenta now has achieved a new place in the world of cuisine, being served in many fancy restaurants.  If you watch the Food Network, you will see polenta prepared by many of the chefs and I must say, I do love it!

Now, let's talk about smoked bacon.

I buy smoked bacon at the farmer's market in fragrant little chunks like the one above and it is so fabulous to use for adding amazing layers of flavor to any recipe.  You get so much "oomph" with just a few little lardons cooked all crisp and brown.  Now "lardon" is a fancy term I learned on the Food Network.  It is pronounced lar-DONE (long O) and is a French term.  It means to cut little match stick pieces of bacon.  That's it.  Yeah, fancy huh?  Learn the term and use the technique in your next recipe!  You will impress everyone when you ask if they love the lardons of bacon.

Here is how you make lardons.  Just cut a piece across the bacon about 1/4 inch thick.  Then, you slice that piece into little match stick pieces to cook.  If all you have is strip bacon, just place a few strips on top of each other, place them parallel to you and cut across the strips in about 1/4 inch pieces.  It is just not as thick as the country bacon, but will serve the purpose.  Remember - lardons!  Use the term to impress!!

Now, place the lardons in a saute pan with just a few drops of olive oil and cook until crispy.  Cutting them this size lets them cook at the same time.
When they are nice and crispy, remove the bacon lardons from the pan.   This keeps them from getting soggy while you cook the remainder of the dish.

Add 2 cloves of garlic that you have minced and quickly saute'.  Now, add 1 bag of spinach a few hands full at a time and let it wilt down, stirring as it does.  Throw in a couple pinches of red pepper flakes for a little kick.  Remove from the pan and add the bacon.  Place a few rounds of fried polenta on a plate and cover with some of the sauteed spinach (and be sure and get some of that bacon in there),  It's all garlicky and bacony and spinachy and  yummy.  Mm Mm Mm

This is really an easy recipe to make and it is wonderful as an alternative to always serving a salad with pasta.  The contrast of the crispy fried polenta is so good with the sauteed spinach.  Actually, you could serve this with just about any entree.

Give this recipe a try next time you want something a little different.  And, if you want to try polenta for breakfast with some maple syrup, give it a shot!  It's very tasty and a nice alternative to all the regular breakfast fair.  Polenta - the new mush.

Everyday Donna

Things to Remember:


"Polenta? Oh, you mean Italian grits."    unknown