Showing posts with label pumpkins. Show all posts

Tuesday, October 8, 2013

How To Decorate Potted Plants With Burlap


 Yesterday was a perfectly gorgeous fall day and we spent most of it working outside.  I worked on Halloween decorations and Dan painted our new chairs.  (I am so excited about them, can't wait to show you.)  These are the days that inspire me and my creativity soars.

I had purchased some fall mums to replace some of my waning summer plants.  You know how potted plants look when you buy them - plain.  Just plain.  We have no in ground planting space on our patio, so everything is planted in pots.  I like for things to look as much like a garden as possible.  This is how the patio looked in summer.
Many of the plants are fading and it was time to go with fall plants.  Mums are great flowering fall plants and they are readily available this time of year.  There are also plenty of pumpkins available which will last until Christmas if they are not carved.
Plants come in utilitarian pots and I have been known to use them that way, but not on our patio.  Big planters and baskets are expensive.  I am a "make do" kind of girl.  So, I had an inspiration to cover the pots with burlap which is inexpensive, comes in colors, and will withstand lots of water if it rains.  It also has a very fall look to it.

I spent many years working as a floral designer and have covered literally thousands of potted plants with pot foil.  You know that stuff florists use when you receive a potted plant?  It is shiny, comes in different colors,  and usually has a bit of a brocade look to it.  It is sealed on the inside to be waterproof.  I'm here to tell you I can cover potted plants in my sleep.  Then, they are usually decorated with a big bow.  I can make those in my sleep too.  Mercy me the hours I have spent covering pots and making bows.  Whew.

I wanted to jazz up the patio for fall/Halloween and didn't really want plain black pots.  Burlap was the answer and I happened to have a couple of yards on hand.  Pot sizes are measured in inches.  The pot in the picture above is a 10 inch pot, I had two  8" pots of mums and two 6" pots of mums.   Here is how to cover a potted plant.

You will need burlap and some wooden skewers to use with the burlap.  Remember, this is for outside use.  The burlap is not waterproof like pot foil and will leak if you water an indoor plant.  You will need a plastic saucer under the plant if you do this for indoor use.

 I also used jute twine in place of ribbon.  I just really like it because it is rustic looking.  Feel free to use ribbon if you prefer.  I also had some fall berries that I got at the Dollar Tree and added those as a little something extra.  Here is what you do.

Set your pot on the burlap and pull up the burlap on each side until you know the pot will be covered.  I couldn't do that and take a picture at the same time.  Hope you understand what I mean.  You should have a large square when finished.  Then, pull a thread horizontally and vertically so you can cut the burlap straight.  Just grab a thread on the side of the burlap where you need to cut and pull it all the way across.  You will have an opening between the threads that allows you to cut the fabric straight.
Now, set the pot in the middle of the burlap square.  Pull the front side up to the edge of the pot with just a little overhang, and put one of the wooden skewers through the burlap to hold it in place.
Do the same on the back side of the pot half way around.  Now, do the left and right quarter sides.  You will have 4 skewers in the pot.

Next, cut a long piece of jute twine, more than enough to go around the pot and tie in a bow.  Pull the extra burlap up close to the pot and wrap the twine tightly around the pot and tie it behind the front skewer pulling the twine as tight as you can get it to hold the burlap up on the pot.
Tie the twine in a knot around the skewer.

Next, I cut some stems of the berries and tied them with the twine, then made a shoestring bow.  The finished pot looks like this.
You wil have 4 corners that hang down like in the picture.  Doesn't that look better than a plain black pot?  A yard of burlap is $2.97 at Wal Mart and one yard will cover a 10 " pot with left over fabric and a yard will cover two 8 " pots with a little left over.  I used the extra white to cover my small 6" mums.  They are purple and I can't wait for them to pop!
I used natural burlap to cover the two 8" mums.
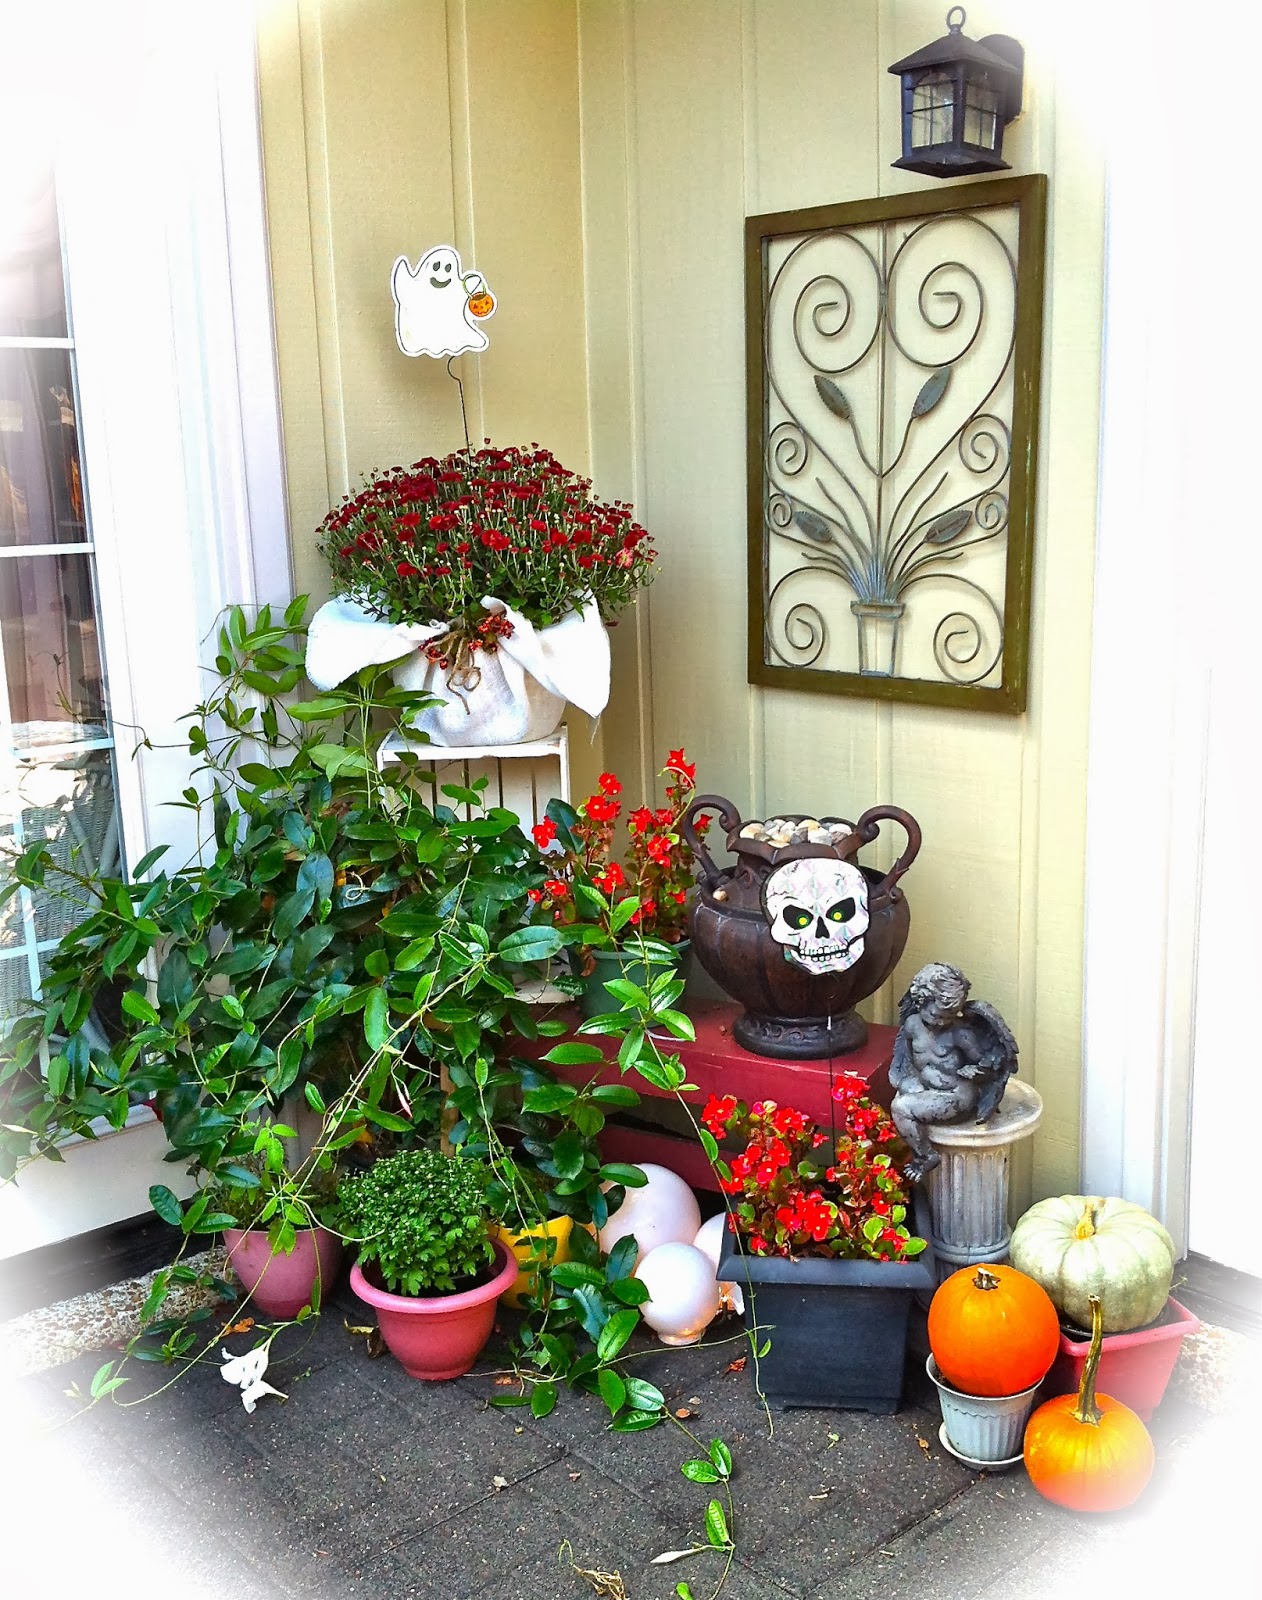
I placed some pumpkins around the patio and carport, hung my Halloween wreath and added the ghost and skeleton reflectors I got at Michael's for a whopping 50 cents each.  They look so cute in the pots!

Here is a picture of the little corner garden on the patio.  Everything is in pots, so it is easily changed with the season.  Can't wait for Christmas!
The white globes in the middle have white Christmas lights in them.  They are so pretty at night.
You can add extras to the pots like the Happy Halloween sign, the reflectors, cat tails, wheat - just use your imagination.  They add another level of interest to the potted flower.

Tomorrow, I think I may go get some pansies to replace the begonias around the patio because they won't last through the winter.  Pansies will bloom here most of the winter.  They like cool weather.

Have you decorated for fall or Halloween?  If you haven't started yet, give this inexpensive way to cover your pots a try.  It really is easy and makes them look so much better!  Have fun!!

Everyday Donna

Things to Remember:

A garden is a delight to the eye and a solace for the soul.  -- Sadi


Wednesday, September 25, 2013

After The Autumnal Equinox It's Time To Decorate For Fall


 The Autumnal equinox occurred on Sunday, September 22 this year.  The Autumnal equinox occurs on either September 22, 23, or 24 of any given year.  The term equinox is derived from latin and means "equal night."  Therefore, the equinox is a 24 hour period of nearly equal day and night.  There is the Vernal equinox in the spring and the Autumnal equinox in the fall.  The Autumnal equinox is our gateway into the fall season.  Personally, fall is my favorite season and I am decorating a little at a time.  How about you?  Do you love all things fall?  Are you decorating your home for fall?

Above is the top of the cabinet in my kitchen/dining area.  Look how beautifully my new tobacco basket lends itself to the look of fall.  It is so warm and inviting it gives me the warm fuzzies.
I am going to miss our fireplace and decorating it for all the seasons and holidays, so this cabinet has  become my new decorating center.  The warmth of the oranges and browns with little hints of yellow makes me want to make a big cup of hot chocolate and sit and watch the candles glow.  To decorate the cabinet, I used a tea light candle holder that used to sit on the mantel at the little yellow cottage.  I filled it with pumpkin scented tea light and they smell delicious.   There is an antique box our daughter restored one summer while doing summer stock theater in Arrow Rock, Missouri filled with a small grapevine wreath, a star (of course) a small pumpkin and a few fall leaves.  I made the burlap candy corn banner for something fun - do you love candy corn as much as I do?  That's one of the best things about fall as far as I am concerned.  I just cut out some small burlap triangles and painted them with white, orange, and yellow acrylic paint and hot glued them to some twine.

The column candle is sitting in a glass vase surrounded by acorns our grandsons picked up while walking back and forth to the pool in the first part of September while it was still warm enough to swim.  We would take a gallon sized zip lock bag and they would pick up acorns, pine cones, and gum balls.  They came home with lots of treasures and it was lots of fun.  Grandma appreciates their treasure hunting!

 I had a piece of the grapevine ribbon I used to make the hanging lamp next to the cabinet, so I just sort of wound it around everything for some texture and interest.  Because it is wired, it is easy to "shape."
 There are some copper votive holders that I already had, and artificial fall leaves that I have had for eons and reused a bazillion times.  The little gourds and pumpkins came from the Farmer's market.
The decorations are simple and warm and are all things I had on hand including the candles.   The only things purchased were the pumpkins and gourds.  The Farmer's Market was selling the little gourds and pumpkins 3 for $1.00.  My kind of price.  How is that for some cheap decorating?

On the kitchen island, I used a metal pumpkin candle holder that I already had and placed it on a piece of burlap ribbon with a red stripe down the center.  The candle holders were a wedding gift 44 years ago and have been used over and over and over throughout our married life.  Using candles with fall colors and more pumpkins and gourds, I was done.  Easy peasy.


I have a new marble topped bistro table for the dining area that I am eager to show you and it will be decorated too, but first I need to find some chairs to go with it.  That table along with my two new bargain wicker chairs make the dining room comfortable and cozy.  Oh, and I am on the hunt for just the right rug.  I'll know it when I see it.  As soon as I get it all together, I will share it with you.

In the meantime, we are enjoying all things fall in the kitchen.  I think I will bake some apple bread.  That would be perfect for these early days of fall don't you think?  And then maybe some pumpkin bread, and then some..........who knows.  Cool weather makes me want to bake, to nest, to get ready for the coming cold weather.  Does fall makes you feel that way?

When decorating for fall, there are many natural elements you can find literally on the ground to use and they won't cost you anything.  There are many "weeds" that are perfect for table top arrangements.  Look around your home and see what you may already have on hand that is usable with these natural elements.  You may not have to spend much of anything to make your home warm and inviting.  Nothing like some candles burning on these earlier evenings, with the smell of something wonderful baking to make the house smell heavenly.  Perhaps some mulled cider or hot chocolate.  Yes, I am ready for this season.  Are you/

Everyday Donna

Things to Remember:

“I guess I'm just feeling Septemberish," sighed Chester. "It's getting towards autumn now. And it's so pretty up in Connecticut. All the trees change color. The days get very clear―with a little smoke on the horizon from burning leaves. Pumpkins begin to come out.” 
 George Selden, The Cricket in Times Square

Wednesday, September 18, 2013

When Life Gives You Burlap


 Everyone has some rough patches in their life - just like burlap.  Some days are satin, some days are burlap.  Know what I mean?  Burlap is a rough fabric, unpleasant to feel, it ravels apart, just like life.  When you work with it, little fibers fly everywhere, they get up your nose and in your eyes, irritating them both.  BUT, it is a very utilitarian fabric used for many purposes.  It is breathable, can get wet over and over and dry out to be used again.  Know what that feels like? Have you had days like that?   I sure have.

Burlap is used to make bags for carrying, for shipping goods like potatoes and coffee, to cover the roots of trees for planting, to cover cement so it doesn't dry out too fast, and to make sandbags to use when rivers threaten to overflow their banks and floods cities and towns.  Burlap is strong and resilient, just like we can be when needed.

Burlap is made mostly in India and Bangladesh from the covering of jute and hemp plants.  No one seems to know the origin of the word burlap.  Burlap is a term used in the United States and Canada for what is known as Hessian cloth to the rest of the world.  The term Hessian cloth comes from the fact that Hessian soldier's uniforms were made from what we call burlap.  Oh, those poor men.  I cannot imagine the misery of wearing this cloth.  I have used it in costuming and it is not pleasant for the costumer or the wearer of said costume.  My first memory of burlap is bulletin boards covered with it in school.

Burlap is inexpensive and that is why it is so useful for many, many things.  Today, burlap is the darling of the craft world.  You will see it made into so many things.  While working on this project yesterday my thought was ---- When life gives you burlap - CREATE!  We don't have to settle for the rough patches, for the irritations, for the unpleasantness.  If we put our hearts and minds to work, we can make truly beautiful things from the "burlap" in our lives.  Yes, we can and that is what I did yesterday.  I had some burlap to use and I made fall pumpkins.  As I worked on them, the more beautiful they became.  I did not fight the burlap, I let it show me where it wanted to go and what it wanted to become.  I cleared my mind and let the creation happen.  We can do that with out lives.  Accept things for what they are, don't fight it, go with the flow and the result can be something totally unexpected and beautiful.

So, here is how I made these pumpkins.  I had a yard of natural burlap and I wanted some fall pumpkins to use around the house.  Many years of sewing experience help and I was going to sew them when I realized that most people don't sew.  To make it easier, I hot glued them together so anyone could make a pumpkin if they so desired.  Here is how I did it.

First, I doubled the burlap and cut out a pumpkin shape the size I wanted.  Make it bigger than you want the finished pumpkin to be because the seams will make the finished product smaller than what you started with.
Next, I cut sections through both pieces that look like the sections of a pumpkin.  You can draw them if you like, I just cut.

Then, I separates the two pieces leaving them in the order they were cut.  Now you can make 2 pumpkins.  You will be working with an inside curve and an outside curve.  No, we are not talking baseball, but a sewing term.  Think of a smile and a frown.  The frown is the outside curve, the smile is the inside curve.  You are going to glue the sections together in this manner.  You may think they won't fit, but be patient and ease the two pieces together, gluing a little at a time and working the pieces together.

I started at what would be the top of the pumpkin and worked in about 4 inch sections.  Place a bead of hot glue about 1/2 inch down on the left piece, or inside curve.  Ease the outside curve to fit.  Let your glue sit just for a few seconds so it is not too hot.  Remember, burlap is porous and the glue will come through the fabric and burn your fingers.  Keep a bowl of cold water handy to dip your fingers in should you burn yourself.

When you finish, the pumpkin will look like this.
Then, you need to stretch it and pin it to a flat piece of burlap.  This will be the back of the pumpkin.  Cut it about 1/2 inch bigger than the seamed piece.
Now, hot glue the edges together about 1/2 inch in working your way around the pumpkin.  Leave an opening big enough for your fist to fit through at the top and bottom.

For the standing pumpkins (mine are 10x12 finished), you will need to weight them for them to stand so you will cut a gusset (another sewing term) about the size and shape of a big baked potato.  If you are making smaller pumpkins, cut the gusset a size that will fit.  Then, you are going to glue them to the opening on the bottom of the pumpkin.
It will look like a puppet's mouth.  Now, paint the pumpkin.  I used orange acrylic paint and a sponge brush.  I literally just scrubbed some paint roughly between each section of seams and on the back and bottom.  I didn't want it to look too perfect, but with more character.  The paint dries quickly.

While the paint dried, I made the stem by cutting a piece of burlap and rolling it, gluing the seam down and the top of the piece.  I made it about 4 inches long.  Then, I twisted some wire around a paint brush handle and glued it to the "stem."

Now, it's time to "stuff" the pumpkin.  First, I filled a quart sized ziplock bag about 1/3 full with dried beans for weight.  You could use rice also.
Be sure and let all the air out of the bag and then zip it shut.  Put the bag in the top opening of the pumpkin and let it drop to the bottom.  For stuffing, I used plastic bags.  Do you have mountains of them that you save from the store and never know what to do with them?  Well, they make great stuffing for projects like this.  Just wad them up one at a time and push them into the pumpkin until it is full to the top.

Now, you are going to glue the stem on and glue the opening shut.  Time to decorate the pumpkin.

I got the berries and the raffia at the Dollar Tree.  I cut some raffia and tied a knot in it and glued it to the top of the pumpkin.  Then, I pulled a leaf off the berry bush and hot glued it over the raffia.  Next, I pulled some of the berries off and glued them to the leaves.  Done.

Here are some of the sitting pumpkins.


I also made a hanging pumpkin for out back gate that is 14x16.  For this, you don't need to make the gusset on the bottom and use only plastic bags to stuff it.  No beans necessary.  Just glue all the way around leaving an opening at the top to stuff it.  I made a hanger for the back with some floral wire.
This is very light weight so it doesn't take much of a hanger.  Here is how it looks on the gate.

And that was my day of creating with burlap.  I didn't know where I was going (just like life), but I stopped and got quiet and the ideas began to flow.  The answer came.  I went from a piece of burlap to these gorgeous pumpkins that made me so very happy.  I love the texture of them, the color, the seams, the fact that they represent fall and all things beautiful.  They can be used again and again.  They are burlap, not satin, but they are beautiful just like every life on this earth.  They irritated my eyes and nose, covered me with fibers and made a mess, but the result was so worth it.  Everyone should work with some burlap.

Everyday Donna

Things to Remember:

When life gives you burlap, you can make something beautiful from it.  donna


Thursday, October 20, 2011

Bountiful Fall Harvest

The Nashville Farmer's Market is where we do the bulk of our food shopping these days.  Why?  First, we support local growers and appreciate their effort and the quality of food they provide us.  We want to know that will continue, so we give them our money in exchange for their excellent products.  Secondly, it is always an adventure.  There is always something new to see or explore.  Third, it means there will be some recipe forthcoming to make our dining experience worth the effort.

I thought I would show you some of the fall products available at the market right now and then share a recipe I made using butternut squash.  Did I take a picture of the butternut squash or the stand where I purchased it?  No, I forgot.  Silly me.  But, I did capture the beauty of the fall mums and pumpkins.  You can even see the state capital in the corner of one picture.  The Farmer's Market is not far from downtown.  It is quite large, has a wonderful variety of fresh produce and locally grown meat - beef, pork, chicken and lamb which is grass fed and hormone and antibiotic free.   There is  also a food court offering a wide variety of international cuisines.  The Jamaican restaurant, Jamaican Way, has been featured on Diner's, Drive Ins and Dives on the Food Network.  It's worth a trip just to enjoy some of the food.  There is also a large Indian market that offers a huge variety of spices and products.  And, there is a really nice nursery offering all sort of flowers, shrubs and lawn decorations.  I can spend a lot of time checking out all the beautiful flowers and I usually come home with something lovely.

Here are just some of the fall pumpkins available.  It is so hard to pick out just a couple to bring home when they are all so beautiful and interesting.
I love the way the sunlight plays on the pumpkins in these pictures.

If you look to the center of this picture, you can see the Tennessee state capital sitting grandly upon the hill.  It is quite a distance from the Farmer's Market but looks lovely on this sunny day.

This poor pumpkin looks like he needs to see the dermatologist.  There are so many interesting varieties of pumpkins and gourds - some quite beautiful, others quite prehistoric looking.  Isn't nature amazing?
Don't you love the leaning towers of pumpkins?  How cute would these be decorated on your front porch?  Or, you could just stack them like this.  They are so interesting and varied.  I could spend hours  looking at all the varieties.

Hope you enjoyed the pictures from the Farmer's Market.  Just thought I'd share them with you.  We had a lovely afternoon there with our "besties" while they were visiting.


My BFF Tonya loves butternut squash, so I purchased some while we were at the market.  I will tell you it is NOT easy to peel, but hopefully this will help you.  Butternut squash has a very hard "shell" like pumpkin.  It can be split and baked, but it had to be peeled for this recipe.  Hopefully, this will make it a little easier for you.  Using a chef's knife, I cut off the top and bottom ends.  The squash has a thick neck and a round bottom with a definite separation between the two.  Cut between the neck and the round bottom.  Next, peel the neck with a sharp knife or heavy-duty vegetable peeler, then peel the round bottom.  Cut the bottom in half and remove the seeds and pith.  Cut the neck in half.  Lay the cut sides down and cut long strips and then cut crosswise so that you have about 1 to 2 inches squares.  Do the same the with round bottom pieces.

Spray a casserole dish with cooking spray.  I used two squash for this recipe to serve 8 to 10 people.  Lightly salt and pepper the squash and place it in the casserole dish.  Drizzle with extra virgin olive oil, then drizzle with honey.  I used about two handsful of brown sugar and crumbled it over the squash.  Next, I took about 3 big sprigs of fresh rosemary and stripped the needles from the stems and minced it.  Sprinkle the rosemary over the squash.  You can used dried rosemary if you do not have fresh. ( Let me say, I am going to miss my herb garden terribly this winter.  I think I may have to put some of my favorite herbs in pots and keep them in a sunny window in our sun room.)   Place the casserole in the oven at 350 and cook until the squash is soft.  It is really delicious and makes a wonderful fall side dish.  Next time, I am going to try this same recipe with sweet potatoes because I think it would be just as good and sweet potatoes are a whole lot easier to peel!

Hope you enjoyed the pictures and that you will try this really delicious recipe now that the days are cooler and there are definite signs that winter is on the way.  I will miss all the summer and fall beauty of the farmer's market and all the fabulous summer produce, but we will continue to shop there all through the winter trying whatever local things are available.  Am I looking forward to cold weather?  Not at all!  But, it's part of living isn't it?  Now, it's time to start sewing on all those Halloween costumes I have to make.  Catch you later.

Everyday Donna

Things to Remember:

“Living up to an image that you have of yourself or that other people have of you is inauthentic living.”
― Eckhart Tolle,

Tuesday, September 6, 2011

Think Fall Y'All

Do you hang some sort of seasonal decoration on your house or front door?  Perhaps a wreath or basket filled with seasonal flowers?  Well, I do and have done so for most of our 42 years of marriage.  To me, it is welcoming and adds texture and dimension wherever you place it and is also a way to celebrate the changing of the seasons.  I am a trained floral designer and have worked with flowers for 30 years.  There is a method to making a wreath and I will show you how.

Last week I made a trip to some of the craft stores and of course, to the local Dollar Tree.  September had begun and we all know that the fall season is upon us.  The aisles were filled with lots of beautiful fall leaves and flowers and it put me in the mood to make a new wreath for the front of the little yellow cottage.  It was time to take down my summer wreath and jump into the wonder of the fall season I love so much.  This is the wreath I took down.
For my summer wreath I had used reds, yellows and a beautiful tiffany blue ribbon.  It had given a cheery welcome to all guests during the summer season, but now it is time to put it away.

I was just in the nick of time with my purchases.  This weekend, our temperatures went from the high 90's nearing 100 down to the high 60's and rain.  Because of the few days of cool weather, there are already hints of red in the dogwood leaves and yellow hints in the maples.  Yes indeed, fall is on the way! Hot dog!!  If you want to make a wreath for your home, here are some suggestions for how to do it.

When purchasing decorations, make sure you do not skimp.  You don't want to be in the middle of your project and discover you do not have enough decorations to fill the wreath and have to go purchase more.   If you have decorations left over, you can always find uses for them to add to the fall flavor in your home.  I had enough left  that I will be able to make a centerpiece for my table and I still only spent $25.00.  Shopping at Hobby Lobby or Michaels when flowers are 1/2 off saves you lots of money and of course everything at Dollar Tree is - your guessed it - only $1 per item or package.  I purchased the mini pumpkins and small gourds at Dollar Tree.  The small gourds were in a package of 6 or 7 for $1.00 and the mini pumpkin were $1.00 each.  That is a big savings over prices you will pay at other stores.

The 18" grapevine wreath was $2.99 at Hobby Lobby.  I purchased one large bush of fall leaves and "weedy" things at Hobby Lobby also for 1/2 price and it was $6.00 and provided me with lots of filler for my wreath.  There were 15 stems total on the bush.

I purchased 3 large yellow sun flowers, a grapevine type garland with fall leaves, a small bush with 5 stems of thistle and two bolts of ribbon at Dollar Tree for $1 per item.   The hank of raffia came from Hobby Lobby for $2.99.  I love raffia because it adds texture and interest and there are so many uses for it!

  These are the things I purchased to make this wreath.  I did not use the packages of individual leaves on this project.  They came from Dollar Tree and I will have another project for them which I will share with you when it is completed.

The tools you need are a pair of wire cutters, a hot glue gun and glue sticks, some chenille stems for making the bow and a piece of floral wire to make the wreath hanger.  Remember, they call hot glue "hot" for a reason.  Be careful with your fingers when placing flower stems covered in hot glue in the wreath.

The first think you need to decide is where you want the flowers on your wreath.  Top, bottom, left or right side?  It's up to you.  You can make the design any way you want. I always visualize how I want the finished project to look and go from there.  Because we are taught to read left to right, we tend to look at things as more balanced when they are made that way.  Therefore, I made my wreath with the flowers on the left hand side.  You choose however you want to make yours, just use the same general method.


First, I placed the grapevine garland with the fall leaves in a reverse "S" shape on the wreath and hot glued both ends to the wreath.   Be sure and use enough glue when making an outdoor wreath so that weather and wind will not make everything fall off.

Next, I pulled the green leaves from the sunflower stems and glued them at different angles along the left side of the wreath.  This makes your "base" working area.  Place your flowers where you think you may want them before gluing them down.  I cut the sunflower stems about 6 inches long.  You want them to stand out from the wreath.  You can move them around until you get the look you want.  I glued two of the sunflowers and mini pumpkins angled up and one sunflower and mini pumpkin angled down leaving a space for filler flowers and another space where my bow would go.

Next, I took the bush with all the fall leaves and filler "weedy" things and cut it apart leaving the stems as long as they could be.  I placed the stems in different places on the wreath, moving them around until I got the look I wanted and cut each stem to the length needed.  Then, I placed lots of hot glue on the end of each stem and up about 3 inches and placed it back in the wreath.

The final step was making the bow and adding long strands of raffia to the back of the bow when I twist tied it with the chenille stem.   Twisting another chenille stem to the one tying the bow and wrapping it around the wreath snuggly keeps it in place along with some hot glue.   I added some more raffia throughout the rest of the arrangement so that there was lots of texture to represent all the dried weeds, pods and flowers of fall.  I made a hanger on the back of the wreath by putting a piece of floral wire through some of the grapevine and twisted it making a loop strong enough to hang the wreath.

Your beautiful fall wreath like the one in the first picture is now ready to hang wherever you like - on the wall, over the mantel, on the door or front of your house.  And you can say "I did that!"  This wreath would cost $50 - $75 depending on where you bought it.  You made it and saved a lot of money in the process!  I hope you try this project and enjoy it through the fall season.  This same technique can be used to make a wreath for any season or holiday!  Let me know if you try this and how it turns out.  Happy Fall Y'All.

Everyday Donna

Things to remember:

Everyone must take time to sit and watch the leaves turn.  ~Elizabeth Lawrence