Showing posts with label styrofoam. Show all posts

Tuesday, September 11, 2012

Six Fall Centerpieces for $31

In order to make the noon dining experience at the East Nashville CoOp a little more joyful and colorful, I decided that the tables needed some centerpieces.  Fall is such a beautiful time of year with so many lovely colors to choose from, so I headed to my favorite place for inexpensive, but oh so usable items, The Dollar Tree.

First I needed some containers.  Now we know that everything at Dollar Tree costs one dollar, so cost is not the issue, it is finding the very thing you want to use.  I wandered up and down the aisles just checking things out.  The thing about Dollar Tree is, you never know just what you are going to find that will make that little lightbulb go off in your head and you'll say, that's it.  That's the perfect thing.
I am walking up and down aisles, and ta da, there they were.  Just the very thing I needed.
Have any idea what these are?  They are ice cream bowls and they looked like little pumpkins to me AND they were 2 for $1.00.  Now that's my price.  They even had cute little spoons that I didn't need for the centerpieces, so I put them in the drawer because Halloween is coming and I know some grandsons who I can use these for.  I got so many useful items for $3.00 - 6 bowls and 6 spoons.  Yes!

They were putting out fall items and I spied these lovely felt fall leaves in different colors.  They are about the size of a place mat.  Six of those in different colors went in my basket.
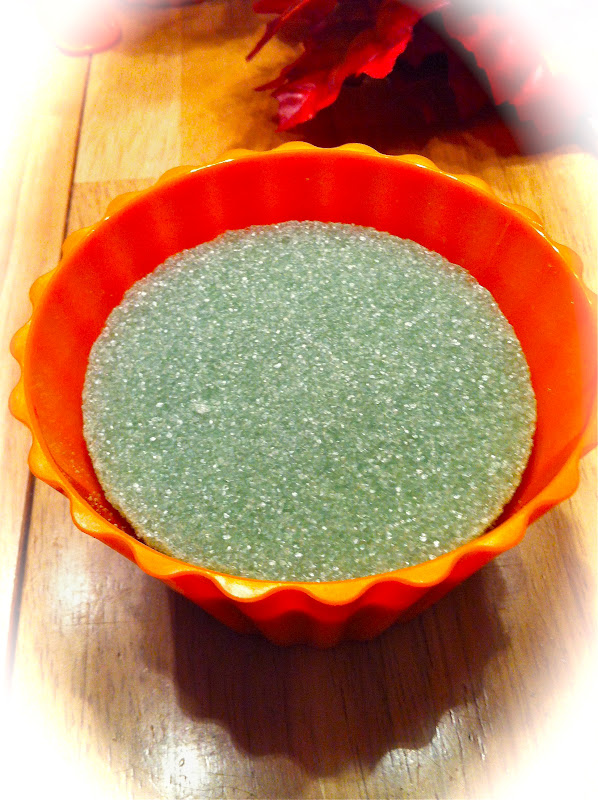
Now, I needed some styrofoam to use for my arrangements and they had these wonderful little pieces that fit exactly inside the ice cream bowls.  I LOVE when that happens.  Score!

 (You will want to anchor the styrofoam to the bottom of your container with hot glue).

Next, I needed flowers, so I went to the rack with all the fall flower bushes and picked assorted mums, black eyed susans, and fall leaves in oranges, burgundies, yellows and browns.  I realize I am always using the term "flower bush" and you may not know what that is.  A flower bush has multiple stems of flowers attached to one main stem.
On this particular bush, there are 6 flowers for $1.00.  That is quite a bargain.  I guestimated 3 bushes per container and I even had a couple of flowers left over.  I wanted round centerpieces (or what we always called roundy moundies in the floral business), not too tall so everyone could still converse without the interference of a centerpiece.  Here is the result of this effort.
Six lovely centerpieces in a variety of colors with different felt leaves to sit on.  Now, do I have a picture of the tables at the CoOp?  Oh no.  I keep forgetting to take one, BUT they look lovely in the middle of the tables.  They add color, fall flare and ambiance - like eating at a nice restaurant which is the effect I was going for.  Everyone deserves a pleasant dining experience, don't you think?

If you have a fall event in your future and you need some inexpensive centerpieces, don't forget to check out your local Dollar Tree.  You will be amazed at the wonderful things you can find there and how much money you can save.  Just use your imagination.  Think outside the box.  Of course ice cream bowls make lovely containers for floral arrangements, or maybe some wine glasses, or fish bowls.  Look at things with new and different eyes.  Or, check out Dollar Tree Crafts.com for some great ideas!  Why spend more money than you have to?  Your project can still look terrific, even with a little economy.

Everyday Donna

Things to Remember:

He who does not economize will have to agonize.  ~Confucius


Wednesday, November 30, 2011

Beautiful DIY Ornament Wreath

It's beginning to look a lot like Christmas here at the little yellow cottage!  Now that we have Thanksgiving behind us, I can begin the transformation to our Christmas wonderland.  The weather was nice on Monday, so we got our outside decorations put up and then it was time to begin on the inside.  I have spent the last two and a half days working on decorating.  I still have projects to complete before I can finish up, but we will get there.

I wanted to share one of the first projects I did, which is my ornament wreath.  Last year I made one of these for each of our daughters, but never got around to making one for myself.   So, I thought I would share the DIY steps with you.  These would make lovely gifts.  They are relatively easy to do and they make me smile.  They are shiny and festive and bring out the "holiday" in the season.  Mine is made from red and silver ornaments, some of which have glittered decorations on them.  I made Holly's red and pearl white which is what she wanted and Annie's was hot pink, turquoise blue, orange and lime which compliments the colors in her home.

This is what you will need.

a styrofoam wreath form  (I used a 16" form)
at least 10 yards of ribbon
a couple of greening pins
at least 4 dozen large ornaments
at least 4 dozen  medium ornaments
at least 4 dozen small ornaments
hot glue gun and lots of glue sticks

Most of my ornaments were purchased at the Dollar Tree and came in tubes with a dozen large ornaments or 2 dozen medium ornaments.  I found the small ornaments at Big lots.  It is better to have too many ornaments than to run out, so don't skimp when making your purchases.  If you use a smaller wreath form, you will need fewer ornaments.  Now, on to "how."

It is important to work with your wreath form laying flat so that the ornaments will not be "lumpy" causing the wreath not to hang flat.  Cover your workspace with brown paper so that glue doesn't drip all over your surface.

This is a picture of what greening pins look like.  You can find a small package of them in the floral department of most craft stores.  The ribbon I used is inch and a half and you will need at least 10 yards if not a little more, so buy two spools to be safe.  You want to wrap the styrofoam so that the ornaments have a surface to adhere to and so that it looks pretty and complete from the back.  Start by using a greening pin to anchor your ribbon to the styrofoam wreath form. Just push the pin through the ribbon into the styrofoam.

Next, begin wrapping the ribbon around the wreath form by overlapping it tightly like in the picture below.
Leave the ribbon on the spool because it makes it easier to handle while you are wrapping.  When  you get to the end of your wrap, secure the ribbon with another greening pin.

Now, lay your wrapped wreath form on the flat, covered surface where you plan to work, and place large ornaments at north, south, east and west securing them with lots of hot glue.  WATCH YOUR FINGERS, HOT GLUE WILL BURN!  Keep a bowl of cold water handy in case any glue drops on your skin.  Do NOT try to pull it off, the skin will come with it.  Dip the affected area quickly into the water so that the glue sets and then pull it off.  


Your beginning wreath will look like this.  Turn the silver tops toward the wreath so that they do NOT show when the wreath is complete.

Continue by filling in the wreath with the rest of your large ornaments glueing them to all surfaces - sides, top and insides of the wreath form.  The next step is to fill in empty spaces with the medium ornaments and finish with the smallest ornaments.  Vary the colors as you work.  This gives your wreath lots of depth and interest.  You will just have to use your judgement and artistic eye to make it all work.
This is how the finished wreath will look.

The final step is to turn your wreath over and make a hanger.  Your wreath will look like this on the back.  See how flat and even the edges are?  That is why you lay it flat while you work.
To make the hanger, take a loop of ribbon and secure it through the styrofoam with another greening pin.  Then, coat the base of the ribbon and the greening pin with hot glue to keep it from pulling out of the styrofoam.  Let the glue set and hang your wreath.


There will be some small gaps between the ornaments because you cannot fit everything completely together because of the round and varying shapes of the ornaments, but that is okay.  It took me about an hour to make this wreath, but give yourself plenty of time.  Because of my years of experience as a floral designer and crafter, I may work a little faster than you.  You will get faster with practice.

I hope you will give this beautiful ornament wreath a try.  It is something you will be able to enjoy for years to come!  Anyone receiving one of the beauties for a gift will be truly appreciative!!  They sell online for as much as $100.00 for a wreath this size.  See how much you can save and have fun at the same time?   Give it a try!

Everyday Donna

Things to Remember:

Gifts of time and love are surely the basic ingredients of a truly merry Christmas." 
~Peg Bracken