Showing posts with label silk flowers. Show all posts

Wednesday, August 21, 2013

New Fall Wreath

 Summer is definitely on the wane.  How do I know?  The sun is lower in the sky, it is getting dark a little earlier each evening, and there are little hints of color starting to show in the trees.  All the stores have their fall merchandise for sale (and yes, Christmas too) and there were potted mums at the grocery store yesterday.  That means pumpkins are just around the corner.  Yahoo!

Today, I had a total creative itch that had to be scratched.  I was restless and irritable, annoyed actually.  The moving and unpacking is finished and I haven't done anything creative in almost two months.  Unacceptable.   Time to solve that issue.

I know it's a little early, but I made my first fall wreath and hung it on the front door.  I mean really, there is no use making anything else since autumn is on the way right?  Right.  I dug around in the craft closet and pulled out everything I needed.

The only new item used was that beautiful printed burlap ribbon I found last week at Michael's and it has been teasing me every time I go in my craft room.  Taunting me.  Look at the beautiful detail.  They have it with different designs on it.  I just happened to like the one that looked like cursive writing.

Today, the taunting ceased!  I unrolled that ribbon and twisted it into a couple of big loops and made two tails that I cut into V shapes and went from there.  It is anchored to the wreath with a brown chenille stem.  Now what?  Here's a tip.  I almost always start with the bow before adding anything else.  It's just easier that way.

 I have lots of fall leaves in a huge bag from previous seasons and I bought several silk flower bushes at the Dollar Tree the other day.  Glue gun, glue sticks, wreath form (from Dollar Tree) - voila, everything I needed so I went to work.

Sometimes, I know how Michaelangelo felt when he looked at a piece of marble and saw a vision of what it could be, like the statue of David.  Don't get me wrong, I am NOT comparing a door wreath with the statue of David, but I am talking about envisioning what something can be, how you see it finished.  It takes creativity and imagination - maybe even a little thoughtful study.  And sometimes, there are just happy accidents and something miraculous happens and you are happy, happy, happy with the outcome.  There is no right or wrong, just whatever you want it to be.

Sorry, got sidetracked there for a minute.  I put the big bow on the wreath and then proceeded to hot glue leaves in varying shapes and colors around the wreath.  I finished by arranging silk flowers in and around the bow, hot glueing them to the burlap ribbon.  That is really all I did.  Place first, glue second. Make sure you like the placement before you glue something down.  It's like measure twice, cut once.  It is hard to move something after the glue has set and you don't like where it is.  That's just a another little FYI from a floral designer with many years experience.

So, my itch was scratched and I am ready to move on to the next project whatever it may be.  Think about what you want to do for the fall season and start now.  It will be September in just a short while and then the real fun begins.  Let's hear it for fall y'all.

Everyday Donna

Things to Remember:

Be creative.  Be original.  Think outside the box.  There is no right or wrong in creating.  It may not always turn out the way you want, or it could be a creative catastrophe (have had a few of those).  What matters is if you like it!  donna


Friday, March 22, 2013

Deco Mesh Spring Wreath

I missed posting this yesterday because we have been helping our daughter and her family move to their new home this week.  We got home late last night and it just didn't happen.  Grandma and Pawpaw were toast.   Therefore, I am sharing this today to finish up spring decorating here at the little yellow cottage (for the moment).

This deco mesh wreath is hanging on the front of our house and is very easy to make.  I also discovered something when making this wreath.  Up to this point, I have been using a wire wreath frame for deco mesh and it takes WAY more of the mesh than making it this way using a straw wreath for the foundation and greening pins.  If you don't know what greening pins are, they are "U" shaped metal pins using in floral arranging.  You can buy them in any craft store and they are super useful for straw wreaths and floral arrangements.

To make this wreath, I used a 14 inch straw wreath form.  I made big loops of deco mesh and pinned them to the straw wreath, first on the left, then to the right, zigzagging around the wreath.  Continue around the wreath a second time filling in the blank spaces.  Easy, easy, easy.  I used only 1 roll of the mesh which I found at Wal Mart cheaper than any place else.  It cost less than $15 for the whole wreath.  I have used as many as 3 rolls making other wreaths.  I like this way a LOT!

If you look closely, you can see the ribbon I used for extra texture and contrast.  The best part about this  wreath on the front of the house is birds haven't built a nest in it.  I love natural looking wreaths, but they always end up a mess because birds nest in them and you know what happens without my explaining.  It ruins the wreaths.  Oh well.
I didn't want to use Easter eggs because then the wreath is limited to the Easter season.  These flowers were in my stash and are colorful and work for the spring season.  The polka dot ribbon was in two pieces.  I saved it from last year.  Love, love, love recycling/reusing things.  I wove the  ribbon through the mesh and pinned it with greening pins.  The flowers are just randomly poked in the straw wreath base.

This whole project took about 20 minutes.  It couldn't be much easier and it is so colorful on the front of the house.  It actually shows up better than any wreath I have made to go on the cedar shake.  Yay!  Score one for the deco mesh.

Since spring is officially here and we are only one week from Easter, you might want to give this project a try for your home.  This mesh is super lightweight and is great to hang inside or out.  It comes in a variety of colors and can be found at Old Time Pottery, Michael's, JoAnn's, and Wal Mart here in Nashville.  It comes in two widths - 10 inch and 21 inch.   I used the narrower width for this wreath.  You can be very creative with it, there are no set rules.  Go crazy, use your imagination, have fun!  Let me know what you make.  Better yet, post a picture.  

Everyday Donna

Things to Remember:

“Creativity is not so much a boundless well, but an all-you-can-eat buffet of elements for your creative endeavor.  Eventually you've eaten your fill, and it's time to digest and then make something.  But at some point, it will be time to return to the restaurant.         

Vera Nazarian, The Perpetual Calendar of Inspiration

Tuesday, September 11, 2012

Six Fall Centerpieces for $31

In order to make the noon dining experience at the East Nashville CoOp a little more joyful and colorful, I decided that the tables needed some centerpieces.  Fall is such a beautiful time of year with so many lovely colors to choose from, so I headed to my favorite place for inexpensive, but oh so usable items, The Dollar Tree.

First I needed some containers.  Now we know that everything at Dollar Tree costs one dollar, so cost is not the issue, it is finding the very thing you want to use.  I wandered up and down the aisles just checking things out.  The thing about Dollar Tree is, you never know just what you are going to find that will make that little lightbulb go off in your head and you'll say, that's it.  That's the perfect thing.
I am walking up and down aisles, and ta da, there they were.  Just the very thing I needed.
Have any idea what these are?  They are ice cream bowls and they looked like little pumpkins to me AND they were 2 for $1.00.  Now that's my price.  They even had cute little spoons that I didn't need for the centerpieces, so I put them in the drawer because Halloween is coming and I know some grandsons who I can use these for.  I got so many useful items for $3.00 - 6 bowls and 6 spoons.  Yes!

They were putting out fall items and I spied these lovely felt fall leaves in different colors.  They are about the size of a place mat.  Six of those in different colors went in my basket.
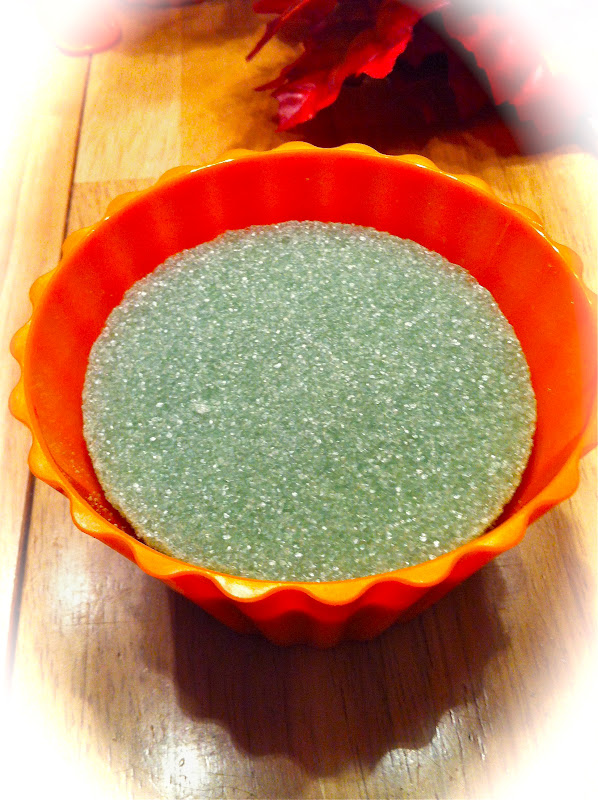
Now, I needed some styrofoam to use for my arrangements and they had these wonderful little pieces that fit exactly inside the ice cream bowls.  I LOVE when that happens.  Score!

 (You will want to anchor the styrofoam to the bottom of your container with hot glue).

Next, I needed flowers, so I went to the rack with all the fall flower bushes and picked assorted mums, black eyed susans, and fall leaves in oranges, burgundies, yellows and browns.  I realize I am always using the term "flower bush" and you may not know what that is.  A flower bush has multiple stems of flowers attached to one main stem.
On this particular bush, there are 6 flowers for $1.00.  That is quite a bargain.  I guestimated 3 bushes per container and I even had a couple of flowers left over.  I wanted round centerpieces (or what we always called roundy moundies in the floral business), not too tall so everyone could still converse without the interference of a centerpiece.  Here is the result of this effort.
Six lovely centerpieces in a variety of colors with different felt leaves to sit on.  Now, do I have a picture of the tables at the CoOp?  Oh no.  I keep forgetting to take one, BUT they look lovely in the middle of the tables.  They add color, fall flare and ambiance - like eating at a nice restaurant which is the effect I was going for.  Everyone deserves a pleasant dining experience, don't you think?

If you have a fall event in your future and you need some inexpensive centerpieces, don't forget to check out your local Dollar Tree.  You will be amazed at the wonderful things you can find there and how much money you can save.  Just use your imagination.  Think outside the box.  Of course ice cream bowls make lovely containers for floral arrangements, or maybe some wine glasses, or fish bowls.  Look at things with new and different eyes.  Or, check out Dollar Tree Crafts.com for some great ideas!  Why spend more money than you have to?  Your project can still look terrific, even with a little economy.

Everyday Donna

Things to Remember:

He who does not economize will have to agonize.  ~Confucius


Monday, August 20, 2012

Transition To Fall Wreath

Greetings friends!  Hope your weekend was enjoyable.  The weather was absolutely stunning this weekend.  I am ever so ready for some cooler days and fallish nights.  You can tell by the position of the sun that summer is waning.  It gets dark just a little earlier and the evening is just a bit cooler which tells us autumn is on the way.  For that, I can say hooray!  School is already in session even though a bit of summer remains.  Things are so different now, since we didn't go back to school until after Labor Day and that was the official end of summer.  It must be hard to know there are still warm summer days remaining when you could be swimming and biking and skating and playing to your hearts content instead of sitting in a classroom.  Yep, I'm showing my age.

The moment the last sky rocket faded in the closing ceremonies of the summer Olympics, I was ready to be done with my summer Americana theme.  I truly enjoyed having the red, white and blue decorations in and on the house, but it was time for a transition to fall.  For me, it's not quite time for pumpkins, gourds and colored leaves, but I wanted late summer colors that could transition to all the glorious colors of fall.  I happened upon some dark red silk hydrangeas at Old Time Pottery and I decided that would be my transition "base".  I didn't want to spend a lot of money for this wreath, so I found some sun flower bushes in yellows and oranges and some dark red poppy bushes at the Dollar Tree that would blend very nicely with the dark red hydrangeas.

There was a piece of natural colored burlap in my fabric stash left from another project that I used to wrap a 14 inch straw wreath.  I cut 2 inch wide strips and pinned the burlap to the wreath with greening pins, wrapping it around until the wreath was completely covered.

There were a bunch of fuzzy green carpals (the pods that fall off magnolia trees) under the magnolia tree that added a nice natural look to the arrangement.  All that "weedy" looking grass you see in the picture is actually from a piece of bamboo that had been growing in our daughter's yard.  They had cut some of the bamboo because it grows very rapidly and can become very invasive.  It was laying in a pile and I was very attracted to the weediness of the leaves, so I brought some home.  Those dried leaves were the perfect addition to my late summer wreath.  Don't overlook anything in your yard this time of year.  Most of it dries nicely and can be used for many projects and the cost is perfect - free!


I cut all the flower stems and arranged them as I wanted them on the wreath and proceeded to glue them down with hot glue.  The bow was made with remaining burlap strips.  Easy peasy.

As soon as it was finished, I hung it on the front porch.  Ahhhh, so refreshing to see something different.  Bye bye USA and Americana Star.  I enjoyed you for the summer, but it's time to move on.  Now, I am in the process of changing everything in the house a little at a time as I complete each project.  Wait until you see the next project.  I have to tell you, I am in love with it!  Hope you'll check back tomorrow.

Everyday Donna

Things to Remember:

Summer days driftin’ away-  
song Summer Nights, Grease