Fresh, sweet, juicy, delicious pineapple. My research said pineapple is second only to the banana as America's favorite tropical fruit. For me, it would be the most favorite fruit! Oh, pineapple is so good. Years and years ago, I found an article in some magazine or the other that showed how to make a "pretty pineapple" as I call it and I have been serving them this way ever since. I have cut them up for many people, including our daughters, but it's really not difficult.
Pineapple is what I would call an awkward fruit. It's hard and prickly and rolls around and how do you cut one up? Since it comes in cans and is usually cut in rings, we tend to think of serving it that way. You can also cut it in chunks or you can cheat and buy it at the grocery already cut up. Don't do that. Try making your own "pretty pineapple."
Native to southern Brazil and Paraguay (perhaps especially the Parana-Paraguay River) area where wild relatives occur, the pineapple was apparently domesticated by the Indians and carried by them up through South and Central America to Mexico and the West Indies long before the arrival of Europeans. Christopher Columbus and his shipmates saw the pineapple for the first time on the island of Guadeloupe in 1493 and then again in Panama in 1502. Caribbean Indians placed pineapples or pineapple crowns outside the entrances to their dwellings as symbols of friendship and hospitality. Europeans adopted the motif and the fruit was represented in carvings over doorways in Spain, England, and later in New England for many years. Wikipedia
No, pineapple didn't come from Hawaii. Just thought you might like that little bit of history. Can you tell I have been married to a history teacher for 42 years?
How do you choose a "good" pineapple at the market? They never get more ripe than they were at the time of harvest, so it's not you picking the wrong pineapple, it's the pineapple. Everything I have read says try to get a heavy pineapple - that indicates a lot of flesh and juice. Smell the bottom of the pineapple - you want a sweet pineapple scent. Also, pull one of the inner leaves from the crown. If it comes away easily, the pineapple is ripe. A pineapple can be left on the counter for 1-2 days before using. If you don't use it within that time, put it in a plastic bag and keep it in the refrigerator. It will be good for another 3 days.
Now, how exactly do you cut up a pineapple? Here is how I do it. Twist or cut the leafy top off and discard. Sit the pineapple on a cutting board upright, and using a long serrated knife, cut it in half and then in half again so that you have 4 quarters. Now, to make a "pretty pineapple."
Take the same knife and remove the core from each quarter. Sorry, I forgot to take pictures of that process, but you can see and "feel" where that hard core is. After you remove the core from each quarter, your pineapple will look like this.
See how you have a nice flat top where the core used to be? That's what you want. Next, take your long serrated knife and start at one end of the yellow fruit (inside the area that is kind of hard) and cut the fruit in about 3/4 inch segments all the way down to the the other end. Cut all the way down to the bottom of the soft fruit until you hit the hard outer part of the pineapple.
Next, take your long serrated knife, and starting at one end where you made your first cut, cut underneath all the segments you made, cutting from one end to the other. Then, slide the segments in opposite directions all the way down, making your fruit look like this.
See? It's a pretty pineapple. Repeat this process with all four quarters. It is not hard, just take your time. It really doesn't take that long to do. Now, use a large platter or tray and arrange your pineapple. I have some big round glass plates that I use, and I also have a silver tray that I use from time to time. I place the pineapple quarters at north, south, east and west and then fill in between with other fresh fruit. You can decide how you want to arrange yours.
Fill in with fruit that you like. For Superbowl Sunday, I used strawberries, grapes and kiwi as you can see in the picture above. If you are using fruit that will brown, like apples or bananas, squeeze some lemon juice over them to keep them from browning. You could also put a bowl of fruit dip in the middle if you wanted.
I always try to have a fruit platter for those who don't eat dessert or have dietary restrictions. Not only is fruit healthy, it is delicious. The grandsons love it!
Next time you have a party or company coming over, make a "pretty pineapple" and fill in with additional fruit of your choosing. You are going to get some oohs and aahs and questions about how you made such a lovely dish. Just tell 'em Everyday Donna told you how.
Everyday Donna
Things to Remember:
Love is a fruit in season at all times, and within reach of every hand. Mother Teresa
Thursday, February 9, 2012
Tuesday, February 7, 2012
Microwave Caramels - Great For Valentine Gift Giving
Caramels are one of the best candies on earth as far as I am concerned. Smooth, buttery, delicious. The definition of caramel is: 1. (noun) caramel
firm chewy candy made from caramelized sugar and butter and milk
As a child, I always loved the individually wrapped caramels (like Kraft), chocolate bars with caramel centers and that one piece of chocolate in the assorted box of candy that had the caramel in it. Beating my sister to it was another thing.
My husband's sister used to poke a hole in the bottom of all the candies in the box so she didn't get one she didn't like. You know, that one with the really yucky gummy/jelly center. Ewww. I can't even think about it they were so bad. But for the caramel center or the cherry cordial, I would have done that if my mom would have allowed such a thing. Makes me laugh to think about her doing that. Always made my husband so mad.
Valentine's Day is getting closer by the minute and it's time to think about special treats for your Valentine(s). Here is an easy recipe for caramels that would be perfect. I made these for Superbowl Sunday - 1. because they are gluten free and my son in love can eat them, and 2. because they are delicious and everyone else likes them a lot. What a great Valentine treat! They are so good and so easy to make. Just a few ingredients cooked in the microwave (no candy thermometer needed). Mix them up, pour them in a pan, let them set, dump them out and cut them up. How much easier could it be? Making them a little fancy for gift giving is easy and eating them is a real treat - especially with that slight taste of the coarse sea salt on the gooey, buttery caramel. Yum. Our other son in love pocketed several to take home with him and the grandsons did too.
Here is what you need.
Ingredients:
1/4 cup butter, cut in small cubes
1/2 cup white sugar
1/2 cup brown sugar, firmly packed
1/2 cup light corn syrup
1/2 cup sweetened condensed milk
1 tsp vanilla
coarse sea salt
1 8 x 8 pan lined with aluminum foil so that it goes over the edge of the pan making it easy to lift the block of caramel out when it is set. Spray the foil lightly with cooking spray.
In a microwave safe bowl (at least 2 quart), add the butter, white and brown sugars, syrup, sweetened condensed milk and vanilla. Stir together. Place in the microwave uncovered. Cook on full power for 6 minutes if you want soft and chewy, or 7 minutes for firmer but chewy. I went for 7 minutes. Stir twice during cooking. Remove from the microwave and stir until well mixed. Pour hot caramel into the prepared pan.
Put the pan in the refrigerator until the caramel is firm enough to remove from the pan - approximately 40 - 60 minutes. Pull up on the aluminum foil and remove the whole slab of caramel, peeling away the foil. Blot any oil from the slab with paper towels. Turn it over.
Place the slab on a cutting board covered with parchment or waxed paper and cut into desired size. Mine had 7 across and 7 down for 49 pieces, or about 1 inch square for each piece. Sprinkle a scant amount of sea salt on each square. I cut them this size so they would fit in the mini baking cups I had on hand. I used the papers just to make them look pretty. You can cut them any size you prefer. Do NOT place them on any paper that is not slightly waxed because they are sticky and you will have a hard time getting the paper off the back of the caramels. Not that I would know that from experience.
I had the little silver tray that's in the picture above. I got it at the Dollar Tree in the wedding section. It looks like a real silver tray, so if you want to give these caramels as a gift, you have only one dollar invested in the tray. I put a couple of heart shaped doilies on the tray for color, then placed each caramel in a miniature baking cup and set them on the tray. You can get these baking papers at most groceries. If you want to use small plates for gift giving, you could use one like this. You can find pretty, small plates at most dollar stores or thrift stores.
What a sweet little treat for your favorite Valentine(s) or perhaps your child's teacher. Take some to work to share. You can wrap the plate in cellophane and tie it with a pretty bow and - ta dah! - you have a wonderful Valentine treat that came straight from your heart and didn't cost a fortune.
These were quite a hit on Sunday, so I know they would be much appreciated for Valentine's Day or any other special occasion you may have coming up. Give this recipe a try. Smooth, buttery, delicious, easy.
Everyday Donna
Things to remember:
You know what Forrest Gump said:
Life is like a box of chocolates. You never know what you're going to get.
Monday, February 6, 2012
A Valentine For Our Grandsons
Valentine's Day is approaching - it's only 8 days away. Have you started making plans yet? Buying cards or gifts for your special someones? We have no princesses. But, we do have 5 princes and another due in the next week. I wanted to make a Valentine that would pay homage to all of them. I started with a piece of burlap and not one idea and this is where I ended up. The wall hanging is 30 x 25 finished. There is an initial for each one of the boys. I have been delayed showing the finished piece until our daughter and son in love decided on a name for the our newest grandson. His initial is proudly displayed now and I can show the final piece. We have H, Z, R, G, A and now a beautiful V added to the mix. I won't tell you his name until he gets here, but it's a great one. All the boys have really great names that just happen to fit their personas. Funny how that works.
When I say I started with a piece of burlap, I am not kidding. I wanted to make a wall hanging that goes over a cabinet inside our front door. I have hung wreaths and other wall hangings there, but I wanted something for Valentine's Day. So, I took a piece of tissue paper and drew a big heart, pinned it to the burlap and cut it out. I mean, what else says Valentine's Day but a heart?
Now what? I folded another piece of tissue paper in half, drew hearts of different sizes and cut them out.
Hmmmmm, now what? I placed these hearts on the burlap and cut out several in different sizes. Still didn't know where I was going with this, but I decided I wanted to put the French phrase je t'aime in the middle of the heart. Je t'aime (zh tem) translates "I love you." So, I printed out the phrase in a font and size I liked and cut it out to make a stencil. I placed it in the middle of the burlap heart and stenciled it on in red.
Okay, that's done, but what next? I decided to pin smaller hearts around the edge of the big heart and stitch them on using random embroidery stitches in different colors. I used red, pink and purple.
Now, the hearts needed embellishing. I printed out a cupid and made a stencil out of it for the big heart on the upper right. I sewed that pink heart button I already had to another heart. I used my wooden stamp set to put the word hugs and xoxo on two other hearts. I also drew a pair of lips and cut them out and stenciled them in red on another heart. Okay, it's starting to take shape. I wanted our grandson's initials on the hearts because they are our very special Valentines. I made some little felt flowers and stitched them on the smaller hearts, then added each of their initials by using my wooden stamp set. I still had the heart with the pink heart button open and I finished by adding one more initial. V.
As you know, burlap is a very open weave fabric and I knew I had to attach this heart to something to keep it from raveling apart. I had some red felt from Christmas, so I laid the burlap on the red felt and cut a heart about 2 inches bigger than the burlap and stitched the burlap heart to the felt using more embroidery stitches.
Now, to hang it. I cut two square pieces of felt about 4 x 4 inches and made big loops by bringing the raw edges together, stitching them to the curved top of the heart. I took a dowel rod and covered it with red satin ribbon and slipped it through the loops. I tied a piece of the red satin ribbon to each end of the covered dowel rod (about 2 inches in on each end) and glued the ribbon in place so it would not slip. This would be the "hanger." I made some little streamers and a bow in the middle of the hanging ribbon and placed in on a nail over the cabinet. Done. Whew. That was quite a process of indecision, starting from nothing and ending with something.
All family members in town came over for the Superbowl last night and we shared lots of food and fun (including red velvet cookies, caramels and rice krispie treats that grandma made). Each of the boys picked out their initial on the hanging and Grandma told them they were her special Valentines. Sometimes creating happens on a wing and a prayer. I don't always have a definite plan, but I really liked where this one ended up. Now, we are just counting down the days until the new grandson gets here. Doctor said this morning it could be anytime. I am SOOOOO excited. Another special Valentine to keep in my heart. Life is good.
Everyday Donna
Things to Remember:
Nobody can do for little children what grandparents do. Grandparents sort of sprinkle stardust over the lives of little children. ~Alex Haley
When I say I started with a piece of burlap, I am not kidding. I wanted to make a wall hanging that goes over a cabinet inside our front door. I have hung wreaths and other wall hangings there, but I wanted something for Valentine's Day. So, I took a piece of tissue paper and drew a big heart, pinned it to the burlap and cut it out. I mean, what else says Valentine's Day but a heart?
Now what? I folded another piece of tissue paper in half, drew hearts of different sizes and cut them out.
Hmmmmm, now what? I placed these hearts on the burlap and cut out several in different sizes. Still didn't know where I was going with this, but I decided I wanted to put the French phrase je t'aime in the middle of the heart. Je t'aime (zh tem) translates "I love you." So, I printed out the phrase in a font and size I liked and cut it out to make a stencil. I placed it in the middle of the burlap heart and stenciled it on in red.
Okay, that's done, but what next? I decided to pin smaller hearts around the edge of the big heart and stitch them on using random embroidery stitches in different colors. I used red, pink and purple.
Now, the hearts needed embellishing. I printed out a cupid and made a stencil out of it for the big heart on the upper right. I sewed that pink heart button I already had to another heart. I used my wooden stamp set to put the word hugs and xoxo on two other hearts. I also drew a pair of lips and cut them out and stenciled them in red on another heart. Okay, it's starting to take shape. I wanted our grandson's initials on the hearts because they are our very special Valentines. I made some little felt flowers and stitched them on the smaller hearts, then added each of their initials by using my wooden stamp set. I still had the heart with the pink heart button open and I finished by adding one more initial. V.
As you know, burlap is a very open weave fabric and I knew I had to attach this heart to something to keep it from raveling apart. I had some red felt from Christmas, so I laid the burlap on the red felt and cut a heart about 2 inches bigger than the burlap and stitched the burlap heart to the felt using more embroidery stitches.
Now, to hang it. I cut two square pieces of felt about 4 x 4 inches and made big loops by bringing the raw edges together, stitching them to the curved top of the heart. I took a dowel rod and covered it with red satin ribbon and slipped it through the loops. I tied a piece of the red satin ribbon to each end of the covered dowel rod (about 2 inches in on each end) and glued the ribbon in place so it would not slip. This would be the "hanger." I made some little streamers and a bow in the middle of the hanging ribbon and placed in on a nail over the cabinet. Done. Whew. That was quite a process of indecision, starting from nothing and ending with something.
All family members in town came over for the Superbowl last night and we shared lots of food and fun (including red velvet cookies, caramels and rice krispie treats that grandma made). Each of the boys picked out their initial on the hanging and Grandma told them they were her special Valentines. Sometimes creating happens on a wing and a prayer. I don't always have a definite plan, but I really liked where this one ended up. Now, we are just counting down the days until the new grandson gets here. Doctor said this morning it could be anytime. I am SOOOOO excited. Another special Valentine to keep in my heart. Life is good.
Everyday Donna
Things to Remember:
Nobody can do for little children what grandparents do. Grandparents sort of sprinkle stardust over the lives of little children. ~Alex Haley
Friday, February 3, 2012
Here's The Secret To Mexican Rice Color and Flavor
Did you ever wonder how Mexican rice gets that color it has or the flavor? You think it's from tomatoes or tomato sauce and you have tried making it that way (I sure have). That's not what makes "the color"! My daughter in love, Jessy, is Puerto Rican and she let me in on "the secret." The color is from achiote seed (or annatto), and she uses it in her cooking - which is fabulous. Now you ask, what is achiote and where do you get it? Well, you can get it in the international aisle of your grocery or from your local Mercado. The box has Sazon Goya on the top and has NET WT. 1.41 oz printed on the bottom left hand corner. Inside the box are 6 or 8 packets (not sure because I have used some of them). Each packet is about the size of the one a moist towlette comes in. Inside the packet is this lovely reddish orange powder that will make your Mexican rice THE perfect color and flavor. It's so nice to have inside information.
I found this information on eHow.com that explains achiote, in case you wonder what it actually is.
Achiote spice comes from seeds that look like small stones. Also called annatto seeds, they are harvested from the inedible, spiny fruit of a small tropical shrub nicknamed "the Lipstick tree." Grown mostly in Peru and Brazil, achiote is sold whole, ground or as a paste. It is also a common ingredient in Mexican, Jamaican, South American and Filipino cuisine. In the Yucatan peninsula of Mexico, achiote seeds are ground together with chiles, garlic, bitter orange and other spices to make a rub for whole suckling pig. The pig is then wrapped in banana leaves and slowly cooked in a stone-lined pit. In the Philippines, achiote is used in soups and stews, or as a meat marinade. Try adding it to your favorite recipes to give them a richer color! Look for achiote or annatto in Latin American markets or in the spice section of your gourmet food store. Sometimes called "poor man's saffron," achiote can be substituted for saffron in dishes prized for their bright, yellow color like paella.
Now that you know what "the secret" is, let me share the recipe I use to make this outstanding Mexican rice. If you follow these directions, it turns out perfectly.
First, you want to use a long grain rice, basmati or jasmine rice - NO Minute Rice. I used jasmine rice because I really like it. Rice should be rinsed to get rid of a lot of the starchiness that surrounds the grains. Put the measured amount in a bowl, cover it with water, stir it around with your hand several times and drain. Repeat this process 3 or 4 times until the water is fairly clear. This will help you achieve fluffy rice, unless you like gummy rice. If so, skip this step.
Here is what you will need for this recipe.
Ingredients:
2 Tbsp olive oil
1/4 medium onion, diced
1 1/2 cups rice
3 cloves garlic, finely chopped
1 cup plain tomato sauce or diced tomatoes in their juice (this is what I used)
4 heaping Tbsp finely chopped parsley or cilantro (I used cilantro) - optional
2 1/4 cups chicken broth
1 packet Sazon Goya con culantro y achiote
Heat oil in a saucepan over medium heat. Add the onion and saute 1-2 minutes. Add dry rice and cook with onions for about 5 minutes until the rice is a golden brown color. Add the garlic and saute 1 more minute.
Add in the chicken broth and tomato sauce (or diced tomatoes with juice) and 1 packet Sazon Goya Con Culantro Y Achiote. ( Add the broth and tomatoes into the center of the rice, not directly on the hot pan as it will reduce the temperature of the pan.) Add the parsley or cilantro if you are using it. Stir until ingredients are well mixed and bring to a boil. Turn the heat to low and cover the pan. Simmer for 20 minutes. DO NOT UNCOVER THE POT! This disturbs the cooking process and it's so tempting to look. After 20 minutes, remove the pan from heat and uncover Fluff with a fork.
I have used this recipe many times and I get perfect rice every time. This recipe feeds 4 - 6 generously and is as good as we get at the local Mexican restaurant. It makes a perfect side dish to your favorite Tex-Mex or Mexican dishes. Really, it's good with anything.
If you have left over rice, it's great to mix with scrambled eggs, salsa and cheese to make a yummy breakfast burrito. Our kids LOVED these when they were all at home and we would make them on Saturday mornings for a special treat.
Now that you know the secret to the perfect Mexican rice with the beautiful red-orange color and flavor, it's time to make some. You are going to be happy you found out this "little secret."
Everyday Donna
Things to Remember:
"rice is the best, the most nutritive and unquestionably the most widespread staple in the world." Escoffier
Thursday, February 2, 2012
Better Than Numero Cinco - Chicken Enchiladas
What's your favorite ethnic food? I like Italian and Greek, Chinese, Thai and Vietnamese food, but I LOVE Mexican or Tex-Mex food. It is my favorite. All of the flavors speak to me somewhere deep in my soul, a primal place. Perhaps I once lived in Mexico or the deep Southwest in another life. It's really hard to say. I just know from the moment I tasted Mexican food, I was hooked.
I had cooked those two whole chickens the other night when I made the chicken, broccoli super yummy casserole and I had a lot of chicken left. Today was a busy day as I had my appointment for my visual field test and more pictures of my optic nerves. In addition, our daughter had called and asked if we could watch our grandson for a bit while she got her hair done. You know, there is nothing more important than a hair appointment, especially when you are 39 weeks pregnant!! All you ladies will understand that! So, we went over to play with little G while momma got her "hair did." Then, off to the opthalmologist's office to finish up this year's eye examination and tests.
It was an absolutely gorgeous day, sunny with clear blue skies. People downtown were walking around in shorts and flip flops on February 2. Talk about a great day! Wow. After we left the doctor's office, I told Dan that I thought we should have chicken enchiladas for supper. I mean, come on - corn tortillas, chicken, cheese and green chiles in a beautiful bechamel sauce. What could be better on such a gorgeous day? So, we made a quick stop at the grocery before heading home to begin preparations for a delicious dinner. Sunny days always make me want to cook something super good. But then again, so do rainy days and cold days and every day I guess. Who doesn't want good food to eat?
I have made this recipe before and it is excellent. I found it on where? You guessed it - Pinterest - the world's greatest resource for all things yummy. Here is what you will need.
Ingredients:
10-12 corn tortillas
2 cups cooked chicken, shredded
3 cups shredded jack cheese
3 Tbsp butter
3 Tbsp flour (or 1.5 tsp corn starch for gluten free)
2 cups chicken broth
1 cup sour cream
1 4 oz can diced green chiles
Preheat your oven to 350 degrees. Spray a 9 x 13 casserole with cooking spray.
Mix chicken and 1 cup cheese in a bowl. Roll up in tortillas and place in casserole dish.
Here is a hint for your corn tortillas to keep them from breaking when rolling. Make sure they are new tortillas. Older ones break easier. Heat a skillet and brush with cooking oil. Heat a tortilla on each side for just a few seconds, dip in bechamel sauce, fill down the middle with chicken/cheese mixture, roll and place in casserole dish seam side down. Not overfilling the tortillas also helps keep them from breaking. If they do break, don't be alarmed. You are going to cover them with sauce and cheese and no one will ever really know.
Making Bechamel sauce:
In a fairly deep saucepan, melt the butter and stir in the flour or corn starch, cooking for 1 min. Add the chicken broth and whisk until smooth. Heat over medium until thick and bubbly. Stir in sour cream and whole can of chiles. Do not boil! Remove pan from heat when you add the sour cream or your sour cream can curdle. (This is the sauce you will dip your tortillas in before filling.)
Line the casserole with filled tortillas. I had 12 in mine - two rows with 5 across and two across the bottom. Pour the sauce over the enchiladas. Top with 2 cups of shredded jack cheese. Bake for 22 minutes and then broil for 2 - 3 minutes to brown the cheese. Remove from the oven.
This is a really easy and delicious recipe for all you enchilada lovers out there. Be sure and use corn tortillas for authentic enchiladas. Flour tortillas will tend to get gummy in the sauce anyway. I served these enchiladas with black beans, rice and home made guacamole and chips. Better than what we get at the local Mexican restaurant and way less expensive because we have left overs for tomorrow and fed 5 people this evening! Wahoo!
You can expect this recipe to feed 4 to 6 people easily if everyone eats two enchiladas and up to 12 if everyone has just one as they are very filling and oh so good! I can tell you this, it's hard to eat just one, so make a double batch if you are expecting a crowd.
Give this recipe a try the next time you want something that is not too spicy, but very very tasty. It's a great way to use left over chicken or you can even use one of the rotisserie chickens from the grocery. This recipe can be made gluten free by substituting 1.5 tsp of corn starch for the flour in the bechamel sauce which I have done. Talk about a great recipe to serve for a super bowl party this weekend! Everyone will be talking about them and how good they are. They will all want the recipe.
Tomorrow, I'm going to show you how to make super Mexican rice to complement your enchiladas - as good or better than they serve at your local restaurant! It will even have that beautiful color they get and you always wonder how they do it. It will no longer be a secret. Now, how is that for temping you to come back tomorrow?
Everyday Donna
Things to remember:
"One of the very nicest things about life is the way we must regularly stop whatever it is we are doing and devote our attention to eating." -- Luciano Pavarotti
Wednesday, February 1, 2012
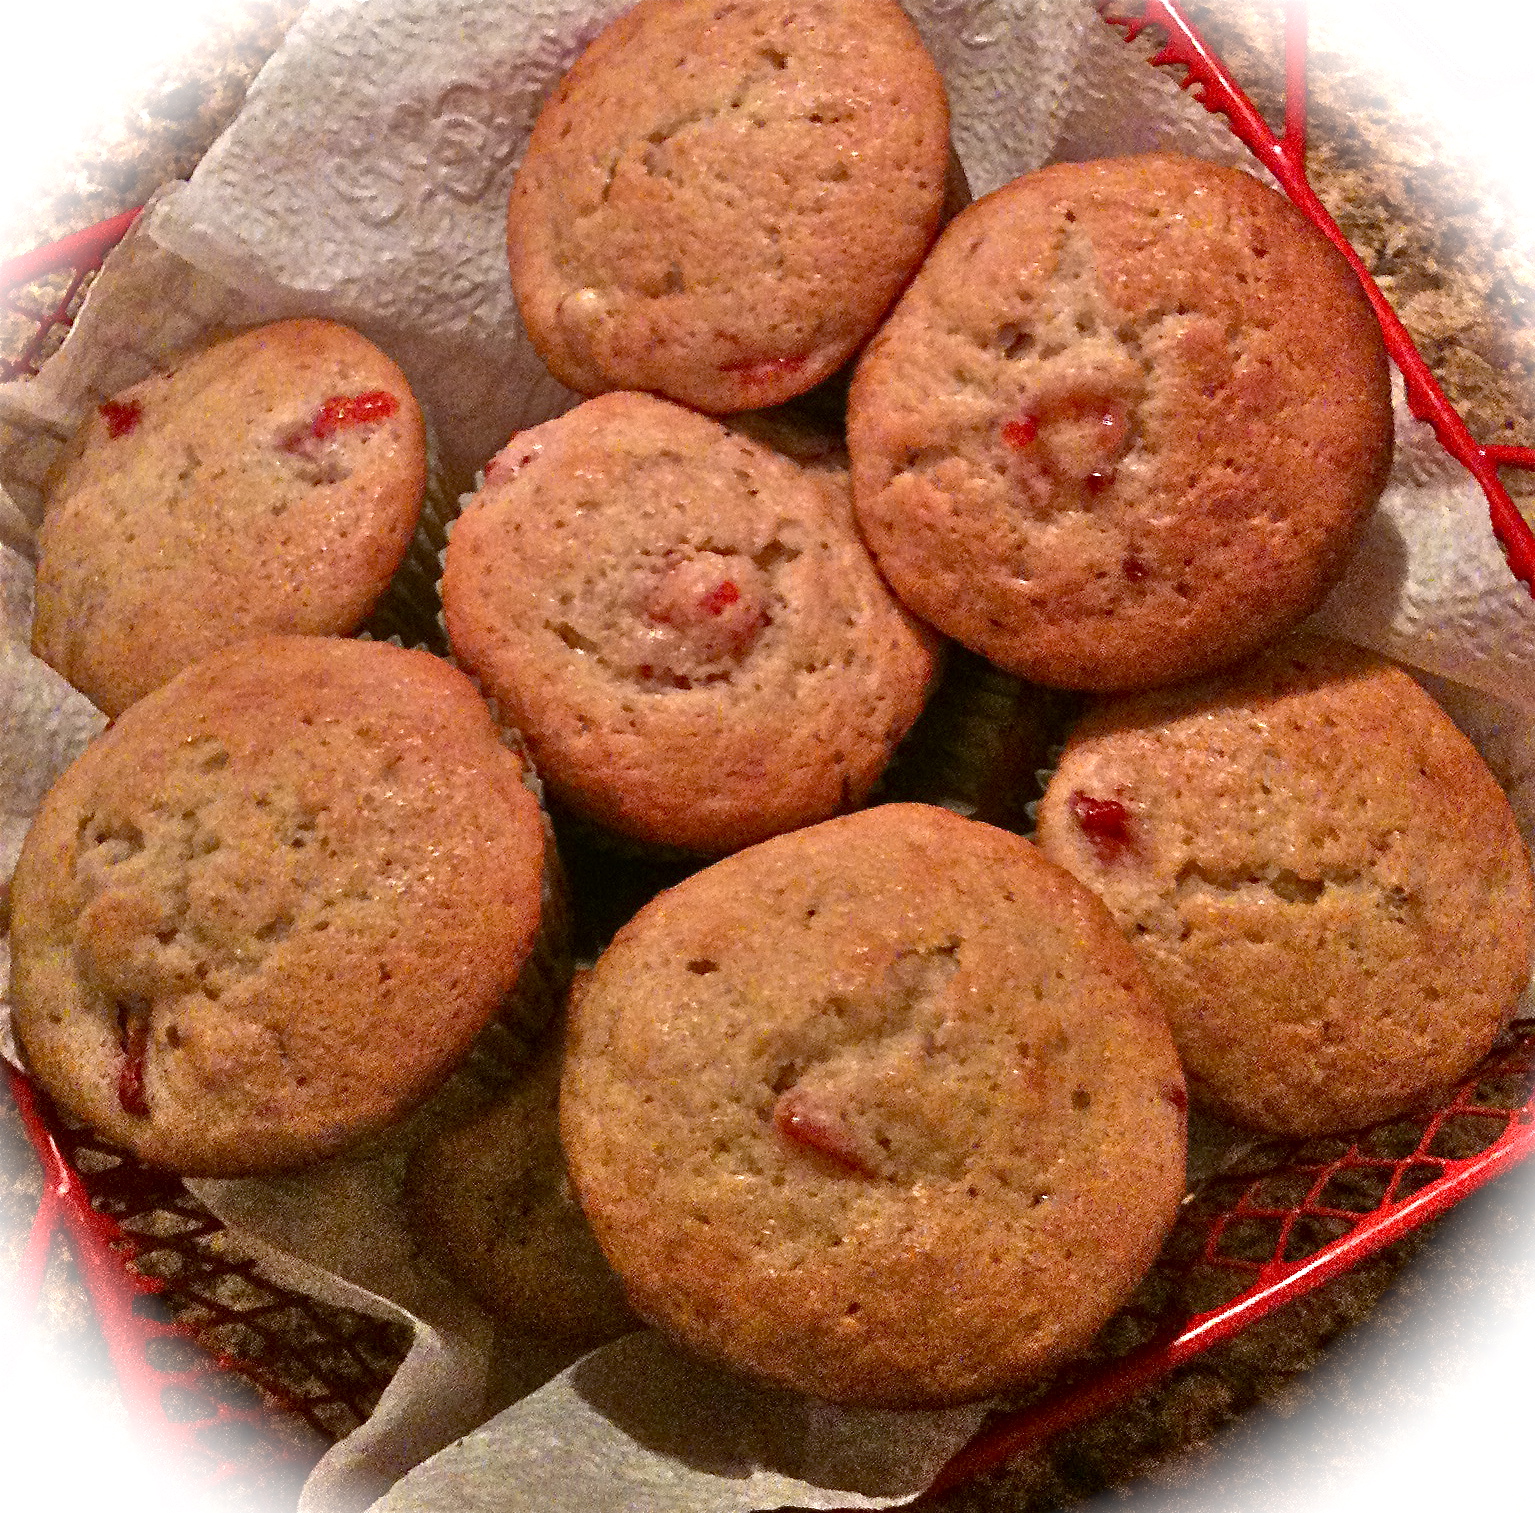
This Is For You Corrie - Strawberry Banana Muffins
What is it about a nice warm muffin that is so comforting? They are good for breakfast, lunch or dinner and even as a snack - especially with a big glass of milk or a hot cup of coffee. Sit down, prop your feet up, peel that paper back and enjoy every morsel. Mm Mm Mm What does Starbucks and most coffee shops tempt you with but a case full of muffins in different flavor varieties. If they have streusel topping, they are even more tempting. Here is a recipe you can easily make for way less than Starbucks charges and they are twice as good because they are made with love.
Our grandsons are muffin lovers, probably even more than cupcakes. The really great thing is you don't need a plate and a fork to eat them. Even better. Therefore, I try to bake them often so they have some to munch on when they are here. Last night, I baked these strawberry banana muffins for dinner and they were terrific with the chicken, broccoli casserole that I wrote about yesterday. Here is what you will need.
Ingredients:
1/2 cup melted butter
2 eggs
1 tsp vanilla
1 cup mashed banana (about 2 large)
1 cup chopped strawberries
2 1/4 cups all purpose flour
1 cup sugar
1 1/2 tsp baking powder
1/4 tsp baking soda
1/2 tsp cinnamon
1/2 tsp salt
1/4 cup milk
Directions:
Preheat oven to 400 degrees
Line muffin tin with papers (makes 12)
Melt butter and let cool to room temperature. Stir together eggs, mashed bananas and vanilla. (I mash my bananas with a potato masher or you can use a fork.) Add cooled butter to this mixture.
Sift dry ingredients together. Add berries to the dry ingredients and mix, making sure all the berries are coated well. This will keep them from sinking to the bottom of the muffins when baking.
Add wet ingredients to dry ingredients until just combined. Add 1/4 cup milk. I used a fork, don't over mix. It will make your muffins tough. This batter is pretty dense, so don't be alarmed.
Fill each muffin cup 3/4 full. I used a heaping 1/4 cup measure to fill mine, or you could use an ice cream scoop. Bake 18 - 20 minutes at 400 or until nice and brown on top. Remove from oven and enjoy!!
Dan and I had a muffin for breakfast this morning and they were maybe a little better than they were for dinner last night - if that is possible. Yum. Yum.
If you want to make some memories with your children, let them help when you are doing simple baking projects like muffins. They will really appreciate what goes into the process and will be so proud to have contributed to the final product. Nothing like a muffin made with love. Enjoy!
Everyday Donna
Things to remember:
One of my proudest moments from childhood was the cake I baked from scratch when I was 9 years old. My grandmother helped me and it was crooked as can be, but the best cake I ever ate. One of the best memories ever. Led to a lifetime love of baking.♥
Our grandsons are muffin lovers, probably even more than cupcakes. The really great thing is you don't need a plate and a fork to eat them. Even better. Therefore, I try to bake them often so they have some to munch on when they are here. Last night, I baked these strawberry banana muffins for dinner and they were terrific with the chicken, broccoli casserole that I wrote about yesterday. Here is what you will need.
Ingredients:
1/2 cup melted butter
2 eggs
1 tsp vanilla
1 cup mashed banana (about 2 large)
1 cup chopped strawberries
2 1/4 cups all purpose flour
1 cup sugar
1 1/2 tsp baking powder
1/4 tsp baking soda
1/2 tsp cinnamon
1/2 tsp salt
1/4 cup milk
Directions:
Preheat oven to 400 degrees
Line muffin tin with papers (makes 12)
Melt butter and let cool to room temperature. Stir together eggs, mashed bananas and vanilla. (I mash my bananas with a potato masher or you can use a fork.) Add cooled butter to this mixture.
Sift dry ingredients together. Add berries to the dry ingredients and mix, making sure all the berries are coated well. This will keep them from sinking to the bottom of the muffins when baking.
Add wet ingredients to dry ingredients until just combined. Add 1/4 cup milk. I used a fork, don't over mix. It will make your muffins tough. This batter is pretty dense, so don't be alarmed.
Fill each muffin cup 3/4 full. I used a heaping 1/4 cup measure to fill mine, or you could use an ice cream scoop. Bake 18 - 20 minutes at 400 or until nice and brown on top. Remove from oven and enjoy!!
Dan and I had a muffin for breakfast this morning and they were maybe a little better than they were for dinner last night - if that is possible. Yum. Yum.
If you want to make some memories with your children, let them help when you are doing simple baking projects like muffins. They will really appreciate what goes into the process and will be so proud to have contributed to the final product. Nothing like a muffin made with love. Enjoy!
Everyday Donna
Things to remember:
One of my proudest moments from childhood was the cake I baked from scratch when I was 9 years old. My grandmother helped me and it was crooked as can be, but the best cake I ever ate. One of the best memories ever. Led to a lifetime love of baking.♥
Tuesday, January 31, 2012
Chicken, Broccoli, Rice, Cheese Casserole - Broccolicious Good!
Nashville is experiencing beautiful weather that is giving me a really bad case of spring fever. It makes me want to redecorate my house, or maybe just give it a good cleaning. I want to put away my winter clothes and break out my sandals. Oh yes, I love sandals and I really hate closed shoes. But, I know this is just nature's way of teasing us, making us think it is spring. There is going to be more cold weather, you can bet on it. I just hope the trees and shrubs don't freeze their little buds off.
We spent today running around doing errands, enjoying every moment of this glorious day. Our daughter is due to give us another grandson around February 14, and we spent time buying some baby boy things today. Even though she has a 23 month old son and he had lots of stuff, every baby deserves a few new things just for them don't you think? Besides, Grandma and Pawpaw like to shop for the grandsons. It is so much fun. You can get so wrapped up in looking at all the amazing things they have for babies these days. There are so many wonderfully handy things that I wish had been available when our children were little, but we survived. Sure wish I had thought up a few of them though.
It was mid afternoon by the time we returned, and there were those inevitable chores to do. You know, the ones the elves never come and do. They are always waiting for you when you get home. When the sun shines so brightly in the windows, you can see how icky the kitchen floor is along with the windows and everything else. Ugh. I opened the refrigerator to check out what I could make for dinner and decided that it needed cleaning before I did another thing! It was just one of those moments when one thing led to another. I tossed out some things that were past their prime and said thank you for coming,then wiped down all the shelves and drawers. That felt good. One thing accomplished. Now the floor was demanding attention, so I mopped it. Awesome. Another accomplishment. Whew. Still, what to fix for dinner.
There were two whole chickens in the fridge that needed to either be cooked or frozen before they passed their prime. I decided to cook them. I got out the 12 quart stock pot, put the chickens in, filled it with water and let them cook until done. Guess that meant something with chicken for dinner. Don't you hate when it's always your decision what to fix for dinner? Anyway, I decided some kind of casserole since I now had a huge bowl of chicken I had picked off the bones. Broccoli sounded good. Cheese always sounds good. So, I fixed a really, really delicious chicken, broccoli, rice and cheese casserole that has a wonderful home made cheese sauce and is topped with crushed Ritz crackers that gives the casserole that "what is that" flavor. Oh, and strawberry banana muffins. Yeah, they are fantastic. That will be tomorrow's post. I love when I am ahead of that curve ball, because tomorrow is our volunteer day at a local non-profit organization we support. We sure are busy for retired people.
Anyway, here is what you need for this fantastic casserole.
Ingredients:
1 lb fresh broccoli, cut into florets and steamed for 2 minutes. (I also cut thin slices of the stems about half way down and used those too)
3 cups cooked chicken, cut into bite sized pieces
1 cup minute rice
1 8 oz block cheddar cheese, grated and divided in half
Sauce:
1/3 cup butter, melted
1/4 cup cornstarch, dissolved in 1/2 cup cold water
1/3 cup chicken broth
1/4 tsp salt
1/4 tsp black pepper
2 cups milk
1/2 of the grated cheddar cheese
Topping:
1 sleeve Ritz crackers, crushed (not too fine)
1/2 stick butter, melted
Directions:
Grease a 9x13 casserole or baking pan. Place the steamed broccoli on the bottom of the casserole. Cover with the chicken, sprinkle the cup of dry rice over the casserole and cover it with 1/2 the grated cheese.
Make the sauce:
Melt 1/3 stick of butter (5 tbsp) in a heavy sauce pan. Combine the cornstarch and cold water and stir until dissolved making a slurry. Add the cornstarch slurry to the melted butter. Add 1/3 cup chicken broth, seasonings and 2 cups milk. Cook until sauce starts to thicken. Turn heat to low and add the other half of the grated cheddar cheese. Stir until completely melted. Pour over the broccoli, chicken, rice and grated cheese in the casserole dish.
Topping:
Crush one sleeve of Ritz crackers in a large zip lock bag. I used my rolling pin. Don't crush too fine, you want some bigger pieces. Melt 1/2 stick of butter in the microwave and pour over the crumbs which you have placed in a bowl. Sprinkle topping over casserole.
Bake at 350 for 30 to 35 minutes until bubbly. Remove from oven and serve.
The buttery Ritz cracker topping gives a wonderful crispy crunch to the goodness of the chicken, broccoli and rice in the casserole. The home made cheese sauce is so much better than any canned soup you can use. It is delicious and easy! For us, it is "just right" as Goldilocks would say. Feel free to add more cheese if you like things cheesier. Also, you can add another sleeve of crushed Ritz crackers and another 1/2 stick of butter if you like really thick topping. It's up to you.
This recipe reheats beautifully. So, if you need something "make ahead" for any occasion, this is the casserole for you. You can add a salad, maybe some strawberry banana muffins and you are all set. Dinner is served.
I am happy that I have plenty to reheat tomorrow night so I don't have to come home from a day of volunteering and cook. Yippee! Hope you give this casserole a try. It is broccolicious good!
Everyday Donna
Things to remember:
It's spring fever. That is what the name of it is. And when you've got it, you want - oh, you don't quite know what it is you do want, but it just fairly makes your heart ache, you want it so! ~Mark Twain
We spent today running around doing errands, enjoying every moment of this glorious day. Our daughter is due to give us another grandson around February 14, and we spent time buying some baby boy things today. Even though she has a 23 month old son and he had lots of stuff, every baby deserves a few new things just for them don't you think? Besides, Grandma and Pawpaw like to shop for the grandsons. It is so much fun. You can get so wrapped up in looking at all the amazing things they have for babies these days. There are so many wonderfully handy things that I wish had been available when our children were little, but we survived. Sure wish I had thought up a few of them though.
It was mid afternoon by the time we returned, and there were those inevitable chores to do. You know, the ones the elves never come and do. They are always waiting for you when you get home. When the sun shines so brightly in the windows, you can see how icky the kitchen floor is along with the windows and everything else. Ugh. I opened the refrigerator to check out what I could make for dinner and decided that it needed cleaning before I did another thing! It was just one of those moments when one thing led to another. I tossed out some things that were past their prime and said thank you for coming,then wiped down all the shelves and drawers. That felt good. One thing accomplished. Now the floor was demanding attention, so I mopped it. Awesome. Another accomplishment. Whew. Still, what to fix for dinner.
There were two whole chickens in the fridge that needed to either be cooked or frozen before they passed their prime. I decided to cook them. I got out the 12 quart stock pot, put the chickens in, filled it with water and let them cook until done. Guess that meant something with chicken for dinner. Don't you hate when it's always your decision what to fix for dinner? Anyway, I decided some kind of casserole since I now had a huge bowl of chicken I had picked off the bones. Broccoli sounded good. Cheese always sounds good. So, I fixed a really, really delicious chicken, broccoli, rice and cheese casserole that has a wonderful home made cheese sauce and is topped with crushed Ritz crackers that gives the casserole that "what is that" flavor. Oh, and strawberry banana muffins. Yeah, they are fantastic. That will be tomorrow's post. I love when I am ahead of that curve ball, because tomorrow is our volunteer day at a local non-profit organization we support. We sure are busy for retired people.
Anyway, here is what you need for this fantastic casserole.
Ingredients:
1 lb fresh broccoli, cut into florets and steamed for 2 minutes. (I also cut thin slices of the stems about half way down and used those too)
3 cups cooked chicken, cut into bite sized pieces
1 cup minute rice
1 8 oz block cheddar cheese, grated and divided in half
Sauce:
1/3 cup butter, melted
1/4 cup cornstarch, dissolved in 1/2 cup cold water
1/3 cup chicken broth
1/4 tsp salt
1/4 tsp black pepper
2 cups milk
1/2 of the grated cheddar cheese
Topping:
1 sleeve Ritz crackers, crushed (not too fine)
1/2 stick butter, melted
Directions:
Grease a 9x13 casserole or baking pan. Place the steamed broccoli on the bottom of the casserole. Cover with the chicken, sprinkle the cup of dry rice over the casserole and cover it with 1/2 the grated cheese.
Make the sauce:
Melt 1/3 stick of butter (5 tbsp) in a heavy sauce pan. Combine the cornstarch and cold water and stir until dissolved making a slurry. Add the cornstarch slurry to the melted butter. Add 1/3 cup chicken broth, seasonings and 2 cups milk. Cook until sauce starts to thicken. Turn heat to low and add the other half of the grated cheddar cheese. Stir until completely melted. Pour over the broccoli, chicken, rice and grated cheese in the casserole dish.
Topping:
Crush one sleeve of Ritz crackers in a large zip lock bag. I used my rolling pin. Don't crush too fine, you want some bigger pieces. Melt 1/2 stick of butter in the microwave and pour over the crumbs which you have placed in a bowl. Sprinkle topping over casserole.
Bake at 350 for 30 to 35 minutes until bubbly. Remove from oven and serve.
The buttery Ritz cracker topping gives a wonderful crispy crunch to the goodness of the chicken, broccoli and rice in the casserole. The home made cheese sauce is so much better than any canned soup you can use. It is delicious and easy! For us, it is "just right" as Goldilocks would say. Feel free to add more cheese if you like things cheesier. Also, you can add another sleeve of crushed Ritz crackers and another 1/2 stick of butter if you like really thick topping. It's up to you.
This recipe reheats beautifully. So, if you need something "make ahead" for any occasion, this is the casserole for you. You can add a salad, maybe some strawberry banana muffins and you are all set. Dinner is served.
I am happy that I have plenty to reheat tomorrow night so I don't have to come home from a day of volunteering and cook. Yippee! Hope you give this casserole a try. It is broccolicious good!
Everyday Donna
Things to remember:
It's spring fever. That is what the name of it is. And when you've got it, you want - oh, you don't quite know what it is you do want, but it just fairly makes your heart ache, you want it so! ~Mark Twain
Subscribe to:
Posts (Atom)