Showing posts with label strawberries. Show all posts

Tuesday, June 4, 2013

Strawberry Pie Recipe

 Pie - not to be confused with Pi, which is a mathematical constant. The number pi (symbol: π) /paɪ/ is a mathematical constant that is the ratio of a circle's circumference to its diameter, and is approximately equal to 3.14159.  Remember that? You don't need it for this recipe.   P I E pie is something deliciously good to eat.  Guess which one we prefer?

You can make a one crust pie, top crust pie (sometimes called cobbler), or two crust pie.  Do you have a preference?  Personally, they are all good in my book.

Strawberries.  Red.  Juicy.  Delicious.  Local strawberries are the best, but are only in season for about a month in the spring, usually late April or the month of May.  Last year it was warm and dry and berries were gone by the first of May.  This spring, it has been cool and damp and we are still able to buy local berries because they did not come in until about the second week of May.  The weather is the main indicator of when berries will be available.

The first garden strawberry was grown in France during the late 18th century.  Prior to this, wild strawberries and cultivated selections from wild strawberry species were the common source of the fruit.  Records show that wild strawberries were being cultivated as far back as the 1500's.  Needless to say, they were only available for short periods of time.  Now, due to strawberries being grown in plasticulture and some green houses, they are available all year round.  The biggest difference between the year round berries and local berries is the local berries are a bit smaller, sweeter, and much juicier than the "store bought" variety available during the year.  

We are always excited when the local berries become available.  We are happy to just wash them off and eat them right out of the container they are so sweet and good.  But, of course, the uses for strawberries are plentiful.  Strawberry shortcake is one of the most well known ways to eat strawberries.  You can make preserves with them, lots of desserts, eat them over ice cream, or make strawberry smoothies and milkshakes.  Yum.  

I had bought a gallon of fresh strawberries at the local Farmer's Market and knew I would make some strawberry pies with them.  I had just cleaned my house for my sister's weekend visit and didn't want to mess up the kitchen floor making crusts so I sent Dan to the store to buy some pre made deep dish pie crusts. (Yes, I have flour everywhere when I make pie crusts.)  Someone didn't read the label and came home with regular pie crusts, so my pies are a little less "deep dish" that I would have liked, but it didn't make a whole lot of difference when it came to eating them, just in the looks.  Here is what you need to make one pie.

1 deep dish pre made pie crust or make a single crust from scratch, bake according to directions, remove from oven and let cool before filling.

Pie Filling

1  quart whole fresh strawberries
1 cup white sugar
3 TBSP cornstarch
3/4 cup water

1/2 cup heavy whipping cream

Remove the stems and caps from all the berries.  Wash and let drain.  Pat dry. 

Arrange 1/2 of the strawberries in the baked pastry shell.  You may want to cut some of the larger ones in half so they lay flat in the pie crust.  Mash remaining berries and combined with sugar in a medium saucepan.  Place the saucepan over medium heat and bring the contents to a boil, stirring frequently.

In a small bowl, whisk together the cornstarch and water.  Gradually stir the cornstarch mixture into the boiling strawberries mixed with sugar.  Reduce the heat and simmer until the mixture thickens., stir often to keep from sticking or scorching.  If you have never made this kind of filling, the mixture will thicken rather suddenly, so don't get discouraged thinking it will never happen.  It will.  

Pour the mixture over the berries in the baked pie crust.  Chill several hours before serving.

Make Whipped Cream

Put the chilled heavy whipping cream in a deep bowl.  Mix with an electric mixer on high speed until soft peaks begin to form.  Add 1 - 2 TBSP sugar and 1 tsp vanilla.  Continue to whip until stiff peaks form.  Stiff peaks means they will stand on their own without falling over.   Spread the whipped cream over the chilled pie, serve.  Try not to eat it all yourself.  Good luck.

This is a really easy recipe and contains no additives or chemicals from artificial contents that some recipes use.  It is also super delicious!  Dan has had waaaaaaay too many pieces at this point, but that's okay.  Just confirmation for how good the pies are.  

If you still have local berries available, you will really want to make at least one of these pies if not more.  You can use berries from the grocery store if you don't have access to the smaller, sweeter, local berries.  Actually, you can make this recipe all year long using imported berries.  Nothing wrong with that!  It's all good.

Once you make this recipe, you are going to want to make more.  Betcha.

Everyday Donna

Things to Remember:

Doubtless, God could have made a better berry (than the strawberry), but doubtless, God never did.
William Allen Butler


Tuesday, April 23, 2013

Strawberry Surprise Dream Cake


 Sunday was Dan's birthday.  This was his cake.  It is a strawberry surprise dream cake and I have been making it since forever.  My memory tells me I made this for our mothers on Mother's Day about 1970, the first year we were married.  It may have been the next year, but it was at the beginning  - BC (before children).  So, this recipe goes back a long way, whenever it was.  I tried to find out when this recipe first appeared, but had no luck.  I just know it's delicious even if it is an old recipe.

If you aren't familiar with Dream whip, it is a powdered non-dairy topping that fluffs up like whipped cream or Cool Whip when you make it.  It can be found in the baking aisle of most major grocery stores.  Dream Whip is made by Kraft and comes in boxes of 2 or 4 pouches.  For this recipe you need 3 pouches (of course), but I use real whipped cream for the filling and topping, so I only used 1 envelope for the cake itself.

This cake is filled with whipped cream and strawberries and is oh my gosh good!  The cake is a yellow cake that tastes like the best strawberry shortcake/sponge cake you have ever eaten.  Yum.  Yum.

The cake is baked in an angel food (or tube) pan.  It is removed after cooling and the top is cut off, part of the inside removed and then mixed with whipped cream and strawberries.  Seriously, what could be better than that?  Not much!

Here is what you need:

1 box 2 layer size yellow cake mix
1 envelope Dream Whip topping mix
4 eggs
1 cup COLD water

Combine all the ingredients in a large bowl and mix with an electric mixer until moistened.  Beat at medium speed for 4 minutes.  Pour into a greased and floured 10 inch tube pan.  Bake at 350 degrees F for 45 to 50 minutes.  Cool for 15 minutes in the pan.


Turn the pan upside down and remove cake from the pan.  Flip the cake over so it looks like this.  If that makes you nervous, know that I have never had one of these cakes fall apart.

Using a long bread knife, cut the top of the cake off - about 1 inche.  I start right about where the curve of the cake begins.  Lay the top aside until after you have filled the cake.  Now, using a small spoon, leave a 1/2 inch thick shell by removing the center of the cake.  Try not to cut through the bottom.
Cut the cake that you remove into 1 inch pieces and put aside.

Slice 1 quart of strawberries and sprinkle with 2 tablespoons of sugar.  Let the berries stand for 30 minutes.

Now, here is where I made a change in the original recipe.  The original calls for making 2 envelopes of Dream Whip according to directions which you can still do.  I used a 16 ounce container of heavy whipping cream and whipped it with a few tablespoons of sugar and a tsp. of vanilla until stiff peaks form.  You could also use Cool Whip if you prefer.  Either way, set aside 1 cup of the whipped cream and fold the rest into the berries to which you add 1 cup of the cake pieces.  Mix gently.  Spoon into the cake shell.
Replace the top layer that you cut off earlier.  Your cake should now look like this.
The cut line is barely noticeable.  This is where the surprise part of the came comes in!  Everyone is surprised when  you slice into the cake and there is all that sumptuous, delicious filling.  Try not to eat all the filling before you put it in the cake.  Holy cow it's good.

To finish the cake, spread the remaining whipped topping on the cake and garnish with more strawberries.  Oh.  So.  Yummy.

When  you cut into the cake, this is what you see.
Whipped cream and strawberries are all nestled in the middle of this wonderful cake.  It's like eating an inverted strawberry shortcake.  I know you want some!

If you want to push this right on over the top, add a large dollop of vanilla ice cream to a slice of the cake and some more strawberries in syrup.  Oh My!  Our 9 year old grandson ate 3 pieces of this cake.  He said it was the best cake ever and he doesn't usually eat strawberries!  How is that for a testimonial?

This recipe is in my poor old falling apart hand written recipe book that I have had since the late 1960's.  I'm glad I have now put it in my blog for future reference.  This poor book may disintegrate at any time and I do not want to lose this recipe.

The cake recipe is on the box of Dream Whip.  You can actually make the Dream Cake using any flavor cake mix.  The Dream Whip adds such a wonderful texture to the cake.  I have to say the yellow cake is still my favorite to this day although you could make this same cake in chocolate.  I know Dan would like that too!

Looking at this picture makes me wish I had a piece to eat right now.  Needless to say, it is long gone.  Give this recipe a try.  You will definitely add it to your recipe list to make again and again.  Remember strawberries will be in season soon and  Mother's Day is coming up and graduations - summer picnics!  Wow.  Delight someone with this fabulous cake.  They will certainly be happy that you did.

Everyday Donna

Things to Remember:


Just a few of the perfect excuses for having some strawberry shortcake.
Pick one.
(1) It's less calories than two pieces of strawberry shortcake.
(2) It's cheaper than going to France.
(3) It neutralizes the brownies I had yesterday.
(4) Life is short.
(5) It's somebody's birthday. I don't want them to celebrate alone.
(6) It matches my eyes.
(7) Whoever said, "Let them eat cake." must have been talking to me.
(8) To punish myself for eating dessert yesterday.
(9) Compensation for all the time I spend in the shower not eating.
(10) Strawberry shortcake is evil. I must help rid the world of it.
(11) I'm getting weak from eating all that healthy stuff.
(12) It's the second anniversary of the night I ate plain broccoli.  author unknown

Thursday, December 27, 2012

Cheesecake Filled Strawberries - Fabulous for New Year's Eve

Do you love cheesecake?   Strawberries?  Cheesecake with strawberry topping?  Then here is the perfect recipe for you that is SO much easier than baking a cheesecake.  Really, these are so simple and absolutely divine.  These would be perfect for New Year's Eve or a football Sunday or for dessert or just because.

Our youngest son has spent the last year living in California.  He made these one night for a backyard movie night and said they disappeared almost instantly.  I suggested he make some for Christmas Eve and let me tell you - they are as good as he said, maybe even better.

These cheesecake filled strawberries are really easy to make and here is what you need.


About 28 strawberries (we used 2 boxes)
1 8 oz block cream cheese, softened
4 TBSP powdered sugar
1 tsp vanilla

Cut the tops off the strawberries, wash and dry them,  and hollow them out with a pairing knife.  

To make the filling, beat the softened cream cheese with a mixer until smooth.  Add the powdered sugar and vanilla.  Mix until well incorporated.  Take a small zip lock bag and make a small cut to remove the corner.  We used a piping tip in the bag, but you don't have too.  It just makes it a little fancier.  Fill the bag with the cheesecake filling and pipe some filling int each strawberry.  Do your very best not to eat them all while you are making them.  That, my friend, will be a challenge!

Serve.

That's it.  How much easier is that than making a cheesecake?  You can also crush some graham crackers and dip the filled berries if you want.  We didn't want.  Your choice.

Not only are these beautiful to look at, they are amazingly delicious and easy to make.  What could be better?  Easy.  Delicious.  Beautiful.  Everyone will think you slaved for hours and hours making these.  Just don't give away the secret that you didn't.

While looking on Pinterest, I saw several variations on this theme and the one idea I might try next time is to dip the berries in chocolate after you fill them.  Chocolate covered cheesecake filled strawberries?  Oh my, oh my, oh my.  That would be somewhat like gastronomical heaven I think.

New Year's Eve is just around the corner and you might really want to consider these.  They are fruit after all and everyone needs fruit.  Right?  And, some cheesecake.  Right?  And, maybe some chocolate.  Right?  In these you get all three in one delicious bite.

Give these a try.  You are going to be SO glad you did and if you have to eat gluten free, these are right up your alley.  Just make sure your vanilla is gluten free.  Make.  Eat.  Enjoy.   It will make ringing in the New Year that much more enjoyable.  Thanks Tyler!

Everyday Donna

Things to Remember:

It's time to ring out the old and ring in the new.   May we increase in wisdom, love, and compassion and decrease our fears and judgements.  donna

Monday, March 26, 2012

Strawberry Frozen Pie with Vanilla Wafer Nut Crumb Crust

Happy Monday to you!  Hope your weekend was a wonderful one.  Thankfully, it rained just enough on Saturday to wash away some of the pollen that has been plaguing me and half the population in Nashville.  I have never seen as much pollen as we have this year.  Guess that's the payback for a mild winter, but I am willing to make the trade off.   Yes, I am having allergy symptoms, but I will deal with those for the time being.  The warm beautiful weather and beautiful blooming trees are worth a few boxes of tissues.

Our first born daughter and her family moved here in December, right before Christmas, which thrilled us all!  Her in-loves made their first visit this past weekend and we all had a cook out Sunday evening.  The entire Nashville family was there.  The weather was stunning, the grandsons all got to play outside to their heart's content and we got to catch up with Alma and Jack.  I play board games with Alma on FB just about every night, but we haven't seen each other in person for many years.  You know how you can pick up with some people right where you left off - never skip a beat?  That's how it is with them, they are such wonderful people.    We had a great time catching up AND they asked us to visit their summer home on the Maine coast which would be awesome.  Perhaps we will get there one of these days.  We definitely look forward to their return visits to Nashville, that's for sure!

Daughter #1 asked if I would make dessert.  Me?  Why of course!  Thanks for asking.  You know how I love to bake.  Because it has been so warm, I was in the mood for something summery and super delicious so I decided to make this Strawberry Frozen Pie which is outta sight!  I have been making this pie since the first year we were married (1969).  The first time I made it was for Dan's grandmother when she came to our house for dinner.  She loved it and I have been making it ever since.  It is actually a combination of two different recipes.  The crust is from a similar recipe, but it has egg whites in it and I don't trust serving raw egg whites, so I always used the filling from one recipe and the fantastic nut crumb crust from the other.  Here is what you need to make this excellent frozen pie:

Ingredients:

Crust

1 1/2 cups vanilla wafer crumbs
1/2 cup finely chopped nuts (I use pecans)
1 stick melted butter

Filling:

1 8 ounce package cream cheese, softened
1 cup dairy sour cream
1 1/2 cups sliced fresh strawberries, or 2 10 ounce pkgs frozen strawberries with syrup
1 cup sugar for fresh strawberries
1/2 cup sugar for frozen strawberries


Whipped cream or cool whip for topping (I made fresh whipped cream)

If you are making your own vanilla wafer crumbs (which I do), place about 1/3 box of vanilla wafers in a gallon sized zip lock bag, squeezing all the air out.  Roll with a rolling pin until you have small pieces - enough for 1 1/2 cups.  (I don't like the crumbs to be like dust, I like very small pieces, about the size of the chopped nuts).  I chop the pecans in my nut chopper.  If you don't have a nut chopper, use a knife and chop into small pieces.  Place vanilla wafer crumbs and nuts in a bowl.  Melt 1 stick of butter in microwave and add to vanilla wafer crumbs and nut pieces.  Press in the bottom and up the sides of a 10 inch pie pan.  I use my trusty corning ware pie plate that I got for a wedding gift.  I realize it is now an antique.  Sigh.  Put in the oven and bake at 350 degrees for 8-10 minutes.  Cool before filling.


Using a mixer, blend cream cheese and sour cream  in a mixing bowl until well mixed.    Mix 1 1/2 cups sliced berries with 1 cup sugar and stir.  Add to cream cheese mixture.  (If using frozen berries, thaw berries and add 1/2 cup sugar and mix.  Add to cream cheese mixture.)  Blend with a mixer to break up strawberry pieces, don't completely pulverize.  You want some strawberry pieces in the filling.    Pour into crust.

 Freeze until firm.  I usually freeze overnight.  Remove from freezer about 5 minutes before serving and decorate with whipped cream.   That strawberry in the middle of the pie  in the picture is HUGE.  Kroger had giant California strawberries on sale and I do mean GIANT!  They were delicious.


How to make whipped cream:

Put 1 pint heavy whipping cream in a deep bowl and beat with mixer on medium high until it starts to thicken.  Add about 2 Tbsp sugar and 1/2 tsp vanilla.  Beat until it forms stiff peaks.  Don't over beat or  you will have butter.  It should look like this.
I piped the whipped cream onto the top of the pie by placing it in a gallon sized zip lock back after cutting a corner off the bag and placing a large star tip in the hole.  Fill the bag with cream and pipe on however you want.  Now, this is a lot of whipped cream and I actually used part of it for the cheese cake I will write about tomorrow.  Just thought I'd let you know.  You could actually use about 1/2 of a pint of heavy whipping cream.

Now, let's discuss this pie.  Description?  Heavenly!  Delicious!  Amazing!  Fantastic!  Awesome!  Divine!!  And, it's really super easy.  Our 8 year old grandson doesn't like strawberries much, but he said it was the best pie he had ever eaten!  Today's endorsement from the world's pickiest eater.  Made me smile.  Jack and Alma raved about it - especially Jack who likes fruit type desserts, so it was definitely a good choice.  (Wait till we get to the cheesecake).  

Put this recipe in your arsenal and pull it out when you want something quick, easy, fantastic and special.  Summer is just around the corner and this pie is so good for warm summer days.  Think about making it for Easter, Mother's Day or Father's Day.  You will get requests to make it again.  The nut crumb crust is maybe the best crust ever and so much easier than a traditional pie crust.  The filling - well I could just eat it with a spoon right out of the bowl - it's somewhat like ice cream or frozen yogurt only better.  The combination of the crust with the filling - they write novels about those kinds of things.  That's all I can say about it.  You will just have to make one and eat it to understand.

Everyday Donna

Things to Remember:

Good friends are like stars.....you don't always see them, but you know they are always there.  author unknown

Thursday, February 9, 2012

Make A Pretty Pineapple Fruit Platter

Fresh, sweet, juicy, delicious pineapple.  My research said pineapple is second only to the banana as America's favorite tropical fruit.  For me, it would be the most favorite fruit!  Oh, pineapple is so good.  Years and years ago, I found an article in some magazine or the other that showed how to make a "pretty pineapple" as I call it and I have been serving them this way ever since.  I have cut them up for many people, including our daughters, but it's really not difficult.

Pineapple is what I would call an awkward fruit.  It's hard and prickly and rolls around and  how do you cut one up?  Since it comes in cans and is usually cut in rings, we tend to think of serving it that way.  You can also cut it in chunks or you can cheat and buy it at the grocery already cut up.   Don't do that.  Try making your own "pretty pineapple."

Native to southern Brazil and Paraguay (perhaps especially the Parana-Paraguay River) area where wild relatives occur, the pineapple was apparently domesticated by the Indians and carried by them up through South and Central America to Mexico and the West Indies long before the arrival of Europeans. Christopher Columbus and his shipmates saw the pineapple for the first time on the island of Guadeloupe in 1493 and then again in Panama in 1502. Caribbean Indians placed pineapples or pineapple crowns outside the entrances to their dwellings as symbols of friendship and hospitality. Europeans adopted the motif and the fruit was represented in carvings over doorways in Spain, England, and later in New England for many years.  Wikipedia


No, pineapple didn't come from Hawaii.  Just thought you might like that little bit of history.  Can you tell I have been married to a history teacher for 42 years?


How do you choose a "good" pineapple at the market?   They never get more ripe than they were at the time of harvest, so it's not you picking the wrong pineapple, it's the pineapple.  Everything I have read says try to get a heavy pineapple - that indicates a lot of flesh and juice.  Smell the bottom of the pineapple - you want a sweet pineapple scent.  Also, pull one of the inner leaves from the crown.  If it comes away easily, the pineapple is ripe.  A pineapple can be left on the counter for 1-2 days before using.  If you don't use it within that time, put it in a plastic bag and keep it in the refrigerator.  It will be good for another 3 days.

Now, how exactly do you cut up a pineapple?  Here is how I do it.  Twist or cut the leafy top off and discard.  Sit the pineapple on a cutting board upright, and using a long serrated knife, cut it in half and then in half again so that you have 4 quarters.  Now, to make a "pretty pineapple."

Take the same knife and remove the core from each quarter.  Sorry, I forgot to take pictures of that process, but you can see and "feel" where that hard core is.  After you remove the core from each quarter, your pineapple will look like this.

See how you have a nice flat top where the core used to be?  That's what you want.  Next, take your long serrated knife and start at one end of the yellow fruit (inside the area that is kind of hard) and cut the fruit in about 3/4 inch segments all the way down to the the other end.  Cut all the way down to the bottom of the soft fruit until you hit the hard outer part of the pineapple.
Next, take your long serrated knife, and starting at one end where you made your first cut, cut underneath all the segments you made, cutting from one end to the other.  Then, slide the segments in opposite directions all the way down, making your fruit look like this.

See?  It's a pretty pineapple.  Repeat this process with all four quarters.  It is not hard, just take your time.  It really doesn't take that long to do.  Now, use  a large platter or tray and arrange your pineapple.  I have some big round glass plates that I use, and I also have a silver tray that I use from time to time.    I place the pineapple quarters at north, south, east and west and then fill in between with other fresh fruit.  You can decide how you want to arrange yours.
Fill in with fruit that you like.  For Superbowl Sunday, I used strawberries, grapes and kiwi as you can see in the picture above.  If you are using fruit that will brown, like apples or bananas, squeeze some lemon juice over them to keep them from browning.  You could also put a bowl of fruit dip in the middle if you wanted.

I always try to have a fruit platter for those who don't eat dessert or have dietary restrictions.  Not only is fruit healthy, it is delicious.   The grandsons love it!

Next time you have a party or company coming over, make a "pretty pineapple" and fill in with additional fruit of your choosing.  You are going to get some oohs and aahs and questions about how you made such a lovely dish.  Just tell 'em Everyday Donna told you how.

Everyday Donna

Things to Remember:

Love is a fruit in season at all times, and within reach of every hand.   Mother Teresa

Wednesday, February 1, 2012

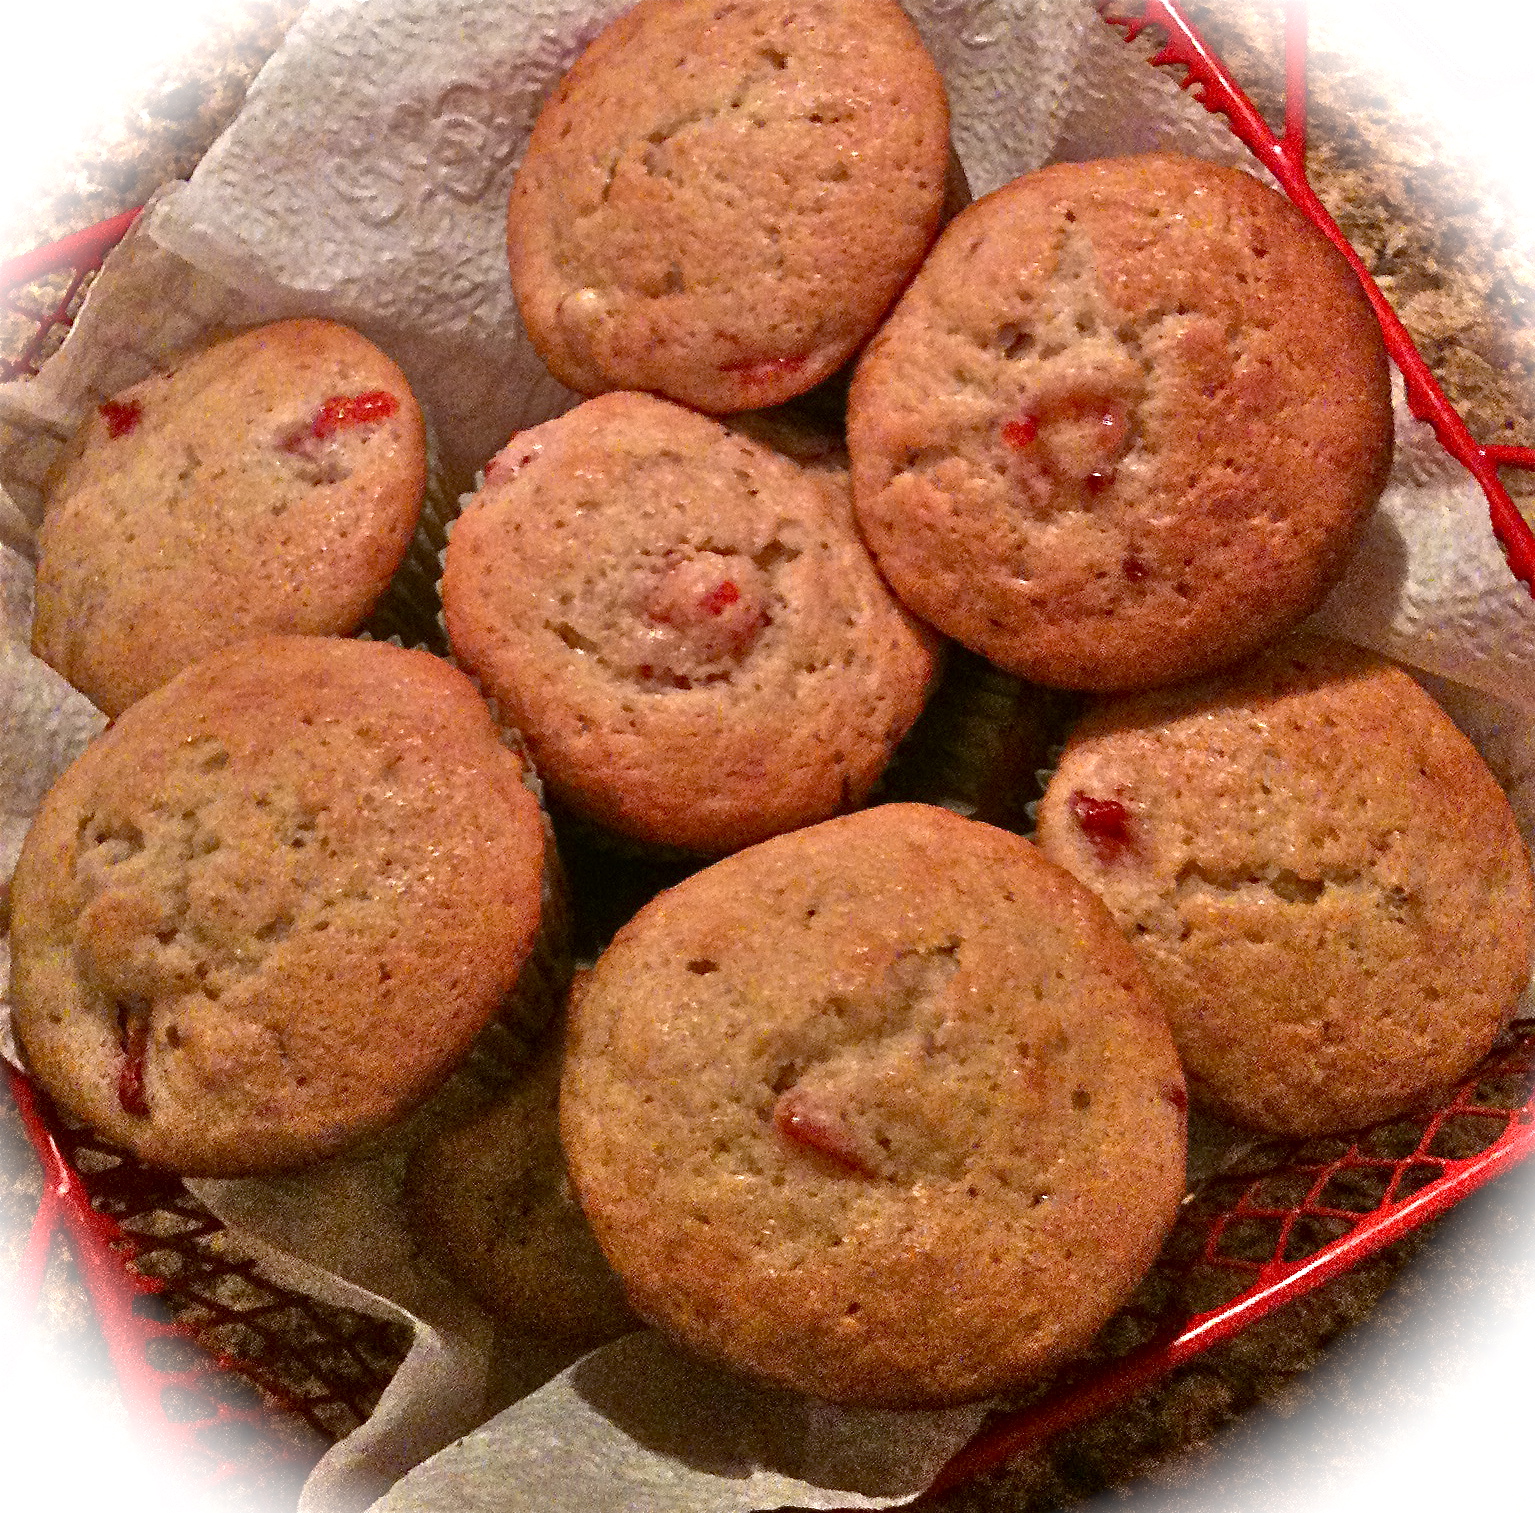
This Is For You Corrie - Strawberry Banana Muffins

What is it about a nice warm muffin that is so comforting?  They are good for breakfast, lunch or dinner and even as a snack - especially with a big glass of milk or a hot cup of coffee.  Sit down, prop your feet up, peel that paper back and enjoy every morsel.  Mm Mm Mm  What does Starbucks and most coffee shops tempt you with but a case full of muffins in different flavor varieties.  If they have streusel topping, they are even more tempting.  Here is a recipe you can easily make for way less than Starbucks charges and they are twice as good because they are made with love.

Our grandsons are muffin lovers, probably even more than cupcakes.  The really great thing is you don't need a plate and a fork to eat them.  Even better.  Therefore, I try to bake them often so they have some to munch on when they are here.  Last night, I baked these strawberry banana muffins for dinner and they were terrific with the chicken, broccoli casserole that I wrote about yesterday.  Here is what you will need.

Ingredients:

1/2 cup melted butter
2 eggs
1 tsp vanilla
1 cup mashed banana (about 2 large)
1 cup chopped strawberries
2 1/4 cups all purpose flour
1 cup sugar
1 1/2 tsp baking powder
1/4 tsp baking soda
1/2 tsp cinnamon
1/2 tsp salt
1/4 cup milk

Directions:

Preheat oven to 400 degrees

Line muffin tin with papers  (makes 12)

Melt butter and let cool to room temperature.  Stir together eggs, mashed bananas and vanilla. (I mash my bananas with a potato masher or you can use a fork.)  Add cooled butter to this mixture.

Sift dry ingredients together.  Add berries to the dry ingredients and mix, making sure all the berries are coated well.  This will keep them from sinking to the bottom of the muffins when baking.

Add wet ingredients to dry ingredients until just combined.  Add 1/4 cup milk.  I used a fork, don't over mix.  It will make your muffins tough.  This batter is pretty dense, so don't be alarmed.

Fill each muffin cup 3/4 full.  I used a heaping 1/4 cup measure to fill mine, or you could use an ice cream scoop.  Bake 18 - 20 minutes at 400 or until nice and brown on top.  Remove from oven and enjoy!!


Dan and I had a muffin for breakfast this morning and they were maybe a little better than they were for dinner last night - if that is possible.  Yum.  Yum.

If you want to make some memories with your children, let them help when you are doing simple baking projects like muffins.  They will really appreciate what goes into the process and will be so proud to have contributed to the final product.  Nothing like a muffin made with love.  Enjoy!

Everyday Donna

Things to remember:

One of my proudest moments from childhood was the cake I baked from scratch when I was 9 years old.  My grandmother helped me and it was crooked as can be, but the best cake I ever ate.  One of the best memories ever.  Led to a lifetime love of baking.♥

Friday, January 20, 2012

Not Your Mama's Banana Pudding!

Ooooooh, doesn't that look divine?  Well, it is!!  It's hard to tell from the picture exactly what it is, but it is a dessert that the recipe calls banana pudding squares.  It's relatively simple, but  (of course), after making it I have a couple of ideas that I would do next time to kick it up a notch.  This time I followed the recipe except for the strawberries and chocolate (my addition).  Believe me, it's quite okay this way.

Do you like banana pudding?  My dad was raised in Kentucky during the depression and they were quite poor, but they lived on a farm and grew most of their food which was a blessing.  He was never much of a dessert eater (mostly a meat, potatoes, greens and beans kind of guy), but one of his all time favorites, as far as desserts go, was banana pudding.  My mom didn't make a lot of desserts, but once in a while she would whip up a banana pudding for Sunday dinner.  That always made dad happy.

This recipe is not your typical banana pudding and there is the perpetual argument whether to use Vanilla Wafers or graham crackers.  Dad was a Vanilla Wafer guy, so Vanilla Wafers it was.  This recipe also uses Vanilla Wafers.  I'm not a purist, so I can go with either one.

Did you know there is a banana pudding festival?  There sure is!  It will be held October 6, 2012 in Centerville, Tennessee, and here are the directions to get there just in case you want to go:

LOCATIONS/DIRECTIONS

East from Memphis or west from Nashville. Take I 40 to exit 148.
Turn South toward Centerville on Hy 50. Go 15.5 miles to Lower Shipp Bend RD.
Turn Left. Go 1 mile.
From I 65, take exit 46(Columbia/Chapel Hill) and go toward Columbia on Hwy. 421 about 12 miles. Take Hwy. 50 toward Centerville about 25 miles. Turn left on Hwy. 50 West, go 2 miles to Lower Shipps Bend Rd. and Turn right. Go 1 mile.

  In case you weren't aware, banana pudding is a Southern staple - more than a staple, it is expected.  Church dinners, Sunday dinner, summertime treats, pot lucks, nighttime snack - it's banana pudding!  Well, there are a few others, but banana pudding is mandatory - it is a necessity to have at least one banana pudding on the table!

The recipe I am using here comes from Kraft, Inc., and it can be made low fat and reduced calorie by using low fat cream cheese, lite Cool Whip and sugar free instant vanilla pudding.  But, where's the fun in that?   I went for the gusto!  Here is what you need.

Ingredients:

35-40 Vanilla wafers, crushed
1/4 stick butter, melted
12 ounce container cool whip
1 8 oz block cream cheese, room temperature
3-5 bananas depending on size
2 boxes vanilla instant pudding
3 cups cold milk

I used fresh strawberries and some dark chocolate to decorate the top.

First:

Crush 35-40 Vanilla Wafers.  I put them in a zip lock bag and crushed them with my rolling pin by rolling it back and forth over the bag.  Melt the 1/4 stick of butter in the microwave and add it to the Vanilla Wafers that you have placed in a small bowl.  Mix them together and put them in the bottom of a 9 x 13 pan.  They are still kind of loose and crumbly, not like a baked crust.
Put the pan in the refrigerator until ready to add other ingredients.

Next, mix the 8 oz block of cream cheese and 1.5 cups of Cool Whip.  I used my hand mixer to make sure it was well mixed.  Place big "blobs" of this mixture over the Vanilla Wafers and smooth it out.  Using the back of a spoon makes it easier.  It will look like the next two pictures.

Now, slice your bananas and cover the entire surface of the cream cheese/cool whip mixture.  I used 4 bananas because mine weren't very big.  You can just play it by ear.  I cut one up at a time and placed them so I didn't peel and cut too many.

Now, make the instant pudding by placing both packages in a deep bowl and adding 3 cups of cold milk.  I mixed it with a hand mixer until it began to thicken.  Pour it over the bananas and spread evenly over the entire pan.

I put the pan in the refrigerator for about an hour until the pudding was completely set.  I removed it from the "fridge" and put a nice coating of Cool Whip over the pudding mixture.  You may have a little Cool Whip left or feel free to use it all!  It's up to you.

This is where I got decorative  - and where I would make a few changes next time I make it.  I sliced some strawberries and placed them on the top so that when I cut the pudding into squares, each piece would have a strawberry in the middle.  Next time, I would put a layer of sliced strawberries over the bananas before adding the pudding.  The strawberries are scrumptious with the pudding!  Then, I would add a few more on top for decoration.

We had some dark chocolate wafers that we had bought at World Market, the kind with krispy things in them.  (yum)   I used a paring knife and cut them into small crumbles and sprinkled them over the top.  They make the pudding super extra special, but I would add some more next time!  Chocolate and strawberries with bananas make you think of what?  Banana split?  Uh huh?  That's right!  Oh My Goodness!  Now we have a whole new level of dessert!  Yes indeed!!  This is how it looks "inside."
If you let it get good and cold, it serves up into nice "squares."  Hence, the name.

I am sitting here eating a small mound of this delectable dessert while I type this blog post.  Let me tell you, it is more than good!  Talk about childhood memories with a kick!!  Wowee!  It is super good with a lovely cup of hot coffee too!  Now, you are probably drooling and looking around to see if you have any bananas in the house.  If not, run out now and get some.  You have got to try this one!

Everyday Donna


Things to Remember:

One of Elvis's favorite things was banana pudding!  : )

Tuesday, July 12, 2011

Sizzling Summer Salad Solutions

Hot, humid, muggy days make you rethink eating.   Nothing sounds good.  No one wants to fire up the stove and make the kitchen even more miserable.  This is an answer to the dilemma.  Simple.  Quick.  Relatively inexpensive.  Delicious.  What more could you ask for?

I made this salad for our family in Dallas when we visited, and my daughter requests it when we visit.  Talk about hot!  It was 110 in the shade.  Nobody wanted to cook.

To the salad, add some grilled chicken that has been marinated in olive oil, lemon juice, garlic and rosemary.  Now we're talking!

This is what it looks like when you serve it and oh my, is it good!  Cool, crunchy, sweet fruit, smokey chicken, candied pecans.  Yup.  That is a summer meal worthy of any hot, miserable day.  Here's how you do it.

Ingredients:

Boneless, skinless chicken breasts (I used 3 cut in half because they were so thick.  Three for $5.00 at Aldi's)
1/3 cup good extra virgin olive oil
1/3 cup fresh squeezed lemon juice
1 large clove garlic minced
1 Tbsp rosemary - fresh, minced  (you can use dried if that's what you have)

Because the chicken breasts were so thick, I cut them in half horizontally to make sure they would cook through quickly on the grill.  Salt and pepper both sides.  Mix the marinade and put into a gallon zip lock bag.  Put the chicken breasts into the marinade and "moosh" around to make sure they are covered with the marinade.  Put the bag in a bowl in case it leaks.  Place in the refrigerator for 1 to 1.5 hours.

Grill until just done.  You don't want them to be too dry.  Cut a slit in the center to make sure they are not pink and that juices run clear.  Remove from the grill when done.

Salad:

1 5 oz bag mixed spring greens or your favorite greens (1 bag from Aldi's $1.29)
1 container strawberries, topped and quartered
1 large hand full fresh blueberries (or as many as you would like)
1 small can mandarin oranges, drained
3 scallions sliced, whites and greens
5 baby carrots cut into very thin medallions
1 cup grapes, halved
 Mix in large salad bowl

Candied pecans:

1/2 cup pecan pieces or pecan halves (which you can cut up)
2 Tbsp granulated sugar
2 Tbsp water

Mix water and sugar in a small saucepan until sugar dissolves.  Place on the stove and add pecans.  Stir for several minutes while sugar mixture bubbles.  Pecans will become shiny as the sugar mixture coats them.  Watch closely, do not let burn!  Stir constantly.  Remove from stove.  Cut into pieces if using pecan halves.   Add to the large salad bowl.

I used two deep soup bowls and filled them with the salad.  I cut one of the chicken breasts for each of us and placed it on top of the salad.  (That's actually 1/2 of a whole breast)  I used a raspberry vinaigrette on my salad.  Dan doesn't eat dressings, so he used salt and pepper only.  You can use any dressing you prefer.

Not only is this a pretty salad to look at (we eat with our eyes first), it is so cool, refreshing and enjoyable.  You can get your daily allotment of fruits and veggies and not feel over stuffed when you are finished.  We have left overs for tomorrow and several chicken breasts that can be used in another recipe later in the week.  That means, little or no cooking while this sweltering heat hangs around.   I don't know about you, but I'm looking for simple and easy right now.

Give this recipe a try.  It will quickly become one of your summertime favorites.  Quick, easy, delicious, inexpensive.  Add some crusty bread and you are ready to eat.  Ideal for any summer meal.

Everyday Donna

Things to Remember:

Respond to every call that excites your spirit.
Rumi ♥