Wednesday, May 1, 2013

Make A Rustic Trellis From Fallen Tree Limbs

 So today, we are going to talk about making this rustic trellis.  My inspiration came from a picture that I saw on a Facebook page for Two Women and a Hoe.  Do you follow them?  They post beautiful pictures with lots of inspirational ideas.  Be sure and check them out.  They have a landscaping business and have a lovely web page by the same name.

If you have never been to middle Tennessee (Nashville), you may not realize how much foliage and how many trees there are here.  There are SO MANY trees and I am a big fan.  Trees are free for the looking.  They not only help us breathe by taking our carbon dioxide and emitting oxygen, but they add to the beauty of our lives.  They give us shade, and comfort.  Nothing like spending a summer day under a huge shade tree with your favorite book.   This is our view from our deck.  How beautiful to sit and watch the trees.

They rustle and blow in the gentle breeze or whip about and gnash in fury during storms, breaking and falling.  Trees provide homes for many animals on our planet.  Trees provide food, fruits and nuts, for us to enjoy.  Fall foliage is a delight to behold with the leaves blazing gold, red, orange, and rust.  Bare, solemn winter trees show us their skeletons and their inner beauty while we wait for spring to bring us beautiful blossoms and leaves once again.  Trees are a true representative of the cycle of life and nature.  As Joyce Kilmer wrote, "I think that I shall never see, a poem lovely as a tree."  I couldn't agree more.

Many of the trees in our yard are well established - actually, quite old.  Every time the wind blows hard, we get some big sticks dropped in the yard.  We also have a ton of small sticks that have to be picked up every time the yard is mowed - that's a minor price to pay for all our lovely trees.  As the limbs fall, Dan takes them to a pile at the back of our yard right at the edge of the woods behind our property.  Woods = more limbs.  : )

You know how you keep looking at something and wondering what you could do with it?  All those fallen limbs had to be good for something besides fire wood.  Well, here is the perfect solution.  A very rustic, hand made trellis.  It's easy to make and adds a lot of character to the yard.  I was so excited to get started on it.

First, we picked out a bunch of limbs that were close in size for the vertical pieces and the horizontal pieces.  (I can't tell you how many you will need, just choose quite a few.  It all depends on the size and look you want.)  Then, I laid them out in the grass to get the look I wanted.
I moved the horizontal limbs around a few times to get them in exactly the right place.  Next, I used zip ties that I got at Home Depot.  They are black and will not disintegrate in the weather.  The colored zip ties will, so be sure and get the black ones for doing this project.

I started with the outside limbs first, where the horizontal limbs intersected with the vertical limbs.  Using needle nosed pliers, I pulled the ties as tight as possible.  After securing the outside limbs, I went up the inside limbs and secured those the same way.  I used this method so the trellis would not get out of shape as I worked.  It is easier than trying to work straight across each limb as you go.

After all the limbs were secured, I cut the long tails off the zip ties.
 To hide the zip ties, I cut lengths of jute several yards long, folded each length in half and tied them around each zip tied intersection to give the trellis a more rustic look.  Plastic does not always lend itself to "rustic" if you know what I mean.
The trellis looks like it is tied together with twine instead of zip ties.  That is much better for a really rustic look.  My trellis is about 6.5 feet tall and 4 feet at the widest point.  You could make yours any size you want.  The inspiration trellis from Two Women and Hoe looked to be about 3.5 or 4 feet tall.  It was on a fence between upper and lower cross bars.  Mine sits on the ground.

I knew the trellis needed "something".  I had a grapevine wreath that I hung from one of the protruding limbs, but that didn't do the trick.  Birdhouses.  That's what it needed and I have a thing for birdhouses and birdcages.  Michael's has lots of unfinished birdhouses that are quite inexpensive.  I found two that I liked and painted them in bright colors to go with Mr. Drag N. Fly from yesterday's post.  Dan put a couple of screws in them and I made wire loops to hang them with.  Yes, that did the trick.

It was very exciting finding a bird house in the shape of a star (my other obsession).  Aren't they adorable on the trellis?  Our grandson wanted to know where the birds were for the houses.  He always asks the hard questions.  I told him we would have to wait and see if any of them could get a mortgage. He looked at me very strangely.

Today, we went to the Farmer's Market and I bought a vining plant called a candy corn plant that will vine up the trellis.  The tag said it is quick growing - I hope!  Most vining plants require full sun, but this one will work in partial sun.  Our yard is very shady.  We'll see what happens.  The plant is called candy corn because it produces orange blossoms with yellow tips.  I can't wait to see it bloom and  grow.

Now, we have another little "meditation" garden spot that is so inviting.  As the begonias grow, and everything fills it, it will be so lovely all the way to the first fall frost.

Take a look around your yard.  How many natural elements do you have that could be used to decorate your outdoor living space?  Don't throw away all those fallen limbs.  Put them to use.  Make a rustic trellis for your yard and decorate it to suit your tastes.  Have fun.  Be imaginative.  Let me know what you make.

Everyday Donna

Things to Remember:

119.  Trees

I think that I shall never see
A poem lovely as a tree.

A tree whose hungry mouth is prest
Against the sweet earth's flowing breast;

A tree that looks at God all day,
And lifts her leafy arms to pray;

A tree that may in summer wear
A nest of robins in her hair;

Upon whose bosom snow has lain;
Who intimately lives with rain.

Poems are made by fools like me,
But only God can make a tree.

Joyce Kilmer  1886-1918


Tuesday, April 30, 2013

Mr. Drag N. Fly Made From Ceiling Fan Blades

 It's an absolutely fabulous day here in Nashville.  The sky is cerulean blue, the sun is shining, it's 80 degrees and all's right with the world.  Truly.  This was my view this morning.  Stunning.

We spent the entire morning out of doors planting all the flowers that have been patiently waiting for their new homes.  Finally.  Our 2.5 year old grandson helped Grandma with her planting.  Nothing makes that little guy happier than a "shuggle" and some dirt.
He had a good time getting his hands dirty and so did Grandma.

Last year about this time, we worked on creating a little secret garden.  The grandsons love to go in it and sit on the bench and look at the plants - NOT.  They like to go in and dig in the rocks that are the floor of  the garden.  That's what they like to do.  This week, I have been working on another little "meditation" garden space.  I don't know about you, but there is so much inspiration on the world wide web for things to do and make that I could spend every hour of every day working on something.  The list is never ending.

There are two items in the picture above that I am going to share with you.  Today, we are going to talk about Mr. Drag N. Fly on the fence. That's what I told Adrian his name was.   Adrian was totally disappointed that it could not fly or that the wings did not move.  Try explaining "it's just a decoration" to a 2.5 year old and good luck.

Ever done any research on dragonflies and damselflies?  If you get a chance, google images for them.  They are SO beautiful.  Their colors are absolutely electric with such delicate wings with beautiful designs on them.  Nature gives us such amazing things.  Wish I could make mine look like a real one.

This dragonfly is something I have seen on several web sites, at craft shows, and on Pinterest of course.  They are so cute and totally caught my eye.  I knew one would be perfect on the long expanse of plain wooden fence in the back yard.  So, I set out to make one.  We didn't have any old ceiling fan blades to recycle/reuse, so I headed to my home away from home, Home Depot, to buy some.  You can buy replacement ceiling fan blades in packages.  Thankfully.  A package of 5 fan blades 42 inches long were $15.95.  Not too bad.  Would have been better if I had some to recycle, but not this time.  Ceiling fan replacement blades come in 42 inch and 52 inch lengths.  Choose the size you would like to use.

For the body, I used a spindle that would go in a stair bannister or deck rail.  It was $4.95 at Home Depot.  You might have an old table leg or something you could use on hand.  Here is what you need.

4 fan blades
1 table leg or spindled post
several tubes of Super Glue gel (3 in a package for a dollar at The Dollar Tree)
2 wood screws
a drill
primer paint (like Zinsser)
paint (acrylic craft paint works fine)
paint brushes (I used 1 inch foam brushes, and a small brush for the narrow spaces)
Acrylic sealer or polyurethane

First, lay the fan blades on a flat surface and mark around the curved ends with a pencil so you will know exactly where to put the glue.  Spread the contents of 1 tube of the super glue gel on the bottom fan blade for each pair (2 tubes) and lay the upper blade where the markings are.  Marking is important so your "wings" will be at the same angle.  Put a weight on the blades until they dry.  FYI, this glue sets up really fast.  Only takes a couple of minutes.  Don't get it on  your hands.  Don't ask me how I know that.
Next, lay one pair of glued blades over the other pair of glued blades and mark with a pencil.  Put the contents of another tube of glue inside the pencil line all the way to the edge and place the set of blades on the glue.  Weight down with something heavy until the glue sets.
My weight was a jar of nails and screws that Dan brought to use for putting everything together.  Does your feller save every screw, bolt, and nail that comes his way?  Dan saves everything.  That's why they look all rusty.  They  may be prehistoric.  It's possible.  His motto is "never throw away a perfectly good ......".  I don't even want to talk about the balls of twine.

Anyway, time to attach the body to the wings.  Use another tube of Super Glue on one side of the spindle and place it on the wings.   Weight down until dry.

When the glue has set, flip the whole thing over and place two wood screws through the blades into the post to hold it all together.  Consider this overkill to keep it from all falling apart in the heat of summer.
The spindle is wood, but the fan blades are not.  They are plastic or some kind of composite and paint does not like to stick to them very well.  Therefore, it is important to prime before painting.
My primer was in a spray can (which goes really fast).  Just lay down something to protect the ground or whatever you will be spraying on and go to town.  Easy peasy.

Now, it's time to paint.   I used acrylic craft paint for my dragonfly and some 1 inch sponge brushes.  It's wise to have a small brush to get in the narrow spaces.  My research showed the beautiful, vibrant colors of dragon flies so I went with bright colors.  They also show up better against the wooden fence.  I used a turquoise color for the body, lime green for the wings with hot pink and electric blue decorations on the wings.  Choose whatever colors you would like.


 A round sponge stomp and the end of a paint brush worked great to make the dots.  I painted two eyes on the "head" and used some wire to make some antennae.  Dragonflies have small antennae.  Then, I sprayed the whole thing with clear acrylic spray to protect it from the weather.

I put a couple of wood screws in the back of the finished dragonfly and wrapped some wire around them, making loops for hangers.  Dan put a couple of wood screws in the fence to hang Mr. Drag N. Fly on.   Done.  Isn't he adorable?

Come back tomorrow and we will discuss the hand made trellis in the picture that is leaning against the fence.  I am in love with it.  It's easy and unique.  If you have any ideas what I could use that extra fan blade for, let me know.  It's gonna drive me crazy.

Everyday Donna

Things to Remember:

All gardening is landscape painting.  William Kent


Monday, April 29, 2013

An Original Porch Sign For Under $20.00


 Happy Monday one and all.  Hope you had a great weekend.  It was rather soggy here in middle Tennessee and when I say soggy, I thought we were going to have to get out the gopher wood and start building an ark.  It rained and rained and rained some more.  I know we need rain, but it is not my favorite weather condition.  I prefer moderately warm, 70ish something and sunny.  But then, I guess we would all prefer that.  We are about to say goodbye to April (where has it gone).  It has been a real mixed bag weather wise.  It has been much cooler than the last two springs we experienced here and a whole lot wetter.  Guess we just have to live with it, although we live right across the street from the Cumberland River and mama, it is rising.  

Since we had such icky weather and no baseball games this weekend, I worked on some projects for our out of doors living space.  One of them was to make the sign above.  I have seen signs with "porch rules" on them, but I didn't want to make them rules.  There are enough rules in the world and no one wants rules for sitting on the porch.  Right?  I just thought of things we like to do on the porch and then put them on our sign.  This is for whomever wishes to join us on the porch, young and old alike.  Porch sitting is all about relaxation, putting your feet up, dreaming, napping, enjoying company, and making memories.  So, that is where my list came from.

Dan built the frame for me out of 1 x 2 wood.  The frame is 3 feet by 2 feet with a support in the middle.

Then, we used wood that is for replacing broken pieces on lattice.  It's thin and easy to work with and  comes in a bundle of about 12 pieces, 8 feet long and 1.25 inches wide.  It is available at Home Depot and Lowe's.  He cut the pieces the width of the frame and nailed them to the frame after I had spaced them where I wanted them to be.
Color was my next decision and I chose a green color because I thought it would look good against the yellow house and the white lettering would show up nicely.  I spray painted the front and the back with several layers to make sure there was good coverage.

Next, I hand lettered my "list" onto the boards because I didn't want it to look like a pre-made sign.  I used a small square shader brush to do the lettering.  No, it's not perfectly even nor does it look like a professional did it, but that's the look I wanted.  The final step was to spray the sign with a clear acrylic spray to help protect it from the weather.  The sign hangs under the eaves and will not get totally soaked when it rains, but the extra protection will help.

 The sign is rough and somewhat rustic - just the way I wanted it.  Have to say I am very happy with it.  Here are a couple of views.

The sign helps fill a big blank space on the deck wall and it adds a lot of color and "hominess."  Since we spend as much time as we can out of doors in the summer, I want our space to be comfortable and inviting.

You can see some of my concrete planters on the deck rail and they look really great there.  I have so many flowers to plant and hopefully it will dry up for the next few days so I can get that job done.  We are having company later in the week and I want everything to look spiffy for our guests.

This project was under $20.00 to make and it is colorful and original.  Hopefully, it will make all our porch/deck guests feel welcome and relaxed all summer long.

Everyday Donna

Things to Remember:

Making original art makes your spaces unique and inviting.  Pinterest and the "blogging" world have so many ideas to draw from.  Have fun.  Be creative.  Make art.  donna

Wednesday, April 24, 2013

Pecan Pie Muffins AKA Pieces Of Heaven

Do you say "pee-can" or "peh-cann"?  I am a "peh-cann" kind of girl.  Southerns tend to say "pee-can".  Either way, these pecan pie muffins are so good.  I mean really good.  Extra specially good.  Divine in fact.  The recipe was emailed to me by my sister.  I have no idea where she got the recipe, but am I ever so glad she did.  They are just like eating little pecan pies.  Seriously.  What could be better?

It was raining cats and dogs this morning and our two and a half year old grandson was spending some time with us while his mom worked on a writing deadline.  We couldn't go outside, so I asked him if he would like to help me make some muffins.  He is a "mini chef" and is ALWAYS up for baking.  I also love having him share the kitchen with me because we are baking memories.  (Did you catch that?  That's not a typo.)

If I took a survey among the male members in our extended family concerning their favorite pie, I know that the answer would be pecan.  How do I know that?  Because I make them for holidays and upon request.  Therefore, why wouldn't they love these delectable little pieces of heaven?  They are much easier to make than a pie and taste just like eating a piece of home made pecan pie and you don't have to fool with a crust.  Even better!   Here is what you need:

1 cup packed light brown sugar
1/2 cup all purpose flour
1 cup chopped pecans
2/3 cups super softened butter
2 whole eggs beaten

Grease a muffin tin - and I mean REALLY grease the cups because these muffins are sticky and you don't want to lose one precious morsel.  Don't use paper cups.

In a medium bowl, combine the brown sugar, flour and pecans.

In a small bowl using an electric mixer, beat the eggs and add the super softened butter, continue beating until smooth.  Add the sugar mixture and thoroughly mix.
The batter looks kind of like chocolate chip cookie dough only not quite as stiff.

Fill the muffin tin cups 2/3 of the way full.   Bake for 20-25 minutes at 350 degrees Fahrenheit.


I used a muffin tin that is not real deep and I got a dozen muffins.  The recipe said  it makes 9 - just so you know to double the recipe because these won't last very long at all!!  They are a little crispy around the top edges and chewy and delicious in the center.  Aaaaaaaamazing.  I could see eating them with some whipped cream on top or a nice dollop of vanilla ice cream.  (Note to self.)  Mmm mmm mmm.

Dan ate one, and then insisted that he really needed another (who can blame him?).  Holly ate one when she came in and declared them fabulous.  Yes, I have had one (or two) myself.  They are sooooooooo good - especially with a nice hot cup of coffee (like now).  Yes, I ate one while typing this.  I just couldn't resist.  Now you want one don't you?

If you like pecan pie, or anyone in your family likes it, give these a try.  They are easy and delicious.  Two really good words in combination, don't you think?  Start preheating the oven.........

Everyday Donna

Things to Remember


Commander Charles Trip Tucker III:  (about pecan pie)  May not be good for the body, but it sure is good for the soul.    (from the movie Enterprise, 2001)


Tuesday, April 23, 2013

Strawberry Surprise Dream Cake


 Sunday was Dan's birthday.  This was his cake.  It is a strawberry surprise dream cake and I have been making it since forever.  My memory tells me I made this for our mothers on Mother's Day about 1970, the first year we were married.  It may have been the next year, but it was at the beginning  - BC (before children).  So, this recipe goes back a long way, whenever it was.  I tried to find out when this recipe first appeared, but had no luck.  I just know it's delicious even if it is an old recipe.

If you aren't familiar with Dream whip, it is a powdered non-dairy topping that fluffs up like whipped cream or Cool Whip when you make it.  It can be found in the baking aisle of most major grocery stores.  Dream Whip is made by Kraft and comes in boxes of 2 or 4 pouches.  For this recipe you need 3 pouches (of course), but I use real whipped cream for the filling and topping, so I only used 1 envelope for the cake itself.

This cake is filled with whipped cream and strawberries and is oh my gosh good!  The cake is a yellow cake that tastes like the best strawberry shortcake/sponge cake you have ever eaten.  Yum.  Yum.

The cake is baked in an angel food (or tube) pan.  It is removed after cooling and the top is cut off, part of the inside removed and then mixed with whipped cream and strawberries.  Seriously, what could be better than that?  Not much!

Here is what you need:

1 box 2 layer size yellow cake mix
1 envelope Dream Whip topping mix
4 eggs
1 cup COLD water

Combine all the ingredients in a large bowl and mix with an electric mixer until moistened.  Beat at medium speed for 4 minutes.  Pour into a greased and floured 10 inch tube pan.  Bake at 350 degrees F for 45 to 50 minutes.  Cool for 15 minutes in the pan.


Turn the pan upside down and remove cake from the pan.  Flip the cake over so it looks like this.  If that makes you nervous, know that I have never had one of these cakes fall apart.

Using a long bread knife, cut the top of the cake off - about 1 inche.  I start right about where the curve of the cake begins.  Lay the top aside until after you have filled the cake.  Now, using a small spoon, leave a 1/2 inch thick shell by removing the center of the cake.  Try not to cut through the bottom.
Cut the cake that you remove into 1 inch pieces and put aside.

Slice 1 quart of strawberries and sprinkle with 2 tablespoons of sugar.  Let the berries stand for 30 minutes.

Now, here is where I made a change in the original recipe.  The original calls for making 2 envelopes of Dream Whip according to directions which you can still do.  I used a 16 ounce container of heavy whipping cream and whipped it with a few tablespoons of sugar and a tsp. of vanilla until stiff peaks form.  You could also use Cool Whip if you prefer.  Either way, set aside 1 cup of the whipped cream and fold the rest into the berries to which you add 1 cup of the cake pieces.  Mix gently.  Spoon into the cake shell.
Replace the top layer that you cut off earlier.  Your cake should now look like this.
The cut line is barely noticeable.  This is where the surprise part of the came comes in!  Everyone is surprised when  you slice into the cake and there is all that sumptuous, delicious filling.  Try not to eat all the filling before you put it in the cake.  Holy cow it's good.

To finish the cake, spread the remaining whipped topping on the cake and garnish with more strawberries.  Oh.  So.  Yummy.

When  you cut into the cake, this is what you see.
Whipped cream and strawberries are all nestled in the middle of this wonderful cake.  It's like eating an inverted strawberry shortcake.  I know you want some!

If you want to push this right on over the top, add a large dollop of vanilla ice cream to a slice of the cake and some more strawberries in syrup.  Oh My!  Our 9 year old grandson ate 3 pieces of this cake.  He said it was the best cake ever and he doesn't usually eat strawberries!  How is that for a testimonial?

This recipe is in my poor old falling apart hand written recipe book that I have had since the late 1960's.  I'm glad I have now put it in my blog for future reference.  This poor book may disintegrate at any time and I do not want to lose this recipe.

The cake recipe is on the box of Dream Whip.  You can actually make the Dream Cake using any flavor cake mix.  The Dream Whip adds such a wonderful texture to the cake.  I have to say the yellow cake is still my favorite to this day although you could make this same cake in chocolate.  I know Dan would like that too!

Looking at this picture makes me wish I had a piece to eat right now.  Needless to say, it is long gone.  Give this recipe a try.  You will definitely add it to your recipe list to make again and again.  Remember strawberries will be in season soon and  Mother's Day is coming up and graduations - summer picnics!  Wow.  Delight someone with this fabulous cake.  They will certainly be happy that you did.

Everyday Donna

Things to Remember:


Just a few of the perfect excuses for having some strawberry shortcake.
Pick one.
(1) It's less calories than two pieces of strawberry shortcake.
(2) It's cheaper than going to France.
(3) It neutralizes the brownies I had yesterday.
(4) Life is short.
(5) It's somebody's birthday. I don't want them to celebrate alone.
(6) It matches my eyes.
(7) Whoever said, "Let them eat cake." must have been talking to me.
(8) To punish myself for eating dessert yesterday.
(9) Compensation for all the time I spend in the shower not eating.
(10) Strawberry shortcake is evil. I must help rid the world of it.
(11) I'm getting weak from eating all that healthy stuff.
(12) It's the second anniversary of the night I ate plain broccoli.  author unknown

Monday, April 22, 2013

Make Your Own Concrete Planters - Cheap!

 Happy Earth Day to you one and all.  Today may have been the most perfect day you could ask for to celebrate our Mother Earth.  It was a balmy 70 degrees here in middle Tennessee, blue skies, gentle breeze, beautiful sunshine, birds chirping and warbling and we did yard work most all day.  Thank you Mother Earth for all you give us.

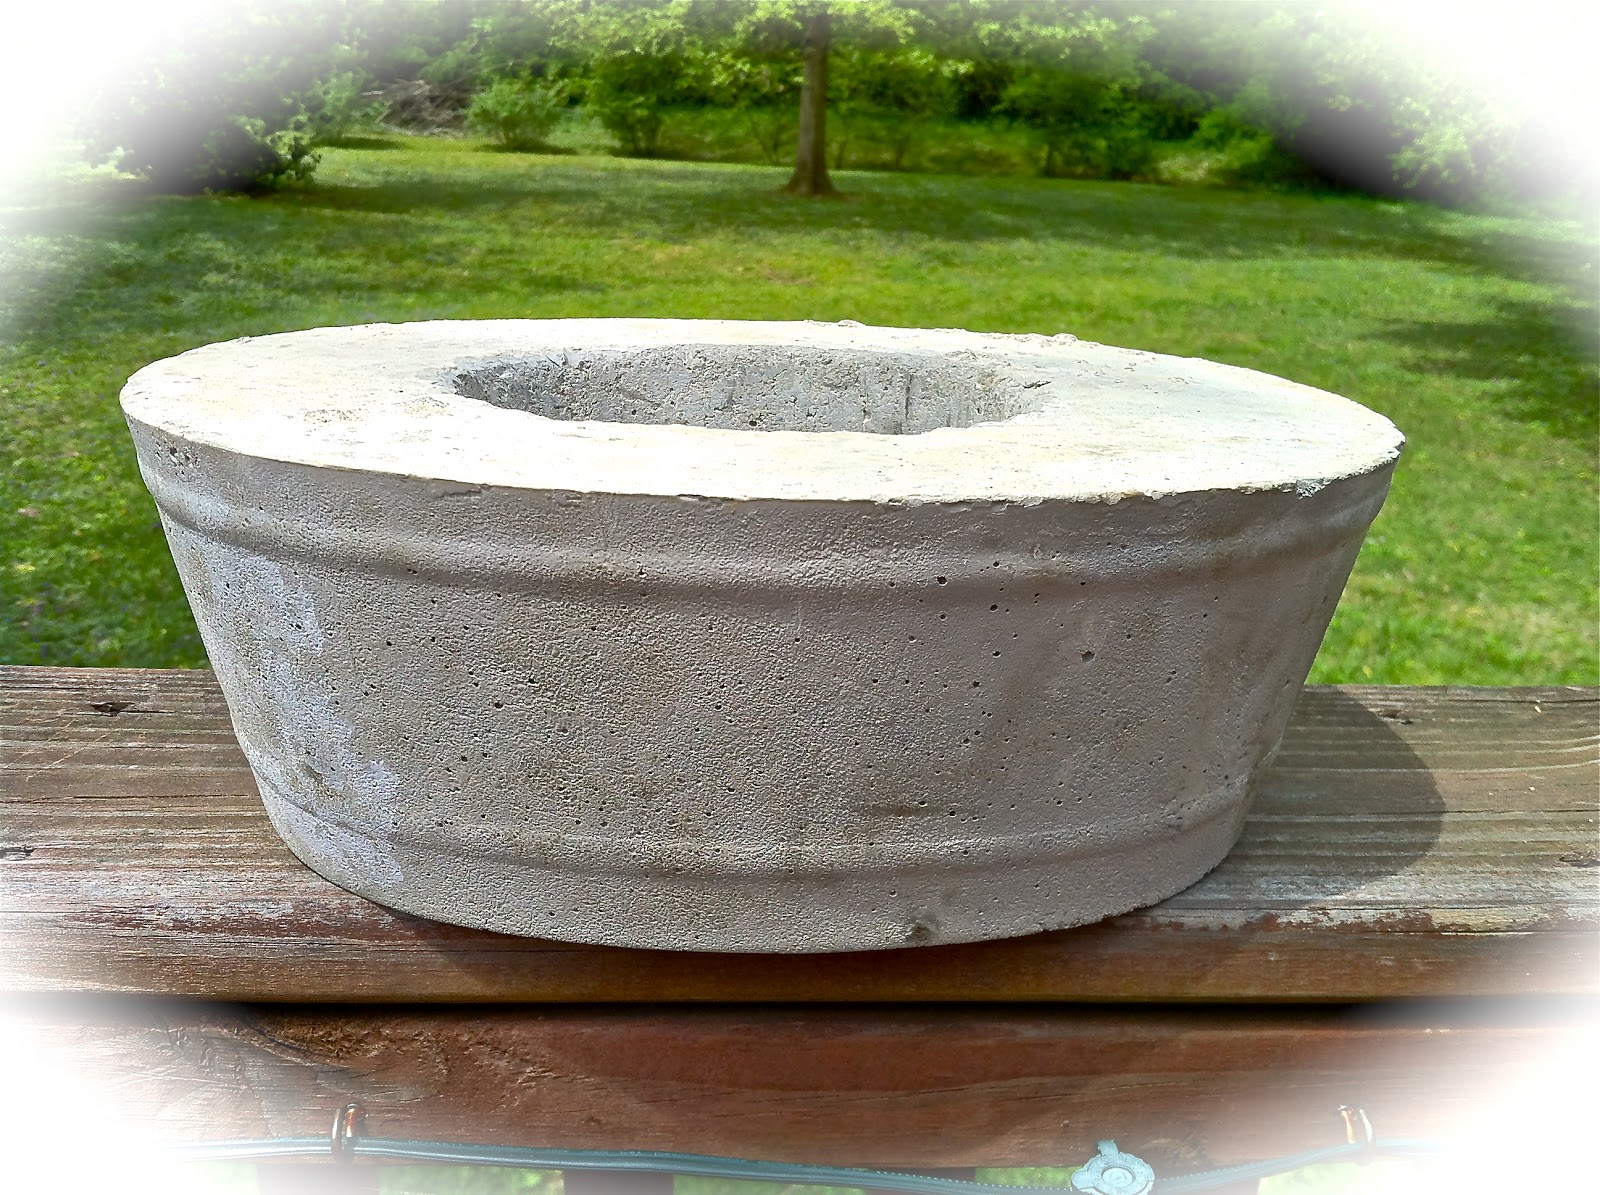
Last week I told you I was working on a project that I was very excited about and today I reveal the finished products to you - these gorgeous concrete planters.  Love, love, love them.  I happen to be a big fan of concrete items.  I like the way they age, the way they get mossy, and the fact that they are a natural product.  Yes,  I have plastic planters, but now that I have discovered this inexpensive method of making my own concrete planters there will be many, many more of these in my future.

Have you ever looked at a website called Curbly.com?  I discovered it by accident a good while ago, but I look at it every day.  He culls the best of design and DIY from the world wide web and there are so many awesome ideas on his site that I could start now and make things until the end of time.  Needless to say, he posted a link about making these planters a couple of weeks ago and I knew I would definitely be making some.  They are a Better Homes and Garden project that you can find on their website and not only are they fun, they are gorgeous.

They are made by using inexpensive "molds" and quick drying concrete product.  I found my bowls at the Dollar Tree and we purchased two bags of Sakrete Quick Dry concrete from Home Depot.  Lowe's also carries it.  A 50 pound bag costs less than $4.00.

I did learn some things while making these and sadly, I lost two of my favorite planters because I used glass jars in the middle and they would NOT come out of the set concrete.  Also, I used a couple of metal containers in the middle to make the center planting well and we had to cut those out with wire cutters.  This is to say, it is important to use plastic containers for your molds.  You brush them with vegetable oil and voila!  The concrete slips right out of the mold just like a cake out of a baking pan.

We made a total of 7 planters with the two bags of Sakrete which makes them cost about $3.00 each.  Nice huh?  Find anything interesting (plastic) to use as a mold.  I even used a 1990's era pleated waste basket and it was my favorite!!  It looked so cool when it came out of the mold.  Unfortunately, it was a failure because I used a large glass jar in the center which we could not get out.  Can't wait to make some more using a plastic center this time.

Here is what you need for this project.

A large "outside" bowl or container for the mold
A smaller "inside" container that will fit in the middle of the outside container, leaving a rim
some vegetable oil and a brush
Sakrete
A brick or big rock for a weight
A bucket
A trowel
Access to a hose/water

First, brush the inside of the large container with vegetable oil and the outside of the smaller container that will make the planting well.   I did this out of doors because it is kind of messy and I suggest that you do the same if you can.

 See the ridges on the inside of the bowl?  One reason I chose this was for interesting detail on the outside of the planter when it was finished.   I put duct take over the "handle" openings so the concrete would not leak out.  Center the smaller container in the larger bowl that is your mold.  I used this oblong bowl because I thought it would give the planter more interest.


Next, mix some Sakrete in a bucket with some water using a trowel.  You want it pretty thick, not runny.   Using the trowel, scoop the Sakrete into the mold until it is about 1.5 - 2 inches from where you want the top of the planter to be.  Push the center container down with your hands and put a brick or big rock in it for a weight.
This is one of the metal containers I used for the center.  Repeat - DO NOT USE METAL!  It doesn't come out easily.  We had to cut it out with wire cutters.  Just trying to save you some grief.

While your planters dry, make sure they are sitting level so your planters will not be lopsided.  I have one that is a little crooked, but it's not awful.
Here are all my filled molds waiting to dry.  Let these dry for at least 24 hours, no more than 48 hours.  I left mine for about 36 hours.  Now, it's time to remove them from the mold.  This is so much fun.  Remove the brick and set it aside.  Next, turn the mold over and let the planter slide out.  They slide out of the plastic fast!  BE CAREFUL ABOUT PUTTING YOUR FINGERS UNDERNEATH THEM.  THEY ARE HEAVY AND THEY HURT WHEN THEY LAND ON YOUR FINGERS.  USE THE PALM OF YOUR HAND TO SLOW THEM DOWN AS THEY EXIT THE MOLD.
 (I maybe did or didn't do that.  The biggest one in the trash can was really heavy.  I do have a bruise in the middle of one of my fingernails.)  Consider yourself warned.  Just sayin'.

Here is a finished product and I LOVE the way they look.  They make me happy, happy.


See the different details?  Look for interesting containers that will make a pattern on the finished planter.

 Here is how the inside looks.  The shape of the planting well will depend on what kind of container you use.  Remember, no glass and no metal.  (FYI, the rim does not look "muddy" when completely dried.)  To make drainage holes in the bottom, simply use a drill.  You can make one large hole or several small ones.

I got so excited about these that I just dropped some potted plants into them to see how they look.  And how do they look?  Awesome!!  It has been cool and I didn't want to risk the plants getting frost bitten over the weekend.  I will plant them permanently this week.  Did I say I am way excited about these?  I am!  Could you tell?

For less than $20 I made 7 planters.  Sadly, I had to pitch two of them because of the glass centers.  I did not want to try to break the glass out and risk an accident.  Better to say bye bye and know that I can make more.

These are going to sit on the left and right top rails of our deck and the bigger ones that I am going to make will sit on the floor of the deck.

If you have ever priced concrete planters, you know how expensive they can be.  You can even make little ones to use for candle holders!  Simply use an outside mold, put the Sakrete in and push a votive candle into the wet concrete!  Yes, those are on the agenda too!

Perhaps you have ideas for other things you could make for your outside living space using this method.  I am presently on the lookout for more interesting containers.  It's gonna be a concrete jungle when I get done.  If you have any ideas, let me know!  I am always looking for interesting projects and I sure hope you have fun with this one.  Let me know what you make.

Everyday Donna

Things to Remember:

The earth is what we all have in common.  Wendell Berry

Happy Earth Day 2013.

Wednesday, April 17, 2013

Everyday Donna's Grilled Cabbage

 What fun thing did you do today?  We met a friend for lunch and then checked out plants at the Farmer's Market and another garden center.  I came home with a few really awesome succulents, among other things.  Needless to say, I LOVE the weather we are having and am getting extremely excited to start filling all my planters.

In yesterday's post about the beer brined pork chops, I told you that I would post the recipe for this delicious grilled cabbage.  Do you like cabbage?  Did you eat it as a child growing up?  We did!  Every week.   And, you guessed it, it was usually boiled and it made the house smell terrible, but I always loved cooked cabbage.  Then, there is sauerkraut.  Yum.  Love it.  Dan hates it.  Also, there is the Indiana state vegetable, cole slaw, which is made from cabbage.  My friend that we met for lunch today called cole slaw the Indiana state vegetable years ago and it made me laugh so hard I have never forgotten it.  Our whole family refers to cole slaw as the Indiana state vegetable to this day.  Why did he call it that?  Because it is served at every picnic, pot luck, and restaurant in the state.  How much cole slaw have we eaten in our lives?  Waaaaay too much.

Ever tried kimchee?  It is also made from cabbage.  My research said that cabbage and bean curd are the two most used ingredients for cooking in China.  Wonder if they ever make cole slaw?

Cabbage is a very old vegetable, with cultivation beginning around 1000 BCE according to information I found.  Cabbage is a main ingredient in European cooking and Chinese cooking.  The most common use is by pickling, such as sauerkraut and kimchee.  Cabbage is really good for us.   It is full of anti-carginogens, beta carotene, and vitamin C.  Cabbage is related to broccoli, brussels sprouts, and cauliflower.  The reason many people don't like to cook cabbage in the house is because of the really strong smell that permeates the air.  Well, here is the perfect solution -- GRILL IT!  Cooking it out of doors keeps the smell out of the house.  Tadah!

Grilled cabbage is amazingly good, let me tell you.  It is easy to make also.  Here is how I made mine.

1 medium sized head cabbage, cut into wedges
4-5 slices bacon, uncooked
1 medium onion, chopped
1/2 stick butter
1/2 cup grated fresh parmesan cheese
salt and pepper to taste

Cut the head of cabbage in half and then into wedges.  I got 6 wedges.  However many wedges you have, tear that many pieces of aluminum foil about 12 inches long.

Place a wedge of cabbage in the center of each piece of foil.  Lay the bacon strips on top of each other and cut into 1/2 inch strips crossways.  These are called "lardons" of bacon.  Lay some of the lardons on each cabbage wedge.  Now, chop the onion and put some on each wedge.

Cut the 1/2 stick of butter into very thin pieces and lay some on each wedge.  Sprinkle fresh parmesan over each wedge, sprinkle with a small amount of salt and lots of black pepper.

Bring the long ends of the foil together and roll tightly down to the enclosed cabbage.  Roll the ends up tightly, so that there are no holes where the steam can escape while cooking.

Light your grill on one side, leaving the other side unheated.  Place the foil packets on the unheated side.  They should cook about 45 minutes total.  Turn the packets over about 1/2 way through.  Remove from the grill, open and serve.  Yum.  Yum.  One of the best side dishes ever for summer grilling season!

If your bacon doesn't look really crisp when you open your packets, put the pieces in a microwave proof bowl and heat for about 15-30 seconds to crisp it up and redistribute over the cabbage.  Some of mine were crispy, a couple not as much as I would like.  So, when you turn the packets over, you might also want to rearrange them on the grill so the outside packets are closer to the heat for a while.  Just a little FYI.

We really enjoyed this super delicious cabbage with our beer brined pork chops and sour cream mashed potatoes.  Oh so good!
When you are planning a meal and want to know how much cabbage per person, one wedge is plenty for most people.  The flavor of the onions and bacon with the buttery cabbage topped with the parmesan is a perfect combination.  It sure beats the Indiana state vegetable for every meal any day of the week.

Give this recipe a try.  It's delicious.  You are really going to like it.

Everyday Donna

Things to Remember:

Cauliflower is nothing but cabbage with a college education.  Mark Twain