Showing posts with label sugar. Show all posts

Thursday, October 2, 2014

Pumpkin Dump Cake - Easiest Recipe Ever


Oh happy day, it's really finally going to be fall tomorrow.  It has been almost 90 degrees here in Nashville for the last week.  It's going down to a low of 40 tomorrow night.  Yahoo!

Fall means all things pumpkin.  Do you like pumpkin?  We love it in our house (me particularly) and our youngest so is also a big fan.  When he was younger he could eat a whole pumpkin pie at one sitting.  He didn't like most sweets, but pumpkin and pecan pie sure made him happy.

He lives in Denver now and yesterday was his fiance's birthday.  We are so excited that she is going to be joining our family.  He called and said he wanted to bake her a cake but he didn't have a lot of extra money and did I have any ideas.  Hello!  How many do you want?

He said he didn't have a mixer, or milk, or eggs, or much sugar.  I suggested a recipe I had seen on Pinterest for a pumpkin dump cake that only took a can of pumpkin, a yellow cake mix, pecans, and a stick of butter.  That was the ticket!  Easy.  Not many ingredients.  No mixer needed.

He said he had the pumpkin, pecans, and butter.  All he needed was the yellow cake mix.  That's doable when you are lacking ingredients, equipment, and money.

I sent him a text this morning and asked him how the cake turned out.  He said it was delicious!  I trust his judgment when it comes to pumpkin desserts.  Since it is going to get cool tomorrow, I had to make vegetable soup and the pumpkin dump cake for dinner.  It's called anticipation  - and vegetable soup is always better the second day.

He was spot on about the cake.  It's delicious.  Our son in love ate several pieces and asked if he could "borrow" the rest of it to take home with him.  hahaha  I told him how easy it was to make and I made it gluten free by using a gluten free cake mix.  Even better!

Here is what you need:

1 can pumpkin (I used a 14.5 ounce can, but after I baked the cake I realized it called for a 28 oz can - it worked fine)
1 yellow cake mix (gluten free works)
1 1/2 cups chopped pecans
1 stick butter melted

My addition:  1/3 cup sugar, 2 Tsps ground cinnamon, mixed together

First, spray a 9 x 13 baking pan with cooking spray.  Spread the pumpkin evenly in the bottom of the pan.  I thought it might be a little blah, so I sprinkled 1/2 of the cinnamon mixture over the pumpkin.  I love cinnamon with pumpkin.

Next, sprinkle the entire dry cake mix over the pumpkin and evenly distribute.

Cover the cake mix with the pecans.

Melt the butter and pour over the pecans and cake mix.

Sprinkle the remaining cinnamon sugar over the entire pan.  This makes a nice streusel topping when baked.  Yum.

Bake at 325 for 30 minutes or until the cake mix lightly browns. (If using gluten free cake mix, it will not get as brown as a regular cake mix)  The pumpkin should be set, so wiggle the pan to make sure it is done.  If the pumpkin is not set, it will wiggle like jello.  You don't want that.  Put the pan back in the oven until set.
When the cake is done, remove it from the oven and let cool before cutting.  It cuts in nice squares and is SOOOOOOOOOOOO good.  Pumpkiny, nutty, cinnamony, streusely.  Oh my.

I made fresh whipped cream to go with ours.  I could have eaten the whole pan.  I don't eat many desserts anymore because of the whole gluten issue.  Our daughter, who is also gluten free, was so excited to have dessert and know that she could make this to enjoy at home.  She's going to have to make it because her husband sure did like it!

Now that it's finally getting cool and because it's the season for all things pumpkin, you need to make this as soon as possible.  Really.  It is easy to make, has very few ingredients, and you won't be able to resist it.  There's no sifting or mixing.  What could be better than that to have a fabulous dessert?  I say go for it!  You won't regret it.

Everyday Donna

Things to Remember:

"Fall colors are funny.  They're so bright and intense and beautiful.  It's like nature is trying to fill
you up with color, to saturate you so you can stockpile it before winter turns everything muted
and dreary."  Siobhan Vivian, Same Difference


Thursday, July 24, 2014

Heavenly Hash Cake - AMAZING!

On July 4th weekend, we had a party for our youngest son and future daughter in love.  They were recently engaged and they were home from Denver for the weekend, so it seemed like the perfect time to celebrate with all their Nashville friends.

Cortney and Tyler asked me to make their favorite desert - Heavenly Hash cake so of course I did.  Everyone has probably had something called heavenly hash in their life, whether it is candy, ice cream, or some other kind of desert.  Heavenly hash usually involves marshmallows, but not this cake!  Instead, it uses angel food cake and unbelievable chocolate mousse.

This recipe is from one of my favorite cookbooks called St. Louis Days, St. Louis Nights.  Our oldest daughter gave it to me for mother's day while she was attending college in St. Louis.  I have had it for many years and some of my all time favorite recipes are from this book.

The good think about this cake is that you can use a ready made angel food cake from the grocery if you don't want to bake one yourself.  That eliminates a lot of steps right there.  The rest of the cake is a fabulous chocolate mousse that is made from scratch and worth any and all effort put into making it.  Here is what you need:

12 ounces semi sweet chocolate chips
4 eggs, separated
2 teaspoons sugar
2 cups whipping cream
1 cup pecans, chopped
1 teaspoon vanilla
1/2 teaspoon salt
1 large angel food cake (store bought if preferred)

Melt chocolate chips over low heat; beat the egg yolks and add them to the chocolate after you temper it.  Do this by adding a little of the warm chocolate to the yolks and stirring thoroughly.  Now, add the yolks to the chocolate and mix completely.  It will be almost fudge like.  This keeps the yolks from scrambling.

In another bowl, beat the egg whites; add 2 teaspoons of sugar.  Beat until stiff peaks form.

In another bowl, beat the whipping cream and set aside.

Add the egg whites to the chocolate and egg yolk mixture.  Stir and add the chopped pecans, vanilla, and salt.  Don't be alarmed.  The egg whites dissolve into the chocolate mixture.

Fold in the whipped cream.

Cover the bottom of a large greased bowl with 1/2 of the angel food cake broken into chunks.

Cover with half of the chocolate mixture (if you can keep from eating it all).  Add the remaining cake broken into chunks.  Cover with the remaining chocolate mixture.

Refrigerate overnight.

Oh. My.  Goodness.  This is beyond good.  It is amazing.  Since I am gluten free, I cannot eat it with the cake, so I save a little of the mousse and eat it by itself.  SOOOOOOOO delicious.

This is a recipe that is fabulous to take to a pot luck dinner or for when you are having company.  It does make 12 servings, so you may not want to make it just for yourself (unless you intend to eat it all and it is that good)!

Heavenly Hash cake is so good, that I made it twice in 4 days for Tyler and Cortney to enjoy.  Yes, you want to make this one for sure - especially if you love chocolate.  Enjoy!

Everyday Donna

Things to Remember:

When someone asks you to make a favorite recipe for them - always oblige.  There is nothing like showing someone you love them this way.  donna

Tuesday, February 4, 2014

Pink Popcorn Perfect For Valentine's Day

 Yes, the weather is still awful.  I am counting the days until Spring.  I am sure you are too.  It's been a really long winter and there is more to go.  So, why not make something cheerful and pretty to brighten your day?   Something that also tastes amazing!

Have you ever had pink popcorn?  The blogger who posted this recipe raved about it as a childhood memory.  I found it on Cravings of a Lunatic, but she found the recipe on Nan's Recipe Spot.  Evidently they had all enjoyed pink popcorn during childhood.  Guess that's another thing we didn't have.  Perhaps it's regional, I don't know.  But I will tell you this, it is REALLY good stuff.  Indeed.

We were invited to a Super Bowl Party Sunday evening and asked to bring something.  Decisions.  Decisions.  What would everyone else bring?  I had no clue and certainly hoped to not duplicate recipes.  So, to make myself happy I made 7 layer dip because I knew if no one else ate it, I could and possibly would eat it all because I love it.  Best.  Snack.  Dip.  Ever.

In case no one was a fan of the 7 layer dip, I made this pink popcorn to eat during the game.  I mean, come on, there has to be munchies for the game.  Something you don't have to go get a plate and fork for, right?  Well, this was a major hit and people kept asking what it was.  I heard one guy tell his wife he bet it tasted like bubble gum.  Ew.  I laughed and told them it did not taste like bubble gum.  They asked what it was.  I told them candied popcorn colored pink.  I don't know if they ever ate any, but someone else certainly did because it was gone, baby, gone.  Our grandson couldn't seem to get enough of it, so I know I will be making some for Valentine's day.

The recipe is really easy and if you like carmel corn, you will love this recipe.  The one thing you need is a candy thermometer.  If you don't have one, they are not expensive and you will be making this again, so go ahead and invest in one now.  It will also allow you to make lots of other candy recipes.

Here is what you need:

12 -16 cups popped popcorn (16 cups was two batches in my air popper)
2 cups granulated sugar
2/3 cup whole milk
2 TBSP corn syrup
1/4 tsp salt
1 tsp vanilla
2-3 drops red food coloring

Pop up your popcorn, just don't use microwave popcorn.  You can do it on the stove top in a pan, or use your handy dandy air popper if you have one.


Next, place the sugar, milk, corn syrup, and salt in a deep saucepan (cause it really bubbles up when cooking).  Cook over medium heat until the sugar dissolves.  Stir so it doesn't scorch.  Place the candy thermometer on the side of the pan.

Turn heat to low and boil and stir occasionally.  Cook until the temperature on the candy thermometer reaches 230 degrees which is soft ball stage.  Remove the thermometer and turn off the heat.  Add the vanilla and food coloring.  Stir until well incorporated.

Remove pan from heat and let cool a bit.  If you pour the hot candy over the popcorn right away, it will shrink your popcorn.

Using a large baking sheet with sides, cover with parchment or waxed paper.   I actually used two so the popcorn would dry faster.

After the candy cools a bit, pour it over the popped corn and mix with a large spoon until all the popcorn is coated with the candy.  Pour the popcorn out onto the lined baking sheets and let the popcorn dry.

Good luck not eating it all before it dries.  I could hardly keep Dan out of it (and I may or may not have eaten a little myself).

The 7 layer dip was totally consumed as well as the pink popcorn.  This recipe is a keeper and would look so pretty in clear bags or jars for Valentine's Day.   It's also amazingly good which is the best part.

Everyday Donna

Things to Remember:

Every once in a while, someone will mail me a single popcorn kernel that didn't pop.  I'll get out a fresh kernel, tape it to a piece of paper and mail it back to them.  Orville Redenbacher  (sorry, couldn't pass it up, it made me laugh - :)


Thursday, January 23, 2014

Cinnamon Sugared Nuts - Oh My!

Hey, do you know what will be here in just a few weeks?  Two big events.  The first is the Super Bowl and the second is Valentine's Day.  It's time to start thinking about that Super Bowl party and what you will serve or take to share.  And what about that special someone, your Valentine?  Or in our case, many Valentines?  What will you do for them?  Well, I have an answer for you that is soooooo good and easy to make.

First, lets talk about nuts.  Do you like them?  We happen to LOVE them (maybe a little too much).  Did you know that eating a handful of nuts every day can help you live longer?  It's true!  Really.  Check this link - http://www.huffingtonpost.com/2014/01/20/foods-that-help-you-live-longer_n_4612048.html.  Studies show that eating 1/4 to 1/3 cup of nuts a day can increase your longevity.  I am not sure they are talking about THESE nuts in particular, but they are so good and surely they count a little.  Never mind the sugar and cinnamon coating.  Cinnamon is good for you at least.

I made these nuts at Christmastime for stocking stuffers and I almost forgot to take a picture of them.  This is what I had left when I remembered, so use your imagination just a bit.  I always make candies, cookies, carmel corn, and nuts to put in decorative bags to give as extras for everyone.  These are SO dangerously good and are always such a hit.

You know when you are walking through a shopping mall and smell those German roasted nuts that they sell at kiosks?  The ones that smell like heaven?  That's what these are like.  Oh Em Gee.  Delicious.  And, slightly dangerous because it is impossible to control the consumption of said nuts.  But, they would be perfect for a Super Bowl party and for Valentine gift giving.  Here is what you need:

5 cups pecan halves
1 cup almonds or cashews (I used cashews - delish)
2 egg whites
2 TBSP water
2 cups granulated sugar
2 and 1/2 tsp ground cinnamon
1 tsp salt

Preheat your oven to 300 degrees Fahrenheit

Line 2 large baking sheets (with sides) with parchment paper and spray with non stick cooking spray.  (You will understand why this is necessary after making them.  Don't skip this step.)

Mix nuts in a large bowl and set aside.

Using an electric mixer, beat the egg whites and water on medium high until stiff peaks form - about 4/5 minutes.  Add the sugar, cinnamon, and salt, stirring until well combined.  Put the nuts in the egg white mixture and stir to coat completely.  Spread nuts over the baking sheets and bake for 45 minutes, stirring every 15 minutes.

Allow to cool completely and enjoy - that translates to try not to eat them all at once.  Seriously.

You can store these at room temperature for a few weeks covered.  Like there will be any left in a few weeks.  That's funny.

You might want to make a test batch before the Super Bowl or Valentine's Day just so you will know how good they are.  Next blog post, I will show you a perfectly beautiful container you can make to put these in for gift giving.  Everyone will be so impressed and grateful for all your culinary and craft skills.  Y'all come back now.  You won't want to miss the tutorial.

Everyday Donna

Things to Remember:

I always loved Christmas time when we would have a bowl full of mixed nuts in the shell and we would spend time around the table with a nutcracker, eating the nuts.  I liked them all, especially filberts better known as hazel nuts.  donna

Thursday, November 7, 2013

Pumpkin Cream Cheese Muffins

 Why does fall simply scream for you to make things from pumpkin?  And, why is pumpkin so good?  And why are these muffins so super fantastic?  Let's see.  Because it's fall, they are made from pumpkin AND cream cheese and they are amazing.  Does that explain it?

This week was parent teacher conferences at our grandsons' school.  Mom needed help while she went to the conferences, so they stayed here with Grandma.  We had a lot of fun.  I taught them how to play Red Light, Green Light, Mother May I?, and Hide The Thimble.  There was also hide and seek and I Spy.  We had a lot of fun.  The also wanted to bake muffins, so we did.  The 7 year old picked this muffin off my Pinterest board.  We got to it and baked away.  Ever let a 3 year old crack the eggs?  I'm just sayin'.

This recipe makes 24 muffins.  That's a lot of muffins, so they took a good portion of them home so that Dan and I didn't eat them all.  The recipe is from Annie's Eats.  Here is what you need"

Filling

8 ounces cream cheese
1 cup powdered sugar

Muffins

3 cups all purpose flour
2 tsp cinnamon
1 tsp ground nutmeg
1 tsp ground cloves
1 tsp salt
1 tsp baking soda
4 large eggs
1 1/2 cups sugar
1 15 ounce can pumpkin puree
1 1/4 cups vegetable oil

Topping

1/2 cup sugar
5 TBSP flour
1 1/2 tsp cinnamon
4 TBSP cold butter, cut into small pieces

Preheat the oven to 350 degrees Fahrenheit.  Spray muffin tins with cooking spray or put paper cups in each muffin well.

To make the filling, mix the cream cheese and powdered sugar with a mixer until well blended.  Set aside.

To make the muffins, combine the flour, spices, salt, and baking soda.

Combine the eggs, sugar, pumpkin, and oil with a mixer until well blended.  Add dry ingredients.  On low, mix just until blended.

Fill each muffin cup with just enough batter to cover the bottom of each well or paper (about 1 TBSP).

Scoop a small amount of filling (about 1 heaping tsp) into each muffin cup over the batter.  Top with remaining batter covering cream cheese completely.

Make the topping by mixing all the ingredients together.  Cut the butter in with a pastry cutter or a couple of knives until blended.   Sprinkle on topping.

Bake 20-25 minutes.  Cool completely before serving, as cream cheese center will be hot.


It will take all your will power to not eat as many of these at one time as you can.  Trust me.  Just look at the center of these muffins.  Yum.
My daughter said she ate 3 in one day, so just be warned.  I am not kidding when I say you will have a hard time staying away from these.

With Thanksgiving just around the corner, and then the Christmas holidays, you will certainly find an occasion or two to make and serve these.  Give it a go.  They are so worth it.

Everyday Donna

Things to Remember:

"Oh how we love pumpkin season.  You did know this gourd-ish squash has its own season, right?  Winder, Spring, Summer, pumpkin...We anxiously anticipate it every year."  Unknown


Tuesday, November 5, 2013

Yes, Virginia, There is Chocolate Cobbler

 The last few days have been busy ones.  I have been working on projects for the Elves' Fair at our grandsons school which is this Saturday.  They attend a Waldorf school and this is their biggest fund raiser of the year.  Each family donates 12 items for each child they have attending.  Our daughter is a free lance writer and mother of 3 young sons and is very, very busy.  (I remember those days all too well).  Therefore, Grandma makes the items and donates them to the fair because we think the school is absolutely amazing!

So today, I thought we would talk about cobblers.  You know, there are pies, crisps, and cobblers.  Most cobblers are made from fruit with some kind of biscuit type topping for the crust.  Pies can have a bottom and top crust, or just a bottom crust.  Crisps, have a topping usually made with oats and flour and butter and other yummy stuff.

This cobbler is a bit different from the norm.  It has no fruit and does not have a biscuit topping.  It is called a chocolate cobbler.  I mean, yum, what could be better?   This is something traditional to the south and I had never had it before moving to Nashville.  The first time I enjoyed this special confection, it was made by a friend of our daughter's and Annie considers is her favorite dessert.  I might second that notion.

Personally, I am not sure I would call it a cobbler because it is more like a lava cake with all kinds of ooey, gooey chocolate under a cake type topping.   But, I didn't name it and if "they" want to call it chocolate cobbler, I'm all in for the name.  I really can't quibble with a name for something this wonderful.

This is all made in one pan and baked in the same pan.  Simple enough right?  It is also FABULOUSLY delicious.  What more can I say?  The recipe comes from a Gooseberry Patch cookbook and is called Granny's Chocolate Cobbler.  (Go Granny!)  Here is what you need;


3/4 cup butter, melted
3 cups sugar, divided
1 1/2 cups self rising flour
1/2 cup milk
1/2 + 2 TBSP baking cocoa
2 tsps vanilla
2 1/2 cups boiling water

Preheat oven to 350 degrees Fahrenheit

Place the butter in a 9 x 13 baking dish and let it melt in the oven.  Remove pan from oven when butter is melted and set aside.

In a large bowl, combine 1 1/2 cups sugar, flour, milk, 2 TBSP cocoa, and the vanilla.  Pour over the melted butter.

In a small bowl, mix together remaining sugar and cocoa.  Sprinkle evenly over the batter in the pan.

Pour boiling water over the batter and DO NOT STIR!!

BAKE AT 350 FOR 30 MINUTES.  Remove from the oven and try not to eat it all at once!


Serve with whipped cream or ice cream.  Look at that!  You know you want to make this!!

Merciful heavens, this is food for the Gods, the angels, and for you and your family.  I cannot adequately describe this dish, other than to say if you like chocolate you must make it as soon as possible.  Dan loves chocolate and he LOVES this cobbler.  (I kind of like it too!)

Give this recipe a try.  Let me know what you think.  (I can hear you drooling from here)

Everyday Donna

Things to Remember:

My therapist told me the way to achieve true inner peace is to finish what I start.  So far today, I have finished 2 bags of M&M's and a chocolate cake.  I feel better already.  Dave Barry


Tuesday, October 29, 2013

Pumpkin, Caramel, and Pecan Cheesecake - WOW!

 Hello everyone!  Yes, October is winding down.  It's almost Halloween.  How is that possible?  Where has this month gone?  The leaves are finally starting to change.  The transition is later this year because it has been so warm.  It's so nice to see the colors in the trees and the variety of hues on the hillsides.  It definitely means fall is here!

Our first born celebrated the 11th anniversary of her 30th birthday on Saturday.  We sat with her boys while she and her lovely husband had a date night.  They don't get a lot of those.  So, we celebrated with the family at our house on Sunday evening.  I cooked dinner for everyone and instead of the standard birthday cake, I made this fabulous pumpkin cheesecake.  The recipe is in the new Bon Appetit and the Food Network Magazine.

It is a Philadelphia cream cheese advertisement and as soon as I saw it, I knew I had to make it.  Why? Because it sounded absolutely amazing and guess what?  It is absolutely amazing!  Talk about a dessert you are going to want to make for any and all upcoming occasions.  Things like Thanksgiving, Christmas, the new moon, the full moon, the sun shining, the dog got a haircut.  Just pick something.  It's worth it, believe me.

Here is what you need:

1/2 cup chopped pecans divided
38 Ginger snap cookies, finely crushed (about 1 1/2 cups)
1/4 cup butter, melted

4 packages (8 oz. each) cream cheese, softened
1 cup sugar
1 can (15 oz) pumpkin
1 Tbsp cinnamon
1 tsp. vanilla
4 eggs
25 Kraft Caramels
1/4 cup milk

Heat oven to 325 degrees Fahrenheit (notice, it's NOT 350)

Chop 1/4 cup nuts finely, place in medium bowl.  Add crushed ginger snaps and melted butter.  Mix well.  Press into bottom of 13 x 9 inch baking pan.

Beat cream cheese and sugar in a large bowl with a mixer until blended.  Add pumpkin, cinnamon, and vanilla, mix well.  Add eggs 1 at a time mixing on low speed after each addition just until blended.  Pour over crust.

Bake for 45 minutes or until center is almost set.  Cool completely.  Refrigerate for 4 hours.


Make the sauce when you are ready to serve.  Microwave the caramels and milk in a microwaveable bowl on high for 1 1/2 minutes or until caramels are completely melted, stirring every 30 seconds.

Serve cheese cake by spooning the caramel over each piece served and sprinkle with nuts.

Serve with whipped cream if desired.  We desired, it's just not in the picture.  YUMMMMMMY!

This cake is really easy to make and is even better the second day.  Oh so good.  Give it a try, especially if you are a pumpkin lover or a cheesecake lover.  It is a marriage made in heaven!

Everyday Donna

Things to Remember:

Because you don't live near a bakery doesn't mean you have to go without cheesecake!
Hedy Lamar

Wednesday, October 23, 2013

Chocolate Macadamia And White Morsel Cookies

 Let's talk about cookies.  Who doesn't love a good cookie?  Especially a home made cookie!  Do you have a favorite cookie?  We have many, but this cookie is in the top five.  It may actually be in the top two.  Yes, it's that good.

Let's discuss why this cookie is so very good.  First, it is chocolate.  Need I say more?  Second, it has Macadamia nuts.  (OMG)  Third, it has white morsels in it.  So, let's recap.  It's chocolate, has Macadamia nuts, AND white morsels in it.  How could it be any better than that I ask you?  Seriously?

I found this recipe years ago in some magazine or the other and decided to give it a whirl.  The recipe immediately went into my poor falling apart handwritten recipe book so that it would never be lost because this was many years before the advent of the internet and/or blogging where I put a lot of my recipes for reference.  It's a great place to keep recipes because the recipes don't get all smudged with stuff from your hands while you are cooking and the ink doesn't run when you get liquid on the page AND you can share it with lots of other people.  I have some favorite recipes that are nearly unreadable.  Nuff said.

You are definitely going to want to make these cookies.  Why you ask?   Because they are fabulous and you will not be able to eat just one at a time (don't ask how I know this), and because they are fabulous.

Let's talk about Macadamia nuts for a moment.  LOVE them.  How about you?  They are not the cheapest nut to use in a cookie, but they may be the absolute best!  I find them at Target in small 2 ounce packages and it takes 2 packages for this recipe.  What do you know about Macadamia nuts other than they are sooooooo good?  I did a little research and this is what I found:

Macadamia:

a hard-shelled nut somewhat resembling a filbert and produced by an Australian evergreen tree  
of the protea family that is cultivated extensively in Hawaii —called also macadamia


No wonder they are a little on the pricey side since they only grow in Australia and Hawaii.  Trust me, it's worth the little extra for these wonderful nuts.

Now, here is what you need to make these cookies:

2 1/4 cups all purpose flour
2/3 cup unsweetened baking cocoa
1 tsp baking soda
1/4 tsp sat
1 cup softened butter (2 sticks)
3/4 cup sugar
2/3 cup packed brown sugar
1 tsp vanilla
2 large eggs
2 cups white morsels (1 12 ounce package)
3/4 cup chopped Macadamia nuts (rough chop - you want good sized pieces)

Preheat oven to 350 degrees Fahrenheit

Combine the flour, baking soda, and salt in a small bowl.

Beat the butter, sugar, brown sugar and vanilla until creamy.  Add eggs 1 at a time, beating well after each addition.

Gradually beat in the flour mixture.  Stir in morsels and nuts.

Drop by well rounded teaspoon full onto ungreased cookie sheet.

Bake for 9 - 11 minutes.  Remove from oven, let cool slightly, remove from baking sheet with a spatula.

YUUUUUUUUUUUM!  Try not to gorge yourself on these beauties.

You are looking at these and drooling aren't you?  I know you are even if you won't admit it.

This recipe makes a lot of cookies.  I got 5 dozen out of the recipe.  If you want them a little bigger, be my guest, just make sure they are completely baked when you remove them from the oven.  They are not soft cookie.

Next week is Halloween and if you are having a party, try this recipe.  Or, try this recipe because it's fall.  Or, just make them because you need to. Share them - if there are any left.  

Everyday Donna

Things to Remember:

The Macadamia is named after a scientist by the name of John Macadam who first wrote about the tree and it's fruit (nuts) in 1865.


Monday, October 7, 2013

Pumpkin Streusel Coffee Cake


Oh what a glorious Monday today.  It was a perfect 66 degrees with amazing cerulean skies and it really felt like fall for the first time.  I could do this weather every day.  What's not to love about it?  We worked outside all day and it was absolutely perfect.  Pure bliss.
 
This weather definitely puts me in the mood to bake and cook.  I had the urge for something sweet, perhaps made with pumpkin (it is fall after all) and I  used this recipe that I found on Allrecipes.com.   This is an amazing coffee cake with a lovely streusel on the bottom and a brown sugar glaze on the top.  It has the taste of a pumpkin spice cake which is one of my all time favorite cakes and it is easy to bake.  Yes, the perfect recipe.

This cake can be baked in a tube pan or a bundt pan, whichever you may have.  I love bundt cakes, so I went that route.  Easy peasy.  Here is what you need.

1/2 cup butter, softened
1 1/2 cups sugar
1 15 oz. can pumpkin
3 large eggs
2 1/2 cups flour
2 tsp baking powder
1 TBSP cinnamon
1/2 tsp ground cloves
1/2 tsp salt

Streusel Topping

1/4 cup flour
1/4 cup sugar
1/4 cup light brown sugar
1/2 tsp cinnamon
2 TBSP butter, melted
1/3 cup chopped nuts (I used walnuts)

Preheat the oven to 350 degrees Fahrenheit.  Spray the bundt pan with cooking spray and set aside.

Beat the butter and sugar on medium with a mixer until well blended.  Add the pumpkin and eggs.  Mix thoroughly.  In a medium bowl, combine the dry ingredients.  Add to the pumpkin mixture.  Mix on medium until combined.  Pour into prepared pan.

Make the streusel topping by combining all the ingredients.  Sprinkle over the cake batter.  Bake at 30 degrees for 50-55 minutes until a toothpick comes out clean.

Cool about 15 minutes.  Make the brown butter glaze while the cake cools.  Invert cake on a plate.

Brown Butter Icing
1 1/2 TBSP butter
1 1/2 cups powdered sugar
2 TBSP milk

Put the butter in a saucepan and melt on medium heat, letting it cook until it bubbles and browns, continuously stirring.  Don't let it scorch.  As soon as it browns, remove from the stove and pour into the powdered sugar.  Stir.  Add milk 1 TBSP at a time.  I only needed 1 TBSP.  Pour over cooled cake.  Serve.

This cake is soooooo delicious and it was very hard to eat only one piece.  It's perfect with a cup of coffee.  It would also be lovely with hot tea or hot apple cider and it just screams fall.  Mm mmm mmmm.
We ate this cake for dessert, not just for breakfast or with coffee.  Deeeeeelicious!  Our grandsons LOVED it.  It is worth making.  Give it a try and let me know what you think.

Everyday Donna

Things to Remember:

I'm pretty sure the secret to world peace is hidden somewhere in the smell of coffee and baked sweets.  Unknown

(What a great quote!)


Monday, September 16, 2013

Pumpkin Whoopee Pies With Nutella - YUM!

 Happy Monday, September 16.  It is 7:16 pm and outside it's dark.  That means summer is definitely on the wane and the days are getting shorter, BUT it also means that fall is approaching rapidly.  Yippee!  Do you like fall as much as I do?  The changing leaves, the cooler temperatures, pumpkins, Indian corn, cider, bonfires, apples, sweaters, colorful mums, Halloween and Thanksgiving.  There are so many wonderful things about fall.

Starbucks has their pumpkin spice coffee drinks available and that is the first official "call to fall".  Everyone gets excited when pumpkin spice drinks return.  Therefore, it is okay to start making any and all things pumpkin.  Starbucks gave the go ahead.

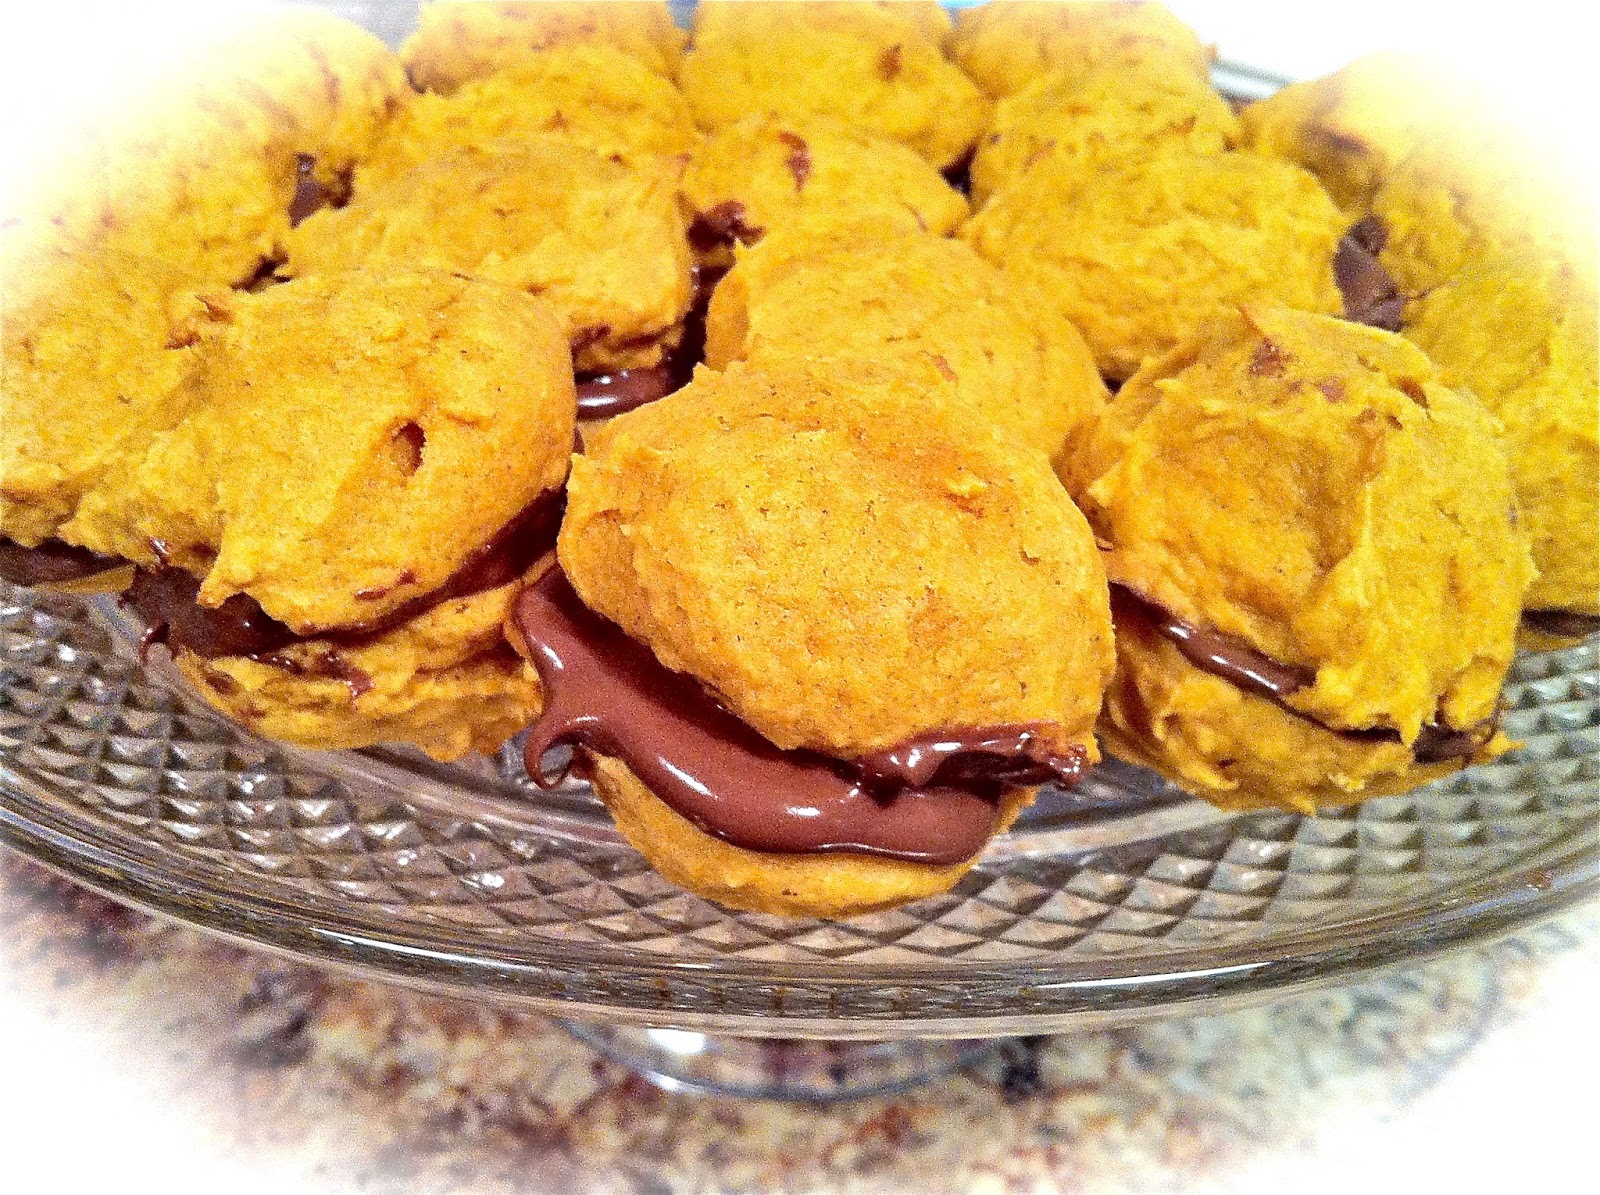
I got my new Food Network magazine last week and it has a lot of fabulous recipes or fall.  I wanted to start making them all.  Inserted in the magazine is a little booklet with 50 things you can make from canned pumpkin!  Fifty, five oh, 50.  Wow!!  That is more than exciting and as I perused it I couldn't decide whether to start with #1 and work my way through or - ding, ding, ding, hold the phone.  How about #42 and #43 to start?   It's a pumpkin cookie recipe that can be made into whoopee pies filled with - OH MY - Nutella.  Guess where I started?  You guessed!!  You are a sharp cookie (no pun intended).

Sometimes a recipe just jumps out and says make me now.  Do you ever have that happen?  So, I did.

Here is what you need:

6 TBSP softened butter
1 1/2 cups sugar
1 cup canned pumpkin *see note below
1 egg
1 tsp vanilla
2 cups flour
1 tsp baking soda
1 tsp cinnamon
1/2 tsp salt

Beat the softened butter and sugar with a mixer until fluffy.  Beat in the pumpkin, egg, and vanilla.  Whisk the flour, baking soda, cinnamon, and salt together.  Stir into the pumpkin mixture.

Drop by tablespoons full onto an oiled baking sheet.  Bake at 400 degrees Fahrenheit for 12 minutes; cool.


If you want to eat the cookies, you can make this glaze.

1/2 cup confectioners sugar
1 TBSP milk  - mix together, spread on cookies

OR, if you want to make them into whoopee pies, do not glaze the cookies.  Spread the bottom of one cookie with Nutella and place the bottom of another cookie on top.  You now have a delectable little sandwich made of delicious pumpkin cookies with Nutella spread in the middle to hold them together.  Now, I can't pass this up - whoopee!   This recipe made 36 cookies or 18 whoopee pies.

*I will tell you that I hated to leave that bit of pumpkin in the can since the recipe called for one cup of pumpkin, so I added the whole can to the recipe which probably made the cookies a little softer than they would be if you followed the recipe exactly.  The texture is somewhat like gingerbread, very soft and delicious and oh so good with that lovely dollop of Nutella in the middle.  They are especially good with a cup of coffee and they just scream fall y'all.

It's hard to decide what to make next.  Maybe the pumpkin bread pudding made with cinnamon raisin bread, or maybe the cheesecake pie, or maybe.........   Whatever it is, I will share the recipe with you when I make it.  In the meantime, give these a try.  They are pumpkinlicious.

Everyday Donna

Things to Remember:

What do you get if you divide the circumference of a pumpkin by its diameter?  Pumpkin pi!


Wednesday, August 28, 2013

Blueberry Cobbler With Biscuit Crumb Topping

 Did you ever have fruit that is going down, like fast.  You know, those brown bananas that have a day or so before you have to toss them?  Don't toss those bananas, cut them up and put them in a baggie to go in the freezer if nothing else.  They are good for smoothies!  Or, there is always banana bread.  Yum.

I happen to love all things blueberry and I buy them every time I go to the grocery and then suddenly I have several containers in the fridge and there is that first sign that they may start to shrivel at any moment and must be used!  No blueberry should ever be wasted!  Of course, you can put them in a baggie and freeze them just like the bananas.  But, I had a hankerin' for something sweet and desserty and I usually make a peach and blueberry cobbler, but alas I had no peaches.  Therefore, some other recipe must be used.  I make blueberry pie, but I didn't want to make crust.  It just seemed like too much effort so I started combing the world wide web.

I found this recipe on a blog called wickedgoodkitchen.com and it sounded just perfect so I thought I would give it a try.  It's a keeper!  It's easy and delicious.  I served it for dessert tonight and our 3 year old grandson ate two helpings - with ice cream of course.

Here is what you need:

Filling:

4-5 cups fresh blueberries, rinsed, dried and sorted.  (toss those shriveled ones)
1 cup sugar
2 tsp freshly grated lemon zest
3 Tbsp all purpose flour

Biscuit Crumb Topping:

1 cup + 5 TBSP all purpose flour
6 TBSP sugar
1 & 1/2 tsp baking powder
1/4 tsp salt
6 TBSP butter, cut into bits
1 large egg, slightly beaten
1 tsp vanilla
1 TBSP sugar
1 tsp ground cinnamon

Preheat oven to 375 degrees fahrenheit

Lightly butter a 10" baking dish

Combine the sugar, lemon zest, and flour called for in the filling.

Put the blueberries in the baking dish, sprinkle with the sugar/zest/flour in a very even manner so that there is no clumping of the sugar which allows it to dissolve while baking and won't be gritty.  I stirred mine a couple of times to prevent that from happening.  Continue to evenly sprinkle until all mixture has been used.

Make the crumb topping.  Put the flour in a bowl, add the sugar, baking powder and salt.  Whisk or mix with a fork.

Cut the cold butter into small bits and cut into the flour mixture until crumbly.  I used a pastry blender, or you can use your hands.  Add the beaten egg, vanilla and stir to thoroughly mix until you have a dough type mixture.

Spread over the blueberries using your hands.

Combine the sugar and cinnamon and sprinkle over the biscuit topping.

IMPORTANT.  SET THE BAKING DISH ON A BAKING SHEET BECAUSE IT WILL COOK OVER AND YOU WILL HAVE BURNED SUGAR AND SMOKE IN YOUR KITCHEN AND DON'T ASK ME HOW I KNOW THIS.  JUST SAVE YOURSELF A MESS.   TRUST ME.

Bake for 40-45 minutes until the top is nice and brown.  Remove from the oven and serve warm with a lovely dollop of ice cream or whipped cream or - both!

This really is a wonderful cobbler.  It is not too sweet, but the lemon zest gives it a really nice brightness.  The crust is like a big soft cinnamon biscuit that is absolutely delicious.

I will be making this again, and again, and ...... you know.  Give it a try.  I think you will really like it too.

Everyday Donna

Things to Remember:

Blueberries are considered one of the "super" foods.  So hey, why not enjoy them any way you can.  Cobbler works for me.  donna


Tuesday, June 4, 2013

Strawberry Pie Recipe

 Pie - not to be confused with Pi, which is a mathematical constant. The number pi (symbol: Ï€) /paɪ/ is a mathematical constant that is the ratio of a circle's circumference to its diameter, and is approximately equal to 3.14159.  Remember that? You don't need it for this recipe.   P I E pie is something deliciously good to eat.  Guess which one we prefer?

You can make a one crust pie, top crust pie (sometimes called cobbler), or two crust pie.  Do you have a preference?  Personally, they are all good in my book.

Strawberries.  Red.  Juicy.  Delicious.  Local strawberries are the best, but are only in season for about a month in the spring, usually late April or the month of May.  Last year it was warm and dry and berries were gone by the first of May.  This spring, it has been cool and damp and we are still able to buy local berries because they did not come in until about the second week of May.  The weather is the main indicator of when berries will be available.

The first garden strawberry was grown in France during the late 18th century.  Prior to this, wild strawberries and cultivated selections from wild strawberry species were the common source of the fruit.  Records show that wild strawberries were being cultivated as far back as the 1500's.  Needless to say, they were only available for short periods of time.  Now, due to strawberries being grown in plasticulture and some green houses, they are available all year round.  The biggest difference between the year round berries and local berries is the local berries are a bit smaller, sweeter, and much juicier than the "store bought" variety available during the year.  

We are always excited when the local berries become available.  We are happy to just wash them off and eat them right out of the container they are so sweet and good.  But, of course, the uses for strawberries are plentiful.  Strawberry shortcake is one of the most well known ways to eat strawberries.  You can make preserves with them, lots of desserts, eat them over ice cream, or make strawberry smoothies and milkshakes.  Yum.  

I had bought a gallon of fresh strawberries at the local Farmer's Market and knew I would make some strawberry pies with them.  I had just cleaned my house for my sister's weekend visit and didn't want to mess up the kitchen floor making crusts so I sent Dan to the store to buy some pre made deep dish pie crusts. (Yes, I have flour everywhere when I make pie crusts.)  Someone didn't read the label and came home with regular pie crusts, so my pies are a little less "deep dish" that I would have liked, but it didn't make a whole lot of difference when it came to eating them, just in the looks.  Here is what you need to make one pie.

1 deep dish pre made pie crust or make a single crust from scratch, bake according to directions, remove from oven and let cool before filling.

Pie Filling

1  quart whole fresh strawberries
1 cup white sugar
3 TBSP cornstarch
3/4 cup water

1/2 cup heavy whipping cream

Remove the stems and caps from all the berries.  Wash and let drain.  Pat dry. 

Arrange 1/2 of the strawberries in the baked pastry shell.  You may want to cut some of the larger ones in half so they lay flat in the pie crust.  Mash remaining berries and combined with sugar in a medium saucepan.  Place the saucepan over medium heat and bring the contents to a boil, stirring frequently.

In a small bowl, whisk together the cornstarch and water.  Gradually stir the cornstarch mixture into the boiling strawberries mixed with sugar.  Reduce the heat and simmer until the mixture thickens., stir often to keep from sticking or scorching.  If you have never made this kind of filling, the mixture will thicken rather suddenly, so don't get discouraged thinking it will never happen.  It will.  

Pour the mixture over the berries in the baked pie crust.  Chill several hours before serving.

Make Whipped Cream

Put the chilled heavy whipping cream in a deep bowl.  Mix with an electric mixer on high speed until soft peaks begin to form.  Add 1 - 2 TBSP sugar and 1 tsp vanilla.  Continue to whip until stiff peaks form.  Stiff peaks means they will stand on their own without falling over.   Spread the whipped cream over the chilled pie, serve.  Try not to eat it all yourself.  Good luck.

This is a really easy recipe and contains no additives or chemicals from artificial contents that some recipes use.  It is also super delicious!  Dan has had waaaaaaay too many pieces at this point, but that's okay.  Just confirmation for how good the pies are.  

If you still have local berries available, you will really want to make at least one of these pies if not more.  You can use berries from the grocery store if you don't have access to the smaller, sweeter, local berries.  Actually, you can make this recipe all year long using imported berries.  Nothing wrong with that!  It's all good.

Once you make this recipe, you are going to want to make more.  Betcha.

Everyday Donna

Things to Remember:

Doubtless, God could have made a better berry (than the strawberry), but doubtless, God never did.
William Allen Butler


Monday, June 3, 2013

Fresh Peach and Blueberry Bread - Delicioso!

 Here we are in the first week of June already.  This year is flying by.  Today, we got to attend our 6 year old grandson's "bridge" ceremony which is a Waldorf education celebration of moving from kindergarden to the halls of higher learning, better known as first grade.  As I watched him cross the bridge from the land of childhood, play, and imagination, into the land of higher learning where the road to maturity begins, my heart was filled with joy.  The teacher told a beautiful story about the land of the littles and what it was like before they chose their families and came to earth - the beautiful blue and green world of plants, animals, and minerals.  As they crossed the bridge, the teacher gave them a key to wear around their necks (the key to higher learning) and a small bag containing a gift from the animal, plant, and mineral world.  Then they received a yellow rose and joined their families.  There were tears (just in case  you wondered).  It was a wonderful way to start the week.

We had a busy weekend.  My sister, Sara, and our longtime friend, Linda, came to visit for the weekend.  We toured the city, ate a lot of good food, and even did some honky tonkin' on Broadway here in Nashville.  There is so much good music going on in this town.  Talk about a fun way to spend Saturday afternoon.  If you ever come to the city, do NOT miss all the music.  Nashville is Music City, USA, after all.

Knowing they were coming to visit, I baked some goodies to have on hand.  First, I made two fresh strawberry pies which I will write about tomorrow.  Since fresh peaches are coming in from Georgia, I had some on hand that I had purchased at the Nashville Farmer's Market.  Now, there is always that conundrum of what to do with peaches after you make a cobbler, or slice some up to enjoy on cake or with ice cream.  You can always eat one whole (peeled I hope, peach skin makes me shiver), but there has to be many more things you can make with sweet, ripe, juicy peaches.

I found this recipe for peach/carrot bread on All Recipes.com.  The recipe sounded so good, but I didn't know how I felt about peaches and carrots and I really didn't want to stand and grate carrots.  Personally, I prefer peaches and blueberries.  I often add blueberries to my peach cobbler because they complement each other so beautifully.  I had blueberries on hand, so I substituted blueberries for the carrots.  Guess what?  It works!  It works superbly!!  This bread is awesome!!!!  Here is what you need.

3/4 cups chopped pecans
2 1/2 cups all purpose flour
3/4 cup sugar
1 tsp ground cinnamon
3/4 tsp baking soda
1/2 tsp salt
1 1/2 cups peeled, chopped fresh peaches
3/4 cup fresh blueberries
2/3 cup vegetable oil
1/2 cup milk
2 large eggs lightly beaten

Mix all the ingredients together in a large bowl using a spoon.  Pour the batter into a 9 x 5 loaf pan that has been lightly greased and floured.  Place in a 350 degree preheated oven and bake for 1 hour and 5 to 10 minutes.  Test the center of the loaf with a skewer in the center until it comes out clean.

Remove from the oven and let cool before removing from the pan.
This recipe makes a very large loaf.  It fills the loaf pan to the top when baked, so be sure and bake it until very done in the center.  I took mine out at 1 hr 5 minutes and tested it with a toothpick.  The toothpick showed clean, but the bread was a little underdone in the center when we ate it.  (I would recommend a skewer instead of a toothpick so it goes down into the loaf further.) No one seemed to mind one bit though.  Everyone had several pieces in fact.  This is DELICIOUS!
You can see the peaches and the blueberries, and the pecans add a nice texture to the bread with that lovely hint of cinnamon.  Mmm.  Mmm.  Mmm.  It's sort of like baked peach cobbler without having to make a crust.

There will be fresh peaches from now until the first part of September.  Here is a recipe  you can use that is something different, easy, and soooooo good.  Makes some loaves and freeze them.  It is awesome for breakfast or brunch.  Fabulous with coffee.  If you want to try the carrots, just use 3/4 cups grated carrots in place of the blueberries.  If you make it that way, let me know how it turns out.  We will stick with the blueberries.

Everyday Donna

Things to Remember:

It's nice to have some home baked goods for company.  It let's them know you thought of them and wished to honor them with something from your hands and heart.  donna


Tuesday, May 28, 2013

Spiced Pecan Cake


Happy Tuesday everyone!  Has it seemed like Monday all day to you?  It sure has to me!  Those Monday holidays mess up my week, especially since I don't go to work everyday.  Sometimes I have to look at my phone to see what day it actually is.

Hope you all enjoyed your Memorial Day weekend.  We celebrated with family and friends with a cookout enjoying the first of the summer bounty from the Farmer's Market.  Fresh strawberries, corn, green beans, and peaches are in.  Yum.  One of the most enjoyable things about summer is the bounteous fare of fresh fruits and vegetables we get to enjoy.  And, then, there is the beautiful sunshine, warm weather, and summer evenings to top it all off.

Fresh local strawberries are the absolute best don't you think?  It's nice to have access to strawberries all year round, but they just don't taste like the smaller, juicier, sweeter, local berries.  They are just a little taste of heaven as far as I am concerned.

I made this beautiful pecan cake with some of the fabulous pecans my new friend Dianna sent me from Texas.  They pick them up off the ground by the pounds.  There are pecan trees everywhere in the Dallas area.  Yes, I said pounds. Wouldn't that be wonderful?  My daughter told me there is a company you can take them to and they shell them for you.  Amazing!  Who knew?  It's sure better than cracking hundreds of shells and trying to get the nuts to come out in something other than little tiny pieces.  Look at these beauties!
We have bags of them to enjoy.  Lucky us!  So, I decided to make this fabulous pecan cake I found on Food Network.com.  The recipe was posted by Pat and Gina Neeley and is really, really good.  Makes a super "shortcake" for fresh fruit.  Here is what you need:

Filling

1 1/4 cups chopped pecans
3 Tbsp brown sugar
1 1/2 tsp cinnamon

Stir everything together in a bowl until all the nuts are coated.  Set aside.

Glaze:

1 1/2 cups powdered sugar
2 Tbsp lemon juice
2 Tbsp milk

Combine all ingredients in a bowl and set aside.

Cake

1 package golden yellow cake mix
1 cup sour cream
1/3 cup vegetable oil
1/4 cup sugar
2 Tbsp all purpose flour
4 large eggs

Preheat oven to 375 degrees, grease and flour a 9x13 pan

Beat all cake ingredients together for 4 minutes.  Pour half the batter into the prepared cake pan.  Spread the pecan filling on top of the batter.  Pour remaining batter over pecans, spreading batter to cover the filling.

Bake about 30 minutes until toothpick comes out clean.  Let cool 30 minutes.  Drizzle with glaze.

This cake is as good by itself as it is with some beautiful strawberries!  Makes a perfect "coffee type cake" that could be served for brunch.   Or, it's absolutely delicious eaten just as it is.  Give it a try.  It's delicious.

 Everyday Donna

Things to Remember:

 A special thank you to my dad and his two brothers who all served in World War II.  As a mother, I can't imagine seeing three of your sons go off to war.  What a sacrifice.  Fortunately, they all returned.  Others were not so fortunate.   Thank you will never be enough for their service and sacrifice for our freedom.

Thursday, May 23, 2013

Restaurant Style Salsa Roja Made At Home

 Do you love Tex-Mex food as much as we do?  Especially the chips and salsa?  Oh, we always eat too many chips and way too much salsa and then are so full we can't eat our food.  Guess that's okay really, because then we have some leftovers for the next day.

Did you know that salsa is now the number one condiment in the United States?  We eat more salsa in this country than ketchup.  Hard to believe, but it's true.  Salsa is the spanish word for sauce and there are many, many kinds of salsa.  When we refer to salsa, we mean the red kind served at most Tex-Mex restaurants with chips.

Eating salsa at home is a different story.  The biggest problem for me is we don't like jarred salsa.   It always has green peppers in it and Dan can't eat green peppers.  It also doesn't taste like fresh salsa.  You can get some fresh salsa's that are pretty good in the fresh food aisle at the grocery store IF your grocery sells it.  If you can't get it, I have a solution for you!

I have been messing around trying to find a good home made recipe for salsa and I have finally hit upon it.  Dan LOVES this salsa (and he's kind of picky).  It's made with canned tomatoes which means the tomatoes have been cooked and that actually makes them better for you!  Did you know that?  Yes, there is more lycopene in cooked tomatoes.  Lycopene inhibits cancer and cardiovascular disease in humans.

This recipe is really quite easy to make, but you need a blender or food processor to make it.  It is not chopped like pico de gallo which is called salsa fresca and is made from fresh tomatoes, onions, chilies, and lime juice.  Good pico depends on good tomatoes which only happen in the summer around here.  It also takes a lot of chopping.  Salsa roja can be made year round because you can always get canned tomatoes and you can use a blender or food processor.  Guess which one I prefer?

Here is what you need for this salsa.
1 large can whole tomatoes, drained
1 can Ro-Tel original, undrained (unless you like it really spicy, then get the hot kind)
1 small onion, cut in half, chop 1/2 only
1 or 2 cloves of garlic, chopped
2 or 3 limes (depending on size)
1 bunch fresh cilantro
1/4 tsp salt
2 tsp sugar

To make the salsa, drain the can of large tomatoes and put them in the blender or food processor.  Add the Ro-Tel liquid and all.  Cut the onion in half and chop only one half of the onion and toss in the blender.  If your garlic cloves are large, start with 1, use 2 if small.  Peel, chop and toss in blender.  Now for the fun.  I use the "grate" setting on our blender.  Whir it around just until the ingredients are mixed.  You do not want ketchup consistency, but want some tomato pieces in the salsa.  Next, add the salt, sugar, and juice of two limes, and a large handful of cilantro rough chopped.  Whir one more time.   Now taste.  If it needs more salt, add just a pinch.  The sugar is important because it helps cut the acidity of the tomatoes, but don't make it too sweet.  Adjust lime and garlic to your tastes.

We had a big old bowl of this salsa with dinner tonight.  It's delicious.  Also, a serving of salsa counts as a serving of vegetables, so if you have children who are picky eaters but will eat salsa, let them eat away!!

This recipe makes about 4 cups of salsa.  I keep it in the fridge most of the time.  You never know when you might have some unexpected company, want a snack, or something to serve as an appetizer before dinner.  Salsa roja = perfect!  Give it a try.

Everyday Donna

Things to Remember:

A world without tomatoes is like a string quartet without violins.  Laurie Colwin


Tuesday, May 7, 2013

Cinnamon Bread, Picture Frame, Recipe, Gift


To welcome my friends from Texas, I wanted to make some gift bags with home made goodies they could enjoy in their hotel room.  You know what it's like to be hungry, or want a snack, and there is literally nothing to eat, or only expensive machines in the hall that have nothing you like and you have no change.

While "cruising" Pinterest recently, I had seen this idea which was so cool.  At least I think that's where I saw it.  Couldn't find it again.  Baked individual loaves of bread were tied to a picture frame containing the recipe for the attached bread.  Perfect for gift giving.  How great of an idea is that?  That was my starting point.  They would definitely be getting this awesome cinnamon bread that I had found at redflycreations.com.  This bread is amazing and so easy to make.

I found adorable picture frames to use for holding the recipe.  The recipe was all typed and ready to print.  The biggest problem was we were out of printer ink.  NOOOOOO.  So, I had to write out the recipes at the last minute.  
It may not be as neat as printed recipes, but it did the trick.  No one complained.

To their bags, I also added home made Mr. Goodbar Bites that you can find on my blog.  Basically, they are chocolate covered peanut mounds.  Yum.  There were some nice cups with lids and straws that could be used over and over that I filled with different flavors of Crystal Lite.  In addition, there was trail mix, peanut butter crackers and other assorted goodies.  Hopefully, all things they would enjoy.

The Texas Troupe arrived on Thursday evening.  We met them for dinner and I gave them their "welcome" bags.  They let me know they did enjoy them!  Linda had eaten her cinnamon bread before breakfast on Friday morning.  The others wanted to sample and she told them they would have to eat their own.  I don't think the Mr. Goodbar Bites lasted much longer.  They all came in drinking out of their cups, so all in all it was a rousing success.

To make the cinnamon bread, here is what you need:

1 cup butter, softened
2 cups sugar
2 eggs
2 cups buttermilk  (add 2 tsps. vinegar or lemon juice to regular milk if you don't have buttermilk)
4 cups flour
2 tsps baking soda

Cinnamon/Sugar Mix

2/3 cup sugar
2 tsp cinnamon
mix together in a small bowl

Preheat oven to 350 degrees Fahrenheit.

This recipe makes 2 large loaves or 1 large loaf and 4 small loaves.  Grease and flour loaf pans and set aside.

Cream together butter, 2 cups sugar and eggs.  Add milk, flour, and baking soda.

Fill prepared pans 1/2 (or slightly less) full with batter.

Sprinkle 3/4 of the cinnamon mixture over the top of the batter in the pans.  Add remaining batter.  Sprinkle with last of the sugar.  Swirl with knife.  (I forgot to do that, but it didn't make any difference - other than how it looks.)

Bake at 350 for 45-50 minutes or until toothpick comes out clean.  Cool 20 minutes.  Remove from pan.

Since I was giving these individual loaves as gifts, I left them in the disposable aluminum pans and wrapped them in a clear cellophane party bag and tied them to the picture frame with twine.

This.  Bread.  Is.  Beyond.  Delicious!  Oh my, it is so, so good.  We kept the big loaf and shared it during craft time on Saturday.  This is one I will make again and again.  Yummers.
When you need a gift, give a gift of home made love.  Bake your favorite bread and give the recipe with it.  Using the picture frame is such a great idea.  Then, they have a keepsake and something wonderful to eat.  Great idea for teachers, new mothers, neighbors, or anyone for that matter.

Also, you will definitely want to make this recipe for you and your family. They will LOVE it.  It won't last long and you will wish you had more.

Everyday Donna

Things to Remember:


In the sweetness of friendship let there be laughter, and sharing of pleasures.  For in the dew of little things, the heart finds its morning and is refreshed.     Khalil Gibran