Showing posts with label onion. Show all posts

Wednesday, November 13, 2013

Barbecued Beans and Greens (I Added Sausage- Yum)

 Oooh, it has suddenly gotten cold here in Nashville.  It was below 30 this morning and that meant time to put the flannel sheets on the bed.  One thing led to another, and I ended up cleaning the whole house.  I don't know about you, but that leaves me with a great sense of accomplishment.  I even got my closet all organized (which had needed to be done since we moved in here at the end of July).  That sound you hear?  That's me exhaling a giant sigh.  I just love finally getting things done.

Now that cold weather is really upon us - and it is cold in most of the midwest - don't you wish you had some new recipes for tasty comfort foods that are easy to make?  Well, I've got one for you today.  This recipe is SO good and really easy to make.  Our daughter Holly gave me this recipe after she had it at a party for parents of students at her sons' school.  She told me it was one of the best things she had eaten in a long time, and I have to agree with her!  Even her boys like it and they are most suspicious of new things if you know what I mean.

This recipe is made with  cannellini beans, and kale.  As you may know, kale is the new darling of the health food world and with good reason.  It is full of flavonoids and antioxidants.  Kale is good for reducing cholesterol and helps detoxify our systems.  You can read all about the great health benefits of kale here http://www.whfoods.com/genpage.php?tname=foodspice&dbid=38.

I added a pound of browned breakfast sausage just to have a one dish meal.  This recipe would be just as good without the sausage, believe me.  The flavors are amazing.  I can see the skeptical look on your face from here.  Beans and greens?  Barbecue sauce?  Seriously?  You are going to have to trust me on this one and give it a try, just so you will know how good this really is.  Yummmmmmo is all I can say.  Here is what you need:

2 cans cannellini beans, drained and rinsed (white kidney beans are the same thing)
8 cups chopped kale  (1 large or 2 small bunches, stems removed, chopped and blanched)
2 cloves garlic, minced
1 medium onion, chopped
1/2 cup barbecue sauce (they recommend Stubbs, I used Sweet Baby Rays - what I had and it's great)
2 tsps hot sauce  (I used Tapatio)
1/2 cup warm water
2 Tbsp cider vinegar
2 Tbsp dijon mustard
1/4 tsp salt
1 Tbsp olive oil
1 lb. breakfast sausage browned, optional

Preheat oven to 350 degrees Fahrenheit

To blanch the kale, remove the stems, chop in small 1-2" pieces,  and place in a steamer basket over boiling water in a pan big enough to hold all the greens.  Cook for just a few minutes.  Kale can be rather chewy, so make sure you cut it in small bite sized pieces.  Mine was cut a little big and next time I will cut it smaller.  It will just make it easier to eat.  That is my only tip.

Heat the olive oil in a large skillet over medium high heat.  Add the onion and saute for about 6 minutes until soft and translucent.  Add the garlic and saute another minute or so.  Add the blanched, chopped kale and cook for a few minutes.  Add the remaining ingredients and mix well.  

If you are using sausage, brown in a separate pan and add to the above mixture.

If not adding sausage, place everything in a 9" casserole and bake covered for 45 minutes.  If adding sausage, place in a 9 x 13 baking dish, cover and bake for 45 minutes.

Remove from the oven and serve.

This is SOOOO good.  You get protein, greens, fiber, and deliciousness from the sauce.  Serve with some hot bread and you are good to go.  The sauce is so good that I will use this for my baked beans from now on.  Amazingly good.

If you want to serve this as a side dish, leave the sausage out and make as recommended.  Just.  Plain.  Awesome.

I really like recipes that are recommended by others who have actually made or eaten them.  Sometimes choosing recipes can be a toss of the dice.  They sound good, but don't always turn out the way you hoped.  Give this one a try.  It is approved by 3 picky small boys and their Pawpaw.  Thanks, Holly!

Everyday Donna

Things to Remember:

There are two types of people;  those who eat kale and those who should.  Bo Muller-Moore


Monday, November 4, 2013

Hoppin John - Oh So Good

Good Monday friends.  Hope you survived the fall back.  Our daughters, who have young children, are suffering the time change with children getting up really early according to the new clock setting.  I must laugh because we have been there and certainly done that.  They just don't remember what it was like because they were the small children.  What goes around....as they say.

Today, I am sharing a recipe for Hoppin John.  My son, John, taught me how to make this years ago and it is absolutely wonderful.  Hoppin John is a combination of rice and black eyed peas and other goodness like bacon and onions and bell pepper.

My research tells me they are not sure where the name comes from, but Hoppin John was mentioned in cookbooks as far back as 1847.  Chances are, this was a dish made by slaves since there are similar dishes eaten in Africa.

Hoppin John is often served on New Year's Day in the south as a symbol of good fortune for the coming year.  The black eyed peas stand for coins.  Sometimes a few coins are placed under the plate of guests.  Corn bread is served for the color of "gold" and some kind of greens - like turnip or collards - which stands for money, are also served. Supposedly, if you eat this you will have good fortune and prosperity throughout the year.

I don't want to wait until New Year's Day to eat this delicious dish.  It is easy to make and very nutritious.  I promised my friend Linda, who lives in Texas, that I would post this recipe today.  She LOVES black eyed peas and wants to make this recipe.  Here is what you need:

6-8 slices of bacon, cut crossways
1 medium onion, diced
1/2 red bell pepper, diced
2 cloves garlic, minced
2 cans black eyed peas, drained and rinsed*
2 cups rice
4 cups low sodium chicken broth
salt and pepper to taste

In a deep pot, brown the bacon until crisp.  Drain most of the bacon fat off, leaving enough to brown the onions, bell pepper and garlic.  When the onions become translucent, add the garlic, bacon, drained black eyed peas, the rice, and chicken broth.   Cook until the rice is done and most of the liquid has been absorbed.   Stir several times so the rice doesn't stick.  Add salt and pepper if needed.  I didn't add any salt.

*I used Bush's black eyed peas with bacon and jalapeno to add a little kick.  They are not hot, just have a little more flavor.  Try it if you like a little something extra.

This can be a complete meal if you wish, or served as a side.  Delicious!  It also reheats well.

If you are looking for some new winter recipes, this one is a good one to try.  It is easy, nutritious, and delicious.  Remember to serve it on New Year's Day for extra good fortune in the coming new year.  We can all use more good fortune!

Everyday Donna

Things to Remember

“How people could actually get themselves all worked up about saving the grizzly bear of the Rockies, and sit calmly by while such a magnificent dish as South Carolina Hoppin' John faces extinction, was more than I could ever understand.”

Sheila Hibben (1888-1964)


Thursday, May 23, 2013

Restaurant Style Salsa Roja Made At Home

 Do you love Tex-Mex food as much as we do?  Especially the chips and salsa?  Oh, we always eat too many chips and way too much salsa and then are so full we can't eat our food.  Guess that's okay really, because then we have some leftovers for the next day.

Did you know that salsa is now the number one condiment in the United States?  We eat more salsa in this country than ketchup.  Hard to believe, but it's true.  Salsa is the spanish word for sauce and there are many, many kinds of salsa.  When we refer to salsa, we mean the red kind served at most Tex-Mex restaurants with chips.

Eating salsa at home is a different story.  The biggest problem for me is we don't like jarred salsa.   It always has green peppers in it and Dan can't eat green peppers.  It also doesn't taste like fresh salsa.  You can get some fresh salsa's that are pretty good in the fresh food aisle at the grocery store IF your grocery sells it.  If you can't get it, I have a solution for you!

I have been messing around trying to find a good home made recipe for salsa and I have finally hit upon it.  Dan LOVES this salsa (and he's kind of picky).  It's made with canned tomatoes which means the tomatoes have been cooked and that actually makes them better for you!  Did you know that?  Yes, there is more lycopene in cooked tomatoes.  Lycopene inhibits cancer and cardiovascular disease in humans.

This recipe is really quite easy to make, but you need a blender or food processor to make it.  It is not chopped like pico de gallo which is called salsa fresca and is made from fresh tomatoes, onions, chilies, and lime juice.  Good pico depends on good tomatoes which only happen in the summer around here.  It also takes a lot of chopping.  Salsa roja can be made year round because you can always get canned tomatoes and you can use a blender or food processor.  Guess which one I prefer?

Here is what you need for this salsa.
1 large can whole tomatoes, drained
1 can Ro-Tel original, undrained (unless you like it really spicy, then get the hot kind)
1 small onion, cut in half, chop 1/2 only
1 or 2 cloves of garlic, chopped
2 or 3 limes (depending on size)
1 bunch fresh cilantro
1/4 tsp salt
2 tsp sugar

To make the salsa, drain the can of large tomatoes and put them in the blender or food processor.  Add the Ro-Tel liquid and all.  Cut the onion in half and chop only one half of the onion and toss in the blender.  If your garlic cloves are large, start with 1, use 2 if small.  Peel, chop and toss in blender.  Now for the fun.  I use the "grate" setting on our blender.  Whir it around just until the ingredients are mixed.  You do not want ketchup consistency, but want some tomato pieces in the salsa.  Next, add the salt, sugar, and juice of two limes, and a large handful of cilantro rough chopped.  Whir one more time.   Now taste.  If it needs more salt, add just a pinch.  The sugar is important because it helps cut the acidity of the tomatoes, but don't make it too sweet.  Adjust lime and garlic to your tastes.

We had a big old bowl of this salsa with dinner tonight.  It's delicious.  Also, a serving of salsa counts as a serving of vegetables, so if you have children who are picky eaters but will eat salsa, let them eat away!!

This recipe makes about 4 cups of salsa.  I keep it in the fridge most of the time.  You never know when you might have some unexpected company, want a snack, or something to serve as an appetizer before dinner.  Salsa roja = perfect!  Give it a try.

Everyday Donna

Things to Remember:

A world without tomatoes is like a string quartet without violins.  Laurie Colwin


Monday, February 18, 2013

Potatoes Au Gratin With Harp Accompaniment

Hello everyone!  Sorry to have been absent for a while.  Dan and I had the totally creepy crud, the kind that lasts for a week and then takes another week to recover.  Whew.  I hope we don't ever have that again.  It was NOT fun, but we are on the mend.

In the meantime, I have undergone two laser procedures for my glaucoma.  Last week I had the left eye done and today the right eye.  I have had glaucoma for 30 years and am on maximum medications and my pressures won't stay down where they would like them to be.  So, they zapped each eyeball with a fancy little laser (the procedure is called an SLT).  The purpose is to create new drainage pathways.  It took about 5 minutes for each eye.  My eye felt a little irritated for a couple of days, and then it cleared up.  Today, the pressure in my left eye (first eye done) had dropped 7  points in one week.  The pressure usually runs about 23/24 with 4 medications twice a day which is way higher than they would like it to be.  Today, after just one week, the pressure was down to 16!!  Hip, hip, hooray!!  My pressures have not been in the teens for 20 years.  So grateful for the miracles of science and Dr. Bergman.  : )  I will return in six weeks for pressure checks and then my medications will be adjusted, hopefully eliminating  a couple of them!

Now that we are on the mend from our bout of creepy crudiness and our appetites are beginning to return, I had the in town family over for dinner last night.  Do you every get a craving for something and you just have to make it?  Mine was potatoes au gratin. Had to have them.  Cheese, potatoes, onions, creamy goodness.  Yum.  I made a 9x13 pan and there were absolutely none left.  Not.  One.  Bite.  Soooooo good and not hard to make at all.  Here is what you need.

4 pounds of russet potatoes, peeled and thinly sliced
2 tablespoons of butter
2 cups whole milk
1 small onion, minced
1 large clove garlic, minced
1 heaping tablespoon corn starch
8 ounce block of cheddar cheese, grated
1/2 tsp salt
lots of fresh cracked black pepper

Preheat oven to 400 degrees Fahrenheit

Peel potatoes and slice about 1/4 inch thick.  Mince small onion and add to potatoes.  Mince clove of garlic.  Add butter to deep saucepan and melt at medium temp.  Add 2 cups of milk, heaping tablespoon of corn starch, minced garlic, salt, and lots of black pepper.   Stir until milk begins to simmer.  Add all of the grated cheese.  Mix until cheese is melted.  Remove pan from stove.

Grease a 9 x 13 baking dish.  Add potatoes and onions.  Pour sauce over potatoes, should just barely cover potatoes.  Cover with aluminum foil and put in oven for 20 minutes.  Remove the foil and continue to bake for an additional 35/40 minutes until the potatoes are fork tender and the cheese has started to brown.  Remove from oven.  Serve.

These are SOOOOOOOOOOO delicious, you really need to make some as soon as you can.  They are good with any meat.  We had them with grilled barbecued pork chops and grilled asparagus.  Yum.  Yum.  Yum.  

If you know me at all, you know I never met a potato I didn't like and these are one of my most favorite ways to enjoy them.  What's not to like?  Seriously?  Cheese, potatoes, onions, deliciousness.  Is your mouth watering?  Mine is and there are no left overs.  (Insert sad face here).  Guess you know what that means.  Will have to make some more sometime soon.  Give them a try.  You can cut the recipe in half if you don't want to make such a huge pan of them, but you will be sorry later.  They are worth the effort.  Enjoy.

Everyday Donna

Things to Remember:

My friend Ken is staying with us for a bit while he gets settled in Nashville.  He is a harpist and he is practicing while I type this.  He plays so beautifully.  What a treat, our own personal harpist.  Wish you were here to enjoy.  Haven't felt this peaceful in a while.  Thanks Ken.


Wednesday, February 6, 2013

Mas Taco Por Favor's Chicken Tortilla Soup Recipe - Did I Say Fabulous?

We've both been a bit under the weather.  Hacky cough, headache, scratchy throat.  Not feeling terrible, just not great.  The sneezing and runny nose can stop anytime.  Hopefully it will resolve itself soon, and I do hope SOON.  Dan and I have been really healthy for years, but since the grandsons are in school, we seem to come down with a lot of little colds which they bring home from school.  They are all hacking and coughing too.  Springtime can't come fast enough.

Science has found that chicken soup is good for colds and congestion.  This soup I am writing about today is just good for the soul!  Our daughter kept raving about the chicken tortilla soup from a local restaurant called Mas Tacos Por Favor.  This is not your average Tex-Mex place.  It is a little hole in the wall decorated with mis-matched chairs and wobbly tables.  You have to place your order at a window and pray that you find a seat because the place is always packed.

Mas Tacos Por Favor has been written about in many culinary magazines and in the New York Times on June 18, 2012.  Their menu is written on a chalk board and changes every day.  Their tacos are things like braised pork and red mole in la manana, or fried avocado, pulled pork, cast iron chicken and quinoa.  Merciful heavens their food is good.  But, the chicken tortilla soup is divine, their shining star.  Simply heavenly.

I took my chances and googled Mas Tacos chicken tortilla soup and miracle of miracles there was an online recipe in Bon Appetit magazine.  The tortilla soup gods smiled on me with great favor!  Full, rich flavor tasting of lime juice and clear, tasty chicken broth is the base for this soup.  It is topped off with grilled corn, avocado slices, cherry tomatoes, queso fresco and more lime juice.  It has a spicy taste from chipotle chiles and just a bit of jalapeno.  Not too spicy, but just right in my estimation.

Here is what you need to make 8 servings:

1 4 pound chicken
1 onion, quartered
1 carrot, peeled, chopped
5 garlic cloves, smashed
2 dried chipotle chiles
1 jalapeno (with seeds), halved lengthwise
7 cilantro sprigs
3 tablespoons (or more) fresh lime juice
vegetable oil
5 corn tortillas, cut in 1/2 inch strips
2 ears of husked corn, or 2 cups frozen, thawed corn kernels  (I had to use frozen corn)
Chopped fresh cilantro, halved cherry tomatoes, avocado wedges, queso fresco or mild feta, lime wedges.

I didn't have any chipotle chiles on hand, so I used a can of green chiles.  Just a little different, but not the end of the world.

Bring the whole chicken, onion, carrot, garlic, chipotles, jalapeno, and 16 cups water to a boil in a large pot; skim foam from surface.  Reduce heat to medium and simmer, skimming the surface frequently until chicken is cooked through, about 1 hour.

Transfer chicken to a plate.  Strain broth into another large pot.  Return chiles to broth if a spicier broth is desired.  Discard remaining solids.  Shred Chicken meat; discard skin and bones.  Transfer chicken meat to a medium bowl and set aside.

Meanwhile, set pot with strained broth over medium heat and add cilantro springs.  Bring broth to a simmer; cook until reduced to 8 cups, about 1 hour.  Discard cilantro sprigs and chiles if using.  Stir in 3 TBSP fresh lime juice.  Season with salt, pepper, and more lime juice if desired.  Add chicken to broth.

DO AHEAD:  can be made 2 days ahead.  Chill until cold, then cover and keep chilled.

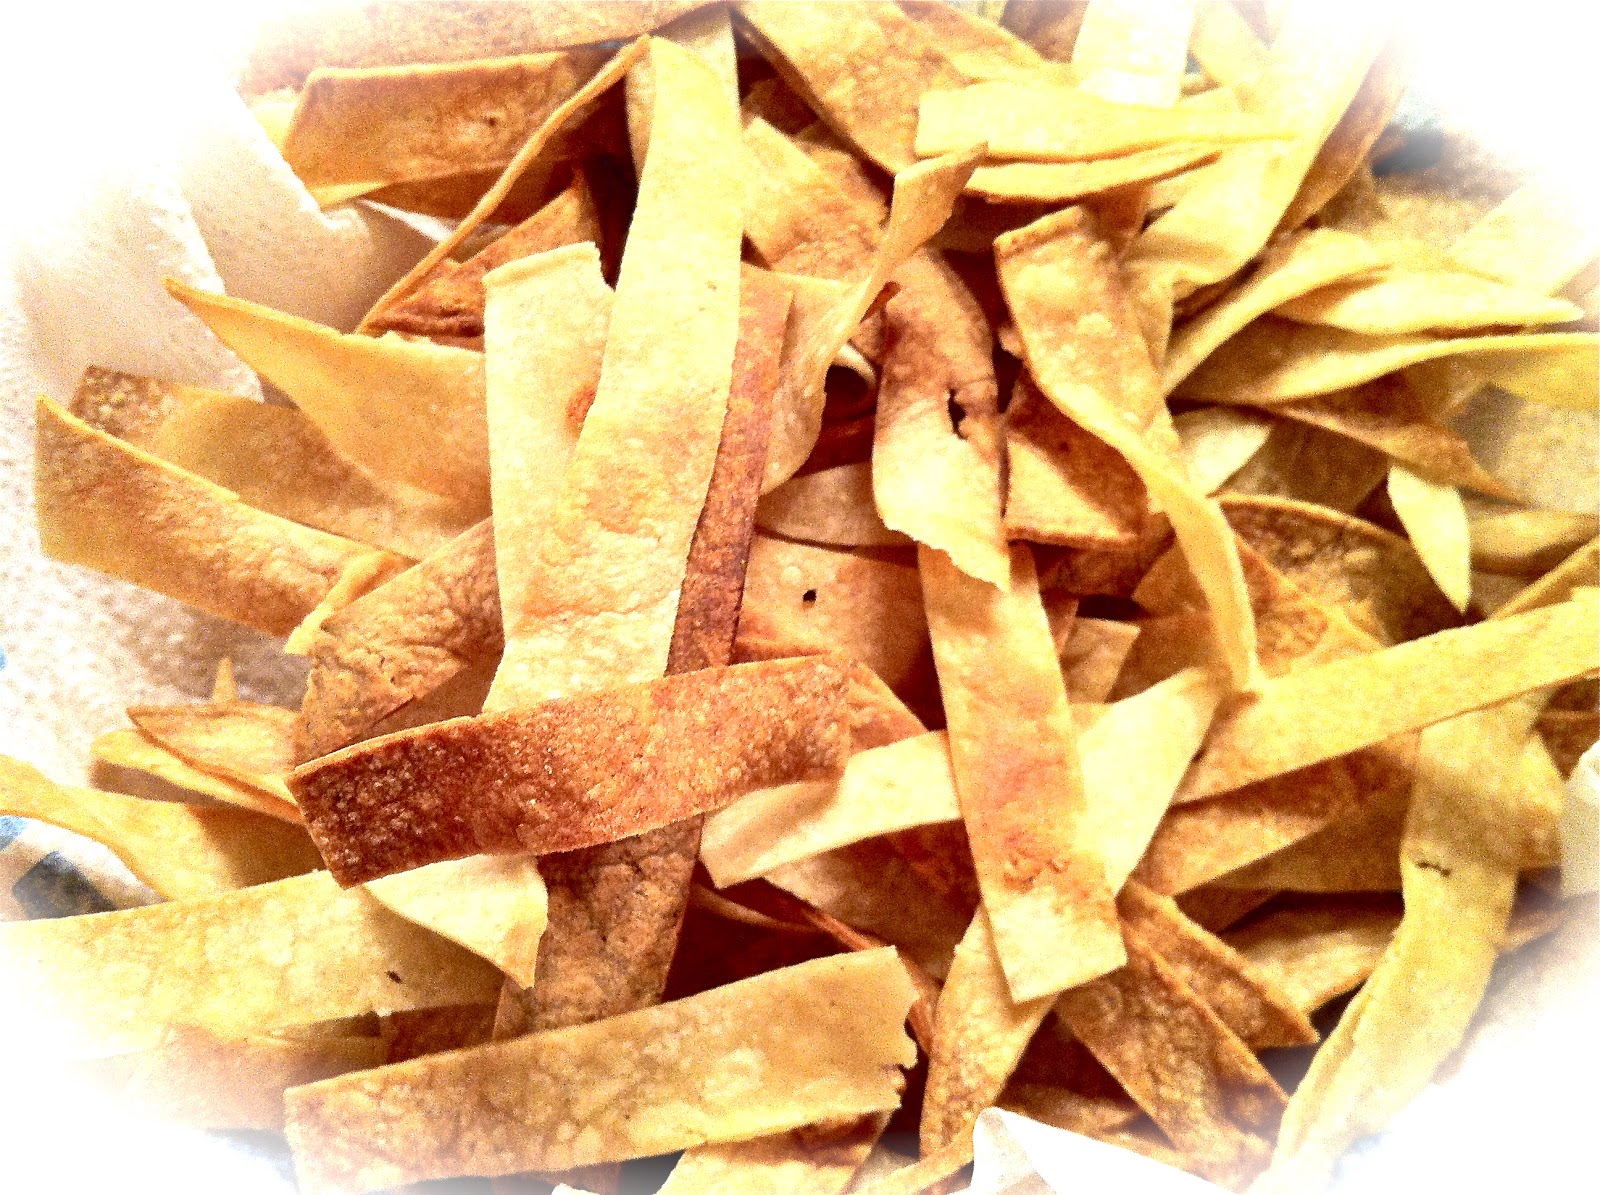
Attach deep fry thermometer to the side of a large cast iron skillet or other heavy skillet.  Pour oil into skillet to a depth of 1 inch.  Heat over medium heat until thermometer registers 350-360 degrees.  Working in batches, fry tortilla strips, turning occasionally until crisp and golden brown, 2-3 minutes per batch.  Using a slotted spoon, transfer to paper towels to drain.  Season with salt.

(I baked my tortilla strips.  Drizzle with oil, toss until coated and put on a baking sheet at 400 degrees.  Stir on occasion to make sure they brown on all sides).
Cook the corn over a gas flame or under a broiler, turning occasionally until charred in spots.  (You can use your outdoor grill too).  Let stand until cool enough to handle  Cut kernels from cobs in strips.   Discard cobs.  (Alternatively, cook kernels in a large skillet over high heat until charred in spots).

Rewarm broth with chicken.  Divide soup among bowls.  I put the corn and tortilla strips in the bowl and then put out plates with toppings because not everyone likes all of them.  (You know who I'm talking about, right?)  We had cherry tomatoes, avocado slices, queso fresco, cilantro and lime wedges. YUUUMMMMMMMMMMMMMMM!

This soup is heavenly.  Divine.  Amazing.  Fabulous.  Incredible.  Awesome.  Flavorful.  Tasty.  Scrumptious.  Is that enough adjectives?

I had never thought of eating avocados in a hot soup broth, but boy oh boy, are they good!  It's all good and will do wonders for a stuffy head.  It's not really hard to make either.  You don't even have to wait until you have a stuffy head to enjoy this fabulous concoction.

If you are ever in Nashville and want some spectacular food, head straight to Mas Tacos Por Favor at 732 McFerrin Avenue in east Nashville.  They are open 11-4 Tuesday through Saturday and I don't know about evenings.  They also have a food truck that makes appearances from time to time around town.  Mas Tacos is owned by Teresa Mason and she certainly knows her stuff when it comes to delicious food.

Give this soup a try.  No, it's not like the chicken tortilla soup you get other places - it's so much better!

Everyday Donna

Things to Remember:

A Jewish woman had two chickens. One got sick, so the woman made chicken soup out of the other one to help the sick one get well.   Henny Youngman


Monday, November 19, 2012

The Tale of The Phantom Turkey

 Hello to you one and all.  How was your weekend?  Hopefully, it was all you wanted and more.  We got a jump on Thanksgiving with my mom, sister, and nephew visiting for the weekend.  Since we would not be getting to celebrate Thanksgiving Day together, I decided we would celebrate on Saturday while they were here.

I spent the day cooking and talking, talking and cooking.  It was a pleasant way to spend the day, enjoying each other's company while doing one of my most favorite things - cooking for those I love.  Of course, the first thing that had to be done was to get the turkey in the oven.  Our oldest daughter worked at a cafe in New York City when she lived there and they baked a turkey every day for sandwiches and dinners.  It was, perhaps, the best turkey I had ever eaten and that is the way I prepare turkeys now.

Mr. Turkey was an 18 pounder and had been thawing in the refrigerator for several days.  He had to be brined on Friday for cooking on Saturday.  Have you ever brined a turkey?  If not, this holiday is the perfect time to start!  It makes the most delicious, flavorful, succulent turkey you have ever eaten and it is really quite simple to do.  I used our Coleman cooler for the brining process, or you can get a new 5 gallon bucket at a home improvement store (like Home Depot) to use.

Make sure you remove all the extras from the turkey that are hiding inside and trim any extra skin and fat from the neck cavity.  Now, make your brine by adding 1.5 cups of coarse salt to a pan containing a quart of water.  Cook and stir until the salt has dissolved.  Remove from the heat and let cool before pouring over the turkey.

When the brining water has cooled, put the turkey in the cooler, or bucket, and pour the cooled brining water over the turkey.  Keep adding water (NOT hot), until the turkey is covered.  You will need at least 7 quarts of water and maybe more.  Add a bag of crushed ice to the water and close the lid of the cooler.  Turkey can be brined up to 24 hours before baking.  If you are using a bucket for the turkey, cover the turkey with water and set the bucket in a cooler and place ice around the bucket.

When you are ready to bake the turkey, remove it from the brining water and wash it thoroughly to remove any remaining salt residue.  Place the turkey in the roasting pan.  Now for the fun part.  This is how I bake the most delicious turkey ever.  In the cavity of the turkey, place one apple that you have cut in half, one large onion that you have cut in half, a quartered lemon, 3-4 garlic cloves, and a handful of fresh thyme sprigs.   You may have to push and shove to get it all arranged, but it is SO worth the effort.  Now, put your hands under the skin on the breast and gently pull the skin loose by moving your hands up and around as far as you can go.  Place fresh thyme sprigs under the skin, as much as you can get under there.  Now, wasn't that fun?

Next, turn the wing tips so they will lay under the body of the turkey so they don't burn during roasting.  This is a really awesome trick I picked up from Alton Brown on the Food Network.  It takes a little twisting and turning to make it happen, but again, it is SO worth the effort.

Now, make a tent of aluminum foil over the turkey, leaving the ends open.  It took two pieces of foil to cover this big boy.  Now, you are ready to begin the roasting process.  Place the turkey in your 350 degree preheated oven.  Recommended cooking time is 15 minutes per pound for a turkey that is not filled with stuffing.  So, if you have a 20 pound turkey you are looking at 20x15, or 300 minutes or 5 hours.  Figure roasting time by multiplying the weight of your turkey times 15 divided by 60.  BE SURE AND ALLOW ENOUGH TIME FOR ROASTING THOROUGHLY!  When a meat thermometer is inserted into the thickest part of the thigh, the temperature should be 180 degrees.  Now, you can remove the turkey from the oven and let it rest at least 20 minutes before carving.

I was so busy getting all the side dishes ready, and the grandsons were starving and begging to eat, so I got in a "get er done" mode.  My daughter asked what she could do to help and I said you can carve the turkey.  I finally had everything ready to go and a loud cheer went up (no, not really), but the mothers started preparing their son's plates when it hit me.  NOOOOOOOOOOOO.  I did not take a picture of my beautiful turkey.  Probably the most perfect turkey I had ever roasted.  It was beautifully golden, not one burned place anywhere.  How could this be?  It was like the moment in A Christmas Story when the Bumpusses' dogs had eaten the Christmas turkey.  I was devastated.  I had worked all day to make this beautiful bird and there was nothing but the carcass.  NO. PICTURE. TAKEN.  WAAAAAAAAAAAAAAA.  So, I did the next best thing and took a picture of the carcass just to prove there was a turkey.  A real turkey that I had cooked.  It isn't a phantom.  It was a beautiful, delicious turkey.  It was all I could do.  You can see the beautiful golden skin and the ruins.  I know, it's not the same, but it's what I got.  That's what happens when you take pictures of the food you are getting ready to eat.  This is not a photo op, this is not food that is prepared just for pictures, this is hard core dinner food.  No food stylists here, just Grandma trying to get the food on the table.

I did get a picture of some of the awesomely delicious white meat left on the platter.  This turkey was so good that I wish you could taste it.  Brining is the way to go my friends and adding an apple to the cavity helps the turkey retain moisture.  The onions, garlic, lemon and thyme add more flavor than you can ever imagine.  Yes, this is the way to roast a turkey and it got rave reviews from everyone in attendance.  Even our oldest grandson who may be the world's pickiest eater loved it!  Grandson #2 kept asking for more turkey again and again.  There wasn't much left of this big boy, just enough to make a turkey pot pie and a couple of sandwiches.  I guess that's a worthy testimonial eh?

If you are planning to roast a turkey and don't know how you are going to do it, give this method a try. You will be glad you did.  You will have only a carcass to prove you actually roasted that bird.  And a smile on everyone's face.   And that is the tale of the phantom turkey.   Happy Thanksgiving everyone.

Everyday Donna

Things to Remember:

Be thankful every day, not just on Thanksgiving.  Live with an attitude of gratitude.


Monday, October 8, 2012

The Recipe Is Called Chinese Eggs - We Call It Scrumptious

It's Monday once again and it has gotten cool enough that we had to turn the heat on in the house.  Who would have thought it would get that cool this early?  The fact that there was snow in some parts of the country set records and the Today Show said there is only a 5% chance of snow this time of year.  I certainly hope that is not an indication of the kind of winter we might have.  Yikes!

Today's recipe is one that I have had for many years.  Dan taught school for 38 years and on payday, groups of teachers took turns providing breakfast for all the other teachers, aids and administrators in the school.  It was just a nice little "pick me up" to look forward to on everyone's favorite day - payday.  One Friday he came home raving about the breakfast they had that morning.  He kept telling me it was called Chinese eggs and I could not for the life of me figure out what that could be.  I told him to ask for the recipe and he did.  Let me tell you, this is a really delicious recipe that is easy to fix and oh so good.  You can make it for breakfast, brunch, lunch or dinner.

Our daughter, son in love and grandsons were coming over for dinner last night and I decided to do breakfast for dinner.  The boys LOVE eggs and bacon and I knew it was something they would actually eat for once.  Chinese eggs were a huge hit with the oldest grandson who is 9 and a very picky eater.  Hooray, I finally found something he really likes besides hamburgers.  His comment was it reminded him of fried rice like you get at Chinese and Thai restaurants and he ate two huge helpings.    The advantage is, it is not stir fried and much easier to make.  It is very savory and delicious.  Here is what you need.

1 box Uncle Ben's wild rice (I used 2 boxes of the 5 minutes Uncle Ben's wild rice)
1 stick butter
12 eggs
1/2 lb boiled ham, diced (I cut ham from a baked ham and diced it, works fine)
1/2 onion diced


Cook the Uncle Ben's wild rice according to directions on the box and set aside.  Crack 12 eggs into a bowl and whisk.  Set aside.  Saute the diced ham and onions in 1/2 stick of melted butter.  I did this in my electric skillet.  Add the eggs and scramble.  Add the cooked rice and mix thoroughly.  Add the other 1/2 stick of butter and melt into the egg/ham/rice mixture, stirring until the butter is melted.  No salt is needed in this recipe.  The butter, ham and rice are all flavorful and have enough salt.

That's it.  You are done and ready to serve!

We had fried potatoes with onions, a plate of bacon (for the boys) and a green salad to enjoy with this wonderfully tasty main course of rice, eggs and ham.  We also enjoyed my cinnamon toast coffee cake with this meal which was a major hit with the boys!

I did not give this dish the name Chinese eggs, it is what the recipe was called when it was given to me.  Whatever you decide to call it, call it delicious because it is.

With the testimony of a 9 year old boy, you know it's got to be good right?  This recipe will serve 8-10 people easily.  Give it a try the next time you want something different for dinner or are hosting a brunch or breakfast.  Your guests will thank you and will definitely want the recipe.  Don't you love meals that are easy AND scrumptious?  This is one of those for sure.

Everyday Donna

Things to Remember:

He that but looketh on a plate of ham and eggs to lust after it hath already committed breakfast with it in his heart  C. S. Lewis


Monday, August 6, 2012

Gluten Free Lasagna Made With Zucchini - Fantastic!

Greetings friends!  Yes, I have been absent for a week due to a little hiatus.  We had to make a trip to the old home town to help  my sister after she had some surgery.  Then, we were without internet and television for a few days due to some unknown reason that AT&T had trouble figuring out.  Do you know what it's like to have no television during the Olympics?  Holy gymnastics, Batman, it is NOT fun.  After 5 days, many phone calls and several repairmen later, they finally got everything working.  Hallelujah!  I did get to see that sweet Gabby Douglas win her gold medal.  Awesome.

Our oldest daughter and her family have been on vacation for the last 10 days and just returned this afternoon.  I knew she would not feel like cooking after spending all day in airports with 3 young sons, so I offered to fix dinner.   Dan took them to the airport for their departure so their van had lived at our house during their trip.  He went to pick them up at 4:30 and I fixed dinner so they could literally eat and run.  The boys were F R I E D!  They got up at 5 am eastern time to get to Boston in time to catch their flight home.  They are very brave people.  During dinner, the two year old melted down and then the 5 year old was right behind him.  Mom and dad looked like they might cry.  Grandma and Pawpaw just laughed - been there, done that.

Our son in love has Celiac so I always fix something that is gluten free.  I was in the mood for lasagna (and who doesn't love lasagna?), but decided to make it with zucchini instead of pasta noodles.  Let me tell you, it's absolutely fantastic and I may like it this was better than with noodles.   This would be great for a meatless dish also.  Just leave the meat out of the sauce.  Easy peasy.

Here is what you need:

3-4 zucchini about 8 inches long, sliced longways in 1/4 inch slices
1 pound ground beef, turkey or sausage (I used beef)
2 jars of your favorite spaghetti sauce (I use Trader Joe's tomato basil - it's gluten free and delicious)
1 medium onion, peeled and chopped
2 cloves garlic, minced
8-10 cremini mushrooms (baby bellas)
1.5 containers fresh ricotta (15 ounce each)
3 eggs
1 16 ounce package shredded mozzarella cheese
1 fresh mozzarella ball
salt
pepper

First, slice the zucchini longways in 1/4 inch slices, salt on both sides and let drain in a colander.   Zucchini has a lot of water in it and you don't want it in your lasagna.

Brown the ground beef (turkey or sausage) with the chopped onion and garlic, salt and pepper to taste.  Throw in the sliced mushrooms and the two jars of pasta sauce.  Heat until it bubbles, remove from heat.

Mix 1.5 containers of fresh ricotta cheese in a bowl with 3 eggs.  Set aside.

Spray a 9x13 casserole with cooking spray.  Press the zucchini slices between paper towels to remove any excess moisture.  Line the bottom of the casserole with a layer of zucchini.  See, it works just like noodles.
  Cover the zucchini with 1/2 of the meat sauce.
Put 1/2 the ricotta mixture over the meat sauce in large dollops and then spread with a spoon.
Sprinkle 1/2 of the 16 ounce package of shredded mozzarella over the ricotta mixture.
Add another layer of zucchini over the mozzarella layer and repeat the layers - meat sauce, ricotta and shredded mozzarella.  Cover the last layer of shredded mozzarella with slices from the fresh mozzarella ball.
Cover the casserole with aluminum foil and put it in a preheated 325 degree oven for 45 minutes.  Remove the foil and increase the temperature to 350 degrees for another 15 minutes until all the cheese is melted.  Remove from the oven and let rest for 5-10 minutes.  Serve.  Super D-licious.

I would recommend putting your casserole on a baking sheet while baking, because now I get to clean my oven since the ooey gooey cheese and sauce dripped all over the bottom.  Ugh.   Oh well, it was time to do that anyway.

We had a lovely green salad and crusty bread with this lasagna.  I have to say, I think I may be a zucchini lasagna convert at this point.  It's also a great way to use bounty from your summer garden!  One more delicious way to use up that zucchini!

If you are gluten sensitive or allergic, this is a great way to enjoy lasagna without having to find gluten free noodles.  It is so worth the effort to slice those zucchini and you get the extra nutrition from that delicious squash.  Give it a try and see what you think.  You may become a convert too!

Everyday donna

Things to Remember:

“Once again, my life has been saved by the miracle of lasagna.”
'Garfield' (Jim Davis)