Showing posts with label pepper. Show all posts

Thursday, September 18, 2014

Bacon Jam is the Jam!

So sorry I have not posted in a while, but I have taken up painting and it is occupying a lot of my time.  It is my new passion.  Anyway,  this weekend, we are hosting an engagement party for our best friend's daughter and future son in love and I have been busy in the kitchen preparing things that I can do in advance.  They all look so good.

The house is all spit shined and polished and fall decorations are all in place.  It is supposed to be a beautiful day (yahoo), so we will put tables and chairs out under the trees for guests to enjoy a beautiful Tennessee September day.  The patio is another option for guests.  I love having options, don't you?

Today, I made this spectacular recipe for Bacon Jam that I found on Pinterest from The Kitchen Wife.  When we hosted our son's engagement party on July 4th weekend, I made fresh fig jam.  Sadly, there are no figs available here now, so I had to go with something different.   Well, finding this bacon jam was the answer and let me tell you, IT IS THE JAM!  WOW!!

The fig jam was served with goat cheese and crackers.  It was beyond delicious.  Hopefully, this will be just as successful - and I'm pretty sure it's going to be!  I mean, bacon?  Seriously?  Cooked with onions and wonderful spices?  It smelled so good while I was cooking it down, I could hardly stand it!  Oh my goodness!

The Kitchen Wife said it is good spread on a hamburger,  on a BLT, or as a pizza topping.  I can only imagine, because I could eat it by the spoonful.  It is amazing.  Here is what you need.

1 pound bacon (actually most bacon comes in 12 ounce packages now instead of a pound, but that             works)

2 medium yellow onions, or l large onion, peeled and sliced
2 TBSP Butter
2 TBSP rendered bacon fat
1/4 cup brown sugar
1 TBSP vinegar (she called for white, I used apple cider and it worked great)
1 1/2 tsps thyme
1/2 tsp cayenne
1/2 cup water
1 TBSP balsamic vinegar
1 TBSP extra virgin olive oil
salt and pepper to taste

Put the package of bacon in the freezer for about 15 minutes to make it easier to slice.  (I just took a package out of the freezer and sliced it, worked great).  First, remove the bacon from the package and cut across the bacon in 1/2 inch slices to make lardons.  I had nice big strips of sliced bacon because it was frozen together.  Don't be concerned, as it cooks it quickly falls apart into separate pieces.

Put the cold bacon into a cold skillet to help render the fat from the bacon.  Turn the heat on to medium and allow the bacon to cook until all the fat is rendered.  It takes about 30 minutes.  The bacon will foam as it cooks - that is the fat being rendered.  It will look like this.
When I read the directions, I wondered if I knew when it was foaming.  It's like being in labor, you will know when it happens.  :)  You want to cook the bacon until all the fat has been rendered and the bacon and the fat are deep, dark brown - about the same color.  Watch the bacon, because when it gets to this point, it can burn VERY quickly.  As soon as it got very dark, I started removing the bacon to a bowl lined with a paper towel so it would drain.  Work fast, you don't want to ruin this lovely concoction!

While your bacon is cooking, peel and slice the onion very thin.  I cut my onion in half first, and then sliced it.  That way, it doesn't roll all over the place while slicing.

After you have removed the bacon from the pan, pour the excess bacon fat into a separate bowl (there was a LOT).  Do not discard.

Add 2 tablespoons of butter to the pan and 2 tablespoons of the bacon fat.  Add the sliced onions and cook over medium heat until they are translucent and soft.  They will be very brown.

Add the brown sugar, vinegar, half of the thyme, cayenne, a little salt and pepper.  Stir into the onions.

Chop the bacon very fine and add to the pan.  Stir all together.  Add 1/2 cup of water and let simmer until the water is almost gone.  She said 30 minutes, but mine was done in 20.  I have a gas stove, don't know if that makes the difference.  Just watch and don't let it burn.

Now, add 1 tablespoon of balsamic vinegar, 1 tablespoon of extra virgin olive oil, and the rest of the thyme.  Cook another 15 minutes, or until the liquid is almost gone.  Mine was done in 10 minutes.  The jam should be very dark like in the picture.  Yum.

Taste for seasoning and add a little salt and pepper if needed.

When you are finished, you have this beautiful, dark brown pan of bacon and onions that smells absolutely divine from the spices that have been added.  When I tasted it, it was sweet and savory and smoky all at the same time - with BACON!  Did I say bacon?  Oh yeah.

My BFF was here and I had her taste it.  She declared it divine and I looked at her and said "One jar won't be enough, will it?"  I had better make another.  And, so I did.  This should keep in the refrigerator up to 2 weeks  - if it lasts that long.  (Bring the jam to room temperature before serving.  There will be white spots of fat in it otherwise.) I can see more of this in my future.

One recipe makes 1 pint jar of bacon jam.  We are going to have this with goat cheese and crackers on Saturday.  I will let you know the crowd reaction.  I think it's going to be good.  Really, really good.

This would be a great housewarming gift, hostess gift, teacher appreciation gift, or Christmas gift.  In a basket with other goodies?  Wow!  Give it a try.  I think you are gonna love it.

Everyday Donna

Things to Remember:

My grandmother ate bacon every day of her life and lived to be 96.  How bad could it be then?


Tuesday, July 29, 2014

Ribs Cooked With a Dry Rub Low and Slow - Incredible!

 Hello, friends.  It was a beautiful day here in mid Tennessee.  We were busy painting furniture this morning, and then I did my afternoon canvas art.  There is always that proverbial "what's for dinner" question hanging in the air.  I wanted something really good, but easy.

Do you get tired of fixing the same things over and over for dinner?  I certainly do.  While grocery shopping at Aldi yesterday, I noticed they had some really nice looking baby back ribs that were super reasonable.  They were $9.00 for a rack of ribs.  I don't ordinarily buy ribs because I think they are way too expensive for what you get.  Sometimes it seems there is more bone than meat.  Well, these looked really good, so I bought some.  It was a wise decision.

While cleaning up my paint brushes from the furniture painting session, I decided it would be ribs for dinner.  Yesterday, I cooked a bit pot of fresh green beans with new potatoes and a big pan of fried corn.  Both were fresh from the farmer's market.  Can I say Yum?  Yum!  There was also a fabulous cantaloupe in the fridge that I had sliced.  Excellent!  All I had to do was cook the ribs and reheat the vegetables.  I LOVE when that happens.

To cook the ribs, I decided I would put a dry rub on them and cook them in the oven low and slow first.  Then, we would put them on the grill for a bit, just to get them good and brown.  I made up my rub using spices that I had on hand and I had to write it down tonight so I wouldn't forget it because I will be using it again.  These ribs were so juicy, tender, and flavorful that we could not stop talking about how good they were.  Fortunately, there are some left for tomorrow.  Yay!

Here is what I used in the dry rub.

2 tsps salt
1 tsps fresh cracked black pepper
2 tsps Mexene chili powder (use your favorite, Mexene is mine)
2 tsps paprika
1 tsp ground cumin
1 tsp garlic powder
1/2 tsp cayenne pepper
1 tsp dried oregano
1 tsp dried thyme

Mix all the dry ingredients thoroughly and rub on both sides of the rack of ribs.  (This was just enough for one rack of ribs.  Increase the amounts by doubling or tripling if you are planning to cook more than 1 rack.)  I let the ribs set out for about 30 minutes so they would come to room temperature before cooking.

Preheat your oven to 250 degrees F.  It's all about low and slow.  After the ribs have set out for about 30 minutes, place them on a baking pan with sides.  I used a sheet cake pan.  Cover the pan with aluminum foil and place the pan in the oven.  Cook the ribs for 2.5 - 3 hours on low heat.  They smelled so good while they were cooking I could hardly wait to eat them.   For the last half hour, remove the foil and let the ribs continue to cook.

When I removed the ribs from the oven, I cut the rack in half to make them easier to handle on the grill. Dan put them on the grill for about 10 minutes because I did not want them to dry out.  They were just perfect when he removed them from the grill.

Not only did they have beautiful color, they tasted amazing.  I cut the ribs apart and put them on a platter.  We were both picking at little pieces of the meat before everything else was ready.  Dan couldn't wait to dive in.  Oh my, they were so good - so tender and flavorful.

This post is mainly so I remember what I used in the rub, but I also wanted to share the recipe with  you.  This rub would be good on just about anything, but it made these ribs some of the best we have ever had.

Give it a try, I think you will certainly enjoy the end result.

Everyday Donna

Things to Remember:

Summertime bounty makes meals so enjoyable.  Support your local farmers!  donna

Thursday, January 30, 2014

Cuban Style Pork Butt In The Slow Cooker

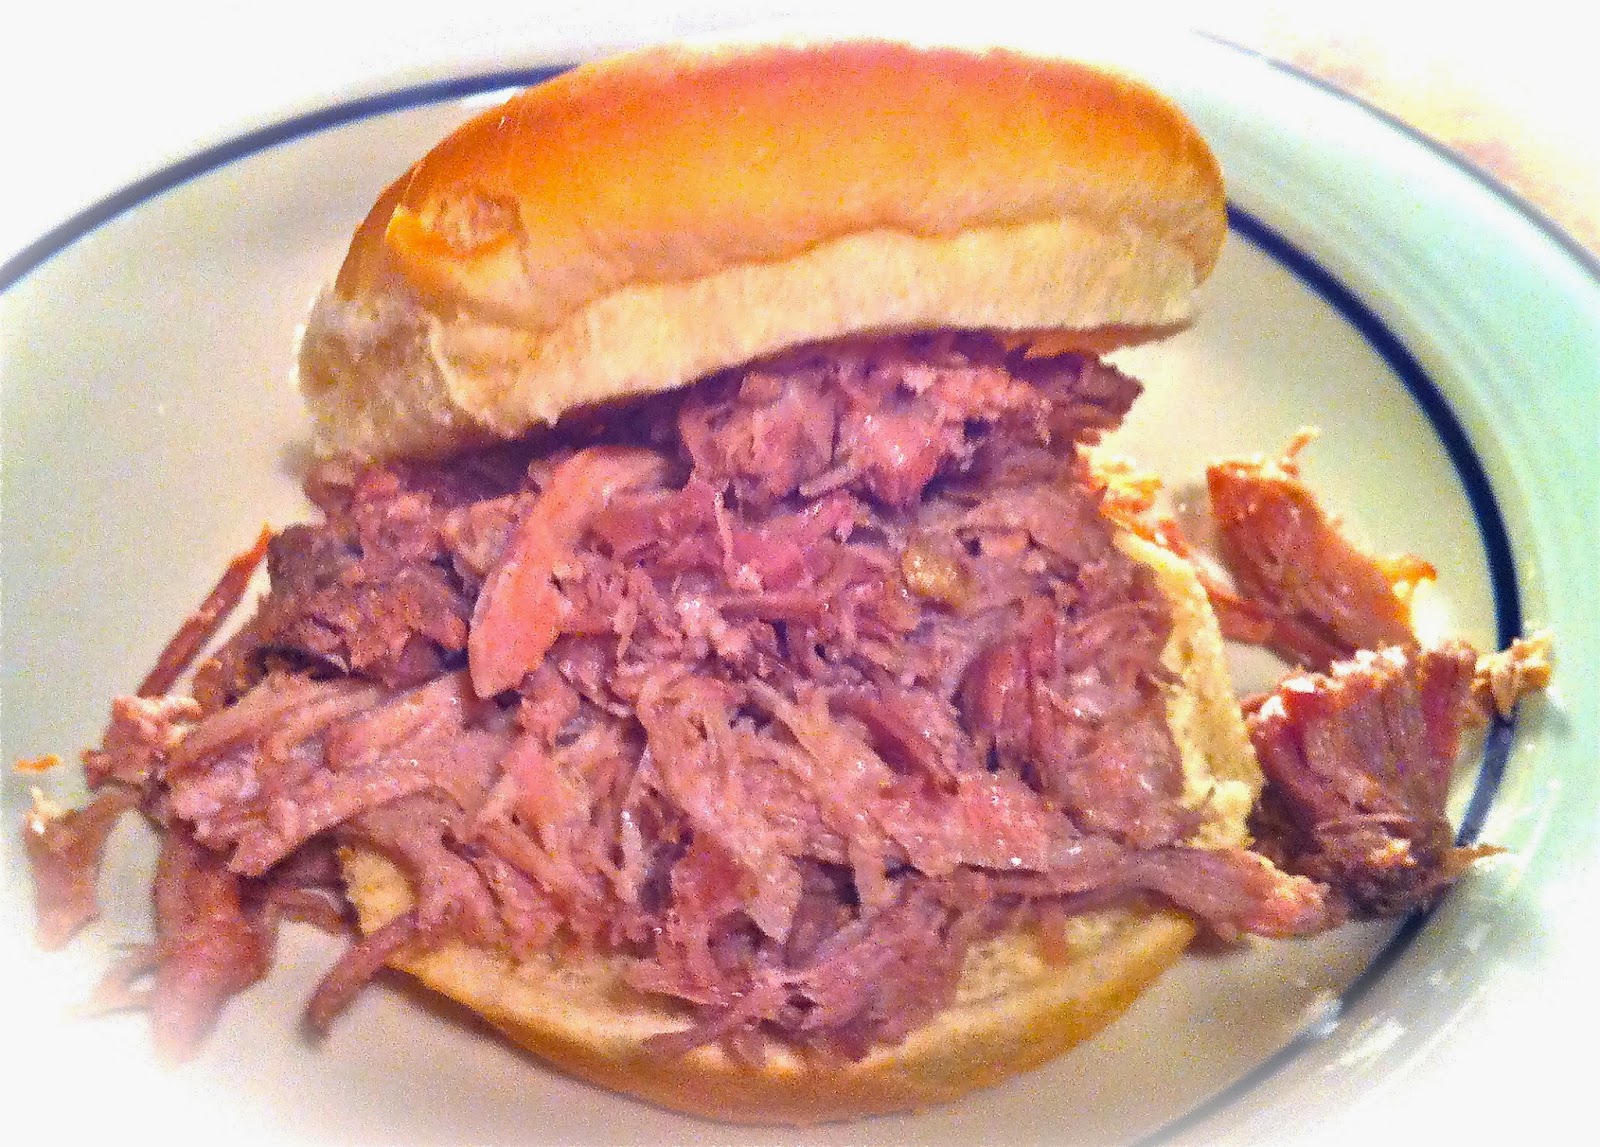
Super Bowl is coming up fast - like this Sunday.  Are you having a party, going to a party?  Do you need to fix something for guests or take something to someone else's party?  Well, I have got a super delicious recommendation for you.  How about a pork butt or shoulder cooked Cuban style in a slow cooker?  It cooks all day and the meat literally falls apart when it is done.  It is easy, super delicious, and this recipe is a keeper!

You can use the meat as pulled pork, you can make a sandwich, eat it plain, you can make a Cuban style sandwich with it, you can add barbeque sauce or hot sauce, whatever you like.  How about sliders or carnitas which are pork tacos?  All you do for carnitas is put a little oil in a pan and cook the pork until it starts to crisp on the outside.  Serve with tortillas and your favorite toppings.  So good!

This recipe came from the Huffington post.  Yesterday I was in the house because of "the" cold and "a" cold, and I had this pork butt that I needed to cook.  I was going to do it low and slow in the oven and finish it on the grill.  Well, it was too dang cold, so I looked up some recipe options and found this slow cooker one.  Lucky me, because it is awesome and we will be having this again and again!

Here is what you need:

1 pork shoulder or butt, about 4 pounds
6 large garlic cloves, more if they are small
1 TBS coarse kosher salt (1 1/2 tsps table salt if that is what you have)
1 TBSP ground cumin
1 TBSP dried oregano
1/2 cup lime juice
1 cup orange juice

First, you are going to make a paste out of the garlic, salt, and herbs.  Using the flat side of a big knife, mash the garlic into the salt until you have a paste.  Add the cumin and oregano.

Lightly salt and pepper the outside of the pork butt.   Cut 2 inch slices into the skin side of the pork butt or shoulder.  Make them about 2 inches deep and 2 inches apart.  Rub the garlic/herb paste into the slits all over the pork.

Put the pork into the slow cooker and add the lime and orange juice.  Cook on high for 6 to 7 hours.

Carefully remove the pork from the slow cooker.  I had to remove it in pieces because it literally fell apart.  I put it in a 9 x 13 baking dish and pulled it with a fork to make smaller pieces.  Easiest pulled pork ever!  Is it good?  You bet it is!  Amazing flavor and texture - so tender and delicious.

We had guests for dinner last night and everyone truly enjoyed every last bite of this fabulous pork.  That is why I know it would be a major hit for a Super Bowl party.  You can do so many things with it or enjoy it in a simple fashion by spooning some of the au jus over the meat.

Have you ever had a Cuban sandwich?  They are DEEEEEElicious.  They have pork, deli ham, mustard, pickles, and swiss cheese on Cuban style bread (if you can find it).  If not, use an Italian loaf or something a little crusty like ciabatta .  You could use a baguette and make smaller sandwiches.  We simply ate this flavorful, tender pork like a barbecue sandwich on a bun.  Eat it any way you like and it will be delicious.

If you are not attending or hosting a Super Bowl party, you can still enjoy this recipe this weekend.  It is easy and worth every minute of those 6 hours cooking time.  Your house will smell amazing and you will be pacing the floor waiting for it to be done so you can dig in.  Yes, it's that good.  Dan highly endorses it.

Everyday Donna

Things to Remember:

The Super Bowl is Americana at its most kitsch and fun.  Sting


Tuesday, January 14, 2014

Cheese Stuffed Manicotti Is Divine!


 Happy Tuesday, everyone.  It has been an absolutely beautiful day here in Nashville.  Mother Nature loves to tease us with 60 degree weather in mid January, but that is about to change.  While out and about today, we saw the salt trucks treating the streets with beet juice for the snow that is supposed to blow in tonight.  How can she do that to us?  Just how?  I know it's winter, and I know it's mid January, but we all really, really like 60 degree weather.  Really, we do.  And, we'll be good - promise.  Double promise, if you will only send more sunny days with mild temperatures.

I know that won't do a bit of good, but it's worth a try.  Makes me feel better if nothing else.  Tomorrow, it's going to be a high of 39.  I tried.  We'll see what happens.

Last night, our son Tyler and his roomie, Rick, came over to join us for dinner before they take off on their next big adventure.  I whipped up some cheese stuffed manicotti, (super yum), a beautiful green salad, and some crusty bread.  It was quite a hit.

Sometimes, you just need some pasta to soothe your soul.  It can be a super comfort food.  This recipe is one I have been making for years and years.  Don't know where I got the recipe, but am sure glad I found it because it is delicious.   You can make it with meat or vegetarian, whichever you prefer.

If you aren't familiar with manicotti, it is a big, fat, tubular pasta that is made to be stuffed.  The box I bought had 14 noodles in it and it fills a 9x13 baking dish.
I made this dish vegetarian for Christmas dinner for those who don't eat meat.  Our super picky 10 year old grandson gorged himself on it and he kept saying, "Grandma, this is SOOOOO good."  I couldn't have guessed after he ate the fourth helping.  That's just to confirm how good it is.  That boy won't eat much of anything and is suspicious of everything.  The good thing is this has lots of tasty cheese, big pasta noodles, marinara sauce, and meat if you want it.  I added spinach to my recipe on Christmas for some extra nutrition.

The noodles are filled with a combination of ricotta cheese, parmesan cheese, and mozzarella cheese.  What could be better?  Then, it is covered with your favorite marinara sauce to which you may or may not have added ground beef or Italian sausage - your choice.  I used Italian sausage last night and it was amazing!  

Here is what you need:

1 box Manicotti noodles, cooked for about 7 minutes - you want it very al dente since it bakes in the oven

1 26-32 ounce jar of your favorite marinara sauce (I use Trader Joe's marinara with basil)
2 beaten eggs
1 and 1/2 15 ounce containers ricotta cheese
8 ounces grated mozzarella cheese, reserve half
1 fresh ball mozzarella cheese
1/5 cup grated parmesan cheese
1/4 tsp salt
pinch of black pepper

Combine the eggs, ricotta, 1/2 of the mozzarella, grated parmesan, salt and pepper.  Mix thoroughly to completely combine.


Cook the manicotti noodles in boiling salted water for 7 minutes.  Remove, drain, and let cool until you can handle comfortably.  I used to fill these with a spoon and it is so hard to do.  You chase the noodles everywhere when your hands get goopy with the cheese filling!  They are super hard to hold on to.  Now, I have a nifty trick.  Cut the corner from a gallon sized zip lock bag.  Fill the bag with the cheese filling and pipe it into the noodles by gently squeezing the bag.  Start on one end and fill half way, turn the noodle and fill the other end.  This will keep the noodles from splitting if you don't overfill them.
Sorry, I could not take a picture while filling the noodles.  Only two hands and no one else was here.  Next time maybe!  You can figure it out I am sure.

Fill the 9 x 13 baking dish with the noodles by laying them side by side.  There are always two at the bottom crossways.  Just how it goes.

Brown 1 pound of ground beef or Italian sausage.  Drain if necessary.  Add the marinara sauce and combine with the browned meat.  Pour over the noodles in the baking dish.  Cover with the remaining shredded mozzarella.  We like more mozzarella than that, so I also sliced a ball of fresh mozzarella and scattered it over the sauce.  Bake at 350 degrees fahrenheit for 45-50 minutes.  Make sure the dish is covered with foil while cooking.  Remove from oven and let cool a little before removing the foil. I normally serve two stuffed manicotti at a time because it's VERY filling.  The guys ate more than that.  Go figure.
This dish also reheats very well.  We are having leftovers tonight.  Yay.  That means no cooking for me!

Give this recipe a try.  I think  you will really, really like it.  It's great for entertaining because it looks like you worked all day making it - very impressive.   I mean, you just can't go wrong with pasta, sauce, and cheese now can you?

Everyday Donna

Things to Remember:

Life is a combination of magic and pasta.  Federico Fellini


Tuesday, October 22, 2013

Baked Pear Spinach Salad With Mascarpone, Cashews, And Champagne Vinegar Dressing


Here it is Tuesday, October 22nd already.  How did this happen?  Where is it going?  Why am I not ready for cold weather or the fact that I had to put on closed shoes on Sunday because it suddenly got cool?  Bye bye sandals until next spring.  Sigh.  It makes me so very sad when sandals have to go.  My feet are not very happy.  I'll be waiting until the first warm day to drag them back out.  Believe me.

One of the really nice things about fall though is the abundance of tree fruit like apples and pears.  YUM!  I like apples, but I LOVE pears.  Dan is not a fan.  He doesn't like the texture which to me is unfortunate, but to each his own.

My daughter and I were talking about pears last week and she mentioned she had baked some.  Baked pears?  Why had I never thought of that.  When I got home, I headed straight to the world wide web and researched some baked pear recipes.  This is one I created by combining several things together for this fabulously delicious salad for dinner.  (The dressing recipe is my own.)  Are they good?  Let me count the ways.  My, oh my.  Here is what you will need:

Pears - as many as you want to bake (I used Bartlett)
1/2 to 1 stick butter
1 container Mascarpone cheese
Cashews, rough chopped (I used about a cup)
Home made Champagne Vinegar Dressing - recipe below

To check if pears are ripe, push around the stem to see if it's soft.  If so, they are good to go.  You want ripe pears for baking.

First, if you have never baked pears, this is how I did mine.  I used Bartlett pears and cut the pears in half, scooping out the core in each half.  I used a teaspoon to core the pears.  You can bake 2 halves, or as many as you want.  I did 3 pears the first time which was 6 halves.  Sunday, I did 5 pears for 10 halves.  I melted a half stick of butter in a baking dish for the 6 halves and a whole stick for the 10 halves.  Preheat the oven to 350 degrees Fahrenheit.  Put the butter in an appropriate sized baking dish and melt the butter in the oven.  As soon as the butter is melted, remove the baking pan from the oven and coat the pears in the melted butter.  I rolled them on the skin side, then placed them cut side down in the butter.  Bake for about 45 minutes until they are fork tender.  Sunday, I baked these and this is how they look when they come out of the oven.  Heavenly.
Now, turn the pears over to expose the cut and cored side.  Place large dollops of mascarpone cheese in each pear half and stick them back in the oven for about a minute or two until the cheese melts.  Don't let it all run out of the pears.  It's the really good part.
If you are not familiar with Mascarpone cheese, it is an Italian cheese that sort of has the consistency of cream cheese but tastes like whipped cream.  Double yum.

I decided I wanted salty and sweet to go with the fresh spinach, and I had a can of cashew halves on hand.  I rough chopped them and sprinkled them over the melted mascarpone cheese.  I put several hands full of fresh baby spinach on salad plates and put a pear in the middle of the spinach.  I sprinkled more chopped cashews on the spinach.  Now to make the dressing.  I don't always measure when making dressing, but this is pretty close and you may want to adjust it to fit your taste.  It is sooooooo good, especially the tanginess with the sweet and salty.  Yummo.

Champagne Vinegar Dressing

Finely mince about 1/4 of a small shallot, super fine.

Using a large clove of garlic, make a paste out of it by putting about 1 to 2 teaspoons of salt on a cutting board and mashing the garlic with the flat side of the knife.  Work the knife back and forth, pressing and mashing until you have a paste made from the garlic clove.

In a bowl, pour about 1/2 cup good quality extra virgin olive oil in and add the shallot and garlic paste.  Add about a tablespoon of Dijon mustard. (two big squeezes) Add the juice of one lemon and two big splashes of champagne vinegar (probably about 2 TBSP).  Add one small pinch of salt if needed and fresh cracked black pepper.  Whisk until combined and drizzle over the spinach and the pear.  Serve.  Consume.  Just try to savor each bite.  Delicious.  (The dressing is so good I could probably drink it with a straw.)

This is such a pretty salad to present with whatever entree you are serving.  Perhaps you will just want to eat the salad with some good crusty bread.  Or, maybe you would prefer the baked pear without the spinach and dressing and consider it dessert.  It all works and it is wonderful any way to choose to eat it.  Truly.  They also keep nicely in the refrigerator (covered) and can be eaten the next day.  I ate mine cold and it was delish!

Sometimes things just come together in an oh so right way.  If you like pears, this is a great way to enjoy them.  Yes indeedy.

Everyday Donna

Things to Remember:

Pears have been cultivated and enjoyed for thousands of years.  Homer referred to them as a "gift from the gods" in the Odyssey.  healthdiaries.com

pear


Monday, March 11, 2013

Childhood Memories - Fried Catfish, Potato Salad, and Corn Bread

Happy post "spring forward" to you all.  Does anybody else feel like a truck hit you because of lack of sleep?  We are feeling the time change here at the little yellow cottage big time and I don't really know why.  Dan and I have both been a bit draggy.  The cloudy, rainy day probably didn't help.  But, it's SO nice to have more daylight later in the day.  The rain clouds cleared up late in the afternoon and it was still light at 6:30.  Yahoo!  I am so looking forward to warm spring and summer evenings when it stays light until 8 or 8:30 and the grandsons can play in the yard while we sit outside enjoying it all.  Bring it on!

I spent most of the weekend working on spring craft projects.  What did you do? I have got a lot of new things to show you once I get them all finished.  Spent most of today with my hands covered in glue working on a fun project.  That's your hint for today.  Check back later in the week to see if there is anything you want to try.  After having fun crafting all day, it was time for dinner.

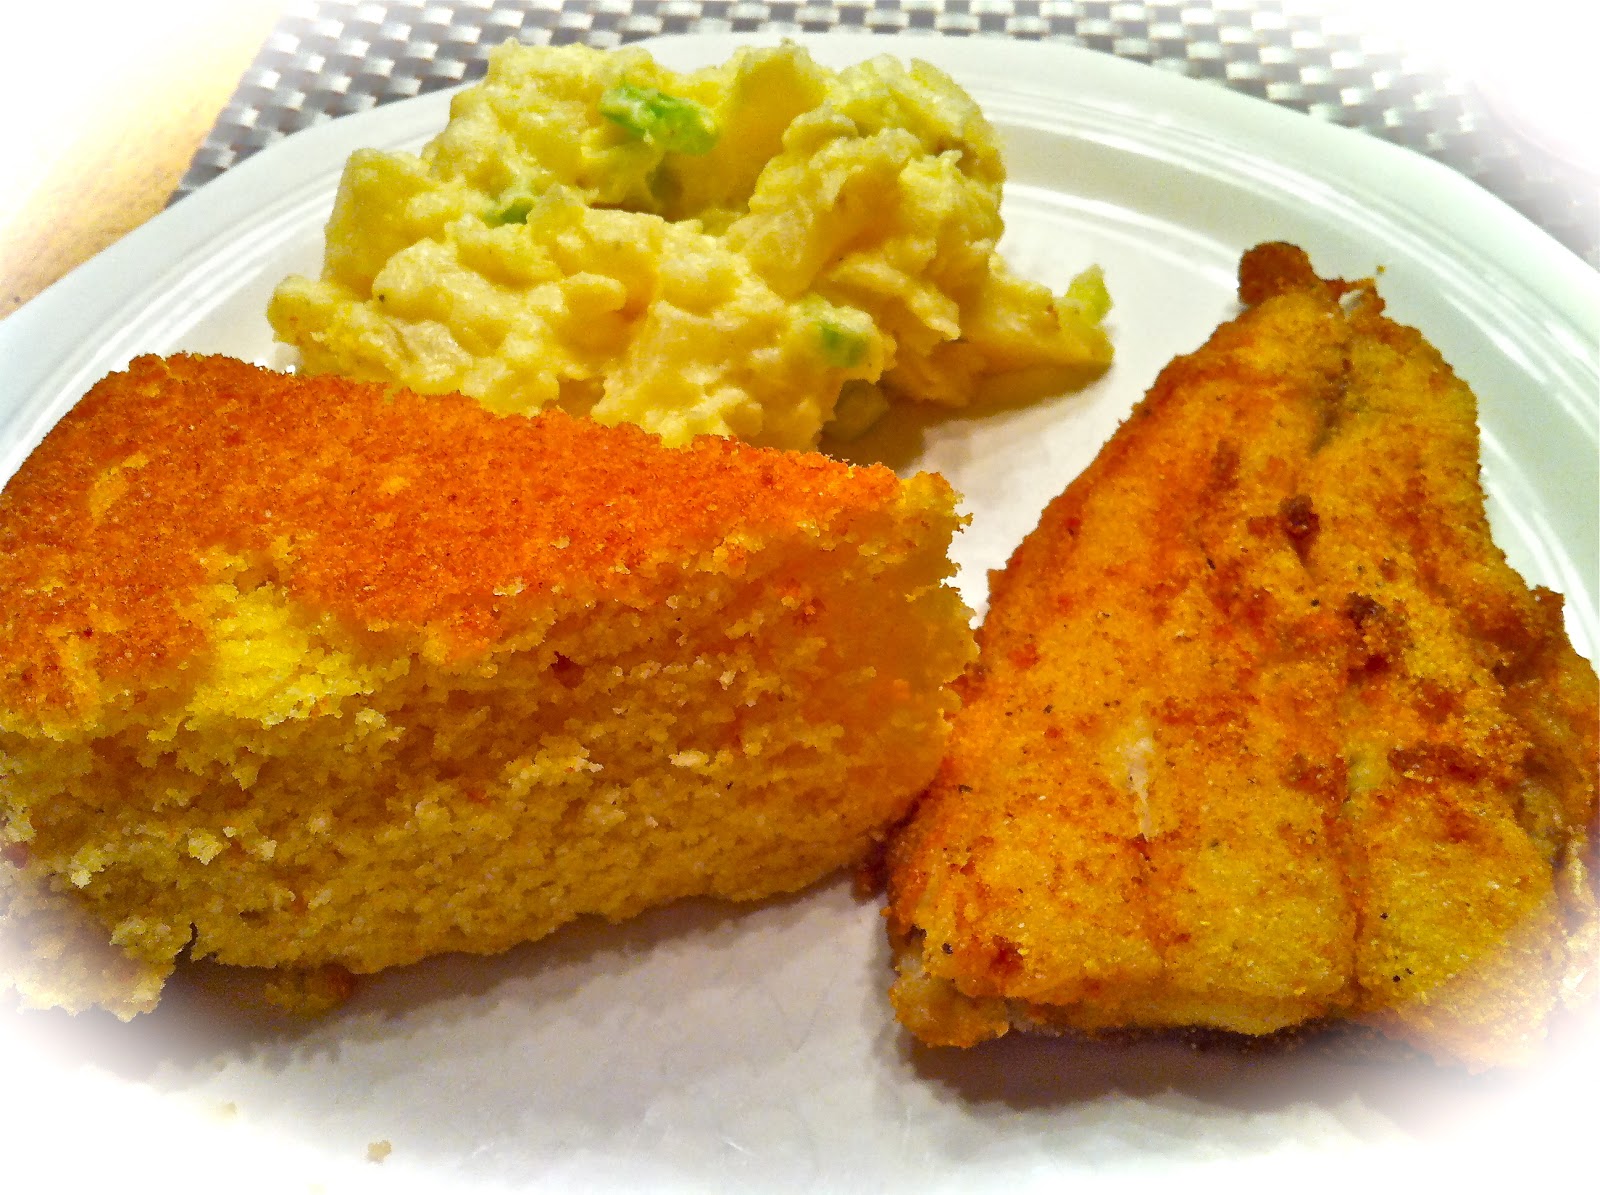
Dinner tonight was a flashback from my childhood, one of my all time favorites.  Everyone has some favorites from childhood and this just happens to be one of mine.  Fried catfish, potato salad and corn bread baked in a cast iron skillet.  Yum.  Yum.  Dan and I both grew up eating fish and loving it.  Dan's dad loved to fish and my uncle loved to fish.  Several times a year, my aunt would call and invite us over for a big old fish fry.  Talk about excited!  That meant all of the above would be on the menu, or maybe hush puppies in place of cornbread and ALWAYS a lemon meringue pie which is probably my most favorite pie to this day.  Just makes me think of warm summer evenings and family eating outside under the huge weeping willow tree.  Such a good memory.

I happened upon some lovely catfish fillets at Kroger and snagged them right up.  I knew that I would be cooking them the "old fashioned way" as I call it.  Simple.  Salt and pepper, rolled in corn meal and fried.  Couldn't be easier if you tried.  I am not a fan of tempura type breading on fish like they do in most restaurants.  I like crispy, crunchy cornmeal browned to perfection where you can taste the fish and not just the breading.  Here is how you make this fabulous catfish.  If you are using fiddlers, or nuggets, follow the same procedure.  You can use this same method on most any fish that  you fry.

These fillets were huge.  Here is one in a 9 x 13 baking dish just to give you an idea of the size.
I knew turning them would be difficult while cooking, so I cut them all in half to make it easier.

First, salt and pepper both sides of the fish.  Place about 2 cups of yellow corn meal (to which you have added about another 2 teaspoons of salt and thoroughly mixed into the cornmeal) in a dish deep enough for breading your fish.  Lay one side of the fish in the cornmeal and kind of press it with your hands so it is well coated with cornmeal and then turn and do the same to the other side.  If there are any "bald" spots, sprinkle more cornmeal over those places and press with your hands.  Coat all your fish pieces in the cornmeal.
Traditionally, this fish is cooked in a cast iron skillet, but I have a glass top stove.  Cast iron gets very hot and can crack a glass stove, so I use my trusty electric skillet set at 350 degrees.  Feel free to use a skillet on your stove.  Add about 1/2 inch of vegetable oil and let it heat until it ripples.  That is when you are ready to fry baby fry.  Letting your oil heat first keeps the cornmeal from sticking to the pan instead of the fish.

Do not turn the fish until you see that the cornmeal is starting to brown around the bottom edges of the fish.  Use a spatula, and not a fork, to turn the fish so it doesn't fall apart.  Cook the other side until golden brown.  Gently lift the fish up just a bit with the spatula to make sure the fish is good and brown before removing from the pan.  Depending on how thick your fish is, it should only cook a few minutes (3-5) on each side.
When removing the fish from the pan, hold it over the skillet for a few seconds to let any excess oil drain from the spatula.  You want it to be beautifully golden brown.
Yum.  Yum.  Yum.  Can you see the edges of the fish where it is all crispy and crunchy.  That is my favorite part.  Delicious.

Even though this fish is filleted and should not have any bones in it, you may want to check each bite  before eating it.  Fish is good, bones are bad.  Just a little warning, especially if you have small ones eating with you.

Oh, this was such a delicious meal.  I know everyone doesn't like fish, but it is so good for you and a wonderful alternative to meat.  Dan and I both grew up eating blue gill (called bream in the south), crappie, cat fish, striped bass and we even caught some Northern Pike one year at Kentucky Dam that was awesome.

If you love cornbread (and I don't mean Jiffy Mix, which I do use), I will share the recipe with you later for a big old cast iron skillet full of old time goodness.  Put a big old slab of butter on it while it's hot and, oh baby, you have got a treat.  The cast iron skillet gives it an amazing crust and it is nothing but crumbly, warm corn goodness on the inside.  Yes sir!  That's what I'm talkin' about.  It also makes fabulous cornbread dressing.

Memories.  This satisfyingly delicious meal gave me a little trip down memory lane this evening.  Sometimes, those are good trips to take.  Family recipes and ways of preparing food are worth passing on and learning to prepare.  It keeps our family memories alive.  Tell the stories to your family of what your favorite foods mean to you.  It's history.  Family history.

Everyday Donna

Things to Remember:

“In my South, the most treasured things passed down from generation to generation are the family recipes.”   Robert St. John

Monday, January 28, 2013

Parmesan Chicken Sticks - Perfect For Super Bowl Sunday

Iiiiiitttttttt's Monday!  Again!  Hope your weekend was spectacular.  We spent ours at grandsons' (plural) basketball games on Saturday and helped our other daughter pack her house for their big move this week.  Have you ever packed to move with two little ones running around?  I have, and all the help you can wrangle is a major bonus.  Some to pack and some to chase children.  They are moving to a new house all on one level.  She is so excited.  No more flights of stairs to navigate with two little boys.   Talk about a workout.  Wow.

On Friday night, I felt ambitious and wanted to fix something different for dinner.  Don't you get tired of the same things all the time?  I sure do.  Well, that huge package of boneless, skinless chicken breasts  in the fridge looked like they were it whether they wanted to be or not.  I hunted around the net to see what I could find as far as recipes using chicken breasts.  One of the first places I always look is Foodnetwork.com.  Lots and lots of good recipes on there and Ina Garten, better known as the Barefoot Contessa, always has awesome recipes that are not hard, but always flavorful and delicious.  What did I spy, but a recipe for parmesan chicken sticks.  Sounded good to me!  I mean, who doesn't love chicken parmesan?   And, what to go with them?  Why my 3 cheese mac and cheese of course (made from scratch) and a recipe for zucchini cakes that I found on Pinterest a while back.  They are like potato pancakes made with zucchini and a tzatziki sauce to go with them.  Yum.  Yum.  Yum.

I put our youngest son to work grating zucchini while I prepared the parmesan chicken sticks.  They are really easy and oh my goodness delicious.  These would be perfect for Super Bowl serving!!  For Super Bowl you want some finger type food that guys will love and these certainly fit the bill.  Here is what you need:

1 1/2 pounds skinless, boneless chicken breasts (3 to 4 - I used 4 and had a mound of chicken sticks)
1 cup flour
1 tsp kosher salt
1/2 tsp freshly ground black pepper
2 extra large eggs
1 cup seasoned bread crumbs (I used Italian bread crumbs)
1/2 cup grated Parmesan
Unsalted butter
Good olive oil
Bamboo skewers 6-10 inches long, optional

Directions

Lay the chicken breasts on a cutting board and slice each diagonally into 4 or 5 large strips.  (The chicken breasts I had were very large so I got 6-7 strips per breast).  I also ended up doubling the breading recipe.

Combine the flour, salt, and pepper in a shallow bowl.  Beat the eggs with 1 TBSP of water in a second shallow bowl.  Combine the breadcrumbs and Parmesan in a third shallow bowl.  Dredge the chicken breasts on both sides in the flour mixture, then dip both sides into the egg mixture and roll in the bread-crumb mixture, pressing lightly to coat.

Heat 1 TBSP of butter and 1 TBSP of olive Oil in a large saute pan and cook the chicken sticks on medium low heat for about 3 minutes on each side, until just cooked through.  Don't crowd the pan.  (I used my non stick electric skillet so I could cook more at a time).  Add more butter and oil and cook the rest of the chicken sticks.  Serve each stick on a skewer if you want.  (We didn't bother, but could be good for the Super Bowl).

You can keep the chicken breasts warm for about 15 minutes on a sheet pan in a preheated 200 degree F oven until you finish all the chicken sticks.

We ate these with some Trader Joe's marinara sauce (warmed) for dipping.  Mm, mm, mm, mm, mmm.  Dan and Tyler declared these fantastic and we certainly will be making them again!  We had a huge plate of chicken sticks and enjoyed them for two more meals.


If you have children, I guarantee they will love these scrumptious pieces of chicken.  So will anyone at a Super Bowl gathering.  They were so tender and tasty we could not stop commenting on how delicious they were.  Tyler, who is somewhat of a foodie, TRULY liked them if you want a good testimonial from someone with rather discriminating taste.  Dan declared the meal better than most restaurant meals which made the effort more than worthwhile.

Thanks Ina for a great recipe!  Hope you all give it a try.

Everyday Donna

Things to Remember:

I predict that one of the teams will win the Super Bowl.  ; )


Friday, January 4, 2013

Hash Browns, Regular, Smothered, Covered, Chunked, and Diced


It's Friday.  Hooray!  It's dinner time.  Boo!  What should we have?  I didn't want to go to a lot of trouble, but we were hungry.  For what?  It's always my decision somehow.  If I ask Dan what he wants, he always says "What do you want?"  So, I just may as well make a decision.  What do I want?  Something easy, but tasty.  Hmmmmmm.

Do you know what was on my mind?  Waffle House fried potatoes!  Have you ever eaten at a Waffle House?  We stop there often when traveling because the food is consistent, inexpensive and you can be in and out in nothing flat - not lots of waiting like there is at so many sit down restaurants.  They cook the food right in front of you, and they serve breakfast 24/7.  Yum.

Now,  you know,  I have never met a potato I didn't like.  Seriously.  But, there is only one thing better than fried potatoes and that is fried potatoes with onions.  The Waffle House goes a little further with their hash brown potatoes.  This is how they list it on their menu.  You can get them: Regular, Large or Triple,  All the Way, or:

smothered - sauteed onions
covered - melted cheese
chunked - grilled hickory smoked ham
diced - grilled tomatoes
peppered - jalapeno peppers (or you could use bell peppers)
capped - grilled mushrooms
topped - Bert's chili
country - sausage gravy

When you place your order, they yell to the person on the grill:  "one order regular, smothered, covered, chunked and diced" if that's the way you order them.  That is the way I fixed them tonight!
Can I tell you how good they were?  Well, I will.  They were amazingly good - and easy to fix.  It took me a total of 20 minutes to have this wonderful dinner on the table.

You could put any toppings you like on hash brown potatoes.  Yes, anything your little heart desires.  Here is how I made these for our dinner tonight.

First, I chopped a medium onion, diced about 10 cherry tomatoes (they're hard to see in the red bowl), diced some deli ham, and grated about 1/3 block of cheddar cheese.  Whatever you are going to add, have it prepared beforehand, because the cooking part goes pretty quickly.


I used 1/2 a bag (about 15 ounces) of frozen hash brown potatoes.  I try to keep frozen hash browns in the freezer at all times.  They are great when you want a meal in a hurry.  No peeling and chopping, which is what I usually do.


Using a large skillet, put in a good amount of vegetable oil and let it get really hot, until it starts to ripple.  I would say 1/4 cup, depending on how many potatoes you are going to fry.  Start with 1/4 cup, you can always add more if needed.  Add the potatoes and spread out in the skillet.  Add the onions at this time because they take the longest to cook.  If you are going to use chopped bell pepper, add it also.  These two items take the longest to cook.

Let the potatoes brown on the bottom before you stir.  Once they start to brown, stir them so that you bring the brown potatoes to the top and the uncooked potatoes are on the bottom.  Stir as needed with a spatula so that you scrape all that brown goodness off the bottom of the pan.  You know that crispy, crunch part?  mmmmmm  When the onions become translucent and the potatoes are getting good and brown, add the ham and tomatoes.  Stir thoroughly so they will get good and hot.  Salt and pepper to taste.  The last think to add is the cheese.  Sprinkle it over the top and let it melt.  Remove the pan from the stove and you are ready to serve!
You now have Regular, smothered, covered, chunked and diced potatoes.  This is a complete meal and we have left overs for breakfast.  I simply added some fresh fruit and a nice piece of buttered toast.  Just like the Waffle House only better because we didn't have to leave the house.   If you don't want meat, don't add it.  Add any ingredients you think would be tasty.  I would use red bell pepper, but they don't agree with Dan.  Needless to say, we didn't miss them.

Anytime you need a quick and scrumptious meal, think about trying a meal like this.  You could add eggs on the side if you wanted and make a complete breakfast for dinner.  These potatoes would also be great for breakfast or brunch.  They are so easy to make and so good to eat.  Yum. Yum. Yum.

Next time you want a fast, easy, tasty meal, give these a try.  You will make them again.  Yes, you will.

Everyday Donna

Things to Remember:

You can fix this meal faster than you can drive to a fast food restaurant and go through the drive through.  Fixing food at home does not have to be a chore.  It can be quick and delicious.


Monday, September 17, 2012

September - Hunger Awareness Month - Chicken Noodle Soup Recipe

Happy Monday all.  This is a continuation of a series on hunger awareness in the United States.  Since the onset of the Great Recession as it is called, need for assistance in obtaining food has risen drastically.  Here are some statistics from FeedingAmerican/Second Harvest concerning the SNAP program, or Food Stamps as many call it.

SNAP (Food Stamps): Facts, Myths and Realities
 

SNAP: PROGRAM FACTS
SNAP is targeted at the most vulnerable.
  • 76% of SNAP households included a child, an elderly person, or a disabled person. These vulnerable households receive 84% of all SNAP benefits.[i]
  • SNAP eligibility is limited to households with gross income of no more than 130% of the federal poverty guideline, but the majority of SNAP households have income well below the maximum: 85% of SNAP households have gross income at or below 100% of the poverty guideline ($22,350 for a family of four), and 62% of SNAP households have gross income at or below 75% of the poverty guideline ($16,762 for a family of four).[ii]
  • The average SNAP household has a gross monthly income of $731, net monthly income of $336, and countable resources of $333.[iii]
SNAP is responsive to changes in need, providing needed food assistance as families fall into economic hardship and then transitioning away as their financial situation stabilizes.
  • Because SNAP participation closely follows unemployment, SNAP responded quickly and effectively to the recession. As the number of unemployed people increased by 110% from 2007 to 2010, SNAP mirrored that growth with a 53% increase in participation over the same period.[iv]
  • The average length of time a participant stays on the program is 9 months.[v]
  • As the economy slowly recovers and unemployment begins to fall, SNAP participation and costs too can be expected to decline. The Congressional Budget Office projects that SNAP will shrink nearly to pre-recession levels as the economy recovers and need abates.[vi]
SNAP has a strong record of program integrity.
  • SNAP error rates declined by 61% from FY1999 to FY2010, from 9.86% to a record low of 3.81%.[vii] The accuracy rate of 96.19% (FY2010) is now at an all-time program high and is considerably higher than other major benefit programs, for example Supplemental Security Income (90%), Medicare fee-for-service (89.5%), and Medicare Advantage Part C (85.9%).[viii] [ix]
  • Two-thirds of all SNAP payment errors are a result of caseworker error.[x] Nearly one-fifth are underpayments, which occur when eligible participants receive less in benefits than they are eligible to receive.[xi]
  • The national rate of food stamp trafficking declined from about 3.8 cents per dollar of benefits redeemed in 1993 to about 1.0 cent per dollar during the years 2006 to 2008. As you may have read in local news, USDA is aggressively enforcing individual cases of trafficking, but while there are individual cases of program abuse, for every one allegation of fraud, there are hundreds of stories of heartbreaking need.[xii] 
The need for food assistance is already greater than SNAP can fill.
  • SNAP benefits don’t last most participants the whole month. 90% of SNAP benefits are redeemed by the third week of the month, and 58% of food bank clients currently receiving SNAP benefits turn to food banks for assistance at least 6 months out of the year.[xiii]
  • The average monthly SNAP benefit per person is $130, or less than $1.50 per person, per meal. [xiv]
  • Only 55% of food insecure individuals are income-eligible for SNAP, and 29% are not income-eligible for any federal food assistance.[xv]

SNAP: MYTHS & REALITIES
Categorical Eligibility
 Categorical eligibility allows many people to automatically enroll in SNAP who wouldn’t otherwise qualify for the program.
  • Categorical eligibility does not allow households to enroll automatically; they must still apply through the regular SNAP application process, which has rigorous procedures for documenting applicants’ income, citizenship, work status, and other circumstances.
  • Categorical eligibility allows states the option of aligning SNAP eligibility rules for gross income and assets with TANF to reduce administrative costs and simplify the eligibility determination process. While three-fourths of SNAP households were categorically eligible, almost all would also have been eligible for SNAP under standard rules.
  • While a small number of households would not have met gross income and asset eligibility rules without categorical eligibility, SNAP families are still among the poorest households:
    • SNAP rules limit eligibility to households with gross income under 130% of poverty and net income at or below 100% of poverty. The average SNAP household has a gross monthly income of $731 and net monthly income of $336. Only 1% of SNAP households in 2009 had monthly net income above 100% of the poverty line.
    • SNAP rules limit eligibility to households with assets of no more than $2000. The average SNAP household still has assets of only $333. [xvi] Additionally, the SNAP asset limit of $2,000 has not been adjusted for inflation in 25 years and has fallen by 48% in real terms since 1986.  
  • FeedingAmerica.org
Food insecurity is a real and serious problem, especially for America's children.  Do what you can to help food pantries in your area.  By donating to FeedingAmerica/SecondHarvest, you can increase your buying power 4 fold due to arrangements they have for purchasing food and distributing it to pantries and those in need.
The East Nashville CoOp Ministry, where I volunteer preparing healthy and nutritious meals, receives food from Second Harvest for food boxes.  We feed anywhere from 50 to 100 people a day on a budget of only $50.00.  That is a true challenge when it comes to feeding that many people.  
Today was a rainy Monday and it makes for a hard day for shelterless people.  They come to the CoOp to get in out of the rain and enjoy a healthy dinner prepared by a staff of volunteers.  We make our menus in advance and little did we know when we decided to make delicious home made chicken noodle soup that it would be a really great day for enjoying a bowl of steaming, delicious soup.  We also served jicama lime tuna salad sandwiches with lettuce and tomato garnish and fruit salad.  I make every effort to incorporate fruit and greens in our clients diets several times a week so that they receive proper nutrition and fiber.  
To make our soup, we cooked 4 whole chickens in a gigantic pot and used LOTS of ingredients that you would not use for making soup at home (same ingredients, different portions).  I like to make at least one "marrow" soup a week so that everyone receives the added benefits of the marrow which aids digestion and adds lots of muscle and bone building nutrients.  Besides that, it tastes wonderful.  This is how you can make a nice pot of delicious home made chicken noodle soup to enjoy.

1 whole chicken (innards removed)
1 large onion, halved and cut into thin sliced "moons"
4 carrots cut into "coins"
2 ribs celery, halved and diced
salt and pepper to taste
1 bag egg noodles (I like Aldi's)

Place the chicken in a large soup pot and cover with water.  Boil until the chicken starts to come off the bone, or leg and thigh separate from the chicken body.  This should take 30-45 minutes.  Remove the chicken from the pot.  Add the vegetables to the broth (don't skim the "foam" that is the marrow).  While the vegetables cook, let the chicken cool down and remove the skin and discard.  Pick all the meat from the bones and set aside.  Cook until the carrots are getting soft.  Add about 8 cups of water to the broth, or enough to make sure the noodles will be covered.  Add the noodles to the broth when it begins to boil.  This keeps the noodles from sinking to the bottom and sticking to the pan.  Let the noodles cook for about 5 minutes, stirring once just to keep them from sticking.  Add all the chicken meat to the pot.  Stir to incorporate all the chicken.  (too much stirring will cause the noodles to disintigrate).  Let the noodles finish cooking, add salt and black pepper to taste.  If you want, add 4 or 5 sprigs fresh thyme which has been removed from the stems or 2 tsps. dried thyme.  Your soup is ready to serve.  

This soup is soul and body satisfyingly delicious.  Serve with a sandwich or nice crusty bread and you have a complete meal.  Personally, I like the soup all by itself.  

Remember to think of all the shelterless people there are including children.  Remember all who may have a roof over their head but live a life of food insecurity.  Do what you can to make a difference.

Everyday Donna

Things to Remember:

When you have a good stock, you can make a good soup.
Martin Yan