Wednesday, June 18, 2014

Awesome Way To Slice A Watermelon!

 It is suddenly summer here in Nashville.  It was 93 degrees today and yes, it is hot.  I am not complaining.  I will take it over the cold, never ending winter we had this year any day.  Give me hot over cold any time.  But, with the hot comes different ways of preparing meals and foods to cool you down and keep you hydrated.

Recently, someone posted this way of slicing a watermelon on Facebook and I thought it was absolutely genius!  Bells rang, birds tweeted, whistles blew.  I mean, why have I never thought of this?  Just duh, is all I can say.

Our daughter had an end of year school party for her oldest son's class and she had a huge watermelon for the kids and their parents.  I told her I would like to try slicing it this way and she was all for it.  Let me tell you, it is not only genius, it is the best way to serve watermelon - like ever!!  You have these wonderful  popsicle like wedges of watermelon, easy to carry around and eat, no plate necessary, and no huge pieces of watermelon rind to get rid of.  All the pieces are nice little 1.5 squares - the perfect bite sized piece of watermelon!!!  I am talking life changing here people.  Here is what you do.

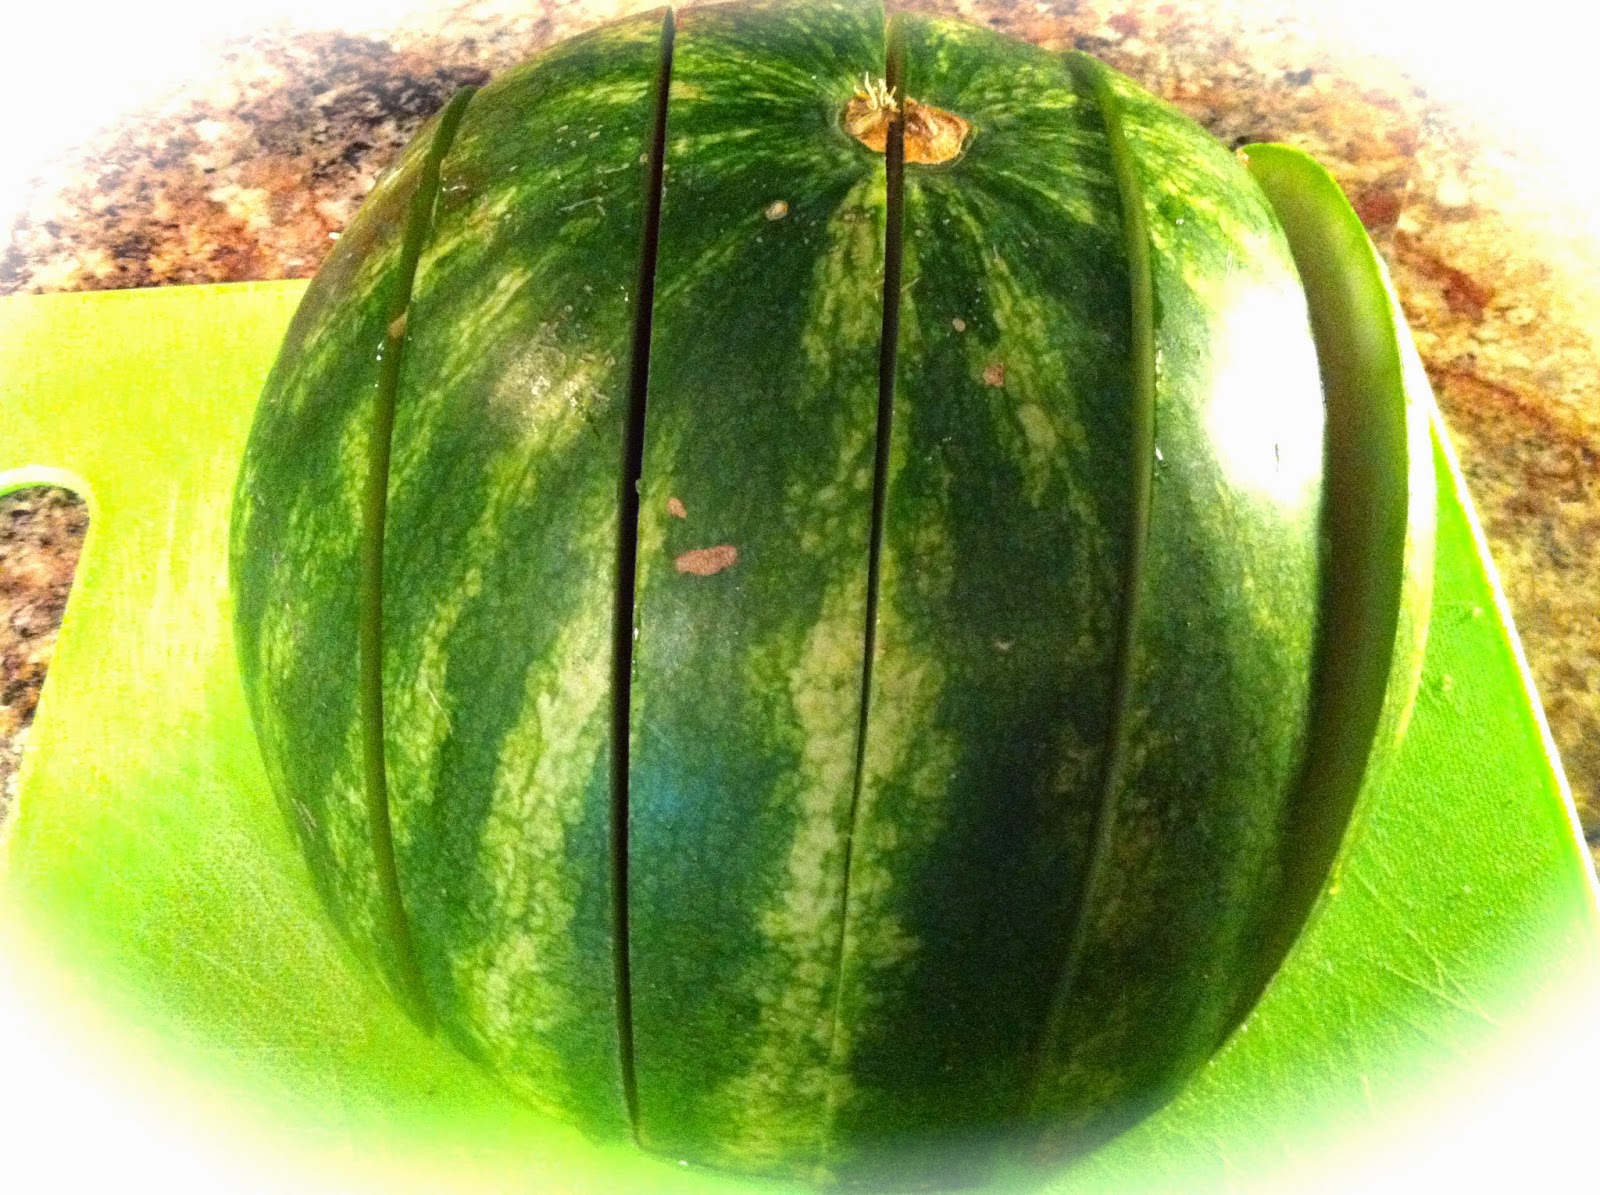
First, you need a round watermelon, not an oblong one.  Most of the seedless ones are round.  The one in the picture is small, but you can do the same with a big one - you just need a slightly different method.

First, cut the watermelon in half - not so it is oblong, but round on each end.  Does that make sense?  Then, trim it up if necessary so it will sit flat.  Sometimes the watermelon will split if it's really ripe and be uneven.  Just do a little fancy knife work to make it flat (and don't waste those lovely thin slices of watermelon - eat them!).

 Now, put it on something you can turn.  I used a cutting board.  Make sure you have a long knife and start at one end cutting in about 1.5/2 inch segments.


 Cut from one side to the other.  It should look like this.


Now, turn your cutting board so the vertical slices are horizontal.  Start at the end, and slice about 1.5/2 inch segments across like this.
You can start eating by pulling the middle piece.  When you pull it out, you have this beautiful cube of watermelon.  It is just amazing.  Perfect bite sized cubes of watermelon.  Genius I tell you.  Also, you no longer need a giant bowl to put all the slices in.  It sits right on the platter.  Ah-mazing!

Now, have someone help you transfer it to a serving platter.  I put the serving plate next to the cutting board and had Dan picked up the cutting board with the watermelon on it.  I put my hands firmly on the watermelon to hold it together, and slid it to the serving platter.  Ta dah!  Then, I put  the second half on the cutting board and sliced it so it was ready to go when this half was eaten.  If you are having a large crowd, put both halves on serving platters after you slice them this way.   Easy peasy.

For a bigger melon like we used at Holly's, I cut half way across the watermelon because my knife wasn't long enough to go all the way across.  I didn't want any cut fingers, so I cut halfway and turned the watermelon half way around and continued to cut from the original slices.  Then, I turned the watermelon 1/4 way and cut halfway across, turned it half way around and completed the slices.  Here is the bigger melon.
Dan helped me move it to the serving platter and it worked just perfectly.  The kids at the party LOVED the watermelon cut this way.  They would run by, grab and wedge and off they would go.

Not only is is super convenient for serving, it looks really pretty on the platter.  I don't know who thought this up, but thank you whoever and wherever you are.  I will be eternally grateful and will never wrestle another watermelon as long as I live.  Clean up was a breeze - no huge drippy pieces of watermelon rind to dispose of.  You can eat right down to the white or green part easily.   Then, simply toss that little green square of rind.  Awesome.

You really should try this.  You will never go back to the "way it was" - ever!  For the melon that wasn't eaten, I stored it in a zip lock back and it was delicious for several days AND it didn't take up half the refrigerator!  If we got hot outside, we could come in an grab a piece of perfectly cubed watermelon and enjoy.  Yes, try this.  It will make your summer.

Everyday Donna

Things to Remember:

When one has tasted watermelon, he knows what the angels eat."  Mark Twain


Monday, June 16, 2014

Old Fashioned Cornbread Made Gluten Free - Delicious!

Hi everybody.  I'm back.  I have been on quite a hiatus as I completed a 100 day painting challenge and other things in life.  It went very well.  I am painting with acrylics on canvas.  I learned a LOT in the process about myself and painting techniques.  It's amazing how dedicating yourself to something for 100 days can change your life.  I will write about that in more depth later.

Today, I wanted to share this recipe I found for gluten free cornbread that is absolutely delicious and as close to what my grandma used to make as I can find.  We have several people in our family who are eating gluten free by doctor's orders, including myself.  Talk about changing lifelong habits!  Wow.  Especially when it comes to all the baking I have done most of my life.  But, life will go on.

This recipe is made with Greek yogurt which is a definite change up from the buttermilk we always used.  It also makes it just a tad healthier.  Here is what you need.

2 cups yellow cornmeal, coarsely ground if you can find it.  (make sure it's gluten free)
1 tsp salt
1 tsp baking soda
2 tsps baking powder
1 egg, beaten
4 TBSP melted butter, cooled
1 1/2 cups plain Greek yogurt
4 TBSP honey

Preheat your oven to 400 degrees.  Hopefully, you have a 10 or 12 inch cast iron skillet to bake this in, but you can use an 8x8 square pan if you don't.  Grease the pan either way.  I used spray coconut oil.

First, combine the cornmeal, salt, baking soda, and baking powder.   Thoroughly combine with a whisk.

In a separate bowl, mix the egg, cooled melted butter, yogurt and honey.  Thoroughly combine with a whisk or fork.

Create a "well" in the center of the dry ingredients and pour the wet ingredients into the "well."  Use a fork and just combine.  Don't over mix.  This is a very thick batter.

Pour the mixture into the prepared pan.  Bake for 20-30 minutes or until golden brown on top.  Remove the pan from the oven and let sit for a few minutes to cool down.  Slice and serve.  Slather on a big pat of fresh butter and add some honey if you like.  This is absolutely delicious and I could eat it for my meal.

This recipe was found on Gluten Free on a Shoestring!  Give it a try.  You are going to love this one!!

Everyday Donna

Things to Remember:

If we keep doing things in the same old way expecting different results, nothing will every change.  Try something new.  Dedicate yourself to something for 100 days and see the changes that occur in your life.  It is truly worth the dedication.  donna

Wednesday, February 5, 2014

Make A Custom Mug For Someone


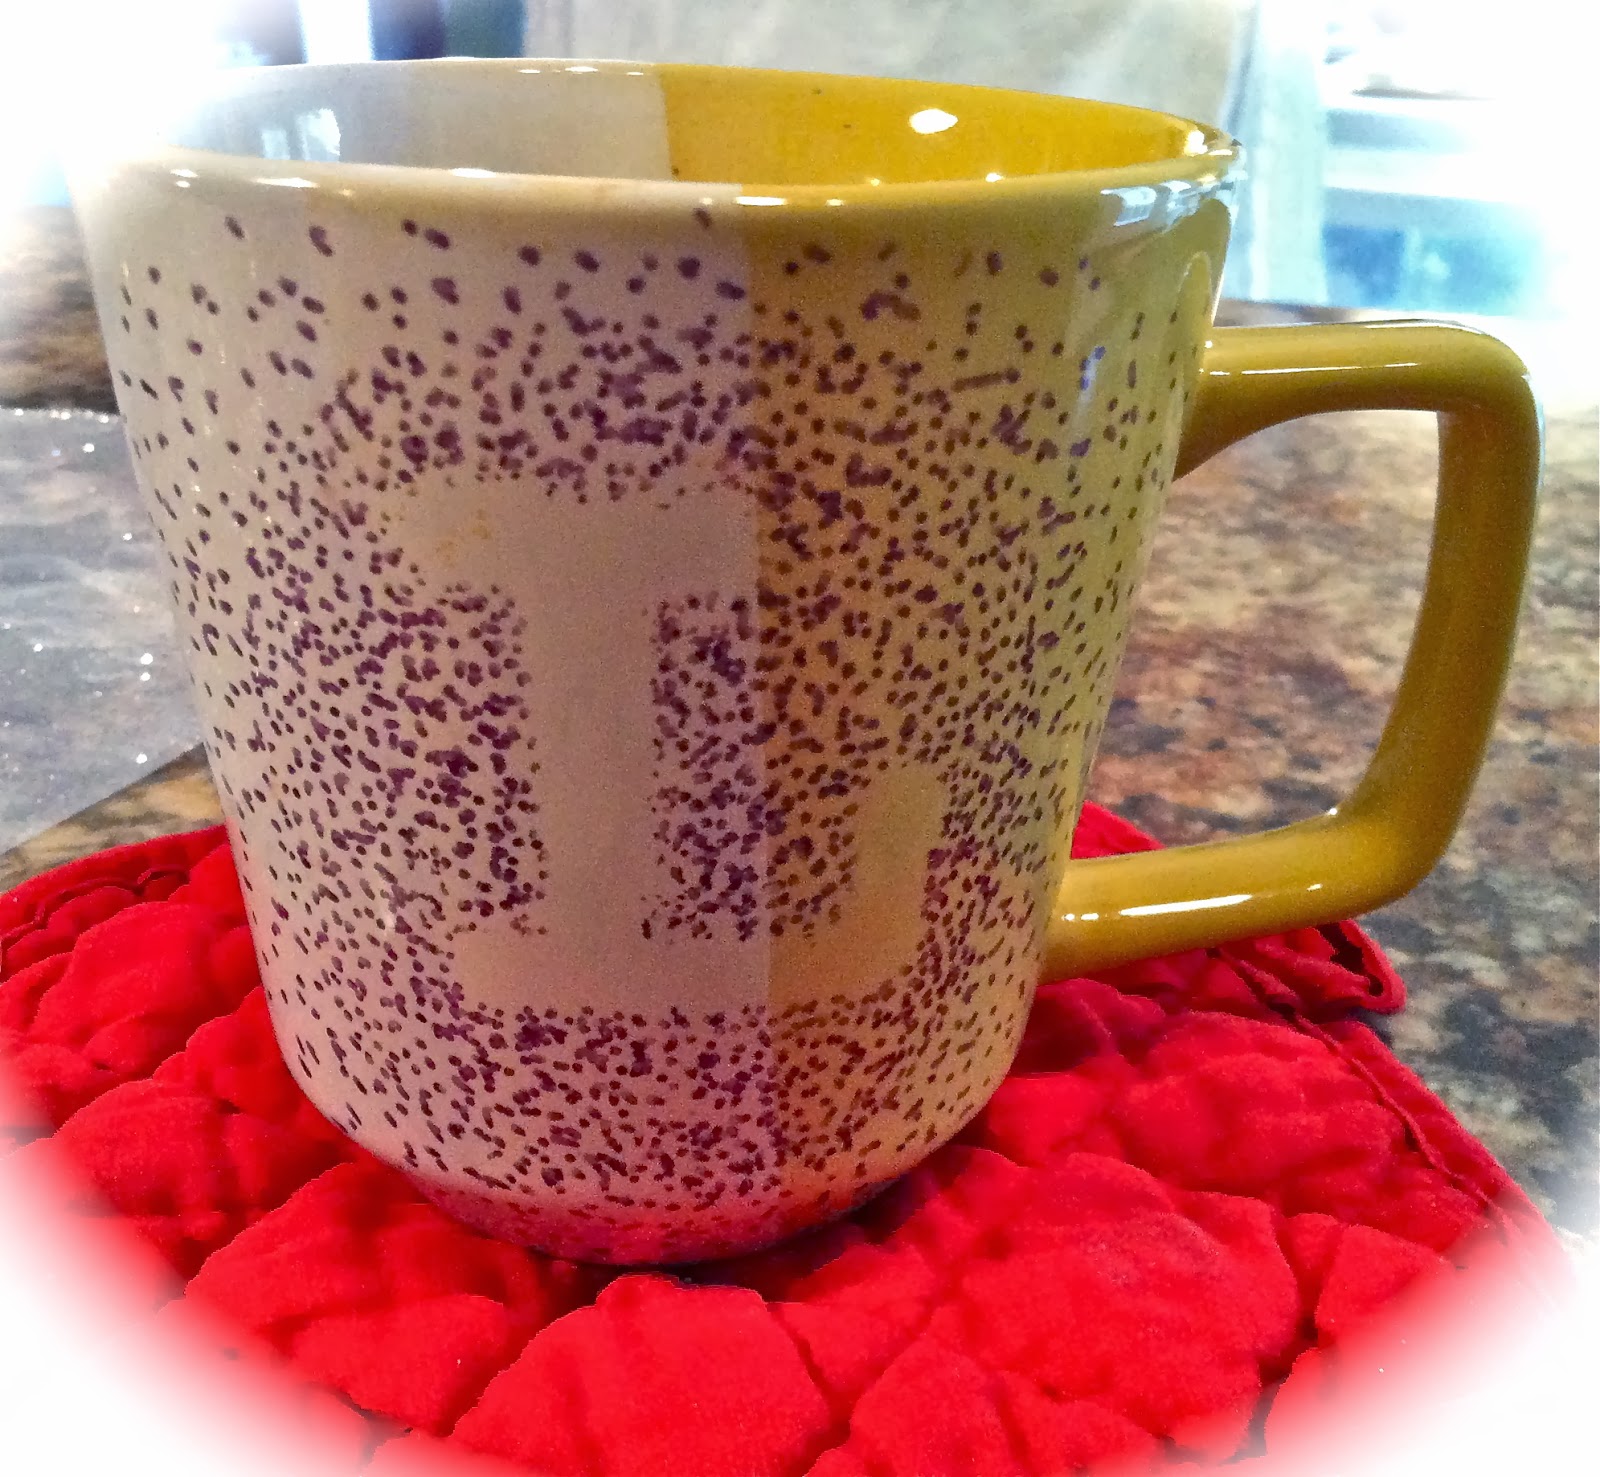
Thought I would share another easy Valentine idea with you today.  I made this cup for my friend Linda as a Christmas gift.  She loves yellow and purple, so guess what colors I chose?  This mug caught my eye because it was yellow and cream which was perfect with purple accents.

To make these mugs, all you need is an inexpensive mug, something for a pattern - you could use a heart for Valentine's Day, a cupid, or an initial.  Anything could work.  I even made some with mustaches on them which are so cute - and a sharpie in a color of your choice.

To make the initial, I used a letter from this package I found at Big Lots .
The entire package was only a couple of dollars and I have found all kinds of uses for them.  There are different fonts in different sizes with numbers and letters.  I punched out a large "L" and taped it to the front of the mug using tiny pieces of 2 sided tape.

Using the sharpie, I simply made random dots all around the letter, then removed the letter and put it on the other side of the mug and did the same thing.

Next, the sharpie has to be heat set, so I placed it in a cold oven directly on the wire rack and set it to preheat to 450 degrees Fahrenheit.  When the buzzer went off at 450, I turned the oven off and let the mug cool in the oven.  Make sure the mug is not hot before picking removing it from the oven!

You should be able to wash the mug by hand without removing the design.  I am not sure you can guarantee it to be dishwasher safe, although our sons in love have had their mustache mugs for a couple of years and they put them in the dishwasher.  From what I have read, it sometimes depends on the glaze on the mug.

These mugs could be filled with candy, the pink popcorn I posted last night, or someone's favorite tea or coffee.  I sent Linda some boxes of tea that she could enjoy in her mug along with some coasters I made for her.  She really liked it.

Handmade gifts are always special for gift giving.  These would also be super for teacher's gifts, friends, or co workers.  Gift recipients appreciate that you took the time to make something with your own hands and that it came from your heart.

Dollar Tree, TJ Maxx, Big Lots, or Target are good places to look for inexpensive mugs.  The inexpensive mugs seem to work better because their glaze is more porous - it's not about being cheap.

Give this project a try the next time you need a gift.  You could even make sets of them for wedding or shower gifts.  The options are endless.

Everyday Donna

Things to Remember

Gifts have ribbons, not strings.  Vanna Bonta


Tuesday, February 4, 2014

Pink Popcorn Perfect For Valentine's Day

 Yes, the weather is still awful.  I am counting the days until Spring.  I am sure you are too.  It's been a really long winter and there is more to go.  So, why not make something cheerful and pretty to brighten your day?   Something that also tastes amazing!

Have you ever had pink popcorn?  The blogger who posted this recipe raved about it as a childhood memory.  I found it on Cravings of a Lunatic, but she found the recipe on Nan's Recipe Spot.  Evidently they had all enjoyed pink popcorn during childhood.  Guess that's another thing we didn't have.  Perhaps it's regional, I don't know.  But I will tell you this, it is REALLY good stuff.  Indeed.

We were invited to a Super Bowl Party Sunday evening and asked to bring something.  Decisions.  Decisions.  What would everyone else bring?  I had no clue and certainly hoped to not duplicate recipes.  So, to make myself happy I made 7 layer dip because I knew if no one else ate it, I could and possibly would eat it all because I love it.  Best.  Snack.  Dip.  Ever.

In case no one was a fan of the 7 layer dip, I made this pink popcorn to eat during the game.  I mean, come on, there has to be munchies for the game.  Something you don't have to go get a plate and fork for, right?  Well, this was a major hit and people kept asking what it was.  I heard one guy tell his wife he bet it tasted like bubble gum.  Ew.  I laughed and told them it did not taste like bubble gum.  They asked what it was.  I told them candied popcorn colored pink.  I don't know if they ever ate any, but someone else certainly did because it was gone, baby, gone.  Our grandson couldn't seem to get enough of it, so I know I will be making some for Valentine's day.

The recipe is really easy and if you like carmel corn, you will love this recipe.  The one thing you need is a candy thermometer.  If you don't have one, they are not expensive and you will be making this again, so go ahead and invest in one now.  It will also allow you to make lots of other candy recipes.

Here is what you need:

12 -16 cups popped popcorn (16 cups was two batches in my air popper)
2 cups granulated sugar
2/3 cup whole milk
2 TBSP corn syrup
1/4 tsp salt
1 tsp vanilla
2-3 drops red food coloring

Pop up your popcorn, just don't use microwave popcorn.  You can do it on the stove top in a pan, or use your handy dandy air popper if you have one.


Next, place the sugar, milk, corn syrup, and salt in a deep saucepan (cause it really bubbles up when cooking).  Cook over medium heat until the sugar dissolves.  Stir so it doesn't scorch.  Place the candy thermometer on the side of the pan.

Turn heat to low and boil and stir occasionally.  Cook until the temperature on the candy thermometer reaches 230 degrees which is soft ball stage.  Remove the thermometer and turn off the heat.  Add the vanilla and food coloring.  Stir until well incorporated.

Remove pan from heat and let cool a bit.  If you pour the hot candy over the popcorn right away, it will shrink your popcorn.

Using a large baking sheet with sides, cover with parchment or waxed paper.   I actually used two so the popcorn would dry faster.

After the candy cools a bit, pour it over the popped corn and mix with a large spoon until all the popcorn is coated with the candy.  Pour the popcorn out onto the lined baking sheets and let the popcorn dry.

Good luck not eating it all before it dries.  I could hardly keep Dan out of it (and I may or may not have eaten a little myself).

The 7 layer dip was totally consumed as well as the pink popcorn.  This recipe is a keeper and would look so pretty in clear bags or jars for Valentine's Day.   It's also amazingly good which is the best part.

Everyday Donna

Things to Remember:

Every once in a while, someone will mail me a single popcorn kernel that didn't pop.  I'll get out a fresh kernel, tape it to a piece of paper and mail it back to them.  Orville Redenbacher  (sorry, couldn't pass it up, it made me laugh - :)


Thursday, January 30, 2014

Cuban Style Pork Butt In The Slow Cooker

Super Bowl is coming up fast - like this Sunday.  Are you having a party, going to a party?  Do you need to fix something for guests or take something to someone else's party?  Well, I have got a super delicious recommendation for you.  How about a pork butt or shoulder cooked Cuban style in a slow cooker?  It cooks all day and the meat literally falls apart when it is done.  It is easy, super delicious, and this recipe is a keeper!

You can use the meat as pulled pork, you can make a sandwich, eat it plain, you can make a Cuban style sandwich with it, you can add barbeque sauce or hot sauce, whatever you like.  How about sliders or carnitas which are pork tacos?  All you do for carnitas is put a little oil in a pan and cook the pork until it starts to crisp on the outside.  Serve with tortillas and your favorite toppings.  So good!

This recipe came from the Huffington post.  Yesterday I was in the house because of "the" cold and "a" cold, and I had this pork butt that I needed to cook.  I was going to do it low and slow in the oven and finish it on the grill.  Well, it was too dang cold, so I looked up some recipe options and found this slow cooker one.  Lucky me, because it is awesome and we will be having this again and again!

Here is what you need:

1 pork shoulder or butt, about 4 pounds
6 large garlic cloves, more if they are small
1 TBS coarse kosher salt (1 1/2 tsps table salt if that is what you have)
1 TBSP ground cumin
1 TBSP dried oregano
1/2 cup lime juice
1 cup orange juice

First, you are going to make a paste out of the garlic, salt, and herbs.  Using the flat side of a big knife, mash the garlic into the salt until you have a paste.  Add the cumin and oregano.

Lightly salt and pepper the outside of the pork butt.   Cut 2 inch slices into the skin side of the pork butt or shoulder.  Make them about 2 inches deep and 2 inches apart.  Rub the garlic/herb paste into the slits all over the pork.

Put the pork into the slow cooker and add the lime and orange juice.  Cook on high for 6 to 7 hours.

Carefully remove the pork from the slow cooker.  I had to remove it in pieces because it literally fell apart.  I put it in a 9 x 13 baking dish and pulled it with a fork to make smaller pieces.  Easiest pulled pork ever!  Is it good?  You bet it is!  Amazing flavor and texture - so tender and delicious.

We had guests for dinner last night and everyone truly enjoyed every last bite of this fabulous pork.  That is why I know it would be a major hit for a Super Bowl party.  You can do so many things with it or enjoy it in a simple fashion by spooning some of the au jus over the meat.

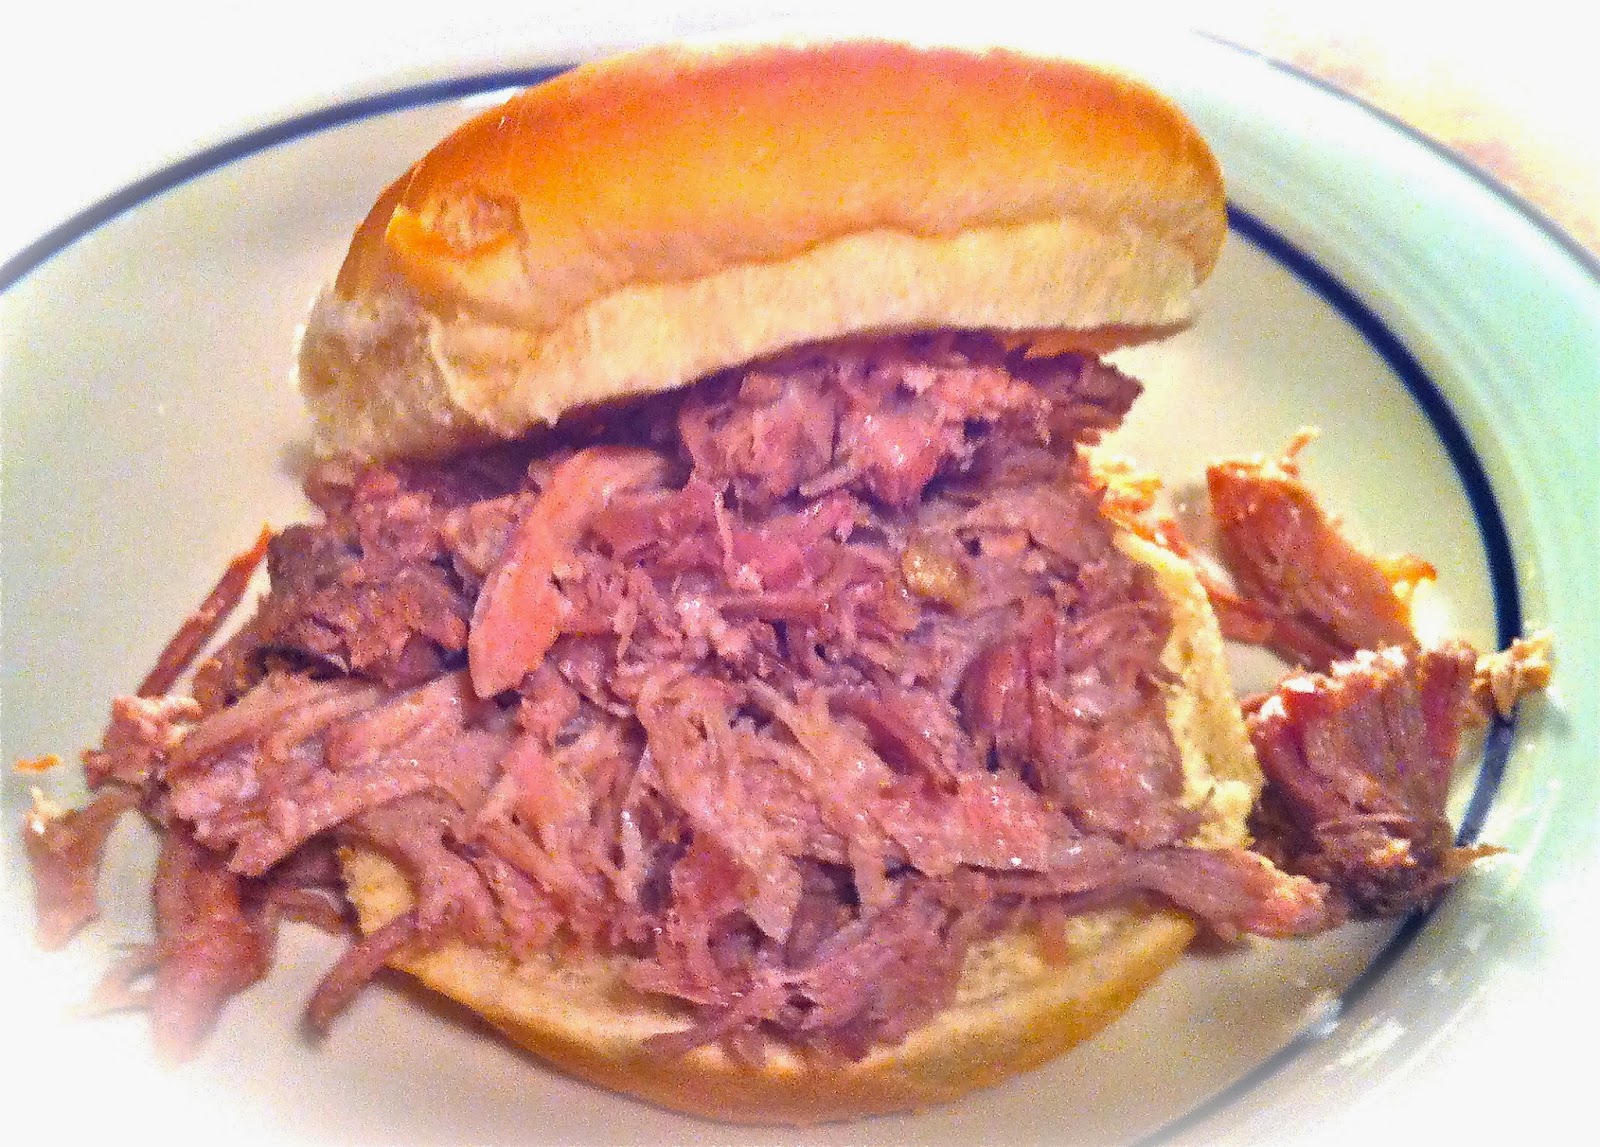
Have you ever had a Cuban sandwich?  They are DEEEEEElicious.  They have pork, deli ham, mustard, pickles, and swiss cheese on Cuban style bread (if you can find it).  If not, use an Italian loaf or something a little crusty like ciabatta .  You could use a baguette and make smaller sandwiches.  We simply ate this flavorful, tender pork like a barbecue sandwich on a bun.  Eat it any way you like and it will be delicious.

If you are not attending or hosting a Super Bowl party, you can still enjoy this recipe this weekend.  It is easy and worth every minute of those 6 hours cooking time.  Your house will smell amazing and you will be pacing the floor waiting for it to be done so you can dig in.  Yes, it's that good.  Dan highly endorses it.

Everyday Donna

Things to Remember:

The Super Bowl is Americana at its most kitsch and fun.  Sting


Wednesday, January 29, 2014

Make A Burlap Valentine Heart To Hang In Your Home

 Are you staying warm where you are?  I.  Am.  Over.  This.  Weather.  Bring on springtime.  I want flowers and green grass and warm sunshine.  I don't want to wear a coat, a scarf, or gloves any more.  Done.  Through.

Yesterday, I worked on this Valentine heart wreath made from burlap.  I happen to love burlap even though it sheds a lot and the little fibers get up your nose (which is really fun with a cold).  Burlap is inexpensive and relatively easy to work with.  Even though this burlap looks very red, it is actually a little darker.  Reds just seem to be hard to photograph.

I found some red burlap at Wally World a couple of weeks ago and bought two yards.  Red is not always available, so I always buy extra when I find it.  I seem to use a lot of it for some reason - perhaps because I like red and it is an accent color in my home.

I have this old piece of wood that hangs on the wall in our dining area that I use as sort of a gallery to keep from putting lots of holes in the wall.  It works out very well, and is an interesting art piece in and of itself.  It must have been part of a door at one time.  We found it at our favorite second hand store here in Nashville.  I like to hang interesting things on it.  This wreath is the perfect piece and may stay there after Valentine's Day - at least until spring.

For the wreath form, I used some 16 gauge wire that I bought at Christmas time to make the coiled wreath that you can find on my blog.  It is the one filled with yarn balls and Christmas ornaments.  This wire is sturdy and easy to shape at the same time.  You could use a coat hanger, but the heavier ones can be hard to shape and those awful white ones may be too flimsy.  I found this wire at Home Depot.  I just sort of formed the size I wanted and cut the wire and twisted the bottom.  The wire shape is about 14 x 14.
The form does not have to be perfectly shaped because you are going to cover it with the burlap ties.  Don't fret if the wire is wavy.

It is easy to cut strait lines in burlap because of the loose weave.  You simply pull a thread all the way across and cut in the open space that is left.
Pull a thread and try to pull it all the way across without breaking.  Go slow and good luck.  If the thread breaks, just simply find the break, pull out the lose end and go from there until you get all the way across the width of the burlap.  This burlap is 45 inches wide.
See the open space?  Just cut all the way across and you have a nice straight strip.  Make your strips the width that you want.  I made mine 1.5 inches.  That width works nicely with this project and is not too hard to tie.  If you make thinner strips, the burlap sometimes comes apart when tying and wider ones are hard to tie.  Guess how I know that?

I used about a half yard of fabric for this wreath.  I cut strips 4 at a time and then cut the strips into about 7 inch lengths.  These are easy to tie and not too long.  If you need more strips, cut a few more.  This way, you don't waste a lot of the burlap if you don't use it.

Take one of the 7 inch strips and tie an overhand knot around the wire form.  If you are not familiar with knots, that is just like you would tie the beginning of a shoe lace.  One tie is good and it will hold in place on the wire.  Push the ties as close together as you can.  Just keep filling in around the form, turning your knots in different directions so the wreath will look full when finished.  That's all you do.  Simple as can be.


This wreath should probably be an indoor wreath unless your door is covered by a roof that would protect it from snow and rain.  Otherwise, you may have a very sad and limp wreath.  That's just FYI.

This wreath is so cheerful and it adds a lot of color and texture to the room.  It could be made out of any color burlap or any shape for that matter.  It doesn't have to be just for Valentine's day.  I may leave this one up for a while.   I can remove the little banner below it and it is just a pretty wreath.

You could make this and use felt, ribbon, or fabric.  It would cost more, and make take more strips of ribbon or fabric, but would be just as pretty.  Your choice.  If you have scraps available, use those by all means.

You could also make these wreaths in different sizes, even quite small for gift giving.  As long as you can make a heart shape out of the wire, you can cover it with the burlap.

Add some color and whimsy to your home during these dull, gloomy winter days.  Even if you are not a big Valentine's fan, how could this beautiful heart not cheer up a room?   Have fun with this project.  I sure did.  It  only took about an hour to complete.  Easy.  Peasy.

Everyday Donna

Things to Remember:

Without Valentine's Day, February would be...well, January.  Jim Gaffigan


Tuesday, January 28, 2014

Swedish Woven Hearts To Hold Your Valentine Treats


 Hey, everyone.  I'm here to show you how to make those containers for the cinnamon sugared nuts I talked about last week!  I hope you had a great weekend.  I am a little under the weather with a very runny nose, but that's okay because it's too cold to go out anyway!  Hope you are all staying safe and warm during this winter siege.

Valentine's Day will be here in just a few short weeks, so I thought it was time to get busy making some things and decorating the house.  I know it's just a one day holiday, but who doesn't love some colorful hearts to cheer things up during these wintry doldrums?

The containers I am making are made from paper - you can use card stock, construction paper, or some of these cute acid free papers I found at Target in a package for $1.  Yes, you read that right.  There were 10 pieces of 12 x 12 papers in a package for uber cheapness.  They were in the front of the store in their dollar bin and they are adorable.  The package even showed the paper patterns inside.
I also have some 8 1/2 x 11 paper that I found at Michael's for $3.  That paper is a little heavier and a little harder to work with just in case you are interested, but is also perfect for Valentine's Day.

These are called Swedish woven hearts and you may have made them in elementary school, who knows?  I just discovered them on Pinterest a while back and knew they would be perfect for our grandsons for Valentine's Day.  There are endless options to making them.  They even learned how to make them last weekend.  Our 7 year old grandson liked them so much, he is going to make them for his first grade class at school.  Here is how one of the hearts looks "filled."
How cute is that?  You can also put handles on them for hanging.  Just cut some thin paper strips and use a glue stick to attach them to the inside of the paper hearts.
These are made by weaving the paper together and it is not hard once you get the hang of it.  You will want to work slowly so you don't tear the paper as you weave it together.  I say that because you weave the pieces through the centers, not just over and under.  The last row is tight and requires a little dexterity.  Don't be scared off by that last statement, it just means take your time.

First, you need to cut your paper strips.  They need to be 3 to 3 1/2 times longer than they are wide, so mine are 3.5 inches wide by 12 inches long.
The handy dandy paper cutter makes the job go faster.  If you don't have one, simply use a ruler and mark your strips and cut with scissors.

Fold the strips in half, end to end so they are half as long as they were.  
You need to make a curved top, so I used a tuna can placed on the OPEN end (not the folded end) and traced a semi circle.   Trace one on both pieces of paper and cut with your scissors.  I made a template to make things easier.
This became my template because I cut the strips on the open end instead of the folded end.  Duh.   You will want to mark the folded end in thirds, for 3 strips.  I put a small pencil dot at the appropriate places on the folded end.

Now, this is important and I learned this myself.  None of the tutorials I looked at told me this, but it makes weaving the hearts together so much easier if you will lay one strip on top of the other in a heart shape and mark the edge of the piece so you know how far to cut up.  If you don't cut far enough, you cannot weave the strips together and you will tear your paper.
Just make two pencil dots approximately 1/3 from the top and bottom.  Then, reverse the papers and do the same so you can cut both strips the same length.  See the pencil dots on the folded edge and the marks at the top?

Now, cut from the FOLDED edge toward the open edge.  You should have 3 strips.  Now the really fun part - weaving the two together.  I started with over/under/over because I think it's easier to do.  You will do this twice and under/over/under in the middle.  REMEMBER:  YOU ARE GOING THROUGH THE CENTER OF EACH STRIP WHEN YOU WEAVE, OTHERWISE IT WILL NOT LOOK LIKE THIS WHEN YOU ARE DONE.
This is a closed woven container that will hold something.  If you just weave over/under/over it will not hold anything.

To start, put the top strip on one half of the heart piece inside the first piece on the other half.
This is another picture of how it should look.  See how the strips go through the centers?  That's what you want to do.

This is easier to follow once you start doing it.  I know this makes no sense, but it really will and it should look like this when  you finish the first strip.  Over/under/over.
The weaving should look the same on both sides.  If not, you missed going through a center somewhere.  Take it apart and start over.  The next piece will go under, over, under.  You may have to bend your paper a little to make it work.  Just take your time.  Push the pieces to the top as you work, or you will not be able to weave your last piece through.  Go back to over/under/over and you are done.  Easy Peasy.  If a 7 year old can do it, you can do it.  If I can do it, you can do it!  
This is how I bent my paper to get it through the last section.  The center is a little tricker.  When finished,  it will look like this.
I know it sounds hard and I was confused when reading the directions the first few times.  Once I had the strips in my hand, it made sense.  It will for you too.  I can't figure a way to write it that is not confusing, if you get my drift.  

If you want to jazz up your hearts some more, cut thin strips of contrasting paper,  ribbon, or lace, and weave it through the strips.  I used a little dab from a glue stick to hold the pieces in place.  
See the difference?  The options are endless!  You can also cut a narrow strip, wide strip, narrow strip for your weaving pattern instead of 3 equal sized strips.  You can do all kinds of fancy things with these.

I used some pieces of nylon tulle and filled it with M&Ms (grandsons LOVE them) and tied a ribbon around the top because I didn't have any cinnamon sugared nuts at the time.  This will keep the nuts or candies from falling out of the hearts at gift giving time.  
  

Be imaginative and create all different kinds of hearts.  You could use sheet music.  If you use book pages, make sure they are really long ones or you could use magazine pages - the list is endless.  Felt is also a possibility.  How cute would those be?

Have fun with this project.  We sure did.  You can make a plethora of these hearts for next to nothing and everyone will love that you made them by hand.

Everyday Donna

Things to Remember:

All you need is love.  But a little chocolate now and then doesn't hurt.  Charles M. Schulz