Wednesday, March 13, 2013

Cornbread From Scratch AND Cornbread Dressing - Two Recipes For The Price Of One

AND
Hello friends!  It's a good day, no - it's a great day, when  you get two for the price of one.  At least I think it is.  Sometimes I make one recipe knowing there will be a great use for it in another recipe.  Like here.  Delicious cornbread made from scratch and leftovers used to make a fabulous cornbread dressing!  Oh yes, two of my all time favorites.

I am going to show you how to make cornbread like my Kentucky grandma did and how to make cornbread dressing like a true southerner.   Oh boy, oh boy, are they both fantastic!  We enjoyed cornbread with fried catfish two nights ago and tonight we had the world famous roast beef and dressing.  What?  Did I say roast beef and dressing?  I sure did!  Most of us think of dressing with turkey or chicken.  You mean you can have it with roast beef?  You can and absolutely should!  

This combination comes from my first job.  I started working at Mead Johnson and Company in Evansville, Indiana, the week after I graduated high school in 1966.  I worked in the Medical Research Department.  There was an employee cafeteria that served wonderful food for super reasonable prices.  I mean real home cooked food.  On Thursday, once a month they served roast beef and dressing.  The cafeteria was always absolutely packed on that day and you knew you had to wait in line for a while, but is was so worth the wait.  I don't know about you, but my mom always made dressing with poultry, we never had it with beef.  This is where I learned that not only could you have it with beef, it was one of the best things ever!

Let me walk you through how to make cornbread in a cast iron skillet - a true southern treat.  Don't get me wrong, I like Jiffy cornbread and I use it a lot, but it doesn't even compare with REAL cornbread.  Kentucky cornbread.  Southern cornbread.  The most important part is a cast iron skillet, corn muffin, or corn stick baking pan.  Yes, they come in cast iron.  It's vitally important for that fabulously crispy, crunchy crust on the outside.  No other baking pan will make your cornbread turn out this way.  Seriously.

I have a 10 inch cast iron skillet that I use to bake my biscuits and cornbread in.  Once you do it this way, you will understand why.  Example - do you like Cracker Barrel cornbread?  It's because they bake it in cast iron.  It is soooooo yummy.  Now, here is a BIG secret to good cornbread.  The oil that you use in the batter should be heated in the cast iron skillet, swirled around the skillet then poured into the batter.  This keeps the bread from sticking to the pan and makes for a better cornbread.  Why?  I don't really know, but it does and it is the way grandma and mom always did it.  So, I do it too.  

Here is what you need for the cornbread

1 1/2 cups self rising cornmeal mix  (that means it already has the baking powder and salt in it, so you don't have to add it)  If you can't find self rising cornmeal mix, look on line to find out how to make it.
2 large eggs
1 cup buttermilk (add 1 tsp white vinegar or lemon juice to whole milk if you don't have buttermilk on hand and let sit for 5 minutes)
2 large eggs
1/4 cup vegetable oil
1 cup all purpose flour
*1/4 cup sugar  (we NEVER add sugar to our cornbread, feel free if you like it sweet)

Heat your oven to 450 degrees F.  

Beat the eggs in a medium bowl and stir in the buttermilk, corn meal mix, flour (and sugar) until smooth.  Heat the oil in the pan (I do this in the oven for about a minute), swirl it around the pan and add it to the batter.  REMEMBER, HANDLE WILL BE HOT ON CAST IRON - USE A HOT PAD!!!!!
Mix the batter until smooth.  It should be pourable, not too thick.  If it seems too thick, add 1 to 2 tablespoons more milk.  Pour into prepared pan. 

Bake 20 - 25 minutes or until golden brown.  
See, the batter is thick but pourable, like a brownie batter.   After you remove the baked cornbread from the oven, let the pan sit for a few minutes, get a plate and flip the pan over so the cornbread  can be cut and the beautiful crusty bottom becomes the top.  This is how it looks.
Oh my goodness, it is so good.  Eat it hot with a big slab of butter melted on it, or you could do it like my grandma always did for a night snack.  Crumble cold cornbread up in a glass of milk or buttermilk and eat it with a spoon.  Several of our family members had relatives who did the same.  Did anyone in your family do this?  Have I done it?  No.  Thanks.  It might be delicious, but I can't stand anything floating in my milk other than cereal.  Feel free to try it if you want.  Let me know what you think.

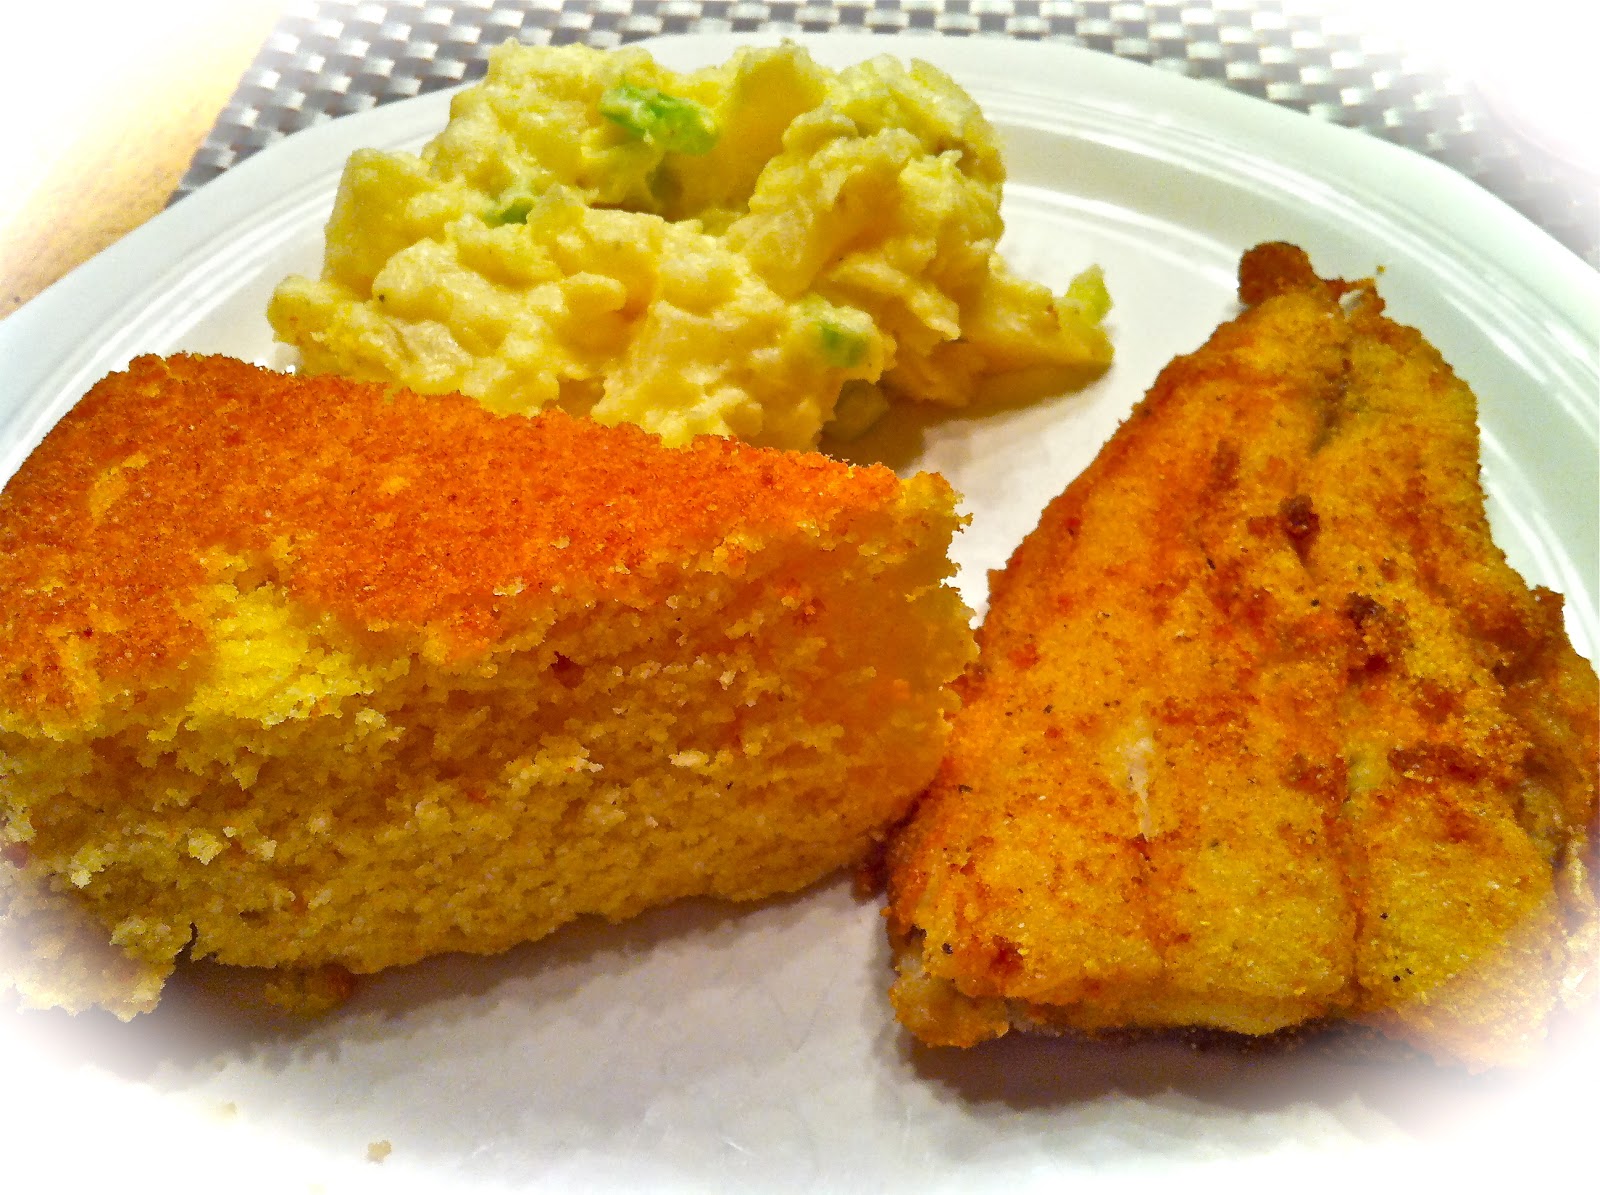
Dan and I enjoyed this wonderful cornbread with our fried catfish the other night.  Another reason for making the cornbread from scratch was so I could make dressing to go with our roast beef tonight.  Two birds with one cornbread.  Love it!  

If you like stove top stuffing, you are going to love this recipe!  It is super wonderful and so flavorful.  It's really easy to make if you already have the cornbread made and you want it to be a day or two old.  The dressing just works better with older bread, it doesn't get as soggy.

Here is how to make cornbread stuffing our family's way.


4-5 cups crumbled cornbread
3 slices bread, lightly toasted and crumbled
1 cup diced onions
1 cup diced celery
1/2 stick butter
1 tsp salt
fresh cracked black pepper
1 Tbsp ground sage
1 tsp dried thyme
1/2 tsp dried rosemary
2 large eggs, beaten
3 cups beef stock (from a box or can), or a little more if needed.

Dice onions and celery.  Melt butter in a skillet and add onions and celery.  Cook until onions start to get clear - do not brown!  You want them to be crunchy in the dressing.

Crumble cornbread and bread in a large bowl.  Add 1 tsp salt and lots of fresh cracked black pepper. 
Remove onions and celery from the stove and add to bread crumbs.  Add salt, pepper, and spices.  Mix thoroughly!!!!  Add beef stock, mix thoroughly.  Taste before adding eggs.  Add anything you think needed now.  (I like lots of sage, you may only want to use 2 tsps ground sage if you are not a fan.)  Beat eggs with a fork in a bowl, add to bread mixture.  Mix thoroughly!  If the dressing seems dry, add a bit more beef stock.  You want it very moist before baking.


Preheat oven to 350 degrees F.  Spray a 9 x 13 pan with cooking spray.  Put all the dressing mixture in the pan and bake for 30 minutes or until golden brown.  Remove from oven and serve.

Look at all the bright green celery and onions everywhere.  Yummmmmmmmo!  I like the vegetables to have a bit of crunch to them instead of being soggy.  That's why it is important not to overcook them in the skillet.  This reheats beautifully in the microwave in case you don't eat it all .  

Oh such succulent roast beef laying over that savory dressing.  I have to tell you, it was a wonderful meal!  Wish you could have joined us.  The really exciting part is, we have left overs for tomorrow.  I LOVE when that happens.  Give these recipes a try.  You are going to be cooking like a southerner in no time!

Everyday Donna

Things to Remember:

Monday, March 11, 2013

Childhood Memories - Fried Catfish, Potato Salad, and Corn Bread

Happy post "spring forward" to you all.  Does anybody else feel like a truck hit you because of lack of sleep?  We are feeling the time change here at the little yellow cottage big time and I don't really know why.  Dan and I have both been a bit draggy.  The cloudy, rainy day probably didn't help.  But, it's SO nice to have more daylight later in the day.  The rain clouds cleared up late in the afternoon and it was still light at 6:30.  Yahoo!  I am so looking forward to warm spring and summer evenings when it stays light until 8 or 8:30 and the grandsons can play in the yard while we sit outside enjoying it all.  Bring it on!

I spent most of the weekend working on spring craft projects.  What did you do? I have got a lot of new things to show you once I get them all finished.  Spent most of today with my hands covered in glue working on a fun project.  That's your hint for today.  Check back later in the week to see if there is anything you want to try.  After having fun crafting all day, it was time for dinner.

Dinner tonight was a flashback from my childhood, one of my all time favorites.  Everyone has some favorites from childhood and this just happens to be one of mine.  Fried catfish, potato salad and corn bread baked in a cast iron skillet.  Yum.  Yum.  Dan and I both grew up eating fish and loving it.  Dan's dad loved to fish and my uncle loved to fish.  Several times a year, my aunt would call and invite us over for a big old fish fry.  Talk about excited!  That meant all of the above would be on the menu, or maybe hush puppies in place of cornbread and ALWAYS a lemon meringue pie which is probably my most favorite pie to this day.  Just makes me think of warm summer evenings and family eating outside under the huge weeping willow tree.  Such a good memory.

I happened upon some lovely catfish fillets at Kroger and snagged them right up.  I knew that I would be cooking them the "old fashioned way" as I call it.  Simple.  Salt and pepper, rolled in corn meal and fried.  Couldn't be easier if you tried.  I am not a fan of tempura type breading on fish like they do in most restaurants.  I like crispy, crunchy cornmeal browned to perfection where you can taste the fish and not just the breading.  Here is how you make this fabulous catfish.  If you are using fiddlers, or nuggets, follow the same procedure.  You can use this same method on most any fish that  you fry.

These fillets were huge.  Here is one in a 9 x 13 baking dish just to give you an idea of the size.
I knew turning them would be difficult while cooking, so I cut them all in half to make it easier.

First, salt and pepper both sides of the fish.  Place about 2 cups of yellow corn meal (to which you have added about another 2 teaspoons of salt and thoroughly mixed into the cornmeal) in a dish deep enough for breading your fish.  Lay one side of the fish in the cornmeal and kind of press it with your hands so it is well coated with cornmeal and then turn and do the same to the other side.  If there are any "bald" spots, sprinkle more cornmeal over those places and press with your hands.  Coat all your fish pieces in the cornmeal.
Traditionally, this fish is cooked in a cast iron skillet, but I have a glass top stove.  Cast iron gets very hot and can crack a glass stove, so I use my trusty electric skillet set at 350 degrees.  Feel free to use a skillet on your stove.  Add about 1/2 inch of vegetable oil and let it heat until it ripples.  That is when you are ready to fry baby fry.  Letting your oil heat first keeps the cornmeal from sticking to the pan instead of the fish.

Do not turn the fish until you see that the cornmeal is starting to brown around the bottom edges of the fish.  Use a spatula, and not a fork, to turn the fish so it doesn't fall apart.  Cook the other side until golden brown.  Gently lift the fish up just a bit with the spatula to make sure the fish is good and brown before removing from the pan.  Depending on how thick your fish is, it should only cook a few minutes (3-5) on each side.
When removing the fish from the pan, hold it over the skillet for a few seconds to let any excess oil drain from the spatula.  You want it to be beautifully golden brown.
Yum.  Yum.  Yum.  Can you see the edges of the fish where it is all crispy and crunchy.  That is my favorite part.  Delicious.

Even though this fish is filleted and should not have any bones in it, you may want to check each bite  before eating it.  Fish is good, bones are bad.  Just a little warning, especially if you have small ones eating with you.

Oh, this was such a delicious meal.  I know everyone doesn't like fish, but it is so good for you and a wonderful alternative to meat.  Dan and I both grew up eating blue gill (called bream in the south), crappie, cat fish, striped bass and we even caught some Northern Pike one year at Kentucky Dam that was awesome.

If you love cornbread (and I don't mean Jiffy Mix, which I do use), I will share the recipe with you later for a big old cast iron skillet full of old time goodness.  Put a big old slab of butter on it while it's hot and, oh baby, you have got a treat.  The cast iron skillet gives it an amazing crust and it is nothing but crumbly, warm corn goodness on the inside.  Yes sir!  That's what I'm talkin' about.  It also makes fabulous cornbread dressing.

Memories.  This satisfyingly delicious meal gave me a little trip down memory lane this evening.  Sometimes, those are good trips to take.  Family recipes and ways of preparing food are worth passing on and learning to prepare.  It keeps our family memories alive.  Tell the stories to your family of what your favorite foods mean to you.  It's history.  Family history.

Everyday Donna

Things to Remember:

“In my South, the most treasured things passed down from generation to generation are the family recipes.”   Robert St. John

Thursday, March 7, 2013

Savory Cheese, Olive, and Buttermilk Herb Bread

Bread - the staff of life.  My research shows that some form of bread is found in every society on earth.  Who doesn't love a good, delicious bread?  I'm not talking about white bread from the grocery store.  Not at all.  Actually, I don't like sliced white bread from a package, I don't care if it's the greatest thing ever.  Thanks, but no thanks.  Not a fan.

Baking bread can be quite involved, so many of us stick to banana bread, pumpkin bread, and zucchini bread because it doesn't involve yeast and waiting for the dough to rise and punching it down and waiting some more.  That's what bakeries are for, right?  But, have you ever thought about savory breads that don't require yeast and all the many steps listed above?

Pinterest addict that I am, I scour the recipes looking for things that sound amazing and delicious.  I found this recipe for cheese, olive and buttermilk herb bread that is from a blog site called sugarandeverythingnice.blogspot.com.  She adapted this recipe from "Mix and Bake" by Belinda Jeffrey.  I haven't seen the original recipe, so I don't know what changes the writer made to the original, but it is good and really easy.  Really good.  Really easy.

If you don't like olives, I don't know what to tell you other than the fact that they are not the most prominent flavor of this bread.  The most prominent flavors would be cheese and herbs.  If I make it again (and I will) I would actually add more olives because I love them.  You can leave them out if you want, that is up to you.  I will also add more cheese next time.  Cheesy bread is delicious bread.  Yum.

Here is what you need to make this awesome bread:

2 1/4 cups all purpose flour
2 tsp baking powder
1/2 tsp baking soda
1 tsp salt
1/2 dry mustard powder (I used 2 tsps of dijon instead because I love it)
1/4 cup (60 gms) grated cheddar cheese - I would use 1/2 cup next time
1/4 cup (60 gms) grated parmesan cheese - again, I would use 1/2 cup
1/2 cup green olives, sliced (I would use 1 cup)
8 pieces sun dried tomatoes, sliced thinly
1 tsp freshly ground black pepper
1/4 cup mixture of spring onion (scallions) and Italian parsley
2 tsp thyme leaves or 1 tsp dried thyme
2 eggs
2 1/2 Tbsp Olive Oil
1 1/4 cup buttermilk (or use 1 1/4 cup less 1 Tbsp milk + 1 TBSP white vinegar or lemon juice.  Set aside for 10 minutes before using)
Egg wash made from 1 egg yolk beaten with 2 tsp water
Extra thyme sprigs and sea salt for topping

Preheat oven to 350 degrees F.  Generously butter a large loaf pan and dust with flour.  Set aside.

Sift flour, baking powder, soda, salt, pepper and mustard powder (if using) into a large bowl.  Whisk to incorporate the dry ingredients.  Add both cheeses, olives, sun dried tomatoes, spring onions, parsley and thyme and mix thoroughly.

In a separate bowl, whisk the eggs, then whisk in the oil and buttermilk and dijon mustard (if using) until well combined.

Make a well in the center of the flour mixture and pour in the wet ingredients.  Stir together to form a thick, sticky batter.  Scrape the batter into the prepared tin and spread it out evenly.

Brush the top of the batter with the egg wash and then sprinkle some thyme leaves and sea salt on the loaf.

Bake for 40-45 minutes or until a toothpick inserted in the middle of the loaf comes out clean.  If the top starts to burn, place a piece of foil over top of the loaf and continue baking.  Leave in the pan for 5 minutes before turning out onto a wire rack.

This loaf is best served on the same day.  Wrap left overs in foil and store in fridge.  Can be gently reheated if serving again.

We enjoyed this delicious savory bread with the cheese, sausage, and grits casserole I posted on Monday.  We did spread some garlic herbed goat cheese on it and it was fantastic!  This bread is sort of dense, almost cake like in texture.  I would have liked more cheese and olives, but that is just me.  If you don't like strong flavors, stick to the recipe.

If you get tired of sweet breads and would like something savory, this recipe fits the bill.  It would be awesome to serve for brunch or for an afternoon treat.  Children would certainly enjoy it!  The grandsons gobbled it up.  You could spread their favorite cheese on it while it's still warm.  Delicious!

Baking bread doesn't have to be hard or have a million steps to be delicious.  Give this recipe a try.  It's a keeper.

Everyday Donna

Things to Remember:

If you have extraordinary bread and extraordinary butter, it's hard to beat bread and butter.  
Jaques Pepin


Tuesday, March 5, 2013

Midwestern Stromboli Pizza King Style - EverydayDonna's Recipe

Do you get tired of cooking sometimes?  All the time?  Never?  Some of the above?  None of the above?  I love to cook, but sometimes on Friday evening I like to take a break and make something easy.  We have had a guest staying with us for the last two weeks.  By Friday evening, I was shot.  I had been cooking up a storm and I needed a break, but of course we had to eat.  So, I decided to make one of our favorites - strombolis.

Do you like strombolis?  Ever had a stromboli?  Don't confuse them with a calzone.  They are not the same.  We LOVE these sandwiches, but we like the midwestern style stromboli.  We are from Evansville, Indiana, and there is a pizza shop that has been in operation as long as we have been married which is 43 years.  Yeah, I know, forever.  The shop is called Pizza King and my research showed that there are Pizza King's all over Indiana, but I could not find if they were franchised or owned by the same company or just had the same name.  Looked like the original Pizza King started in northern Indiana somewhere.  Interesting.  Anyway, besides awesome pizza they have fabulous sandwiches - hot ham and cheese, strombolis, and Texas barbecue.  They are always wrapped in aluminum foil and baked.  You can get the stroms and Texas barbecues anywhere from mild to "blow the top of your head off" hot.  But, they are SOOOOOOOO good.  I miss them here in good old Nashville.  So, what did I do but create my own.  Sure, why not?

Here is a little history on the stromboli.  They are an American sandwich (which we all think is Italian, but isn't) usually made in a pizza type dough with Italian meats and cheese, layered and rolled, baked and then sliced.  Midwestern style strombolis are not like that.  They are made in a crusty roll like a baguette, or on a deli style roll which is what I used.  Mine has sausage, pepperoni, onions, marinara sauce and mozzarella cheese.  Mmmm, mmmm, mmmm, delicious.

Why are they called strombolis?  Good question.  Here is what Wikipedia has to say.


Stromboli is a type of turnover filled with various cheeses, typically mozzarellaItalian meats such as salamicapicola and bresaola or vegetables. The dough traditionally used is Italian bread dough.
A stromboli is made with a square shaped pizza dough that can be topped with any pizza toppings and is then rolled into a log and baked. Many American pizza shops serve a stromboli using pizza dough that is folded in half with fillings, similar to a calzone.
There are some theories regarding the origin of the stromboli in the United States. Romano's Italian Restaurant & Pizzeria claims to have originated it in 1950 in EssingtonTinicum Township, just outside of Philadelphia, by Nazzareno Romano. According to Romano, a friend suggested he name it after the then recently released movie, Stromboli.[1] Another claim is that the stromboli was invented in 1954 by Mike Aquino at Mike's Burger Royale in Spokane, Washington. Aquino is also supposed to have named the sandwich after the movie.


So, we don't really know exactly where this sandwich originated, we just know we are happy that it originated somewhere even though ours isn't made this way.  Ha!  Now, about making these delicious sandwiches.  They are really super easy and I guess you could use your favorite ingredients, but here is how I made mine which is very close to the Pizza King stromboli.  Here is what you need.

1 pound milk bulk sausage
1 pound hot Italian sausage (casing removed if using links)
1 large onion, diced
2 cloves garlic, minced
1 cup of your favorite marinara sauce (I used Trader Joe's tomato basil)
about 30 pepperonis chopped (stack and chop, makes it easier)
1 8 ounce block mozzarella cheese, grated
3 tsp crushed red pepper flakes
6 deli type rolls
olive oil
6 sheets of aluminum foil, about 12-14 inches long

1 baking sheet

Brown the sausages and onions in a saute' pan.  Drain any fat from the pan.  Add the garlic and chopped pepperoni when the sausage is browned.   Add the marinara sauce and red pepper flakes.  Stir until thoroughly mixed and heated through.

Brush the top and bottom of a deli roll with some good olive oil.  Put the sliced deli roll in the middle of a piece of foil, fill with sausage mixture.  Put several heaping hands full of cheese on the sausage.  Bring the edges of the foil together and roll down to the sandwich and roll the ends up.

When all the rolls have been filled and wrapped, place them on a baking sheet and bake in a 350 degree  oven for about 20-30 minutes.  Remove from the oven and let cool for a few minutes.  Unwrap and enjoy.
There was enough meat left for another 6 strombolis.  It could easily be frozen and used another time.  I used it in a bolognese sauce later in the week.  Yum.

This sandwich is "just right" spicy as Dan said.  Not too hot, not too mild.  Goldilocks would approve. Look at all that yumminess.  If you like really spicy food, use all hot sausage and add all the red pepper flakes you want.  If you like bell peppers, add some to the sausage mix while cooking.  You can add what you like, it's your choice but this is the traditional  "Evansville" way.

When the strombolis are unwrapped, the rolls will be crusty and crunchy on the outside and the filling is spicy and cheesy good.  So easy, so good.  If you have never had one, now is the time to try making these.

 The West Side Nut Club sponsors THE Fall Festival in Evansville every year during the first full week of October.  (Google it, it's so interesting)  There are hundreds of food booths which all raise money for non profits.  Thousands of people attend every year.  One of the most popular booths year after year consistently is the Tau Kappa Epsilon Stromboli booth from the University of Southern Indiana.  Everyone is willing to stand in line for some time just to snag a few of their delicious strombolis which are made this way.  Many people go day after day during the week to eat these stroms because they just can't get enough.  Now, you don't have to wait until the first week of October, or even have to go out to Pizza King to enjoy one of these fabulous sandwiches.  Wait, what am I thinking?  You may not have anywhere that makes this type stromboli.  If you don't live in Indiana, if you don't have a Pizza King, you can now make your own extraordinary midwestern style stromboli.  Now you will know what you have been missing all these years.  Enjoy!

Everyday Donna

Things to Remember:

Every region of the country has their own food specialties that you grow accustomed to and love.  This is one of ours.  What is something you love from your area?  donna


Monday, March 4, 2013

Sausage and Cheese Grits Casserole - Delish!

Hooray, it's Monday!  Yes,  you read that right.  Hooray, it's Monday!  I know not many people feel that way and you may think I have totally lost it, but the SUN shined all day today.  The sun.  It's still up there.  Thankfully.  I was beginning to wonder.  And, the temp got up into the low 60's.  Did you hear me?  The low 60's.  And, I didn't have to wear a coat.  NO COAT.  NO SNOW.  NO CLOUDS.  NO GRAY.  Sun, glorious sun with hope that spring cannot be far behind.  Yahoooooooo!   And my BFF was here for a doctor's follow up appointment from her surgery in November and we got to have lunch together, and talk, and drink coffee.  Just like old times.  Sigh.  It has been a truly good Monday.

Enough about me, how about you?  How was your weekend?  Your Monday?  Hope it was fabulous.  Simply fabulous.  Hope you expressed gratitude.  Monday's are always Gratitude Monday's.   My friend Don called me early this morning to share his gratitude list and it included me for being his friend.  Now, how can you have a bad Monday when that happens?  You absolutely cannot have a bad day.  Ever.  When someone says they are thankful you are in their life, well it just rocks.  Thanks Don, love you too!  We met in my costume shop when he came in one day and have been fast friends ever since.  Don't you love when that happens?  I sure do.

Now, about that picture above.  Let's talk about it.  It is a recipe I made a couple of Sundays ago for dinner.  Yes, dinner.  It can also be a breakfast casserole, but don't you like breakfast for dinner sometimes?  We do.  Also, it is gluten free and I made it for company.  Our son in love has Celiac and their family was coming for dinner, so I gave it a try.  It's a keeper.  I found the recipe on plainchicken.com which is one of my favorite sites to peruse every few weeks for new recipes.  She always has simple, but delicious recipes and I haven't made one yet that we didn't love.

So let's talk about grits.  Do you like them?  Don't know?  Haven't made them or eaten them?  They are a mostly southern dish and we LOVE them.  They are somewhat like polenta (if you like polenta, and we do), extremely delicious, and easy to make if you use the quick grits.  Here is some information from Wikipedia on grits.


Grits refers to a ground-corn food of Native American origin, that is common in the Southern United States and mainly eaten at breakfast. Modern grits are commonly made of alkali-treated corn known as hominy.
Grits are similar to other thick maize-based porridges from around the world such as polenta or the thinner farina. "Instant grits" have been processed to speed cooking.
The word "grits" derives from the Old English word "grytt," meaning coarse meal.[1] This word originally referred to wheat and other porridges now known as groats in parts of the U.K.  Wikipedia


This casserole is extremely tasty.  Even our oldest grandson, who may be one of the pickiest eaters on earth ate it.  Okay, that rates as a minor miracle.  I mean, it's got tons of cheese and sausage, some herbs, eggs, and grits.  What's not to like?  Here is what you need to make this casserole.

2 pounds sausage (regular, hot, or some of both)
4 cups water
1 1/4 cups quick cooking grits, uncooked
4 cups (1 pound) shredded sharp cheddar cheese (I used two 8 ounce blocks and grated it myself - cheaper and tastes better than pre-grated)
1 cup milk
1/2 tsp dried thyme
2 cloves garlic, minced
4 large eggs, lightly beaten
paprika

Brown sausage in a large skillet, stirring until it crumbles.  Drain well if needed and set aside.

Bring water to a boil in a large saucepan, stir in grits.  Return to a boil.  Cover, reduce heat and simmer 5 minutes, stirring occasionally so the grits don't stick.  Remove from heat.  Add cheese and next 3 ingredients, stirring until cheese melts.  Stir in sausage and eggs.

Spoon mixture into a lightly greased 9 x 13 x 2 baking dish.  Sprinkle with paprika.  Bake, uncovered at 350 degrees F for 1 hour or until golden and heated through.  Let stand 5 minutes before serving.

To make ahead:

Prepare grits mixture as directed above, but DO NOT bake.  Cover and chill overnight.  Remove from refrigerator; let stand while covered for 30 minutes.  Uncover and bake as directed.

This recipe is gluten free as long as your sausage has no gluten in it.  Check the label!    I would have liked all hot sausage, but we have little ones eating and I didn't want it to be too spicy for them so I used 1 pound of mild and 1 pound of hot sausage.  It's your choice what kind of sausage you use.

Other than that, this is an awesome casserole to serve for breakfast, brunch, lunch, or dinner.  We enjoyed it with zucchini/potato cakes, fresh fruit, salad and some fabulous buttermilk, cheddar, olive bread that I baked.  I will share that recipe with you later.  Yum.

Next time you want something easy but different, give this recipe a try.  It's truly cheesy goodness.  Enjoy the rest of your Monday, you've still got time.

Everyday Donna

Things to Remember:


Wednesday, February 27, 2013

Hand Breaded Pork Tenderloin How To - And You Will Want To

 Remember, I am from the "old school", better known as "the good old days".    I graduated high school in 1966 - a year most of you won't even remember.  As a matter of fact, most of you weren't even born then.  But let me tell you, we had a lot of fun back then.

We used to get in our cars (in my case, my parent's car), whether with friends or a date, and tool around town from one drive-in restaurant to another, visiting with our friends, eating, laughing, talking, cruising to see who was there, and then riding around some more.  Round and round from the Farmer's Daughter to Hamilton's Drive-In, out to the Double R, across town to Frisch's Drive-In and then back across town to the Parkway.  Then it was time to start the circuit all over.  Gasoline was $.24.9 cents a gallon.  Dan and I have cashed in many a coke bottle to go out on dates and buy gasoline.  Do you even know what it means to cash in coke bottles?  I know I'm old.  Sheesh.

Those were the days of carhops and window trays.  There were no drive through windows.  You pulled in to a parking place, placed your order on the speaker next to the car (each car had a speaker) and then a car hop - that was an employee of the restaurant - would bring your order out on a tray that attached to your car door.  You had to roll your window down for the tray to be attached.  Then, everyone ate in the car while all kinds of hilarity went on.  Yes, hilarity.  Those were some good times for sure.

Last week, a group of people I graduated high school with (back when dinosaurs roamed the earth) were on Facebook talking about who had the best breaded tenderloin sandwich in town.  I am from Evansville, Indiana, in case you wondered.  That was a major discussion and made me start thinking about those delicious sandwiches that all the restaurants had.  If you have never had a breaded tenderloin sandwich, you have NO idea what you are missing.  I'll take one over a hamburger any day of the week.

I had tenderloin sandwiches on my mind, so I decided to make some for dinner last night.  I have made them through the years and thought I would share how to make them, because you really, really want to make these.  They are crisp on the outside, tender on the inside and SOOOOOOOO delicious.  Our youngest son is 25 and he declared them fabulous.  Our houseguest Ken also LOVED them.  Tyler's friend Craig, who may be one of the pickiest eaters on the planet devoured his in about 3.4 seconds.  They all ate two HUGE sandwiches along with parmesan potato wedges and oven roasted Brussels sprouts that are to die for.  (I will tell you how to make those in another post.)

Here is how you make these fabulous sandwiches.  First you need a pork tenderloin.  I buy mine at Aldi's.  They are only $3.99 for a plain tenderloin and you can make 5 or 6 sandwiches from one tenderloin.  (I cooked two whole tenderloins for dinner.  Yeah.  That looks like a lot until you have a lot of guys eating.)  You also need a meat mallet or a heavy cast iron skillet to flatten the individual portions out.

This is a pork tenderloin.
It will have what is called silver skin on some of it like pork ribs do.  Remove it with a sharp knife.  Cut the tenderloin into medallions about 1.5 inches thick,   I got 6 portions out of each tenderloin.
If you are having a bad day or feeling frustrated, here is where you can have some fun!  It's time to pound away until each medallion has been flattened and is really thin.  It's really cheap therapy!  Make sure you have something under them like a cutting board so you don't damage your counter tops.
Wow, I felt so relaxed after all that pounding.

Now, it's time to  make your "breading".  I use flour, egg mixed with milk, and crushed saltine crackers.  To crush the crackers, you can do it in a blender or food processor if you have one, but I do it this way.  I place an entire sleeve of crackers in a gallon sized zip lock back and use my wooden rolling pin to crush the crackers until they are a really fine consistency like bread crumbs.  It only takes a few minutes and you don't have to wash a food processor or blender.

Next, you need a breading station.  Did I take pictures?  Of course not.  Remember, we eat this food, it is not for a magazine display (I wish), so I get engrossed in what I'm doing and forget to take pictures.  Life can be difficult sometimes, hey?  Anyway, I use 3 of my antique Corning ware bowls that are square and flat on the bottom.  In one, I place all purpose flour.  In the second one, I crack two eggs and add about 1/3 cup milk and whisk it until well mixed.  In the third bowl, I put my cracker crumbs.

Time to start the ritual - the breading process.  Put a large saute skillet on the stove and put about an inch of vegetable oil in it and let it start getting good and hot.  Unlike Paula Deen, sadly I do not have a deep fryer built into my kitchen, so a skillet it is.  You want the oil to ripple, that's when you are ready to fry.

While the oil is heating, lightly salt a cutlet, dredge each side in flour, egg wash, and cracker crumbs.  Put them in a container (like a plate), until you are ready to fry.  When the oil is ready - go!
You will cook the cutlets approximately 3 minutes on each side, or until they are golden brown.  Turn the cutlets when you can see the edges turning brown on the side that is in the hot oil.  It's really easy.  This is how they look when finished.
Just look at the beautiful golden color.  They are not only good to look at, they are crispy, crunchy on the outside and super tender on the inside.  Now, you want to dress them "old school".  I like them with lettuce, tomato, dill pickles, mayonnaise and just a little dijon mustard.  That's my way.  I put all the condiments out and everyone fixed theirs the way they like it.
Put these on a nice fresh bun, decorate it to your liking and dig in.  Yes, they are twice as big as the bun.  That's the way they were back in the day.  I wish you could have been here to enjoy these with us, they were fabulous if I do say so myself.

We didn't have to get in the car and drive around for hours just to get one although that was most of the fun.  You can do these at home in your own kitchen and eat as many as you want for the price of one sandwich at most restaurants.  I know you are drooling just looking at this.  I know you want one.  Do it.  Make these.  You are going to love them!  Try on some "old school", you're gonna like it.

Everyday Donna

Things to Remember:

Everyone will have their "good old days."  You know, like when we walked to school up hill both ways in a foot of snow?  Oh, you don't remember those days?  You will.  Trust me.  Just wait.  donna


Tuesday, February 26, 2013

Enchilada Casserole With Home Made Red Sauce


Last night I wanted Mexican for dinner.  I was cooking, so it was my choice right?  Right!  If you follow this blog, you know my love for Mexican food and flavors.  They are my favorite, hands down anytime.

I had all the ingredients to make enchiladas which are also my favorite next to tamales.  I have never had the gumption to make tamales as they are quite a process, but one of these days I'ma gonna do it.  Really I am.  You will be the first to know if and when I do.

Enchiladas are also a process.  Have you ever tried to fill and roll corn tortillas?  They split unless you heat them in hot oil or you can dip them in the warm red sauce before you roll them.  It is messy and I am not very proficient at this technique or very patient. (Uh oh, cat's out of the bag).   If you don't do one of these two, then your enchiladas are cracked and all the filling is spilling out and they don't look very pretty.  Remember, I am not a chef nor have I ever worked in a Mexican restaurant, so I go for the easy way - better known as my way.  Hey, it works!  If you love enchiladas too, you are going to be SO happy I showed you my fake enchilada recipe.

I do make my red sauce from scratch.  It is a recipe from Allrecipes.com and it is easy, takes 10 minutes and is fabulous!  Doesn't take much longer than opening a can of prepared sauce and heating it up.

Here is what you need for the sauce:

1/4 cup vegetable oil
2 TBSP flour
1/4 cup chili powder (I use Mexene which is my personal favorite)
1 8 oz can tomato sauce
1 1/2 cups water
1/4 tsp cumin
1 clove garlic, pressed or minced super fine
salt to taste

Heat oil in a skillet or deep saucepan over medium high heat.  Stir in flour and chili powder, reduce the heat to medium.  Cook until lightly browned, stirring constantly so the flour doesn't burn.

Gradually stir in tomato sauce, water, cumin, and garlic until smooth.  Cook over medium heat approximately 10 minutes or until thickened slightly.  Season with salt to taste.

This sauce is as good as any you will get in a restaurant.  We LOVE it.  Now, to make the enchilada casserole, here is what you need.

12 corn tortillas (use flour if that is your preference, but enchiladas are made with corn tortillas)
2 pounds ground beef
1 large onion, diced
2 cloves garlic, minced.
2 packages taco seasoning
1 8 oz block cheddar cheese, grated

Brown the ground beef and onions in a large skillet.  Add taco seasoning and garlic. Mix thoroughly.   Drain ground beef if necessary.  (I use grass fed local beef and there is nothing to drain.)

Now to assemble the casserole.  You need a 9x13 baking dish.  Line the bottom of the dish with 6 corn tortillas.
Cover the tortillas with the browned ground beef mix.
Cover the ground beef with 2/3s of the grated cheese.
Drizzle with some of the red sauce.  Now, cover this with 6 more corn tortillas.  (Forgot to take a picture, oops).

Pur the remaining red sauce over the corn tortillas.
Look how beautiful that red sauce is and it tastes absolutely divine!

Sprinkle the remaining grated cheese over the red sauce.  If you want more cheese, go for it!
Bake at 350 degrees for about 30 minutes, or until the cheese is melted and the sauce is bubbling.  Remove from oven and serve!

We had 4 grown men here for dinner last night and me.  This casserole got RAVE reviews.  Get that?  RAVE reviews!  Dan declared it better than our favorite Mexican restaurant's enchiladas which is quite a compliment.  We had this with black beans and Mexican rice.  Delicious.

Give this recipe a try the next time you are hungry for South of the border/Tex Mex flavors.  It will hit the spot.  You could easily halve this if you wanted, just use half the red sauce and refrigerate the rest for another meal.  Yum.  Yum.  Yum.  All I can say.

Everyday Donna

Things to Remember:

When cooking, sometimes it is okay to do things a little differently, especially if the end result is basically the same, takes less time and is easier to accomplish.  That's my philosophy.   donna