Tuesday, December 27, 2011

The Best Fudge Recipe I've Ever Made!

Christmas Day has come and gone and we survived our first celebration here in the little yellow cottage. We had 4 out of 5 grandsons present, two daughters, one son and two sons in love celebrating together!  What fun we had.  It was a bit crowded, but so what?  We were together and that is the most important thing.  Our older son, daughter in love and grandson live in New York City, and John had a show on Christmas Day so they were unable to join us this year.  But, we did spend time Skyping and got to watch our grandson open his gifts.  THAT is the amazingly fabulous thing about technology!  Being able to see each other face to face, talking like we were in the very same room.  Thank you to whomever invented Skype!

The holiday seasons for us are all about fun, fellowship and good food.  Our oldest daughter and her family moved to Nashville the week before Christmas and it was a wee bit hectic, trying to help them get enough things unpacked to be able to live for a few days AND get their Christmas shopping done all at the same time.  We watched our grandsons a couple of days to help her out and I didn't get my usual amount of baking done this year  - which is okay because there is usually waaaaay too much.   But, I did try some new recipes and made enough gluten free things that our son in love could also enjoy treats with the rest of us.  All in all, it was a very successful holiday.  

This fudge is fantastic - best recipe I have ever tried.  Candy is so cantankerous to make that I have sort of given up the last few years except for a couple of really reliable, easy things that I can count on.  You have to use a candy thermometer, the humidity affects the outcome, it's too hard, or too soft and on and on.  It is really frustrating.  Well, this year I found this recipe on Pinterest and it said it was a winner at the state fair.  Okay, I'll give it one more shot.  My husband LOVES chocolate and he LOVES fudge, but you know how fudge can be.  Sometimes it's grainy and sandy and I don't like that.  Or it's too hard or too soft.  Boo on that too.  I hate wasting time and ingredients on something that really isn't good.  But, this recipe is the best fudge recipe I have ever made bar none!  It is creamy, chocolaty, made a huge pan full and was worth the effort.  Think I will stick with this recipe from now on.

Here is what you need:

2 sticks of butter (use real butter)
6 cups of sugar
1 can evaporated milk
1 jar marshmallow cream
1.5 (18 oz) packages chocolate chips (1 -12 oz bag and 1 -6 oz bag)
2 tsp vanilla

a jelly roll pan (approximately 11 x 15), butter bottom and sides of pan
a large dutch oven
1 wooden spoon

In a large dutch oven, melt the butter, sugar and evaporated milk on medium heat until boiling.  Once it boils, set timer to 6 minutes.  After 6 minutes, remove pan from heat and add marshmallow cream and chocolate chips.

Mix thoroughly with wooden spoon until all marshmallow cream and chocolate chips are melted and the contents are a nice even chocolate color.  Add vanilla and  continue to stir until fudge thickens and no longer runs quickly off the spoon.  It will be very glossy and  the fudge will kind of collapse off the spoon in big clumps.  That's how you know it's done.  The whole process took about 30/35 minutes.  Don't get in a hurry.

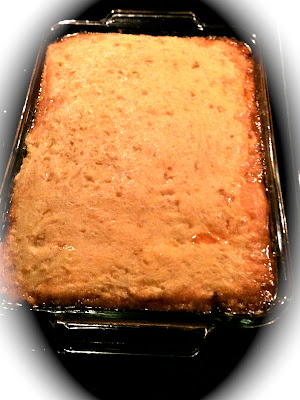
Pour the fudge onto the buttered jelly roll pan and spread evenly over pan.  Looks like this. (Are you drooling?)

Let the fudge sit about 30 minutes and it's ready to slice.  I cut it in about 1 inch squares and it makes TONS!  It is rich, sweet, chocolaty and just the right texture for my liking.  Dan has declared it the best!  He is a connoisseur of all things chocolate, so consider that confirmation of it's goodness.  : )

If you have more holiday parties to attend or are having a New Year's Eve Party, this is a wonderful treat for your guests.  It would also make lovely little treat bags for everyone to take home.  

Hope you will give this recipe a try, because the best part is you get to lick the spoon when the fudge is done and poured in the pan.  MMM, MMM, MMM, MMM.
Takes you back to childhood doesn't it?  Everyone likes to lick the spoon.  Yummm.  Enjoy this fabulous recipe.  Just one little square of this delicious fudge is so good with a cup of coffee.  Best dessert ever.  

Everyday Donna

Things to remember:

Go ahead, lick the spoon.  It's the best part!  

Thursday, December 22, 2011

Chalkboard/Memo Board You Can Make

It is December 22 and I still have projects to finish that are being given as Christmas gifts. YIKES!  The picture above is one of the gifts I made this year using a cookie sheet (from Dollar Tree) and made into a chalkboard/magnetic memo board.   They are super useful, decorative and fun to make.  

Chalkboard paint is all the rage these days and you see everything painted with it.  It is available at most any hardware store. ( I got mine at Lowes.)  You can even customize your own color using paint and some unsanded grout. Martha Stewart's website has a recipe.   The possibilities are endless.  I even saw a tablecloth someone had painted with chalkboard paint and covered a table so you could write on it while you sat at the table.  How much fun is that?  Anyway, I wanted a versatile piece that was magnetic and could be written on.  My choice?    A cookie sheet because it has flat surface you can write on and is metal so it will be magnetic.  First stop - Dollar Tree.  I bought a half dozen cookie sheets for $1 each and started from there.  Here is what you will need.

Cookie sheet
primer paint
black spray paint or color you want (for back and edges of cookie sheet - $.97 at Home Depot)
paint brush
chalkboard paint
acrylic paints in assorted colors
glass flat backed marbles ($1 for a bag at dollar tree)
magnets (available at craft stores)
hot glue gun
ribbon
chalk
small note pad

Start by drilling two holes at top of the flat surface of the cookie sheet right below the border.  Make them about 3 inches apart and equal distance on either side of center.  Next, paint the entire sheet with primer.  This step is important because it is difficult to get paint to stick to metal, especially since you are going to be writing on it.  Next, spray the back of the cookie sheet with inexpensive spray paint.  I used black paint that was $.97 a can at Home Depot.  After that dries, turn the cookie sheet over and paint the front with chalkboard paint.  Let it dry and paint with two additional coats.  

Decide on how you want the cookie sheet decorated.  I printed out initials on my inkjet printer, then used a piece of transfer paper to trace the initial in the upper left corner of the cookie sheet.  I painted it with acrylic paint.  I chose colors that would coordinate with each recipient's kitchen and used a very simple method to decorate.  Dots.  I love dots and they are SO easy to do.  I used a flat pencil eraser and the end of a wooden skewer to make the dots by simply dipping in the paint and applying it to the edge of the cookie sheet in random patterns.  If you are not sure what pattern you would like to use, work it out on a piece of paper first before beginning on your finished piece.

To make the magnets, I simply painted the flat backs of the glass marbles with acrylic paint and let them dry, then applied a magnet with hot glue.  The initials were put on with a sharpie.  Simple.  


The hanger and holder for the chalk were made with some adorable ribbon I found at the craft store.  For the chalk holder, simply wrap a piece of ribbon around a piece of chalk so it won't be too tight to get the chalk out of,  but not so loose that the chalk won't stay in the "holder."  Cut the ribbon, hot glue it together forming a loop and then glue the back of the loop on the flat surface of the cookie sheet near the bottom of the board leaving enough room so a whole piece of chalk will fit.  (see picture)

The ribbon hanger was done by threading a piece of ribbon through the right hole leaving a loop long enough to hang your board and pulling the ribbon back through the left hole.  Make a tail long enough to tie a pretty bow and hot glue it to the board.  The hanger is then all one piece.   Keep the ribbon attached to the whole roll so you can adjust lengths until you are ready to cut it.  That keeps from wasting ribbon.

Add a magnet to the back of a small note pad with hot glue and place it in the bottom right hand corner.  Got my cute little note pads at WalMart.  Ta Dah!  Finished.  Now, you have an adorable memo board that is magnetic and you can write notes on.  Be sure and rub the edges of your chalk on a piece of paper to round out the edges.  Chalk has very sharp edges and may cut through your chalkboard paint.  The paint also needs to "age" for a few days before you use it and then seasoned.  Read the can label for directions.

These are a few of the boards I made and have already given as gifts.  They were so much fun to make.   They can be personalized in so many ways, and are both decorative and useful!

Notice, this is before I lettered the magnets and added the hangers, etc.  Don't you think they are adorable?  What a handy, heartfelt, handmade gift from you to the recipient.  These would be great for children's rooms too!  Just take this idea and run wild!  Let me know what idea you come up with.  You are going to have so much fun making these.  Enjoy!

Everyday Donna

Things to Remember:

Christmas time is coming, lights are on the trees
Hang up your stocking for Santa Claus to see,
If you haven't got a stocking, a little sock will do
If you haven't got a little sock, God Bless you!

Wednesday, December 21, 2011

Easy, Inexpensive Gift You Can Make

If you are looking at this picture and wondering if this is a piece of wall art, the answer is no.  These are coasters that I made for Christmas gifts and they are so quick, easy and inexpensive.  They are made from ceramic tiles, scrapbook paper, Mod Podge, acrylic sealer, and a square of felt.  Aren't they pretty?

I don't know if you have tried to buy coasters lately, but they are hard to find and when you do they are expensive!!  They are something every household can use.  We have always used coasters to keep water marks off our wood furniture.  These coaster were made as companions for another gift I am giving this season.  (Will post on that next.  It is a really cute gift also!)

The tiles were bought at Home Depot.  They come in lots of colors and are really affordable. The white and tan tiles were only $.13 each.  The most expensive tiles were the black ones and they were $.38 each.  You can find scrapbook paper at any craft store and the sheets I used were on sale 5 for $1.00.  One sheet of paper will make 4 coasters.  Mod Podge and acrylic spray sealer are also available at any craft store.  Oh, and you will need a couple sponge brushes also available anywhere paint is sold.  I used a 1 inch size.  A square of felt from Michael's was less than $1.00 and I made all the little squares used on the back of the tiles from on square.  You will need a hot glue gun to glue the felt squares to the back of the tiles.  I used scissors that cut different shapes to make the fancy little scallop on the edge of the paper, but that is not necessary.  Otherwise -  easy peasy.

First, I found a box that was slightly smaller than the square tiles and used it as a template to draw the shape for the paper.  I drew 4 squares on each paper and cut them out with scissors.  Next, I lined my tiles up and started by brushing a thin layer of Mod Podge on one tile at a time.  Place a piece of the paper in the center of the tile, leaving an even border showing around the tile.  Smooth the paper with your fingers to remove any air bubble.  Continue the process with each tile.  Set aside and let the Mod Podge dry (it dries clear).  I let them dry overnight.

Next, put  another thin layer of Mod Podge all over each tile (over the paper too) and let it dry for several hours.  Just for safety, one more coat of Mod Podge.  After all the tiles were good and dry, I took them outside and sprayed them with a thin layer of acrylic sealer following directions on the can.  Acrylic sealer is very pungent and I would NOT recommend using it inside.  Two more thin layers of sealer were applied after each layer dried.  It dries very quickly and makes your coasters waterproof.

Take a square of felt and cut it into half inch squares.  You will need enough for 4 squares per tile.  Using a hot glue gun, glue a small square of the felt to each corner of each tile on the back side.  It will look like this:

I applied the glue to the felt square and then pressed it on the tile.  That way you are sure to cover the surface of the felt so that it sticks!  Because the tiles are rough and scratchy on the back, you don't want to skip this step.  No one wants scratched furniture protecting it from water stains.

Let these dry overnight again, so that they are all good and dry.  Next, I stacked 4 tiles together and tied them with twine.  They are a lovely and useful gift.  The really nice thing is they can be personalized for each recipient and they are a thoughtful, heartfelt, handmade gift.   Don't forget to make a set for yourself!

If you need a gift that is quick, easy and inexpensive this is one that everyone can use!  Hope you have fun with this.  We are in countdown mode and I still have a long way to go.  Back to the crafting table - I really am going to make it.  I know I can, I know I can.

Everyday Donna

Things to Remember:

Heartfelt and handmade gifts are the most precious.

Monday, December 19, 2011

Gluten Free No Bake Cookies - Delicious!

Everyone loves a sweet treat sometime.  Unfortunately, those with gluten allergies are limited because wheat flour contains gluten and most baked goods contain wheat flour.  Our son in love has Celiac, so I am always on the hunt for gluten free recipes, especially ones that don't require a bunch of hard to find ingredients.  He also happens to love no bake cookies, and guess who found a gluten free recipe?  This girl!  Thank you Pinterest.  Now, we can eliminate the gluten, but unfortunately there is nothing I can do about the calories.  hahaha

No bake cookies are easy and delicious.   He was so excited yesterday when he found I had made him a huge batch of these cookies to enjoy for the holidays - especially when everyone is enjoying all kinds of delectable goods.  You might want to see my post on peanut brittle from yesterday which is also gluten free!  And, you can  make Rice Krispie  Treats gluten free now because there is a brown rice gluten free version of Rice Krispies available!  It's easy to find gluten free marshmallows (just check the package) and the only other ingredient is butter.  So, you are good to go!  Now, back to the no bake cookies.

You must use gluten free oats to make this recipe gluten free.  I got mine at Trader Joe's.  By the way, did you know that Trader Joe's will give you a list of all their products that are gluten free?  It is pages long, but ever so helpful when shopping.  Walmart has also added lots of gluten free products.  They tend to be pricier than other grocery items since they are "specialty," but Trader Joe's and WalMart's are more affordable.  Just thought I'd let you know that piece of information in case you weren't aware.  Now, back to the no bake cookies.  Sorry I keep getting off track.

Here is what you need for the no bake cookies.

1 stick butter
1 1/2 cups brown sugar
1/2 cup heavy cream
1/3 cup unsweetened cocoa powder
1/2 cup creamy peanut butter (make sure it's gluten free)
1 teaspoon vanilla  (make sure it's gluten free)
3 cups old fashioned gluten free oats
1 cup dry roasted peanuts
2 baking sheets lined with wax paper

Directions:

In a large saucepan, melt the butter over medium high heat.  Stir in the brown sugar, cream and cocoa and boil for 1 minute.  Remove the saucepan from heat, add the peanut butter and vanilla and stir until smooth.  Stir in the oats and peanuts.  Drop heaping tablespoons full of the batter onto a wax paper lined baking sheet, spacing them 1 inch apart and let them cool until set - about 20 minutes.

Storage suggestions  Keep the cookies at room temperature between sheets of wax paper in an airtight container.  

One recipe makes 36 cookies.

These cookies are quick and easy to make and they are really, really good - especially if you like no bake cookies.   This also allows those with gluten allergies a chance to enjoy a sweet treat.  Give these a try even if you don't have gluten allergies.  You could use regular old fashioned oats in place of the gluten free. 

Hope you enjoy this quick and easy recipe that will give you your chocolate and peanut butter fix and they are extra good with a nice cup of coffee!  Yum!!!  Enjoy!!

Everyday Donna

Things to Remember:

Cookies are made of butter and love.  ~Norwegian Proverb

Sunday, December 18, 2011

The Easiest Peanut Brittle - EVER!

Things have been rather hectic this past week.  This weekend we had two children with birthdays to celebrate and our oldest daughter and her family moved to Nashville from Dallas.  To say that we are excited is a bit of an understatement.  We now have 4 out of 5 grandsons living within minutes of us and grandson #6 is due in February.  It doesn't get much better than that!

In preparation for their arrival, I made some goodies that were:  #1 - delicious and #2 - gluten free.  Our son in love has Celiac and he doesn't get to enjoy many treats because most baked goods are made with flour and flour has gluten.  I always try to have something for him to enjoy along with the rest of us.  

I made gluten free no bake cookies and I will post the recipe later in the week, but this was the recipe I wanted to share with you.  Make in the microwave peanut brittle!  Oh my goodness!!  It is beyond easy and is soooo delicious!  By the time I took this picture, half of the batch I made had already been consumed.  So, tomorrow I will make another batch.  Here is what you need.

1 cup sugar
1/2 cup light corn syrup
1 Tbsp butter
1 tsp vanilla
1 cup peanuts (I used dry roasted)
1 tsp baking soda

First, combine the sugar and corn syrup in a microwave safe bowl.  (I used a corning ware bowl).  Stir to combine.  Microwave on high for 5 minutes.  Add the butter, vanilla and peanuts.  Stir.  Microwave on high for 1 minute 25 seconds.  Remove the bowl from the microwave and quickly stir in baking soda.  (It will foam a lot, don't be alarmed).  Immediately pour mixture onto a baking sheet lined with parchment paper, aluminum foil or a silpat.  Spread into a rectangle using the back of a spoon or a wooden spoon and let cool for 1 hour.   Break into pieces and enjoy!

Nothing could be easier and it is really, really, really good!  It is also gluten free which is a real treat for those who have allergies to gluten.  

This makes a nice sized batch of candy that would be great boxed and given as a gift, shared with co workers or eaten by your family!  It doesn't take hours slaving over a hot stove.  You don't need a candy thermometer and you don't have to worry about the humidity.  Candy can be a real pain sometimes.  This is the easiest candy recipe ever!  If you like brittles, you are going to love this one!  Enjoy.

Everyday Donna

Things to remember:

“Candy is nature's way of making up for Mondays." ~Unknown Author” 

Tuesday, December 13, 2011

It's Called Pumpkin Crunch But We Called It "Pumpkinlicious"!

If only I could get a picture of this dessert that would: 1. do it justice and 2. let you taste it just so you could know how good it is.  Maybe good is not the right word, maybe it should be fabulous - pumpkinlicious.  All I know is that it is one of the best dessert's ever - EVER!  Goodness gracious, I have no effective description for this fantastically wonderful goodness.  

Our second daughter and son in love came to dinner last week, and I wanted to make a dessert that I had all the ingredients for.  Well, God bless Pinterest  because I had found this recipe a while back and posted it to my recipe boards.  Let me tell you, it's a keeper!  Here is what you need.

Ingredients:

1 15 oz can pumpkin
1 12 oz can evaporated milk
1 cup sugar
1 tsp cinnamon
3 eggs
1 box yellow cake mix
1 cup chopped pecans
3/4 cups butter (1.5 sticks)
1 12 oz container cool whip
1 8 oz block cream cheese, softened
1/2 cup confectioners sugar

Preheat oven to 350

Mix pumpkin, evaporated milk, sugar, cinnamon and eggs and pour into a 9 x 13 baking dish.  Sprinkle dry cake mix on top of pumpkin mixture.  Sprinkle pecans on top of cake mix.  Cover nuts with pieces of thinly sliced butter.  (Make sure it is almost completely covered with butter, you'll understand when you eat it).  Bake at 350 for one hour.  Let cool completely  Beat cool-whip, cream cheese and confectioners sugar together and spread on top.  Serve.

Wowee, did we all love this dessert.  Our "kids" each ate two pieces.  I mean, yeah, it's that good.  You are thinking that is a lot of butter, but it makes the pecans all "praline like" and the filling is like pumpkin pie and all that gooey goodness on top.  Wowza.  If you could just taste it, you would rush to your kitchen right now and make one.  I'm not kidding.

This is an easy dessert to make for the holidays and everyone will enjoy it of that I can be sure!  This will become a standard at our celebrations - right there with coconut cake and pecan pie.  It's actually better than pumpkin pie and easier to make.  Give it a try and let me know what you think.  It's making my mouth water just writing about it.  If only I had a yellow cake mix in the house......

Everyday Donna

Things to Remember:

Christmas was better when I still believed in Santa.  Oh to be 20 again.  ; )


Monday, December 12, 2011

Chile Relleno Casserole - It's Better Than Good!

It's Monday again and the gift making continues.  There seems to be no end in sight at the moment and I have got to get some things in the mail or they are not going to arrive in time for Christmas.  Also, our oldest daughter and her family are moving to Nashville this weekend and next week we will be busy helping them get settled along with -- yes -- Christmas.  This happens to me every year even though I intend to be finished by this time.  Oh well, don't know why I am even remotely surprised.  

Since today was busy, busy, busy I needed something for dinner that wouldn't take a  lot of time and this casserole certainly filled the bill.  It's a recipe I found on Pinterest and knew I would give it a try because it has ingredients that we love.  The "Pinterest poster" called it beef, cheddar and chile casserole.  I call it chile relleno casserole because that is what it tastes like and my husband and son called it fantastic! 

This is a good one if you like Tex/Mex food and it is easy.  It's one that we will be having often.  I can tell you that because it is that good.  Here is what you need.

Ingredients:

2 pounds ground beef (I use grass fed)
1 medium onion, chopped
2 garlic cloves, minced
1/2 jalapeno, seeded and chopped (I used canned)
2 teaspoons chili powder (I added more chili powder)
1/2 teaspoon ground cumin
1/2 teaspoon kosher salt
1 8 ounce can tomato sauce
3 cups water
1.5 cups corn meal
1 can creamed corn
1 egg
1 teaspoon baking powder
1/2 teaspoon salt
1 cup shredded cheddar cheese
2  -4 ounce cans chopped chiles


Preheat oven to 350

Brown ground beef and onion until beef is just done.  Add garlic and the jalapenos and continue to cook for another minute.  Add the cumin, chili powder and salt - stir to combine.  Add the tomato sauce and stir to combine.  Remove pan from heat.

In a medium saucepan, bring three cups of water to a simmer.  Using a whisk, slowly add the corn meal and stir to remove lumps.  Remove the saucepan from the heat and stir in the creamed corn.  Stir in the egg, then stir in the baking powder, salt and grated cheese.  Mix well.

In a 9 x 13 casserole dish, layer the ingredients in the following order:

Spread green chiles evenly over the bottom of the casserole.  Spread cooked meat mixture over chiles.  Spread cornmeal mixture over meat, smoothing the surface.

Place the casserole dish in the oven and bake for 45 minutes.  Allow to rest for 10 minutes before serving.  This is how a serving looks -  full of meaty goodness topped with cheesy cornbread!

And this is how it tastes -- yummmmmmmmy!  Since Dan and Tyler declared it wonderful,  it will appear on the menu again (and again and again).

This casserole would be perfect for a crowd, holiday party, tailgate party, or family dinner.  It is easy and ever so tasty.  If you like chile relleno or tamales, you will love this recipe!  All you might need is a green salad and you are all set!  And maybe some guacamole or salsa and chips - yeah.  That sounds wonderful.  We also had black beans cooked with Rotel and Chiles, one of our favorites.  There are so many possibilities here.

With all the busy schedules in the coming days, this is a recipe that is tasty, quick and easy.  Give it a try. I think you are really going to like it.  Simply delicious.

Everyday Donna

Things to Remember:

It's beginning to look a lot like Christmas;
Soon the bells will start,
And the thing that will make them ring is the carol that you sing
Right within your heart.


Saturday, December 10, 2011

Hand Painted Table Runner Tutorial - Easy and Beautiful

I
It's been another busy, creative week here at the little yellow cottage.  Once I get started (finally) the ideas start to roll and I can't seem to work fast enough to accomplish all my goals.  You know how it is?  Anyway, I wanted to create a new table runner for our dining table and for the trunk I use as a coffee table in the living room.  My burlap phase from Thanksgiving has passed for the moment and now I am into painter's drop cloths.  Talk about a bargain!  You can get a drop cloth at Home Depot for $9.00 and it is huge.  Way cheaper than comparable fabric from the fabric store and it is much wider!  

From that one drop cloth I made a bunch of pillow covers, two table runners, two stockings and a partridge in a pear tree (just kidding about the partridge).  But, the fabric has the look of linen and is very easy to paint on with a brush.  Burlap requires a stencil-type method because it is very porous and has lots of "holes".  This fabric is like painting on canvas, you can use fine brushes and control the look you want.  Super!

Here is what you will need:

Fabric
Paint - colors of your choice
Fabric medium
Brushes
Print outs of words and stencils
Tracing paper
Trim
Sewing machine or glue

To make my runners, I simply cut pieces of fabric the length and width I wanted to fit the table and trunk.  Next, I printed out words I wanted to use in a font and size that I liked.  For this project I used Chopin Script which is quite beautiful and I was able to download it free from the internet.  Free = Yay!  Also, I downloaded and printed a lot of free Christmas stencils from About.com.  (They have some really great ones and they are - free.)  I printed a lot of stencils because I wasn't quite sure what I was going to use.  I ended up using two different stencils and putting them together for the big table runner to get the look I wanted.  

Now, I didn't use the stencils as "stencils" this time, but traced the words and stencils onto my fabric using tracing paper that I bought at Michaels in the art department.  Those of you my age will know it as carbon paper.  Remember typing class and all those carbons we had to make?  Sorry, I digress.  Simply find the center of your fabric and mark it with a straight pin.  Next, decide on the design you are going to use and place it where you want it to on the cloth.  


I used masking tape to hold my paper to the cloth, placed the tracing paper underneath and used a dull pencil to trace the words and designs.  It will look like this when you remove the paper.

These are the three brushes I used - a fine liner, a small angle and a small square shader.  The most important brush is your fine liner.
Put about a 50 cent sized glob of paint on a paper plate (so it doesn't dry up as you are working) and mix in fabric medium according to directions.  This will make your paint washable.  If you want to use fabric markers, you can.  I just prefer paint and brushes and I have plenty of both on hand.   Since I am right handed, I begin at the far left and work to the right so that I don't drag my hand through wet paint and get it everywhere.  You do what is comfortable for you. When using the liner brush, "roll" it through the paint to keep a sharp point so that the bristles don't splay out when painting.  I do the outlining first and then fill in one letter at a time.   It took me about an hour to paint the big table runner and slightly less for the smaller runner.  This is how they looked completely painted.


You may ask why I chose the French words Joyeux Noel?  Because I think they are lovely, the English equivalent is Merry Christmas, and French script is very popular this year in decorating.  It was just a decorating choice.  But, isn't it gorgeous?  I simply LOVE the Chopin Script.  

Next, I pressed the hems all around the runners and stitched them down on the sewing machine.  If you don't sew you can use stitch witchery or "sewing" glue - just follow the directions.  Then, I added trims.  I don't like "matchy/matchy" so I used different designs and trims and yet they "go together."  Just personal choice.  The trim I used on the small runner is vintage and looks like this close up.  It ties in with all the colors in the living room.
It has the look of needlepoint with dark reds, greens, blues and blacks.  It is gorgeous.  This is the small finished runner.
For the big table runner I used a black and gold metallic trim that is very "madrigal" and regal in look.  
And how it looks on the table.
I had trouble getting the "whole" thing in a picture, but this gives you an idea of how beautiful it looks with all the decorations. 

Where else could you get a hand painted runner for so little money?   The joy of producing such a lovely piece is worth the effort!  You can customize it in any color with any words and decorations you like.  That is the best part.  And, you are using your inner artist!!  

What fabulous gifts these would make!  It wouldn't even have to be for a holiday - it could be something "everyday" useful.  It's the little things that make a house a home.  Have fun with this project.  Let your imagination run wild and let me know how much fun you have making it!  

Everyday Donna

Things to Remember:

Man will begin to recover the moment he takes art as seriously as physics, chemistry or money.  ~Ernst Levy

Thursday, December 8, 2011

Remember those $1.38 plate stands I showed you yesterday?  Well, here is what I did with them.  This is the big reveal.  If you look really close, you will see that I used a candlestick, a sherbet dish and a martini glass to achieve different heights for my candle holders.  The variety is also very visually appealing.   The picture simply does not capture how pretty they look on the table.  

This is the way our kitchen table looked this morning before I began setting it for Christmas. 
 Nice huh?  Guess you would never know I have been crafting on the kitchen table.  Why you ask?  Because my craft/sewing table is also buried in projects.  At least, I resolved this table today.  The other one is going to take some more work.  

After I cleaned off the table and put everything away (sort of), I put down my new hand painted table runner.  It looks like this.
I made it from a painter's drop cloth.  I will give you a tutorial on how I did it later.  I have to say I love it!   Next, I placed three of the plate stands in the center, added three of the sparkly candles I made and some cedar and holly from our bushes outside.  (Remember, use what you have.)  The holly has really beautiful red berries on it and it makes a nice little pop of color on the elevated plates.  Then I added one of my beloved acrylic stars.  Yes, more stars because it goes with the star in the center of the table runner and it WAS a star that guided the wise men to the nativity.  
The same treatment was done on the other two plates.  Next, I added 5 mercury glass votives, and hung some stars from our light fixture.
Then, I put out my red chargers which were given to me by my dear sweet friend Don and added a festive red holiday napkin that is embroidered with gold holly.  I have some beaded napkin rings, but didn't want to use them so I searched around and decided to cut a branch of artificial berries apart that I had and twisted them around the center of each napkin and then added a sprig of fresh holly leaves.
The backs of the chairs have red velvet bows tied on them with a crystal snowflake and some red and white string.  Here is a close up.
Because we use our table every day (we don't have a dining room) I will have to move the chargers for daily use, but I just love the way the table looks.  It is simple but festive.  Smashing actually and that is what I was aiming for.  There will be so much ambience when all the candles are lit. 

These pictures were taken with my phone because I don't have a camera at the moment.  They are not the best, but will give you an idea of what you can do with little expense.  Here are a few more pictures.
I also used some of the plate stands on the trunk I use for a coffee table in the living room.  There is a new hand painted tabled runner on it also.  Instead of candles, I used some of my Dollar Tree mirrored trees that I got a year or two ago.  Here is what the coffee table looks like.  I LOVE this look.
So I have $1.38 in each plate stand and $1.00 in each mirrored tree for a total of $5.76.  Not too shabby for a great looking arrangement.  Greenery is from the yard.  Now that makes me happy.  Here are a few more pictures for you.
At last, I am at the end of my decorating spree.  Everything has come together quite nicely and I will be sharing some more tutorials with you and pictures of all of my efforts.  I LOVE when the sun starts going down and all the lights are on and everything looks so beautiful.  It's a lot of work, but so worth it.  Can't wait for the grandsons to see all the trees! Our New York grandson won't make it here this Christmas  because his dad (our son) will be performing and we will really miss him.  Otherwise, it's going to be such an exciting Christmas and we are counting down the days.  

Everyday Donna


Things to Remember:

Christmas waves a magic wand over this world, and behold, everything is softer and more 
beautiful.    Norman Vincent Peale


Wednesday, December 7, 2011

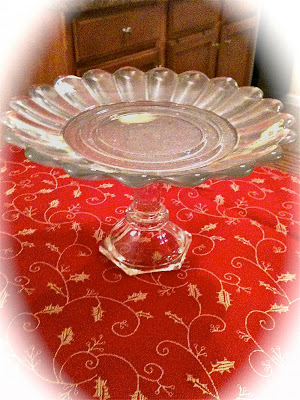
Okay, you look at this and say yeah?  What is it?  Looks like a cake stand.  So?  But, it's something I made to fill a need.  I am going to use this in the centerpiece on my dining table.  It's going to be a candle holder.  Actually, I am making several.  And was it ever cheap!

This is what I used.
I found these plates in the clearance section at Old Tyme Pottery.  They were 38 cents each.  That's right - 38 cents each.  They were on clearance (my favorite word) at 75% off with another percentage off.  Original price was $3.79 each so I saved $3.41 on each plate.  YES!  They have a silvery cast to the glass which makes them really beautiful to use for my Christmas centerpiece and are 8 inches in diameter.  Perfect to hold a pillar candle and leave room for some decorations around the candle.

I had several glass candlesticks from the Dollar Tree that I have been shifting around from place to place for a couple of years.  They were - you guessed it - $1.00 each.  I have them in several heights, but I am using the 4 inch pair to make my candle holders.  They look like this.
The only other thing I needed was super glue.  You can get two tubes  in a packagefor $1.00 at Dollar Tree.

All you have to do is clean  your plate and make sure it is really good and dry.  Lay your plate upside down and apply super glue to the top of the candle stick or glass you are using for the base.  Center it on the bottom of the plate and let it dry.  Turn it over and you have a really pretty elevated plate that can be used for whatever you want it for.  Wouldn't this be lovely to hold cookies or candies for gift giving or to grace your table for Christmas?  It makes a beautiful candle holder and I will show you what my table looks like tomorrow after I get it all decorated with my hand painted runner and finished table setting.  It's going to be smashing I think.  (Did I just say smashing?)

This is a quick and easy project you can do using mismatched plates you may already have and odd and end stemware or candlesticks.  I have a couple of sherbet glasses and martini glasses that I am going to use for bases also.  Any base you find interesting could work as long as it can be glued to a plate.  You can even hit the thrift stores and see what you can find that is usable.   Any vintage plate or candlestick could be fantastic.  Here is what mine looks like with a  candle sitting on it.  Just remember, it is undecorated (and yes I decorated the candles).  Will tell you more about that later.  These candles would also make lovely gifts!  I couldn't decide which picture I liked best so I posted both of them.  Can you see the potential here?

Well, it's time to get to work.  I have many more gifts and projects to make before I am finished.  Hope you can put this idea to use to make something lovely for your home or for gift giving.  With budgets being tight this year, remember it is the thought that counts and you will have put your time and effort and thoughtfulness into this gift.  And, it  is a really inexpensive project that only takes some glue, a couple of pieces, and an idea.  No one will ever know it only cost $1.38 or whatever you spend.    They will think you worked very hard putting it together and are so creative.  : )

Everyday Donna

Things to Remember:


May no gift be too small to give, nor too simple to receive, which is wrapped in thoughtfulness, and tied with love. ~ L.O. Baird

Tuesday, December 6, 2011


Yesterday, I told you I had another adorable candy cane project for you and here it is!  A star made from  candy canes and starlight mints.   How cute is this?  I think they are super adorable.  They look good enough to eat, but don't because they are sprayed with acrylic sealer!

If you know me, you know that I LOVE stars.  My family likes to tease me about it because I have them all over the house.  I can't tell you why I love stars, I just do.  They resonate with my soul, especially when they are in the night sky.  I also have a great fondness for candy canes.  Their red and white stripes are representative of Christmas time and joy and happiness.  Who can't smile at a red and white striped candy cane?  When I saw one of these stars made from - of all things - candy canes, I knew there was another project in my future.  Here is what you do.

  Start by unwrapping 10 candy canes and 20 starlight mints.  This will make one star.  (I bought boxes of candy canes at Target for $l.29 for 24 canes.  A bag of Starlight mints were less than $2.00.)  You also need a hot glue gun and lots of glue sticks, some kind of acrylic sealer (I used Mod Podge matte clear acrylic sealer), and a covering for your work surface.  I use brown craft paper.

Glue 5 sets of candy canes together at the top and bottom like this making "hearts".  Use plenty of hot glue and watch your fingers!  Let the glue set. 
Once the glue sets, place your candy canes in this order and I will try to make this understandable.   First, look at this picture.
Notice how the tops of the candy canes are laying.  I started with the bottom right "heart" and laid it flat on the table.   Continue by laying another heart to the left with the tops of the crooks butted together.  Now, lay a heart on top of these two, adjusting the crooks to cover the ones underneath as close as you can.  They will never fit perfectly.  Continue to the left by laying another heart on the table, but here's where it gets tricky, lift the left side of the previous heart and lay it over the heart you just put down.  This heart is now under the previous heart and over next heart.  Now, lay the final heart over the heart you just laid down and the first heart that started the star.  You will have "under, over, under/over, under and over".  I know this sounds confusing, but just look at the picture.  After you have them all adjusted, begin gluing them together.  Lift one side of a heart at a time and place hot glue on the candy cane underneath where it will be attached. Make any necessary adjustments and press the top candy cane into the glue before the glue sets.  Continue gluing around the star.  Don't be concerned if the glue runs.  When it sets it will simply pop off the candy cane.  Then I trimmed any "globs" with small scissors.  Your star should look like this at this point minus the starlight mints.  Again I forgot to take a picture.  
Now, working one junction at a time (where the hearts join together), put a generous glob of glue at the top and bottom of each heart and place a starlight mint over the glue.  Let the glue set and turn the star over.  Glue mints to all the junctions on the other side.  After the glue is good and dry, remove all globs and glue webs.  After all the glue sets, spray both sides of the star with clear acrylic sealer to preserve the candy.  That's it!  You are finished. 

This really is not hard I promise you.  The hardest part is unwrapping the candy canes without breaking the crooks!  Make sure you have some extras on hand.  I saved all the broken ones to use in peppermint bark.   

Make a hanging loop at the top with ribbon or string and hang your stars wherever you want.  I hung a couple in the front window because our porch is done in a candy cane theme.  I could not get a great picture, but this is what they look like.

This is a really fun, inexpensive and easy craft.  It makes a thoughtful gift for a secret santa, neighbor, friend, or teacher that comes from your heart and hands.  They also don't cost you a lot of money!  How about tying some on Christmas gifts?  That would be lovely.  There are lots of possibilities here.

I hope you enjoy making these beautiful stars.  They will "light" up your Christmas.  

Everyday Donna

Things to Remember:

For my part I know nothing with any certainty, but the sight of the stars makes me dream.
Vincent Van Gogh

Monday, December 5, 2011

Have you ever had so many projects you wanted to complete that you can't seem to do them fast enough?  That is indicative of my impatience issue which leads to my procrastination problem which leads to hurrying and THAT leads to impatience and on it goes.  Hopefully, you don't have that problem.

This weekend I helped the daughter of a friend who recently moved to Nashville with some crafting projects that she will be giving for Christmas gifts.  We had a wonderful Saturday afternoon of listening to Christmas music and crafting.  Let me say, she is a natural -- picked right up on the new skills she is acquiring and created some really lovely Christmas gifts  Before we began, she told me she had no creative abilities.  WRONG!  Everyone has an inner artist and it is so much fun to see someone discover hidden talents.  

While I was helping her, I worked on a few projects myself.  Lots of decorating has been done this last week, but there are more things I want to finish and add before I consider the house "complete."  Of course, things are never done as far as I am concerned, you just finally say that's it!  

This is one of the projects that I worked on while helping Erin.  Aren't these candy cane striped snowflakes adorable?  Even your children or grandchildren could made these.  Our two oldest grandsons, who are 8 and 5, made these while they were visiting Thanksgiving week.  We had so much fun.  I found these on Centsational Girl's blog site and, of course, knew I had to make some.  She used paper straws, but I found these lovely red and white striped plastic straws at the Dollar Tree right before Thanksgiving and I knew they would be perfect for this project, and they will hold up better than paper.  I also found a package of little foam Christmas decorations at the Dollar Tree which had a bunch of little white snowflakes that I used for the center.  This is an inexpensive craft!

Here is what you need:

a package of red and white straws
white chenille stems (pipe cleaners)
small red beads
Decoration for the center - hopefully foam snowflakes 

First, cut 4 white chenille stems in half.  You will have 8 halves.  Cut off a piece of chenille stem that is about 1.5 inches and twist it tightly around the center of the 8 halves and then fan them out like a snowflake.  It will look like this.

Now, cut two plastic straws into 8 pieces about 2 inches long.  You want the straw pieces slightly shorter than the chenille stems.
Next, slide the cut pieces of straw over the chenille stems, leaving a small end exposed.  Cut 1 inch pieces of chenille stem and twist them tightly around the exposed end above the straw pieces.
At this point, you will have 3 pieces of chenille showing.  Take some small red beads and slip them over the pieces of chenille and trim the ends.  Place a snowflake in the center of the spoke and TADAH!  You are finished.   This candy cane snowflake is about 5.5 inches across.  Makes me smile!

Now, how cute is that?  Add a ribbon or string for hanging and you can use these on a tree as ornaments, tie them on packages for gift giving or do what I did.  I made this cute little banner to hang over my sink.  We do not have a window over the sink, so I try to keep it interesting.  I painted three wooden letters I have had since last year in a candy cane stripe and then highlighted it with gold leaf.  Sorry, the picture is not the best.
I have some red and white striped rope that I bought at Hobby Lobby, so I hot glued the letters to a length that would fit between the cabinets and tied two of the candy cane snowflakes, one on either side.  It looks like this.
Again, it's not the best picture in the world, but you get the idea.  The sign underneath the shelf says Candy Canes, 5 cents.  I have had that sign for years.  It just makes the kitchen a little more festive don't you think?  I placed some ornaments I gold leafed on the shelf and placed some candy canes in the coffee cup to complete my Christmas arrangement.  The red and white striped jar is used to hold sugar all year round.  Yep, came from the Dollar Tree.

I hope you will give this project a try.  It's lots of fun and would make a great inexpensive classroom project if you have a party coming up and need a craft for the students to make.

Check back tomorrow because I have another beautiful candy cane project for you.  It's one that I simply love.  Talk to you soon.

Everyday donna

Things to remember:

I wish we could put up some of the Christmas spirit in jars and open a jar of it every month. 
Harlan Miller