Thursday, October 2, 2014

Pumpkin Dump Cake - Easiest Recipe Ever


Oh happy day, it's really finally going to be fall tomorrow.  It has been almost 90 degrees here in Nashville for the last week.  It's going down to a low of 40 tomorrow night.  Yahoo!

Fall means all things pumpkin.  Do you like pumpkin?  We love it in our house (me particularly) and our youngest so is also a big fan.  When he was younger he could eat a whole pumpkin pie at one sitting.  He didn't like most sweets, but pumpkin and pecan pie sure made him happy.

He lives in Denver now and yesterday was his fiance's birthday.  We are so excited that she is going to be joining our family.  He called and said he wanted to bake her a cake but he didn't have a lot of extra money and did I have any ideas.  Hello!  How many do you want?

He said he didn't have a mixer, or milk, or eggs, or much sugar.  I suggested a recipe I had seen on Pinterest for a pumpkin dump cake that only took a can of pumpkin, a yellow cake mix, pecans, and a stick of butter.  That was the ticket!  Easy.  Not many ingredients.  No mixer needed.

He said he had the pumpkin, pecans, and butter.  All he needed was the yellow cake mix.  That's doable when you are lacking ingredients, equipment, and money.

I sent him a text this morning and asked him how the cake turned out.  He said it was delicious!  I trust his judgment when it comes to pumpkin desserts.  Since it is going to get cool tomorrow, I had to make vegetable soup and the pumpkin dump cake for dinner.  It's called anticipation  - and vegetable soup is always better the second day.

He was spot on about the cake.  It's delicious.  Our son in love ate several pieces and asked if he could "borrow" the rest of it to take home with him.  hahaha  I told him how easy it was to make and I made it gluten free by using a gluten free cake mix.  Even better!

Here is what you need:

1 can pumpkin (I used a 14.5 ounce can, but after I baked the cake I realized it called for a 28 oz can - it worked fine)
1 yellow cake mix (gluten free works)
1 1/2 cups chopped pecans
1 stick butter melted

My addition:  1/3 cup sugar, 2 Tsps ground cinnamon, mixed together

First, spray a 9 x 13 baking pan with cooking spray.  Spread the pumpkin evenly in the bottom of the pan.  I thought it might be a little blah, so I sprinkled 1/2 of the cinnamon mixture over the pumpkin.  I love cinnamon with pumpkin.

Next, sprinkle the entire dry cake mix over the pumpkin and evenly distribute.

Cover the cake mix with the pecans.

Melt the butter and pour over the pecans and cake mix.

Sprinkle the remaining cinnamon sugar over the entire pan.  This makes a nice streusel topping when baked.  Yum.

Bake at 325 for 30 minutes or until the cake mix lightly browns. (If using gluten free cake mix, it will not get as brown as a regular cake mix)  The pumpkin should be set, so wiggle the pan to make sure it is done.  If the pumpkin is not set, it will wiggle like jello.  You don't want that.  Put the pan back in the oven until set.
When the cake is done, remove it from the oven and let cool before cutting.  It cuts in nice squares and is SOOOOOOOOOOOO good.  Pumpkiny, nutty, cinnamony, streusely.  Oh my.

I made fresh whipped cream to go with ours.  I could have eaten the whole pan.  I don't eat many desserts anymore because of the whole gluten issue.  Our daughter, who is also gluten free, was so excited to have dessert and know that she could make this to enjoy at home.  She's going to have to make it because her husband sure did like it!

Now that it's finally getting cool and because it's the season for all things pumpkin, you need to make this as soon as possible.  Really.  It is easy to make, has very few ingredients, and you won't be able to resist it.  There's no sifting or mixing.  What could be better than that to have a fabulous dessert?  I say go for it!  You won't regret it.

Everyday Donna

Things to Remember:

"Fall colors are funny.  They're so bright and intense and beautiful.  It's like nature is trying to fill
you up with color, to saturate you so you can stockpile it before winter turns everything muted
and dreary."  Siobhan Vivian, Same Difference


Wednesday, October 1, 2014

Caramel Popcorn with Dark and White Chocolate and Nuts - Oh My!

Hey friends, how are you?  Are you as happy as I am that October is here?  That means beautiful fall weather, colorful leaves, Halloween, The World Series, football, bonfires, sweaters, and all kinds of fall celebrations.  Don't know about you, but I am more than ready for it all!

Do you like popcorn?  I'm really not a big fan, but if you decorate it up enough I will eat it.  I found a recipe on Pinterest that looked SO good, so I gave it a whirl.  It was the consummate Pinterst fail.  If you have never had one, count yourself lucky.  I HATE wasting ingredients.  Even more, I hate taking the time to make something AND wasting ingredients.  Grrrrrrr.

I made the caramel recipe for the popcorn and followed the rest of the instructions.  The caramel never set - it was so gooey that you could not eat it.  I tried putting it in the freezer and it was okay as soon as you took it out, but within 10 minutes it was back to a total goo ball.  It was completely inedible.  I tossed it.  Insert sad face here.

So, I went to my tried and true caramel popcorn recipe from a Gooseberry Patch recipe book that I have had for years and started over.  I added the white chocolate and dark chocolate and nuts called for in the Pinterest recipe.  The original recipe calls for cashews (yum), but the person I was making this for doesn't care for cashews so I added peanuts.  You could add any nut of your choice because they are all good in my book.  Here is what you need:

2 cups brown sugar, packed
1 cup butter (2 sticks)
1/2 cup corn syrup
1 tsp. vanilla
20 cups popped popcorn


3/4 cup white melting chocolate
3/4 cup dark melting chocolate
nuts of your choice

Pop your corn however you like.  I use an air popper.  Measure 20 cups and set aside in a large bowl.

Combine the first 3 ingredients in a saucepan (I use nonstick) and bring to a boil; boil for 5 minutes stirring constantly so it doesn't scorch.  Remove from heat and stir in vanilla.  Pour over popcorn, stirring until thoroughly blended.  Spoon on a baking sheet (I use a roasting pan cause I like the deeper sides when stirring) and bake at 250 degrees for one hour, stirring every 15 minutes.  Remove from oven.  

Melt the white and dark chocolate according to directions.  I used about 3/4 cup of each and melted it in the microwave.  Drizzle over the popcorn while still in the pan.

Sprinkle the nuts over the popcorn.  Let sit until the chocolate hardens.

Now, dive in.  This is so good.  Oh my goodness.  This would be a great treat to eat during a football game, while watching the world series, or for a Halloween party.  You could pass this around a bonfire and it wouldn't last 10 minutes.  Better make a double batch.  Don't even put it in front of kids.  It's gone in nothing flat.

I know this recipe works as I have made it for years.  I make the plain caramel corn at Christmas time and give it as gifts.  Everyone always loves it and asks for more.  It is also gluten free for all of you who have to watch your gluten intake.

Give this recipe a try.  You are going to love it.  Actually, I like just the plain caramel corn.  It's a real sweet treat.

Everyday Donna

Things to Remember:

"Fresh popcorn is near impossible to resist, second only to fresh doughnuts."
Shannon Wiersbitzky, What Flowers Remember


Thursday, September 18, 2014

Bacon Jam is the Jam!

So sorry I have not posted in a while, but I have taken up painting and it is occupying a lot of my time.  It is my new passion.  Anyway,  this weekend, we are hosting an engagement party for our best friend's daughter and future son in love and I have been busy in the kitchen preparing things that I can do in advance.  They all look so good.

The house is all spit shined and polished and fall decorations are all in place.  It is supposed to be a beautiful day (yahoo), so we will put tables and chairs out under the trees for guests to enjoy a beautiful Tennessee September day.  The patio is another option for guests.  I love having options, don't you?

Today, I made this spectacular recipe for Bacon Jam that I found on Pinterest from The Kitchen Wife.  When we hosted our son's engagement party on July 4th weekend, I made fresh fig jam.  Sadly, there are no figs available here now, so I had to go with something different.   Well, finding this bacon jam was the answer and let me tell you, IT IS THE JAM!  WOW!!

The fig jam was served with goat cheese and crackers.  It was beyond delicious.  Hopefully, this will be just as successful - and I'm pretty sure it's going to be!  I mean, bacon?  Seriously?  Cooked with onions and wonderful spices?  It smelled so good while I was cooking it down, I could hardly stand it!  Oh my goodness!

The Kitchen Wife said it is good spread on a hamburger,  on a BLT, or as a pizza topping.  I can only imagine, because I could eat it by the spoonful.  It is amazing.  Here is what you need.

1 pound bacon (actually most bacon comes in 12 ounce packages now instead of a pound, but that             works)

2 medium yellow onions, or l large onion, peeled and sliced
2 TBSP Butter
2 TBSP rendered bacon fat
1/4 cup brown sugar
1 TBSP vinegar (she called for white, I used apple cider and it worked great)
1 1/2 tsps thyme
1/2 tsp cayenne
1/2 cup water
1 TBSP balsamic vinegar
1 TBSP extra virgin olive oil
salt and pepper to taste

Put the package of bacon in the freezer for about 15 minutes to make it easier to slice.  (I just took a package out of the freezer and sliced it, worked great).  First, remove the bacon from the package and cut across the bacon in 1/2 inch slices to make lardons.  I had nice big strips of sliced bacon because it was frozen together.  Don't be concerned, as it cooks it quickly falls apart into separate pieces.

Put the cold bacon into a cold skillet to help render the fat from the bacon.  Turn the heat on to medium and allow the bacon to cook until all the fat is rendered.  It takes about 30 minutes.  The bacon will foam as it cooks - that is the fat being rendered.  It will look like this.
When I read the directions, I wondered if I knew when it was foaming.  It's like being in labor, you will know when it happens.  :)  You want to cook the bacon until all the fat has been rendered and the bacon and the fat are deep, dark brown - about the same color.  Watch the bacon, because when it gets to this point, it can burn VERY quickly.  As soon as it got very dark, I started removing the bacon to a bowl lined with a paper towel so it would drain.  Work fast, you don't want to ruin this lovely concoction!

While your bacon is cooking, peel and slice the onion very thin.  I cut my onion in half first, and then sliced it.  That way, it doesn't roll all over the place while slicing.

After you have removed the bacon from the pan, pour the excess bacon fat into a separate bowl (there was a LOT).  Do not discard.

Add 2 tablespoons of butter to the pan and 2 tablespoons of the bacon fat.  Add the sliced onions and cook over medium heat until they are translucent and soft.  They will be very brown.

Add the brown sugar, vinegar, half of the thyme, cayenne, a little salt and pepper.  Stir into the onions.

Chop the bacon very fine and add to the pan.  Stir all together.  Add 1/2 cup of water and let simmer until the water is almost gone.  She said 30 minutes, but mine was done in 20.  I have a gas stove, don't know if that makes the difference.  Just watch and don't let it burn.

Now, add 1 tablespoon of balsamic vinegar, 1 tablespoon of extra virgin olive oil, and the rest of the thyme.  Cook another 15 minutes, or until the liquid is almost gone.  Mine was done in 10 minutes.  The jam should be very dark like in the picture.  Yum.

Taste for seasoning and add a little salt and pepper if needed.

When you are finished, you have this beautiful, dark brown pan of bacon and onions that smells absolutely divine from the spices that have been added.  When I tasted it, it was sweet and savory and smoky all at the same time - with BACON!  Did I say bacon?  Oh yeah.

My BFF was here and I had her taste it.  She declared it divine and I looked at her and said "One jar won't be enough, will it?"  I had better make another.  And, so I did.  This should keep in the refrigerator up to 2 weeks  - if it lasts that long.  (Bring the jam to room temperature before serving.  There will be white spots of fat in it otherwise.) I can see more of this in my future.

One recipe makes 1 pint jar of bacon jam.  We are going to have this with goat cheese and crackers on Saturday.  I will let you know the crowd reaction.  I think it's going to be good.  Really, really good.

This would be a great housewarming gift, hostess gift, teacher appreciation gift, or Christmas gift.  In a basket with other goodies?  Wow!  Give it a try.  I think you are gonna love it.

Everyday Donna

Things to Remember:

My grandmother ate bacon every day of her life and lived to be 96.  How bad could it be then?


Tuesday, July 29, 2014

Ribs Cooked With a Dry Rub Low and Slow - Incredible!

 Hello, friends.  It was a beautiful day here in mid Tennessee.  We were busy painting furniture this morning, and then I did my afternoon canvas art.  There is always that proverbial "what's for dinner" question hanging in the air.  I wanted something really good, but easy.

Do you get tired of fixing the same things over and over for dinner?  I certainly do.  While grocery shopping at Aldi yesterday, I noticed they had some really nice looking baby back ribs that were super reasonable.  They were $9.00 for a rack of ribs.  I don't ordinarily buy ribs because I think they are way too expensive for what you get.  Sometimes it seems there is more bone than meat.  Well, these looked really good, so I bought some.  It was a wise decision.

While cleaning up my paint brushes from the furniture painting session, I decided it would be ribs for dinner.  Yesterday, I cooked a bit pot of fresh green beans with new potatoes and a big pan of fried corn.  Both were fresh from the farmer's market.  Can I say Yum?  Yum!  There was also a fabulous cantaloupe in the fridge that I had sliced.  Excellent!  All I had to do was cook the ribs and reheat the vegetables.  I LOVE when that happens.

To cook the ribs, I decided I would put a dry rub on them and cook them in the oven low and slow first.  Then, we would put them on the grill for a bit, just to get them good and brown.  I made up my rub using spices that I had on hand and I had to write it down tonight so I wouldn't forget it because I will be using it again.  These ribs were so juicy, tender, and flavorful that we could not stop talking about how good they were.  Fortunately, there are some left for tomorrow.  Yay!

Here is what I used in the dry rub.

2 tsps salt
1 tsps fresh cracked black pepper
2 tsps Mexene chili powder (use your favorite, Mexene is mine)
2 tsps paprika
1 tsp ground cumin
1 tsp garlic powder
1/2 tsp cayenne pepper
1 tsp dried oregano
1 tsp dried thyme

Mix all the dry ingredients thoroughly and rub on both sides of the rack of ribs.  (This was just enough for one rack of ribs.  Increase the amounts by doubling or tripling if you are planning to cook more than 1 rack.)  I let the ribs set out for about 30 minutes so they would come to room temperature before cooking.

Preheat your oven to 250 degrees F.  It's all about low and slow.  After the ribs have set out for about 30 minutes, place them on a baking pan with sides.  I used a sheet cake pan.  Cover the pan with aluminum foil and place the pan in the oven.  Cook the ribs for 2.5 - 3 hours on low heat.  They smelled so good while they were cooking I could hardly wait to eat them.   For the last half hour, remove the foil and let the ribs continue to cook.

When I removed the ribs from the oven, I cut the rack in half to make them easier to handle on the grill. Dan put them on the grill for about 10 minutes because I did not want them to dry out.  They were just perfect when he removed them from the grill.

Not only did they have beautiful color, they tasted amazing.  I cut the ribs apart and put them on a platter.  We were both picking at little pieces of the meat before everything else was ready.  Dan couldn't wait to dive in.  Oh my, they were so good - so tender and flavorful.

This post is mainly so I remember what I used in the rub, but I also wanted to share the recipe with  you.  This rub would be good on just about anything, but it made these ribs some of the best we have ever had.

Give it a try, I think you will certainly enjoy the end result.

Everyday Donna

Things to Remember:

Summertime bounty makes meals so enjoyable.  Support your local farmers!  donna

Thursday, July 24, 2014

Heavenly Hash Cake - AMAZING!

On July 4th weekend, we had a party for our youngest son and future daughter in love.  They were recently engaged and they were home from Denver for the weekend, so it seemed like the perfect time to celebrate with all their Nashville friends.

Cortney and Tyler asked me to make their favorite desert - Heavenly Hash cake so of course I did.  Everyone has probably had something called heavenly hash in their life, whether it is candy, ice cream, or some other kind of desert.  Heavenly hash usually involves marshmallows, but not this cake!  Instead, it uses angel food cake and unbelievable chocolate mousse.

This recipe is from one of my favorite cookbooks called St. Louis Days, St. Louis Nights.  Our oldest daughter gave it to me for mother's day while she was attending college in St. Louis.  I have had it for many years and some of my all time favorite recipes are from this book.

The good think about this cake is that you can use a ready made angel food cake from the grocery if you don't want to bake one yourself.  That eliminates a lot of steps right there.  The rest of the cake is a fabulous chocolate mousse that is made from scratch and worth any and all effort put into making it.  Here is what you need:

12 ounces semi sweet chocolate chips
4 eggs, separated
2 teaspoons sugar
2 cups whipping cream
1 cup pecans, chopped
1 teaspoon vanilla
1/2 teaspoon salt
1 large angel food cake (store bought if preferred)

Melt chocolate chips over low heat; beat the egg yolks and add them to the chocolate after you temper it.  Do this by adding a little of the warm chocolate to the yolks and stirring thoroughly.  Now, add the yolks to the chocolate and mix completely.  It will be almost fudge like.  This keeps the yolks from scrambling.

In another bowl, beat the egg whites; add 2 teaspoons of sugar.  Beat until stiff peaks form.

In another bowl, beat the whipping cream and set aside.

Add the egg whites to the chocolate and egg yolk mixture.  Stir and add the chopped pecans, vanilla, and salt.  Don't be alarmed.  The egg whites dissolve into the chocolate mixture.

Fold in the whipped cream.

Cover the bottom of a large greased bowl with 1/2 of the angel food cake broken into chunks.

Cover with half of the chocolate mixture (if you can keep from eating it all).  Add the remaining cake broken into chunks.  Cover with the remaining chocolate mixture.

Refrigerate overnight.

Oh. My.  Goodness.  This is beyond good.  It is amazing.  Since I am gluten free, I cannot eat it with the cake, so I save a little of the mousse and eat it by itself.  SOOOOOOOO delicious.

This is a recipe that is fabulous to take to a pot luck dinner or for when you are having company.  It does make 12 servings, so you may not want to make it just for yourself (unless you intend to eat it all and it is that good)!

Heavenly Hash cake is so good, that I made it twice in 4 days for Tyler and Cortney to enjoy.  Yes, you want to make this one for sure - especially if you love chocolate.  Enjoy!

Everyday Donna

Things to Remember:

When someone asks you to make a favorite recipe for them - always oblige.  There is nothing like showing someone you love them this way.  donna

Monday, July 14, 2014

Sufferin' Succotash - Fresh and Delicious

When our youngest son was about 5 years old, I made lima beans for dinner.  He sort of came unglued and asked why we were having June bugs for dinner.  He was NOT interested in eating them for any reason.  I had to explain they were not June bugs, but lima beans and he was fine with that.  Quite relieved, actually.

We are from Indiana, and what we call June bugs are green beetle type bugs that appear in the summer.  We tied thread to them and you could fly them around for entertainment.  They were shaped like a lima bean and sort of the same color.  Hence, Tyler's consternation with what we were having for dinner.

You may or may not like lima beans.  I have always liked them.  Growing up, we ate what my mother put on the table, or we went hungry.   There were a few things I didn't like, so I didn't eat them.  After becoming an adult, I discovered that is was more the way the item was prepared than the item itself.  Squash was in that category.  My mom boiled it and it looked like scrambled eggs in the bowl.  I love it now, because I fix it a different way than my mother did.

We were at the farmer's market on Saturday, and one of the vendors had fresh lima beans - already shelled!  Yes!  I had already purchased lots of other fresh vegetables - corn, green beans, cucumbers, tomatoes - and I wanted a new and interesting way to fix the lima beans.  I found this recipe on Epicurious for succotash made in a slightly different way than what we had growing up.  Our succotash was corn and lima beans, nothing outstanding.  This recipe is REALLY good.  Here is what you need:

2 TBSP extra virgin olive oil
1 1/2 cups chopped onion
salt
1 large garlic clove, minced
3 cups chopped fresh tomatoes (about 1 1/2 lbs)
2 1/4 cups corn kernels cut from 4-5 ears of fresh corn
2 cups fresh lima beans or 10-12 ounce box frozen lima beans
3 TBSP thinly sliced fresh basil

I added some freshly grated parmesan cheese.  YUM!

First, heat the oil in a large skilled over medium heat.  Add the chopped onion and sprinkle with salt.  Saute' until soft and translucent, about 5 minutes.  Add the minced garlic, stir until fragrant - about 1 minute.  Add the tomatoes, corn, and lima beans.  *This recipe called for no liquid, but I added enough to cover the bottom of the pan about 1/2 way up the vegetables.  The other vegetables didn't produce enough liquid to cook the beans.*  Reduce the heat to medium low, cover, simmer until the lima beans are tender, about 20 minutes.  Stir occasionally.  Season with salt and pepper.  Add the sliced basil.

I added some freshly grated parmesan cheese to each serving.  This is DELICIOUS!  There are so many layers of flavor rather than just boiled corn and lima beans.  Food is so much more interesting than when we were growing up.  Gotta love it!

You might want to give this a try for different and wonderful summer fare.  I think you could add some browned sausage or ground beef and you would have a fabulous one dish meal!  We all loved this recipe.  Hope you give it a try.

Everyday Donna

Things to Remember:

Succotash is a very southern staple, but originated with Native Americans.  Just a little FYI.  donna


Thursday, July 10, 2014

Polenta Pizza Bites - Gluten Free

We have been living in a whirlwind of busy-ness these past two weeks.  Our youngest son and his fiance spent the 4th of July weekend with us here in Nashville after driving from Denver.  To celebrate their recent engagement, we had a lovely afternoon soiree shared with family and friends.  Let me say, we are SO excited to have Cortney joining our family.

I made a LOT of food and a good time was had by all.  Many of us eat gluten free by necessity and I tried to make as many things as I could that would be enjoyed by everyone.  One of my favorite recipes to make when serving hors d'oeuvres has always been these yummy pizza bites made on party rye bread.  Well, rye bread was not an option, so I had to come up with something different for the base.

I thought about polenta since it is made from corn and I did some research of possible recipes and these are what I came up with.  They are awesomely good and quite easy.  Here is what you need.

2 rolls of ready made polenta, sliced in 1/4 inch rounds
1 pound Italian sausage, casings removed
1/2 medium onion, chopped
1-2 cloves garlic, minced
1/2 jar marinara sauce
grated parmesan cheese
a handful of fresh basil leaves

Remove the casings from the Italian sausage and brown in a medium sized skillet.  Add the onion, and crumble the sausage while browning using a spatula.  Add the garlic when the sausage is browned so it doesn't burn.  Add the 1/2 jar of marinara sauce.  Set aside.

Slice the polenta into 1/4 inch rounds and place on a baking sheet sprayed with cooking spray. I filled two baking sheets from the two rounds.   Place the polenta rounds under the broiler for 5-10 minutes, until they are lightly browned and just a bit crisp on top.  Remove from the oven.

Spoon the sausage filling over each polenta round. They hold about a tablespoon of filling.   I had just enough to cover all the slices from the two polenta packages.

Next, cover each mound of sausage filling with freshly grated parmesan cheese and return to the broiler just until the cheese melts.  Remove from the oven and put a few minced basil leaves on each round.

Serve and enjoy!

These were a super big hit and everyone loved them.  They were so good there we none left.  These are great hors d'oeuvres or could even be served as an entree with a salad for dinner.  Give them a try the next time you want something different or for those who have to eat gluten free.  Yum.

Everyday Donna

Things to Remember:

As our daughter said during her toast for the newly engaged couple, "love is the best" and it is.    donna

Wednesday, June 18, 2014

Awesome Way To Slice A Watermelon!

 It is suddenly summer here in Nashville.  It was 93 degrees today and yes, it is hot.  I am not complaining.  I will take it over the cold, never ending winter we had this year any day.  Give me hot over cold any time.  But, with the hot comes different ways of preparing meals and foods to cool you down and keep you hydrated.

Recently, someone posted this way of slicing a watermelon on Facebook and I thought it was absolutely genius!  Bells rang, birds tweeted, whistles blew.  I mean, why have I never thought of this?  Just duh, is all I can say.

Our daughter had an end of year school party for her oldest son's class and she had a huge watermelon for the kids and their parents.  I told her I would like to try slicing it this way and she was all for it.  Let me tell you, it is not only genius, it is the best way to serve watermelon - like ever!!  You have these wonderful  popsicle like wedges of watermelon, easy to carry around and eat, no plate necessary, and no huge pieces of watermelon rind to get rid of.  All the pieces are nice little 1.5 squares - the perfect bite sized piece of watermelon!!!  I am talking life changing here people.  Here is what you do.

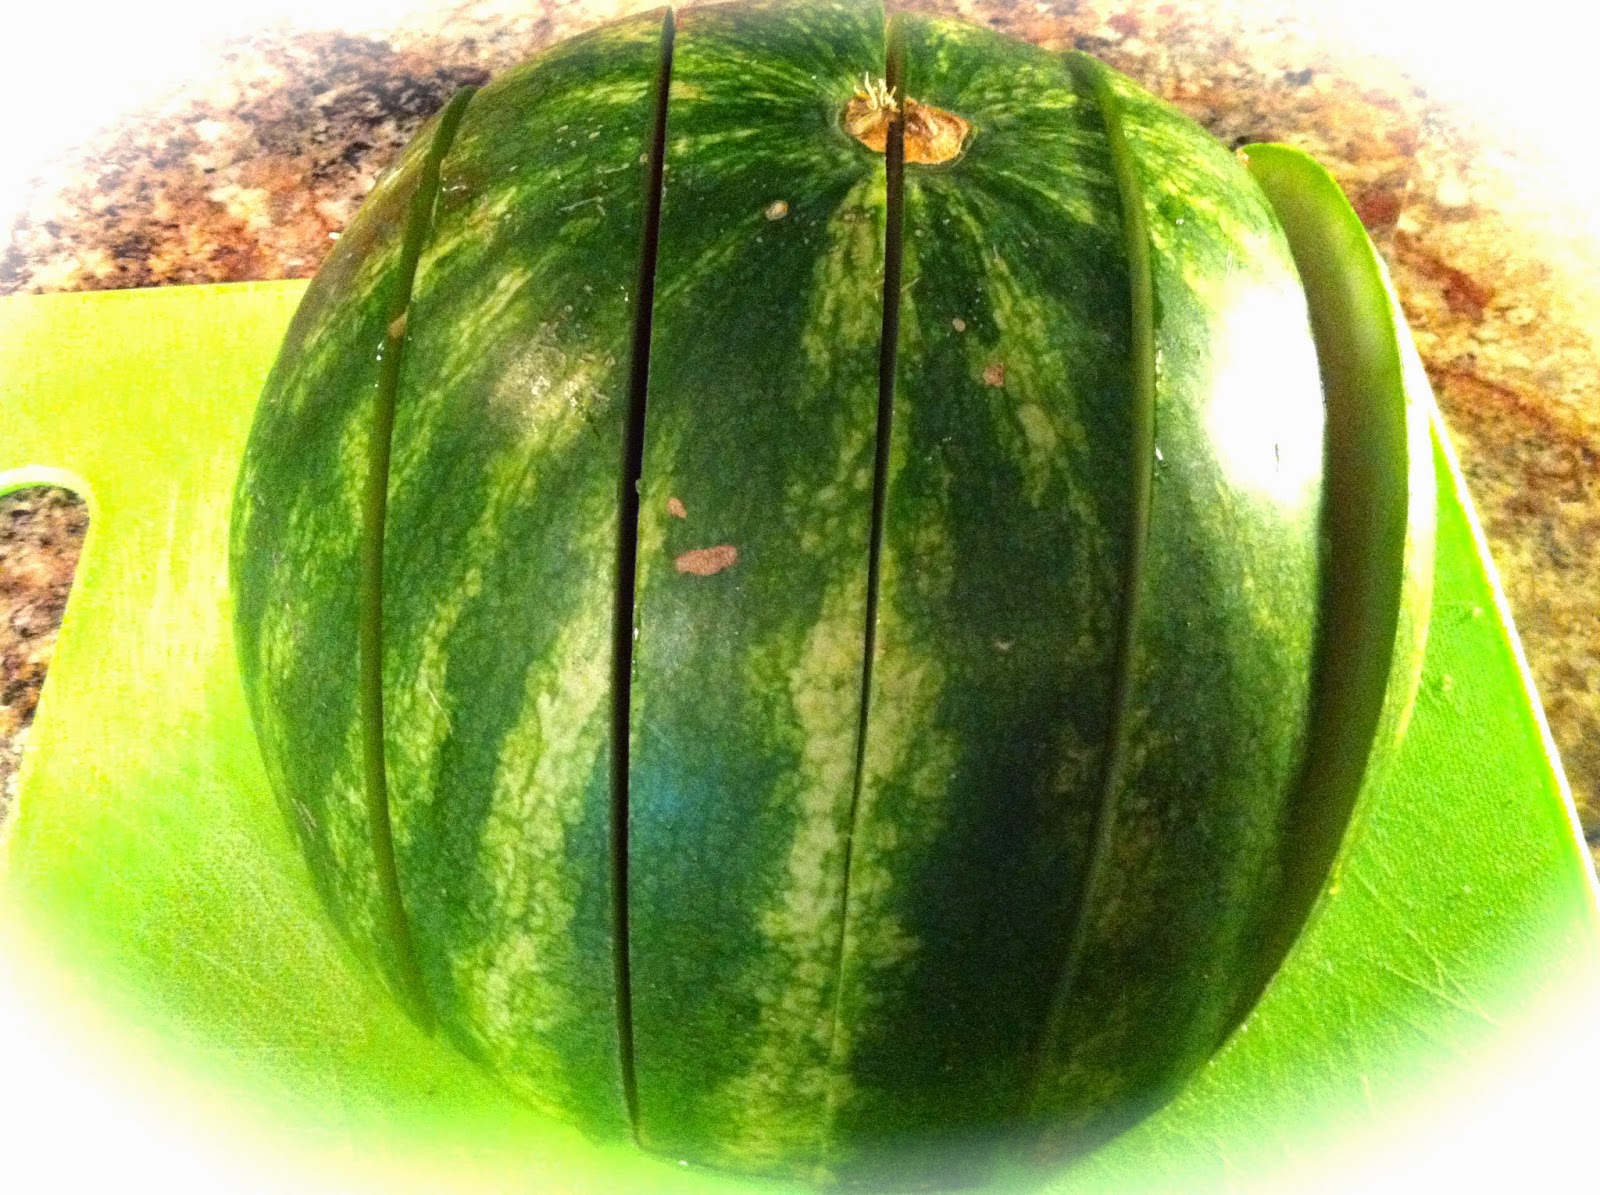
First, you need a round watermelon, not an oblong one.  Most of the seedless ones are round.  The one in the picture is small, but you can do the same with a big one - you just need a slightly different method.

First, cut the watermelon in half - not so it is oblong, but round on each end.  Does that make sense?  Then, trim it up if necessary so it will sit flat.  Sometimes the watermelon will split if it's really ripe and be uneven.  Just do a little fancy knife work to make it flat (and don't waste those lovely thin slices of watermelon - eat them!).

 Now, put it on something you can turn.  I used a cutting board.  Make sure you have a long knife and start at one end cutting in about 1.5/2 inch segments.


 Cut from one side to the other.  It should look like this.


Now, turn your cutting board so the vertical slices are horizontal.  Start at the end, and slice about 1.5/2 inch segments across like this.
You can start eating by pulling the middle piece.  When you pull it out, you have this beautiful cube of watermelon.  It is just amazing.  Perfect bite sized cubes of watermelon.  Genius I tell you.  Also, you no longer need a giant bowl to put all the slices in.  It sits right on the platter.  Ah-mazing!

Now, have someone help you transfer it to a serving platter.  I put the serving plate next to the cutting board and had Dan picked up the cutting board with the watermelon on it.  I put my hands firmly on the watermelon to hold it together, and slid it to the serving platter.  Ta dah!  Then, I put  the second half on the cutting board and sliced it so it was ready to go when this half was eaten.  If you are having a large crowd, put both halves on serving platters after you slice them this way.   Easy peasy.

For a bigger melon like we used at Holly's, I cut half way across the watermelon because my knife wasn't long enough to go all the way across.  I didn't want any cut fingers, so I cut halfway and turned the watermelon half way around and continued to cut from the original slices.  Then, I turned the watermelon 1/4 way and cut halfway across, turned it half way around and completed the slices.  Here is the bigger melon.
Dan helped me move it to the serving platter and it worked just perfectly.  The kids at the party LOVED the watermelon cut this way.  They would run by, grab and wedge and off they would go.

Not only is is super convenient for serving, it looks really pretty on the platter.  I don't know who thought this up, but thank you whoever and wherever you are.  I will be eternally grateful and will never wrestle another watermelon as long as I live.  Clean up was a breeze - no huge drippy pieces of watermelon rind to dispose of.  You can eat right down to the white or green part easily.   Then, simply toss that little green square of rind.  Awesome.

You really should try this.  You will never go back to the "way it was" - ever!  For the melon that wasn't eaten, I stored it in a zip lock back and it was delicious for several days AND it didn't take up half the refrigerator!  If we got hot outside, we could come in an grab a piece of perfectly cubed watermelon and enjoy.  Yes, try this.  It will make your summer.

Everyday Donna

Things to Remember:

When one has tasted watermelon, he knows what the angels eat."  Mark Twain


Monday, June 16, 2014

Old Fashioned Cornbread Made Gluten Free - Delicious!

Hi everybody.  I'm back.  I have been on quite a hiatus as I completed a 100 day painting challenge and other things in life.  It went very well.  I am painting with acrylics on canvas.  I learned a LOT in the process about myself and painting techniques.  It's amazing how dedicating yourself to something for 100 days can change your life.  I will write about that in more depth later.

Today, I wanted to share this recipe I found for gluten free cornbread that is absolutely delicious and as close to what my grandma used to make as I can find.  We have several people in our family who are eating gluten free by doctor's orders, including myself.  Talk about changing lifelong habits!  Wow.  Especially when it comes to all the baking I have done most of my life.  But, life will go on.

This recipe is made with Greek yogurt which is a definite change up from the buttermilk we always used.  It also makes it just a tad healthier.  Here is what you need.

2 cups yellow cornmeal, coarsely ground if you can find it.  (make sure it's gluten free)
1 tsp salt
1 tsp baking soda
2 tsps baking powder
1 egg, beaten
4 TBSP melted butter, cooled
1 1/2 cups plain Greek yogurt
4 TBSP honey

Preheat your oven to 400 degrees.  Hopefully, you have a 10 or 12 inch cast iron skillet to bake this in, but you can use an 8x8 square pan if you don't.  Grease the pan either way.  I used spray coconut oil.

First, combine the cornmeal, salt, baking soda, and baking powder.   Thoroughly combine with a whisk.

In a separate bowl, mix the egg, cooled melted butter, yogurt and honey.  Thoroughly combine with a whisk or fork.

Create a "well" in the center of the dry ingredients and pour the wet ingredients into the "well."  Use a fork and just combine.  Don't over mix.  This is a very thick batter.

Pour the mixture into the prepared pan.  Bake for 20-30 minutes or until golden brown on top.  Remove the pan from the oven and let sit for a few minutes to cool down.  Slice and serve.  Slather on a big pat of fresh butter and add some honey if you like.  This is absolutely delicious and I could eat it for my meal.

This recipe was found on Gluten Free on a Shoestring!  Give it a try.  You are going to love this one!!

Everyday Donna

Things to Remember:

If we keep doing things in the same old way expecting different results, nothing will every change.  Try something new.  Dedicate yourself to something for 100 days and see the changes that occur in your life.  It is truly worth the dedication.  donna

Wednesday, February 5, 2014

Make A Custom Mug For Someone


Thought I would share another easy Valentine idea with you today.  I made this cup for my friend Linda as a Christmas gift.  She loves yellow and purple, so guess what colors I chose?  This mug caught my eye because it was yellow and cream which was perfect with purple accents.

To make these mugs, all you need is an inexpensive mug, something for a pattern - you could use a heart for Valentine's Day, a cupid, or an initial.  Anything could work.  I even made some with mustaches on them which are so cute - and a sharpie in a color of your choice.

To make the initial, I used a letter from this package I found at Big Lots .
The entire package was only a couple of dollars and I have found all kinds of uses for them.  There are different fonts in different sizes with numbers and letters.  I punched out a large "L" and taped it to the front of the mug using tiny pieces of 2 sided tape.

Using the sharpie, I simply made random dots all around the letter, then removed the letter and put it on the other side of the mug and did the same thing.

Next, the sharpie has to be heat set, so I placed it in a cold oven directly on the wire rack and set it to preheat to 450 degrees Fahrenheit.  When the buzzer went off at 450, I turned the oven off and let the mug cool in the oven.  Make sure the mug is not hot before picking removing it from the oven!

You should be able to wash the mug by hand without removing the design.  I am not sure you can guarantee it to be dishwasher safe, although our sons in love have had their mustache mugs for a couple of years and they put them in the dishwasher.  From what I have read, it sometimes depends on the glaze on the mug.

These mugs could be filled with candy, the pink popcorn I posted last night, or someone's favorite tea or coffee.  I sent Linda some boxes of tea that she could enjoy in her mug along with some coasters I made for her.  She really liked it.

Handmade gifts are always special for gift giving.  These would also be super for teacher's gifts, friends, or co workers.  Gift recipients appreciate that you took the time to make something with your own hands and that it came from your heart.

Dollar Tree, TJ Maxx, Big Lots, or Target are good places to look for inexpensive mugs.  The inexpensive mugs seem to work better because their glaze is more porous - it's not about being cheap.

Give this project a try the next time you need a gift.  You could even make sets of them for wedding or shower gifts.  The options are endless.

Everyday Donna

Things to Remember

Gifts have ribbons, not strings.  Vanna Bonta


Tuesday, February 4, 2014

Pink Popcorn Perfect For Valentine's Day

 Yes, the weather is still awful.  I am counting the days until Spring.  I am sure you are too.  It's been a really long winter and there is more to go.  So, why not make something cheerful and pretty to brighten your day?   Something that also tastes amazing!

Have you ever had pink popcorn?  The blogger who posted this recipe raved about it as a childhood memory.  I found it on Cravings of a Lunatic, but she found the recipe on Nan's Recipe Spot.  Evidently they had all enjoyed pink popcorn during childhood.  Guess that's another thing we didn't have.  Perhaps it's regional, I don't know.  But I will tell you this, it is REALLY good stuff.  Indeed.

We were invited to a Super Bowl Party Sunday evening and asked to bring something.  Decisions.  Decisions.  What would everyone else bring?  I had no clue and certainly hoped to not duplicate recipes.  So, to make myself happy I made 7 layer dip because I knew if no one else ate it, I could and possibly would eat it all because I love it.  Best.  Snack.  Dip.  Ever.

In case no one was a fan of the 7 layer dip, I made this pink popcorn to eat during the game.  I mean, come on, there has to be munchies for the game.  Something you don't have to go get a plate and fork for, right?  Well, this was a major hit and people kept asking what it was.  I heard one guy tell his wife he bet it tasted like bubble gum.  Ew.  I laughed and told them it did not taste like bubble gum.  They asked what it was.  I told them candied popcorn colored pink.  I don't know if they ever ate any, but someone else certainly did because it was gone, baby, gone.  Our grandson couldn't seem to get enough of it, so I know I will be making some for Valentine's day.

The recipe is really easy and if you like carmel corn, you will love this recipe.  The one thing you need is a candy thermometer.  If you don't have one, they are not expensive and you will be making this again, so go ahead and invest in one now.  It will also allow you to make lots of other candy recipes.

Here is what you need:

12 -16 cups popped popcorn (16 cups was two batches in my air popper)
2 cups granulated sugar
2/3 cup whole milk
2 TBSP corn syrup
1/4 tsp salt
1 tsp vanilla
2-3 drops red food coloring

Pop up your popcorn, just don't use microwave popcorn.  You can do it on the stove top in a pan, or use your handy dandy air popper if you have one.


Next, place the sugar, milk, corn syrup, and salt in a deep saucepan (cause it really bubbles up when cooking).  Cook over medium heat until the sugar dissolves.  Stir so it doesn't scorch.  Place the candy thermometer on the side of the pan.

Turn heat to low and boil and stir occasionally.  Cook until the temperature on the candy thermometer reaches 230 degrees which is soft ball stage.  Remove the thermometer and turn off the heat.  Add the vanilla and food coloring.  Stir until well incorporated.

Remove pan from heat and let cool a bit.  If you pour the hot candy over the popcorn right away, it will shrink your popcorn.

Using a large baking sheet with sides, cover with parchment or waxed paper.   I actually used two so the popcorn would dry faster.

After the candy cools a bit, pour it over the popped corn and mix with a large spoon until all the popcorn is coated with the candy.  Pour the popcorn out onto the lined baking sheets and let the popcorn dry.

Good luck not eating it all before it dries.  I could hardly keep Dan out of it (and I may or may not have eaten a little myself).

The 7 layer dip was totally consumed as well as the pink popcorn.  This recipe is a keeper and would look so pretty in clear bags or jars for Valentine's Day.   It's also amazingly good which is the best part.

Everyday Donna

Things to Remember:

Every once in a while, someone will mail me a single popcorn kernel that didn't pop.  I'll get out a fresh kernel, tape it to a piece of paper and mail it back to them.  Orville Redenbacher  (sorry, couldn't pass it up, it made me laugh - :)


Thursday, January 30, 2014

Cuban Style Pork Butt In The Slow Cooker

Super Bowl is coming up fast - like this Sunday.  Are you having a party, going to a party?  Do you need to fix something for guests or take something to someone else's party?  Well, I have got a super delicious recommendation for you.  How about a pork butt or shoulder cooked Cuban style in a slow cooker?  It cooks all day and the meat literally falls apart when it is done.  It is easy, super delicious, and this recipe is a keeper!

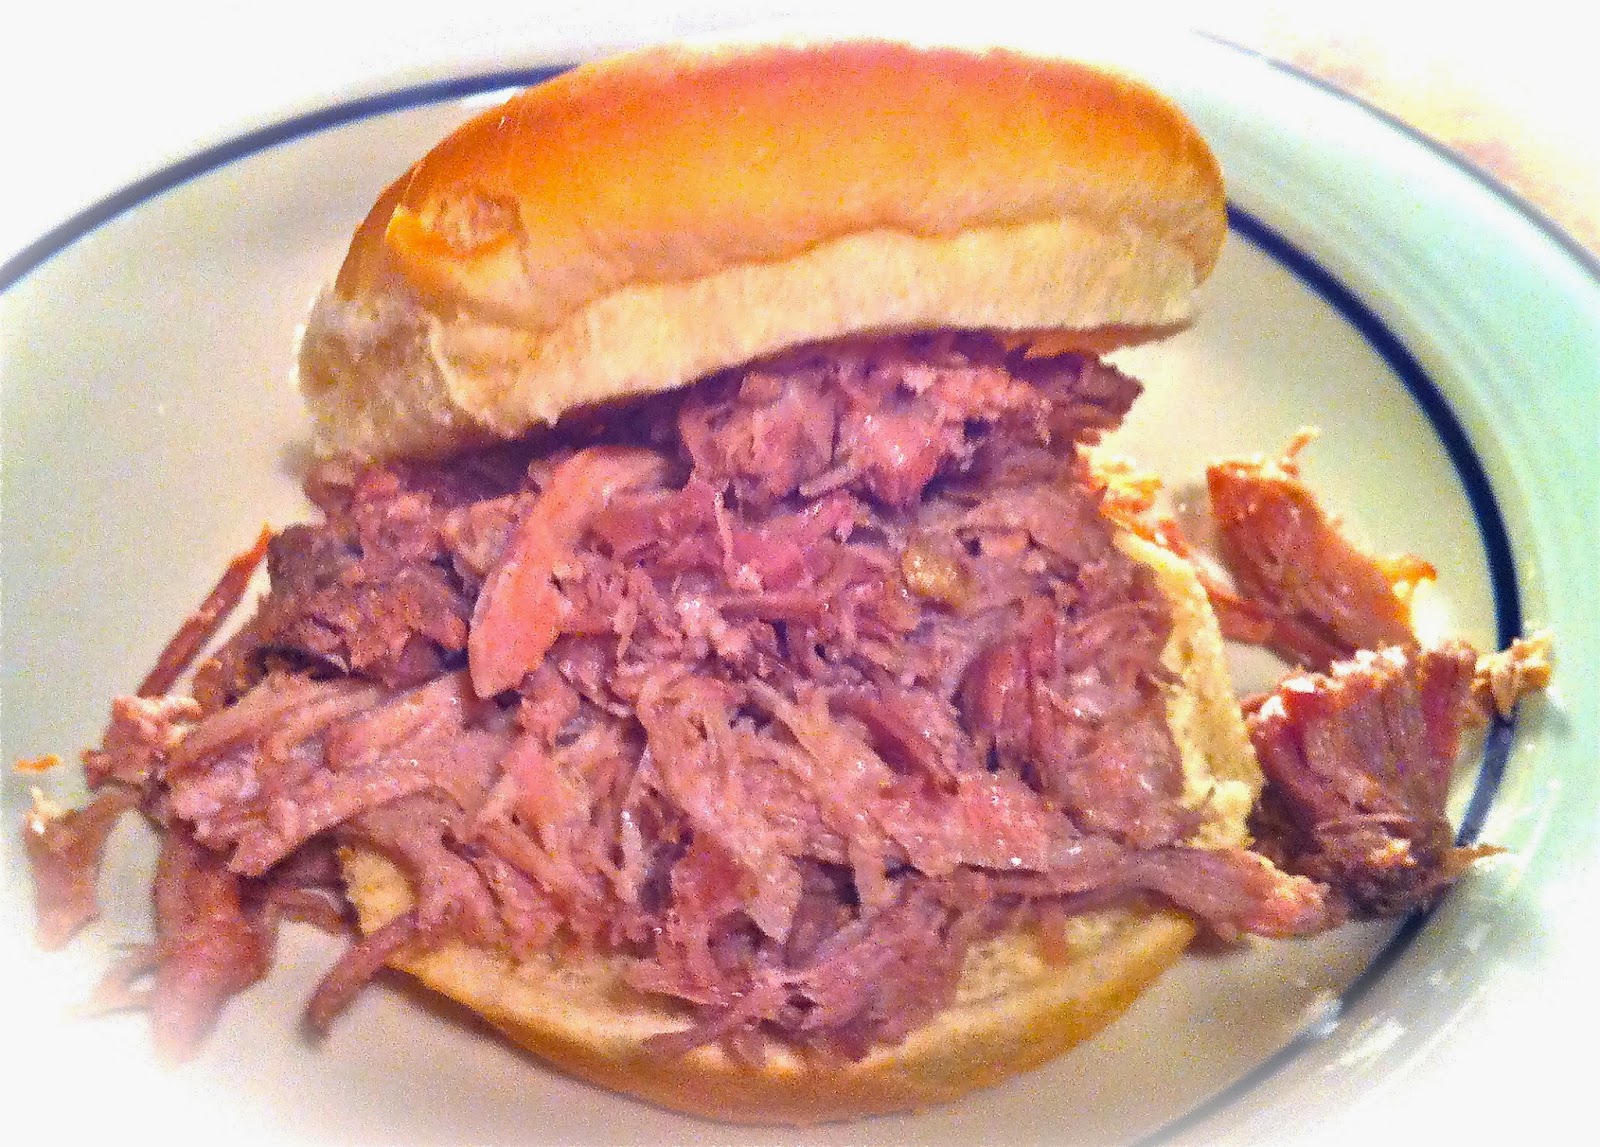
You can use the meat as pulled pork, you can make a sandwich, eat it plain, you can make a Cuban style sandwich with it, you can add barbeque sauce or hot sauce, whatever you like.  How about sliders or carnitas which are pork tacos?  All you do for carnitas is put a little oil in a pan and cook the pork until it starts to crisp on the outside.  Serve with tortillas and your favorite toppings.  So good!

This recipe came from the Huffington post.  Yesterday I was in the house because of "the" cold and "a" cold, and I had this pork butt that I needed to cook.  I was going to do it low and slow in the oven and finish it on the grill.  Well, it was too dang cold, so I looked up some recipe options and found this slow cooker one.  Lucky me, because it is awesome and we will be having this again and again!

Here is what you need:

1 pork shoulder or butt, about 4 pounds
6 large garlic cloves, more if they are small
1 TBS coarse kosher salt (1 1/2 tsps table salt if that is what you have)
1 TBSP ground cumin
1 TBSP dried oregano
1/2 cup lime juice
1 cup orange juice

First, you are going to make a paste out of the garlic, salt, and herbs.  Using the flat side of a big knife, mash the garlic into the salt until you have a paste.  Add the cumin and oregano.

Lightly salt and pepper the outside of the pork butt.   Cut 2 inch slices into the skin side of the pork butt or shoulder.  Make them about 2 inches deep and 2 inches apart.  Rub the garlic/herb paste into the slits all over the pork.

Put the pork into the slow cooker and add the lime and orange juice.  Cook on high for 6 to 7 hours.

Carefully remove the pork from the slow cooker.  I had to remove it in pieces because it literally fell apart.  I put it in a 9 x 13 baking dish and pulled it with a fork to make smaller pieces.  Easiest pulled pork ever!  Is it good?  You bet it is!  Amazing flavor and texture - so tender and delicious.

We had guests for dinner last night and everyone truly enjoyed every last bite of this fabulous pork.  That is why I know it would be a major hit for a Super Bowl party.  You can do so many things with it or enjoy it in a simple fashion by spooning some of the au jus over the meat.

Have you ever had a Cuban sandwich?  They are DEEEEEElicious.  They have pork, deli ham, mustard, pickles, and swiss cheese on Cuban style bread (if you can find it).  If not, use an Italian loaf or something a little crusty like ciabatta .  You could use a baguette and make smaller sandwiches.  We simply ate this flavorful, tender pork like a barbecue sandwich on a bun.  Eat it any way you like and it will be delicious.

If you are not attending or hosting a Super Bowl party, you can still enjoy this recipe this weekend.  It is easy and worth every minute of those 6 hours cooking time.  Your house will smell amazing and you will be pacing the floor waiting for it to be done so you can dig in.  Yes, it's that good.  Dan highly endorses it.

Everyday Donna

Things to Remember:

The Super Bowl is Americana at its most kitsch and fun.  Sting


Wednesday, January 29, 2014

Make A Burlap Valentine Heart To Hang In Your Home

 Are you staying warm where you are?  I.  Am.  Over.  This.  Weather.  Bring on springtime.  I want flowers and green grass and warm sunshine.  I don't want to wear a coat, a scarf, or gloves any more.  Done.  Through.

Yesterday, I worked on this Valentine heart wreath made from burlap.  I happen to love burlap even though it sheds a lot and the little fibers get up your nose (which is really fun with a cold).  Burlap is inexpensive and relatively easy to work with.  Even though this burlap looks very red, it is actually a little darker.  Reds just seem to be hard to photograph.

I found some red burlap at Wally World a couple of weeks ago and bought two yards.  Red is not always available, so I always buy extra when I find it.  I seem to use a lot of it for some reason - perhaps because I like red and it is an accent color in my home.

I have this old piece of wood that hangs on the wall in our dining area that I use as sort of a gallery to keep from putting lots of holes in the wall.  It works out very well, and is an interesting art piece in and of itself.  It must have been part of a door at one time.  We found it at our favorite second hand store here in Nashville.  I like to hang interesting things on it.  This wreath is the perfect piece and may stay there after Valentine's Day - at least until spring.

For the wreath form, I used some 16 gauge wire that I bought at Christmas time to make the coiled wreath that you can find on my blog.  It is the one filled with yarn balls and Christmas ornaments.  This wire is sturdy and easy to shape at the same time.  You could use a coat hanger, but the heavier ones can be hard to shape and those awful white ones may be too flimsy.  I found this wire at Home Depot.  I just sort of formed the size I wanted and cut the wire and twisted the bottom.  The wire shape is about 14 x 14.
The form does not have to be perfectly shaped because you are going to cover it with the burlap ties.  Don't fret if the wire is wavy.

It is easy to cut strait lines in burlap because of the loose weave.  You simply pull a thread all the way across and cut in the open space that is left.
Pull a thread and try to pull it all the way across without breaking.  Go slow and good luck.  If the thread breaks, just simply find the break, pull out the lose end and go from there until you get all the way across the width of the burlap.  This burlap is 45 inches wide.
See the open space?  Just cut all the way across and you have a nice straight strip.  Make your strips the width that you want.  I made mine 1.5 inches.  That width works nicely with this project and is not too hard to tie.  If you make thinner strips, the burlap sometimes comes apart when tying and wider ones are hard to tie.  Guess how I know that?

I used about a half yard of fabric for this wreath.  I cut strips 4 at a time and then cut the strips into about 7 inch lengths.  These are easy to tie and not too long.  If you need more strips, cut a few more.  This way, you don't waste a lot of the burlap if you don't use it.

Take one of the 7 inch strips and tie an overhand knot around the wire form.  If you are not familiar with knots, that is just like you would tie the beginning of a shoe lace.  One tie is good and it will hold in place on the wire.  Push the ties as close together as you can.  Just keep filling in around the form, turning your knots in different directions so the wreath will look full when finished.  That's all you do.  Simple as can be.


This wreath should probably be an indoor wreath unless your door is covered by a roof that would protect it from snow and rain.  Otherwise, you may have a very sad and limp wreath.  That's just FYI.

This wreath is so cheerful and it adds a lot of color and texture to the room.  It could be made out of any color burlap or any shape for that matter.  It doesn't have to be just for Valentine's day.  I may leave this one up for a while.   I can remove the little banner below it and it is just a pretty wreath.

You could make this and use felt, ribbon, or fabric.  It would cost more, and make take more strips of ribbon or fabric, but would be just as pretty.  Your choice.  If you have scraps available, use those by all means.

You could also make these wreaths in different sizes, even quite small for gift giving.  As long as you can make a heart shape out of the wire, you can cover it with the burlap.

Add some color and whimsy to your home during these dull, gloomy winter days.  Even if you are not a big Valentine's fan, how could this beautiful heart not cheer up a room?   Have fun with this project.  I sure did.  It  only took about an hour to complete.  Easy.  Peasy.

Everyday Donna

Things to Remember:

Without Valentine's Day, February would be...well, January.  Jim Gaffigan


Tuesday, January 28, 2014

Swedish Woven Hearts To Hold Your Valentine Treats


 Hey, everyone.  I'm here to show you how to make those containers for the cinnamon sugared nuts I talked about last week!  I hope you had a great weekend.  I am a little under the weather with a very runny nose, but that's okay because it's too cold to go out anyway!  Hope you are all staying safe and warm during this winter siege.

Valentine's Day will be here in just a few short weeks, so I thought it was time to get busy making some things and decorating the house.  I know it's just a one day holiday, but who doesn't love some colorful hearts to cheer things up during these wintry doldrums?

The containers I am making are made from paper - you can use card stock, construction paper, or some of these cute acid free papers I found at Target in a package for $1.  Yes, you read that right.  There were 10 pieces of 12 x 12 papers in a package for uber cheapness.  They were in the front of the store in their dollar bin and they are adorable.  The package even showed the paper patterns inside.
I also have some 8 1/2 x 11 paper that I found at Michael's for $3.  That paper is a little heavier and a little harder to work with just in case you are interested, but is also perfect for Valentine's Day.

These are called Swedish woven hearts and you may have made them in elementary school, who knows?  I just discovered them on Pinterest a while back and knew they would be perfect for our grandsons for Valentine's Day.  There are endless options to making them.  They even learned how to make them last weekend.  Our 7 year old grandson liked them so much, he is going to make them for his first grade class at school.  Here is how one of the hearts looks "filled."
How cute is that?  You can also put handles on them for hanging.  Just cut some thin paper strips and use a glue stick to attach them to the inside of the paper hearts.
These are made by weaving the paper together and it is not hard once you get the hang of it.  You will want to work slowly so you don't tear the paper as you weave it together.  I say that because you weave the pieces through the centers, not just over and under.  The last row is tight and requires a little dexterity.  Don't be scared off by that last statement, it just means take your time.

First, you need to cut your paper strips.  They need to be 3 to 3 1/2 times longer than they are wide, so mine are 3.5 inches wide by 12 inches long.
The handy dandy paper cutter makes the job go faster.  If you don't have one, simply use a ruler and mark your strips and cut with scissors.

Fold the strips in half, end to end so they are half as long as they were.  
You need to make a curved top, so I used a tuna can placed on the OPEN end (not the folded end) and traced a semi circle.   Trace one on both pieces of paper and cut with your scissors.  I made a template to make things easier.
This became my template because I cut the strips on the open end instead of the folded end.  Duh.   You will want to mark the folded end in thirds, for 3 strips.  I put a small pencil dot at the appropriate places on the folded end.

Now, this is important and I learned this myself.  None of the tutorials I looked at told me this, but it makes weaving the hearts together so much easier if you will lay one strip on top of the other in a heart shape and mark the edge of the piece so you know how far to cut up.  If you don't cut far enough, you cannot weave the strips together and you will tear your paper.
Just make two pencil dots approximately 1/3 from the top and bottom.  Then, reverse the papers and do the same so you can cut both strips the same length.  See the pencil dots on the folded edge and the marks at the top?

Now, cut from the FOLDED edge toward the open edge.  You should have 3 strips.  Now the really fun part - weaving the two together.  I started with over/under/over because I think it's easier to do.  You will do this twice and under/over/under in the middle.  REMEMBER:  YOU ARE GOING THROUGH THE CENTER OF EACH STRIP WHEN YOU WEAVE, OTHERWISE IT WILL NOT LOOK LIKE THIS WHEN YOU ARE DONE.
This is a closed woven container that will hold something.  If you just weave over/under/over it will not hold anything.

To start, put the top strip on one half of the heart piece inside the first piece on the other half.
This is another picture of how it should look.  See how the strips go through the centers?  That's what you want to do.

This is easier to follow once you start doing it.  I know this makes no sense, but it really will and it should look like this when  you finish the first strip.  Over/under/over.
The weaving should look the same on both sides.  If not, you missed going through a center somewhere.  Take it apart and start over.  The next piece will go under, over, under.  You may have to bend your paper a little to make it work.  Just take your time.  Push the pieces to the top as you work, or you will not be able to weave your last piece through.  Go back to over/under/over and you are done.  Easy Peasy.  If a 7 year old can do it, you can do it.  If I can do it, you can do it!  
This is how I bent my paper to get it through the last section.  The center is a little tricker.  When finished,  it will look like this.
I know it sounds hard and I was confused when reading the directions the first few times.  Once I had the strips in my hand, it made sense.  It will for you too.  I can't figure a way to write it that is not confusing, if you get my drift.  

If you want to jazz up your hearts some more, cut thin strips of contrasting paper,  ribbon, or lace, and weave it through the strips.  I used a little dab from a glue stick to hold the pieces in place.  
See the difference?  The options are endless!  You can also cut a narrow strip, wide strip, narrow strip for your weaving pattern instead of 3 equal sized strips.  You can do all kinds of fancy things with these.

I used some pieces of nylon tulle and filled it with M&Ms (grandsons LOVE them) and tied a ribbon around the top because I didn't have any cinnamon sugared nuts at the time.  This will keep the nuts or candies from falling out of the hearts at gift giving time.  
  

Be imaginative and create all different kinds of hearts.  You could use sheet music.  If you use book pages, make sure they are really long ones or you could use magazine pages - the list is endless.  Felt is also a possibility.  How cute would those be?

Have fun with this project.  We sure did.  You can make a plethora of these hearts for next to nothing and everyone will love that you made them by hand.

Everyday Donna

Things to Remember:

All you need is love.  But a little chocolate now and then doesn't hurt.  Charles M. Schulz


Thursday, January 23, 2014

Cinnamon Sugared Nuts - Oh My!

Hey, do you know what will be here in just a few weeks?  Two big events.  The first is the Super Bowl and the second is Valentine's Day.  It's time to start thinking about that Super Bowl party and what you will serve or take to share.  And what about that special someone, your Valentine?  Or in our case, many Valentines?  What will you do for them?  Well, I have an answer for you that is soooooo good and easy to make.

First, lets talk about nuts.  Do you like them?  We happen to LOVE them (maybe a little too much).  Did you know that eating a handful of nuts every day can help you live longer?  It's true!  Really.  Check this link - http://www.huffingtonpost.com/2014/01/20/foods-that-help-you-live-longer_n_4612048.html.  Studies show that eating 1/4 to 1/3 cup of nuts a day can increase your longevity.  I am not sure they are talking about THESE nuts in particular, but they are so good and surely they count a little.  Never mind the sugar and cinnamon coating.  Cinnamon is good for you at least.

I made these nuts at Christmastime for stocking stuffers and I almost forgot to take a picture of them.  This is what I had left when I remembered, so use your imagination just a bit.  I always make candies, cookies, carmel corn, and nuts to put in decorative bags to give as extras for everyone.  These are SO dangerously good and are always such a hit.

You know when you are walking through a shopping mall and smell those German roasted nuts that they sell at kiosks?  The ones that smell like heaven?  That's what these are like.  Oh Em Gee.  Delicious.  And, slightly dangerous because it is impossible to control the consumption of said nuts.  But, they would be perfect for a Super Bowl party and for Valentine gift giving.  Here is what you need:

5 cups pecan halves
1 cup almonds or cashews (I used cashews - delish)
2 egg whites
2 TBSP water
2 cups granulated sugar
2 and 1/2 tsp ground cinnamon
1 tsp salt

Preheat your oven to 300 degrees Fahrenheit

Line 2 large baking sheets (with sides) with parchment paper and spray with non stick cooking spray.  (You will understand why this is necessary after making them.  Don't skip this step.)

Mix nuts in a large bowl and set aside.

Using an electric mixer, beat the egg whites and water on medium high until stiff peaks form - about 4/5 minutes.  Add the sugar, cinnamon, and salt, stirring until well combined.  Put the nuts in the egg white mixture and stir to coat completely.  Spread nuts over the baking sheets and bake for 45 minutes, stirring every 15 minutes.

Allow to cool completely and enjoy - that translates to try not to eat them all at once.  Seriously.

You can store these at room temperature for a few weeks covered.  Like there will be any left in a few weeks.  That's funny.

You might want to make a test batch before the Super Bowl or Valentine's Day just so you will know how good they are.  Next blog post, I will show you a perfectly beautiful container you can make to put these in for gift giving.  Everyone will be so impressed and grateful for all your culinary and craft skills.  Y'all come back now.  You won't want to miss the tutorial.

Everyday Donna

Things to Remember:

I always loved Christmas time when we would have a bowl full of mixed nuts in the shell and we would spend time around the table with a nutcracker, eating the nuts.  I liked them all, especially filberts better known as hazel nuts.  donna

Tuesday, January 21, 2014

Brown Sugar Glazed Pork Loin

 Yes, it is really still winter.  No, we don't want it to be winter, we want the 60 degree weather we had yesterday, not the 30 degree and slipping kind of weather we are having today - with snow flurries.  No, this weather is not my favorite and never will be.  Gray, gloomy days make me gray and gloomy if I am not careful.  Tomorrow is supposed to be sunny - still cold - but sunny.  That is a good thing.

Since it is still winter, we truly appreciate some good comfort food.  I describe comfort food as things that make you feel comforted, satisfied, and feel good.  Sunday evening, the Nashville family came over for dinner and I made this fabulous pork roast with a brown sugar glaze.  It is SOOOO good and really quite easy.  I also made parmesan chicken sticks for the kids which they simply devoured.  You can find the recipe on my blog.

We have six adults and five grandsons who live in town, and food preparation requires some considerations.  We have one really picky eater who happens to be the oldest grandson at 10.  We have a son in love with Celiac, so that is another consideration.  Now, our second daughter has to eat gluten free also.  In the end, we all benefit from gluten free to some degree I am sure, but do you know how many recipes contain gluten?  Way too many.  We don't want anyone falling ill or feeling bad, so we do our best to accommodate.  The good news is there are so many more gluten free products on the market and recipes available.  This recipe called for flour, but I simply substituted corn starch.  To make that accommodation, you simply use 1/2 the amount of flour called for and substitute corn starch.  The recipe called for 2 tablespoons of flour, so simply substitute 1 tablespoon of corn starch.  Easy peasy.

I had a five pound pork roast and knew I wanted to fix it for dinner.  The chicken sticks were easy, but I wanted a different, yet delicious, recipe for the pork.  I found a hum dinger on About.Com in the Southern Food section.  It was easy, I had all the ingredients, so it was a go.  Here is what you need:

1 4.5 to 5 pound boneless pork loin
4 large cloves of garlic, peeled and cut in half
salt and pepper

Glaze

1 and 1/2 cups light brown sugar
1 TBSP corn starch
2 tsp Dijon mustard
3 TBSP balsamic or cider vinegar (I used cider vinegar)

Combine the ingredients in a saucepan, mixing well.  Cook over medium low heat until bubbly.  Stir and set aside.  You may have to reheat slightly before glazing the pork.  It becomes sort of crystalized, so I just spread it on with a spoon.  It will melt in the oven.

Pat the pork loin with paper towels to dry.  Cut the garlic cloves in half.  Make slits on the fat side of the pork loin and push the garlic cloves into the slits.  Lightly salt and pepper on all sides.  Place in a roasting pan, fat side up.  Heat the oven to 325 degrees fahrenheit.  Roast the pork loin for approximately 2 hours.  Remove the pan from the oven and coat the pork loin with the glaze.  Return to the oven for an additional 30 minutes, occasionally spooning the glaze over the pork until the internal temperature on a meat thermometer is 145 degrees for medium, 160 for well done.

The rule of thumb is to cook 1/2 hour for each pound, therefore, 2.5 hours.  Remove from the oven and let rest for at least 5 minutes before carving.  Spoon all the remaining glaze over the pork.  You don't want to waste a drop of it.

The pork was so juicy and tender, it was amazing.  The glaze provides a wonderful sweet flavor to the pork.  Yum.  Yum.  Dan LOVED this and our daughter asked for the recipe.  Nothing better than successful recipe choices.


Tonight, I used some of the left over pork to make Carnitas.  They were wonderful!!  What a great way to use some of that delicious left over pork and they are super easy to make.

FYI, rinse your roasting pan as soon as you have spooned the remaining glaze over the pork roast.  That stuff sets up like concrete otherwise.  To make cleaning the pan easier if that happens (don't ask me how I know this), reheat the pan and pour the remainder out.  I'm just trying to make your lives easier.  Experience is a good teacher.

There are still a lot of cold days ahead.  It's about 60 days until spring - sigh.  There is lots of time for a lot of good "comfort food" meals.  Give this recipe a try.  I really think you will like it.

Everyday Donna

Things to Remember:

Comfort food - food that reassures - is different things to different people.  David Tanis, A Platter of Figs and Other Recipes