Super Bowl is coming up fast - like this Sunday. Are you having a party, going to a party? Do you need to fix something for guests or take something to someone else's party? Well, I have got a super delicious recommendation for you. How about a pork butt or shoulder cooked Cuban style in a slow cooker? It cooks all day and the meat literally falls apart when it is done. It is easy, super delicious, and this recipe is a keeper!
You can use the meat as pulled pork, you can make a sandwich, eat it plain, you can make a Cuban style sandwich with it, you can add barbeque sauce or hot sauce, whatever you like. How about sliders or carnitas which are pork tacos? All you do for carnitas is put a little oil in a pan and cook the pork until it starts to crisp on the outside. Serve with tortillas and your favorite toppings. So good!
This recipe came from the Huffington post. Yesterday I was in the house because of "the" cold and "a" cold, and I had this pork butt that I needed to cook. I was going to do it low and slow in the oven and finish it on the grill. Well, it was too dang cold, so I looked up some recipe options and found this slow cooker one. Lucky me, because it is awesome and we will be having this again and again!
Here is what you need:
1 pork shoulder or butt, about 4 pounds
6 large garlic cloves, more if they are small
1 TBS coarse kosher salt (1 1/2 tsps table salt if that is what you have)
1 TBSP ground cumin
1 TBSP dried oregano
1/2 cup lime juice
1 cup orange juice
First, you are going to make a paste out of the garlic, salt, and herbs. Using the flat side of a big knife, mash the garlic into the salt until you have a paste. Add the cumin and oregano.
Lightly salt and pepper the outside of the pork butt. Cut 2 inch slices into the skin side of the pork butt or shoulder. Make them about 2 inches deep and 2 inches apart. Rub the garlic/herb paste into the slits all over the pork.
Put the pork into the slow cooker and add the lime and orange juice. Cook on high for 6 to 7 hours.
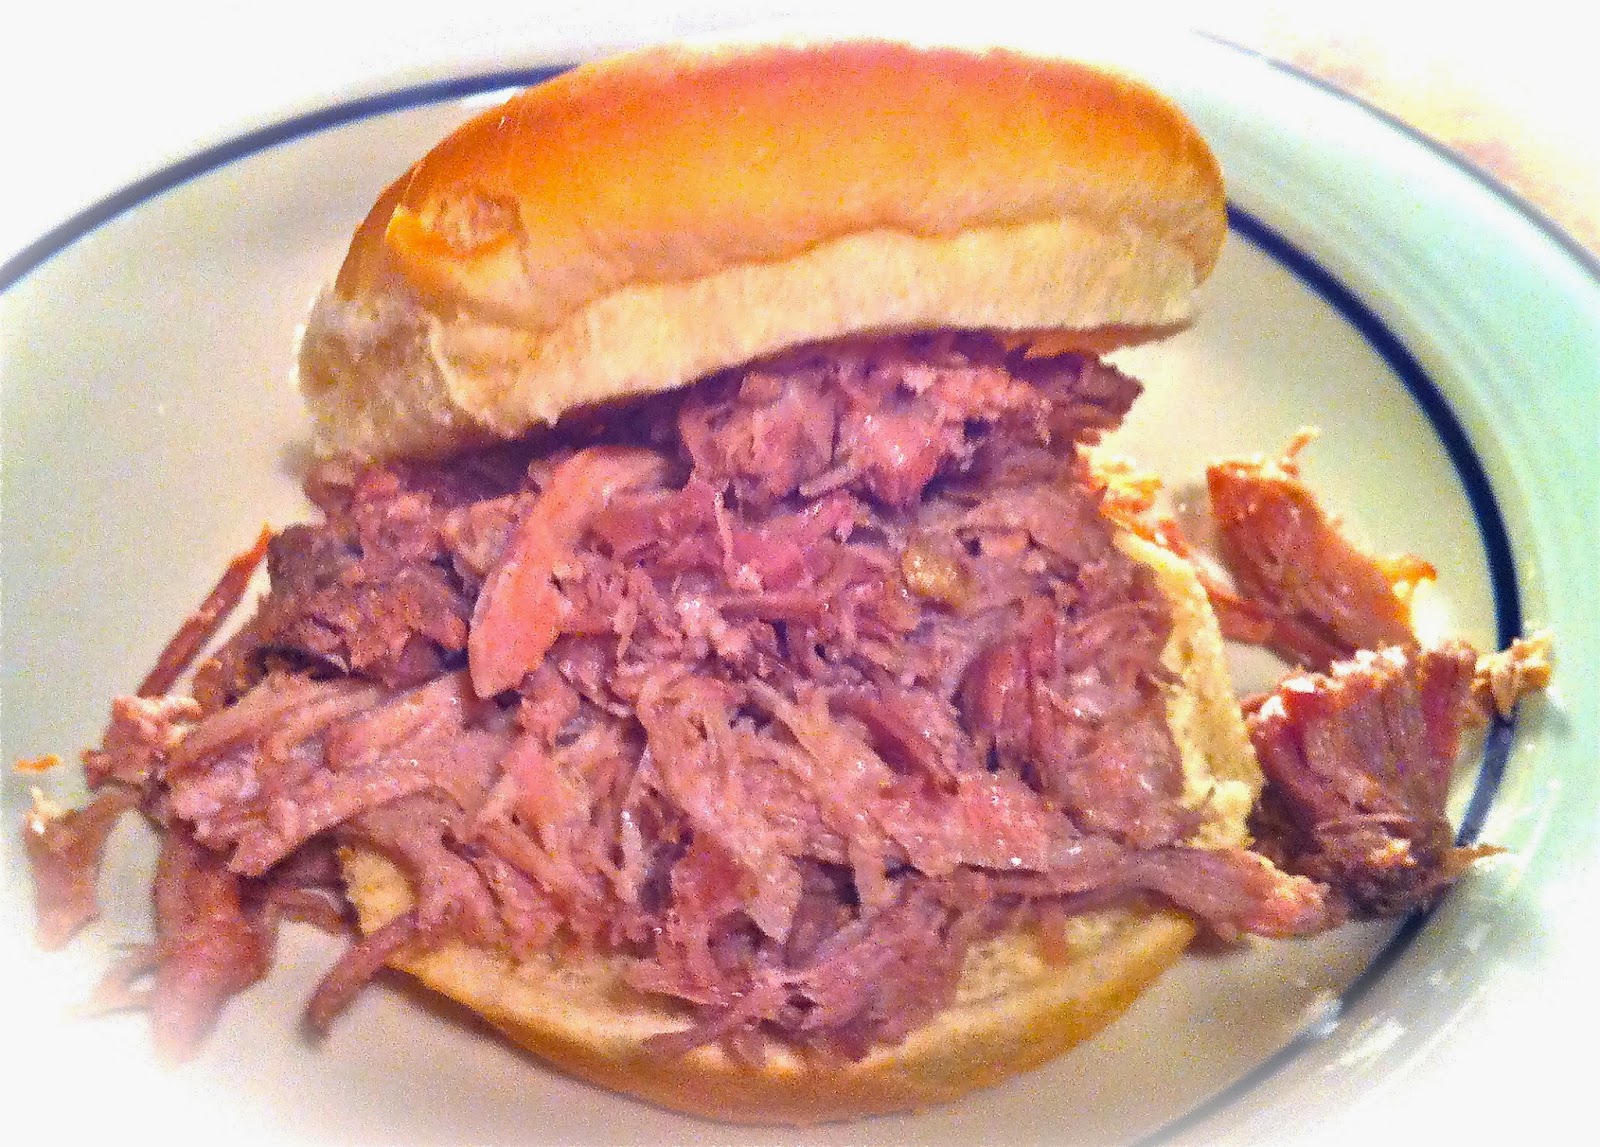
Carefully remove the pork from the slow cooker. I had to remove it in pieces because it literally fell apart. I put it in a 9 x 13 baking dish and pulled it with a fork to make smaller pieces. Easiest pulled pork ever! Is it good? You bet it is! Amazing flavor and texture - so tender and delicious.
We had guests for dinner last night and everyone truly enjoyed every last bite of this fabulous pork. That is why I know it would be a major hit for a Super Bowl party. You can do so many things with it or enjoy it in a simple fashion by spooning some of the au jus over the meat.
Have you ever had a Cuban sandwich? They are DEEEEEElicious. They have pork, deli ham, mustard, pickles, and swiss cheese on Cuban style bread (if you can find it). If not, use an Italian loaf or something a little crusty like ciabatta . You could use a baguette and make smaller sandwiches. We simply ate this flavorful, tender pork like a barbecue sandwich on a bun. Eat it any way you like and it will be delicious.
If you are not attending or hosting a Super Bowl party, you can still enjoy this recipe this weekend. It is easy and worth every minute of those 6 hours cooking time. Your house will smell amazing and you will be pacing the floor waiting for it to be done so you can dig in. Yes, it's that good. Dan highly endorses it.
Everyday Donna
Things to Remember:
The Super Bowl is Americana at its most kitsch and fun. Sting
Are you staying warm where you are? I. Am. Over. This. Weather. Bring on springtime. I want flowers and green grass and warm sunshine. I don't want to wear a coat, a scarf, or gloves any more. Done. Through.
Yesterday, I worked on this Valentine heart wreath made from burlap. I happen to love burlap even though it sheds a lot and the little fibers get up your nose (which is really fun with a cold). Burlap is inexpensive and relatively easy to work with. Even though this burlap looks very red, it is actually a little darker. Reds just seem to be hard to photograph.
I found some red burlap at Wally World a couple of weeks ago and bought two yards. Red is not always available, so I always buy extra when I find it. I seem to use a lot of it for some reason - perhaps because I like red and it is an accent color in my home.
I have this old piece of wood that hangs on the wall in our dining area that I use as sort of a gallery to keep from putting lots of holes in the wall. It works out very well, and is an interesting art piece in and of itself. It must have been part of a door at one time. We found it at our favorite second hand store here in Nashville. I like to hang interesting things on it. This wreath is the perfect piece and may stay there after Valentine's Day - at least until spring.
For the wreath form, I used some 16 gauge wire that I bought at Christmas time to make the coiled wreath that you can find on my blog. It is the one filled with yarn balls and Christmas ornaments. This wire is sturdy and easy to shape at the same time. You could use a coat hanger, but the heavier ones can be hard to shape and those awful white ones may be too flimsy. I found this wire at Home Depot. I just sort of formed the size I wanted and cut the wire and twisted the bottom. The wire shape is about 14 x 14.
The form does not have to be perfectly shaped because you are going to cover it with the burlap ties. Don't fret if the wire is wavy.
It is easy to cut strait lines in burlap because of the loose weave. You simply pull a thread all the way across and cut in the open space that is left.
Pull a thread and try to pull it all the way across without breaking. Go slow and good luck. If the thread breaks, just simply find the break, pull out the lose end and go from there until you get all the way across the width of the burlap. This burlap is 45 inches wide.
See the open space? Just cut all the way across and you have a nice straight strip. Make your strips the width that you want. I made mine 1.5 inches. That width works nicely with this project and is not too hard to tie. If you make thinner strips, the burlap sometimes comes apart when tying and wider ones are hard to tie. Guess how I know that?
I used about a half yard of fabric for this wreath. I cut strips 4 at a time and then cut the strips into about 7 inch lengths. These are easy to tie and not too long. If you need more strips, cut a few more. This way, you don't waste a lot of the burlap if you don't use it.
Take one of the 7 inch strips and tie an overhand knot around the wire form. If you are not familiar with knots, that is just like you would tie the beginning of a shoe lace. One tie is good and it will hold in place on the wire. Push the ties as close together as you can. Just keep filling in around the form, turning your knots in different directions so the wreath will look full when finished. That's all you do. Simple as can be.
This wreath should probably be an indoor wreath unless your door is covered by a roof that would protect it from snow and rain. Otherwise, you may have a very sad and limp wreath. That's just FYI.
This wreath is so cheerful and it adds a lot of color and texture to the room. It could be made out of any color burlap or any shape for that matter. It doesn't have to be just for Valentine's day. I may leave this one up for a while. I can remove the little banner below it and it is just a pretty wreath.
You could make this and use felt, ribbon, or fabric. It would cost more, and make take more strips of ribbon or fabric, but would be just as pretty. Your choice. If you have scraps available, use those by all means.
You could also make these wreaths in different sizes, even quite small for gift giving. As long as you can make a heart shape out of the wire, you can cover it with the burlap.
Add some color and whimsy to your home during these dull, gloomy winter days. Even if you are not a big Valentine's fan, how could this beautiful heart not cheer up a room? Have fun with this project. I sure did. It only took about an hour to complete. Easy. Peasy.
Everyday Donna
Things to Remember:
Without Valentine's Day, February would be...well, January. Jim Gaffigan
Hey, everyone. I'm here to show you how to make those containers for the cinnamon sugared nuts I talked about last week! I hope you had a great weekend. I am a little under the weather with a very runny nose, but that's okay because it's too cold to go out anyway! Hope you are all staying safe and warm during this winter siege.
Valentine's Day will be here in just a few short weeks, so I thought it was time to get busy making some things and decorating the house. I know it's just a one day holiday, but who doesn't love some colorful hearts to cheer things up during these wintry doldrums?
The containers I am making are made from paper - you can use card stock, construction paper, or some of these cute acid free papers I found at Target in a package for $1. Yes, you read that right. There were 10 pieces of 12 x 12 papers in a package for uber cheapness. They were in the front of the store in their dollar bin and they are adorable. The package even showed the paper patterns inside.
I also have some 8 1/2 x 11 paper that I found at Michael's for $3. That paper is a little heavier and a little harder to work with just in case you are interested, but is also perfect for Valentine's Day.
These are called Swedish woven hearts and you may have made them in elementary school, who knows? I just discovered them on Pinterest a while back and knew they would be perfect for our grandsons for Valentine's Day. There are endless options to making them. They even learned how to make them last weekend. Our 7 year old grandson liked them so much, he is going to make them for his first grade class at school. Here is how one of the hearts looks "filled."
How cute is that? You can also put handles on them for hanging. Just cut some thin paper strips and use a glue stick to attach them to the inside of the paper hearts.
These are made by weaving the paper together and it is not hard once you get the hang of it. You will want to work slowly so you don't tear the paper as you weave it together. I say that because you weave the pieces through the centers, not just over and under. The last row is tight and requires a little dexterity. Don't be scared off by that last statement, it just means take your time.
First, you need to cut your paper strips. They need to be 3 to 3 1/2 times longer than they are wide, so mine are 3.5 inches wide by 12 inches long.
The handy dandy paper cutter makes the job go faster. If you don't have one, simply use a ruler and mark your strips and cut with scissors.
Fold the strips in half, end to end so they are half as long as they were.
You need to make a curved top, so I used a tuna can placed on the OPEN end (not the folded end) and traced a semi circle. Trace one on both pieces of paper and cut with your scissors. I made a template to make things easier.
This became my template because I cut the strips on the open end instead of the folded end. Duh. You will want to mark the folded end in thirds, for 3 strips. I put a small pencil dot at the appropriate places on the folded end.
Now, this is important and I learned this myself. None of the tutorials I looked at told me this, but it makes weaving the hearts together so much easier if you will lay one strip on top of the other in a heart shape and mark the edge of the piece so you know how far to cut up. If you don't cut far enough, you cannot weave the strips together and you will tear your paper.
Just make two pencil dots approximately 1/3 from the top and bottom. Then, reverse the papers and do the same so you can cut both strips the same length. See the pencil dots on the folded edge and the marks at the top?
Now, cut from the FOLDED edge toward the open edge. You should have 3 strips. Now the really fun part - weaving the two together. I started with over/under/over because I think it's easier to do. You will do this twice and under/over/under in the middle. REMEMBER: YOU ARE GOING THROUGH THE CENTER OF EACH STRIP WHEN YOU WEAVE, OTHERWISE IT WILL NOT LOOK LIKE THIS WHEN YOU ARE DONE.
This is a closed woven container that will hold something. If you just weave over/under/over it will not hold anything.
To start, put the top strip on one half of the heart piece inside the first piece on the other half.
This is another picture of how it should look. See how the strips go through the centers? That's what you want to do.
This is easier to follow once you start doing it. I know this makes no sense, but it really will and it should look like this when you finish the first strip. Over/under/over.
The weaving should look the same on both sides. If not, you missed going through a center somewhere. Take it apart and start over. The next piece will go under, over, under. You may have to bend your paper a little to make it work. Just take your time. Push the pieces to the top as you work, or you will not be able to weave your last piece through. Go back to over/under/over and you are done. Easy Peasy. If a 7 year old can do it, you can do it. If I can do it, you can do it!
This is how I bent my paper to get it through the last section. The center is a little tricker. When finished, it will look like this.
I know it sounds hard and I was confused when reading the directions the first few times. Once I had the strips in my hand, it made sense. It will for you too. I can't figure a way to write it that is not confusing, if you get my drift.
If you want to jazz up your hearts some more, cut thin strips of contrasting paper, ribbon, or lace, and weave it through the strips. I used a little dab from a glue stick to hold the pieces in place.
See the difference? The options are endless! You can also cut a narrow strip, wide strip, narrow strip for your weaving pattern instead of 3 equal sized strips. You can do all kinds of fancy things with these.
I used some pieces of nylon tulle and filled it with M&Ms (grandsons LOVE them) and tied a ribbon around the top because I didn't have any cinnamon sugared nuts at the time. This will keep the nuts or candies from falling out of the hearts at gift giving time.
Be imaginative and create all different kinds of hearts. You could use sheet music. If you use book pages, make sure they are really long ones or you could use magazine pages - the list is endless. Felt is also a possibility. How cute would those be?
Have fun with this project. We sure did. You can make a plethora of these hearts for next to nothing and everyone will love that you made them by hand.
Everyday Donna
Things to Remember:
All you need is love. But a little chocolate now and then doesn't hurt. Charles M. Schulz
Hey, do you know what will be here in just a few weeks? Two big events. The first is the Super Bowl and the second is Valentine's Day. It's time to start thinking about that Super Bowl party and what you will serve or take to share. And what about that special someone, your Valentine? Or in our case, many Valentines? What will you do for them? Well, I have an answer for you that is soooooo good and easy to make.
First, lets talk about nuts. Do you like them? We happen to LOVE them (maybe a little too much). Did you know that eating a handful of nuts every day can help you live longer? It's true! Really. Check this link - http://www.huffingtonpost.com/2014/01/20/foods-that-help-you-live-longer_n_4612048.html. Studies show that eating 1/4 to 1/3 cup of nuts a day can increase your longevity. I am not sure they are talking about THESE nuts in particular, but they are so good and surely they count a little. Never mind the sugar and cinnamon coating. Cinnamon is good for you at least.
I made these nuts at Christmastime for stocking stuffers and I almost forgot to take a picture of them. This is what I had left when I remembered, so use your imagination just a bit. I always make candies, cookies, carmel corn, and nuts to put in decorative bags to give as extras for everyone. These are SO dangerously good and are always such a hit.
You know when you are walking through a shopping mall and smell those German roasted nuts that they sell at kiosks? The ones that smell like heaven? That's what these are like. Oh Em Gee. Delicious. And, slightly dangerous because it is impossible to control the consumption of said nuts. But, they would be perfect for a Super Bowl party and for Valentine gift giving. Here is what you need:
5 cups pecan halves
1 cup almonds or cashews (I used cashews - delish)
2 egg whites
2 TBSP water
2 cups granulated sugar
2 and 1/2 tsp ground cinnamon
1 tsp salt
Preheat your oven to 300 degrees Fahrenheit
Line 2 large baking sheets (with sides) with parchment paper and spray with non stick cooking spray. (You will understand why this is necessary after making them. Don't skip this step.)
Mix nuts in a large bowl and set aside.
Using an electric mixer, beat the egg whites and water on medium high until stiff peaks form - about 4/5 minutes. Add the sugar, cinnamon, and salt, stirring until well combined. Put the nuts in the egg white mixture and stir to coat completely. Spread nuts over the baking sheets and bake for 45 minutes, stirring every 15 minutes.
Allow to cool completely and enjoy - that translates to try not to eat them all at once. Seriously.
You can store these at room temperature for a few weeks covered. Like there will be any left in a few weeks. That's funny.
You might want to make a test batch before the Super Bowl or Valentine's Day just so you will know how good they are. Next blog post, I will show you a perfectly beautiful container you can make to put these in for gift giving. Everyone will be so impressed and grateful for all your culinary and craft skills. Y'all come back now. You won't want to miss the tutorial.
Everyday Donna
Things to Remember:
I always loved Christmas time when we would have a bowl full of mixed nuts in the shell and we would spend time around the table with a nutcracker, eating the nuts. I liked them all, especially filberts better known as hazel nuts. donna
Yes, it is really still winter. No, we don't want it to be winter, we want the 60 degree weather we had yesterday, not the 30 degree and slipping kind of weather we are having today - with snow flurries. No, this weather is not my favorite and never will be. Gray, gloomy days make me gray and gloomy if I am not careful. Tomorrow is supposed to be sunny - still cold - but sunny. That is a good thing.
Since it is still winter, we truly appreciate some good comfort food. I describe comfort food as things that make you feel comforted, satisfied, and feel good. Sunday evening, the Nashville family came over for dinner and I made this fabulous pork roast with a brown sugar glaze. It is SOOOO good and really quite easy. I also made parmesan chicken sticks for the kids which they simply devoured. You can find the recipe on my blog.
We have six adults and five grandsons who live in town, and food preparation requires some considerations. We have one really picky eater who happens to be the oldest grandson at 10. We have a son in love with Celiac, so that is another consideration. Now, our second daughter has to eat gluten free also. In the end, we all benefit from gluten free to some degree I am sure, but do you know how many recipes contain gluten? Way too many. We don't want anyone falling ill or feeling bad, so we do our best to accommodate. The good news is there are so many more gluten free products on the market and recipes available. This recipe called for flour, but I simply substituted corn starch. To make that accommodation, you simply use 1/2 the amount of flour called for and substitute corn starch. The recipe called for 2 tablespoons of flour, so simply substitute 1 tablespoon of corn starch. Easy peasy.
I had a five pound pork roast and knew I wanted to fix it for dinner. The chicken sticks were easy, but I wanted a different, yet delicious, recipe for the pork. I found a hum dinger on About.Com in the Southern Food section. It was easy, I had all the ingredients, so it was a go. Here is what you need:
1 4.5 to 5 pound boneless pork loin
4 large cloves of garlic, peeled and cut in half
salt and pepper
Glaze
1 and 1/2 cups light brown sugar
1 TBSP corn starch
2 tsp Dijon mustard
3 TBSP balsamic or cider vinegar (I used cider vinegar)
Combine the ingredients in a saucepan, mixing well. Cook over medium low heat until bubbly. Stir and set aside. You may have to reheat slightly before glazing the pork. It becomes sort of crystalized, so I just spread it on with a spoon. It will melt in the oven.
Pat the pork loin with paper towels to dry. Cut the garlic cloves in half. Make slits on the fat side of the pork loin and push the garlic cloves into the slits. Lightly salt and pepper on all sides. Place in a roasting pan, fat side up. Heat the oven to 325 degrees fahrenheit. Roast the pork loin for approximately 2 hours. Remove the pan from the oven and coat the pork loin with the glaze. Return to the oven for an additional 30 minutes, occasionally spooning the glaze over the pork until the internal temperature on a meat thermometer is 145 degrees for medium, 160 for well done.
The rule of thumb is to cook 1/2 hour for each pound, therefore, 2.5 hours. Remove from the oven and let rest for at least 5 minutes before carving. Spoon all the remaining glaze over the pork. You don't want to waste a drop of it.
The pork was so juicy and tender, it was amazing. The glaze provides a wonderful sweet flavor to the pork. Yum. Yum. Dan LOVED this and our daughter asked for the recipe. Nothing better than successful recipe choices.
Tonight, I used some of the left over pork to make Carnitas. They were wonderful!! What a great way to use some of that delicious left over pork and they are super easy to make.
FYI, rinse your roasting pan as soon as you have spooned the remaining glaze over the pork roast. That stuff sets up like concrete otherwise. To make cleaning the pan easier if that happens (don't ask me how I know this), reheat the pan and pour the remainder out. I'm just trying to make your lives easier. Experience is a good teacher.
There are still a lot of cold days ahead. It's about 60 days until spring - sigh. There is lots of time for a lot of good "comfort food" meals. Give this recipe a try. I really think you will like it.
Everyday Donna
Things to Remember:
Comfort food - food that reassures - is different things to different people. David Tanis, A Platter of Figs and Other Recipes
Sometimes I wake up in the middle of the night - usually about 3 or 4 am and I cannot go back to sleep. What would any rational person do? Watch television of course. Usually Dr. Oz is on and since I have missed the afternoon showing, I watch it in the middle of the night. Makes perfect sense doesn't it? I do learn lots of interesting things.
Monday night, it happened again, I turned the TV on, and his guest was Dr. Tieraona Low Dog, who is an M.D. and is Native American. She has written a book called Healthy at Home (which I have ordered on Amazon) and it is full of natural home remedies for all kinds of things. On this episode, she was talking about sore throats, respiratory infections, and coughs. I couldn't have seen this at a better or more opportune time.
My BFF had been in Evansville all last week because her mother was in the hospital. Tonya had spent the entire week at the hospital with her. By Saturday, she was getting sick. She had a scratchy throat and didn't feel well. By the time she got back to Nashville on Saturday evening, she was sick. SICK. Hacky cough, fever, malaise - the whole works sick. She ran a fever all Sunday and Monday with the cough getting worse. I told her what our daughter's pediatrician had told them about using honey for cough suppression. He told her to give her boys a couple of teaspoons every few hours and Annie said it really worked. So, Tonya was doing the honey thing and she said it was really helping. I mean, coughing is the worst.
Back to Dr. Low Dog's herbal recipe for cough. On the show, she made a concoction of thyme, lemon, and honey and she said it would really do the trick in suppressing a cough. When the hour was civil enough, I sent Tonya a text and told her I was making her this concoction. She had seen Dr. Oz on the afternoon showing and said THANK YOU!
I cooked it up just like Dr. Low Dog said and sent it down with Dan to hand in the door. That was yesterday. This morning she sent me a text and said her fever broke during the night - finally - and that the concoction was really helping! Yay!! That is a first hand account that it really does work and it tastes good. Here is what you do:
2 cups water, almost boiling
3 TBSP fresh or dried thyme
juice of one whole lemon
1 cup honey, preferably raw or at least local
DO NOT GIVE TO CHILDREN UNDER 1 YEAR OF AGE!!
Put the time in a bowl. Pour the hot water over it and let it steep for 15 minutes. Strain into a container that has a lid. Add the juice of 1 lemon and the honey. Stir to mix thoroughly Put the lid on and store in the refrigerator for up to 1 week. Take 1 or 2 Tablespoons every 3 to 4 hours. Simple. Easy. And, it tastes good which is more than you can say for most commercial cough medicines which they have shown really do not work.
Seems like there is a lot of flu, congestion, upper respiratory kinds of things going around right now. Coughing will wear you down and keep you awake. Try this concoction and hopefully it will help you too. There are no chemicals or additives. All ingredients are natural which is never a bad thing and it's relatively inexpensive to make. Give this a try for yourself or anyone you know who is hacking, wheezing, and coughing. It could make things better in no time.
Everyday Donna
Things to Remember:
Everything on the Earth has a purpose, every disease an herb to cure it, and every person a mission. This is the Indian theory of existence. Mourning Dove, Christine Quintasket (1888-1936) Saiish
Happy Tuesday, everyone. It has been an absolutely beautiful day here in Nashville. Mother Nature loves to tease us with 60 degree weather in mid January, but that is about to change. While out and about today, we saw the salt trucks treating the streets with beet juice for the snow that is supposed to blow in tonight. How can she do that to us? Just how? I know it's winter, and I know it's mid January, but we all really, really like 60 degree weather. Really, we do. And, we'll be good - promise. Double promise, if you will only send more sunny days with mild temperatures.
I know that won't do a bit of good, but it's worth a try. Makes me feel better if nothing else. Tomorrow, it's going to be a high of 39. I tried. We'll see what happens.
Last night, our son Tyler and his roomie, Rick, came over to join us for dinner before they take off on their next big adventure. I whipped up some cheese stuffed manicotti, (super yum), a beautiful green salad, and some crusty bread. It was quite a hit.
Sometimes, you just need some pasta to soothe your soul. It can be a super comfort food. This recipe is one I have been making for years and years. Don't know where I got the recipe, but am sure glad I found it because it is delicious. You can make it with meat or vegetarian, whichever you prefer.
If you aren't familiar with manicotti, it is a big, fat, tubular pasta that is made to be stuffed. The box I bought had 14 noodles in it and it fills a 9x13 baking dish.
I made this dish vegetarian for Christmas dinner for those who don't eat meat. Our super picky 10 year old grandson gorged himself on it and he kept saying, "Grandma, this is SOOOOO good." I couldn't have guessed after he ate the fourth helping. That's just to confirm how good it is. That boy won't eat much of anything and is suspicious of everything. The good thing is this has lots of tasty cheese, big pasta noodles, marinara sauce, and meat if you want it. I added spinach to my recipe on Christmas for some extra nutrition.
The noodles are filled with a combination of ricotta cheese, parmesan cheese, and mozzarella cheese. What could be better? Then, it is covered with your favorite marinara sauce to which you may or may not have added ground beef or Italian sausage - your choice. I used Italian sausage last night and it was amazing!
Here is what you need:
1 box Manicotti noodles, cooked for about 7 minutes - you want it very al dente since it bakes in the oven
1 26-32 ounce jar of your favorite marinara sauce (I use Trader Joe's marinara with basil)
2 beaten eggs
1 and 1/2 15 ounce containers ricotta cheese
8 ounces grated mozzarella cheese, reserve half
1 fresh ball mozzarella cheese
1/5 cup grated parmesan cheese
1/4 tsp salt
pinch of black pepper
Combine the eggs, ricotta, 1/2 of the mozzarella, grated parmesan, salt and pepper. Mix thoroughly to completely combine.
Cook the manicotti noodles in boiling salted water for 7 minutes. Remove, drain, and let cool until you can handle comfortably. I used to fill these with a spoon and it is so hard to do. You chase the noodles everywhere when your hands get goopy with the cheese filling! They are super hard to hold on to. Now, I have a nifty trick. Cut the corner from a gallon sized zip lock bag. Fill the bag with the cheese filling and pipe it into the noodles by gently squeezing the bag. Start on one end and fill half way, turn the noodle and fill the other end. This will keep the noodles from splitting if you don't overfill them.
Sorry, I could not take a picture while filling the noodles. Only two hands and no one else was here. Next time maybe! You can figure it out I am sure.
Fill the 9 x 13 baking dish with the noodles by laying them side by side. There are always two at the bottom crossways. Just how it goes.
Brown 1 pound of ground beef or Italian sausage. Drain if necessary. Add the marinara sauce and combine with the browned meat. Pour over the noodles in the baking dish. Cover with the remaining shredded mozzarella. We like more mozzarella than that, so I also sliced a ball of fresh mozzarella and scattered it over the sauce. Bake at 350 degrees fahrenheit for 45-50 minutes. Make sure the dish is covered with foil while cooking. Remove from oven and let cool a little before removing the foil. I normally serve two stuffed manicotti at a time because it's VERY filling. The guys ate more than that. Go figure.
This dish also reheats very well. We are having leftovers tonight. Yay. That means no cooking for me!
Give this recipe a try. I think you will really, really like it. It's great for entertaining because it looks like you worked all day making it - very impressive. I mean, you just can't go wrong with pasta, sauce, and cheese now can you?
Everyday Donna
Things to Remember:
Life is a combination of magic and pasta. Federico Fellini
Here we are in a new year - 2014. New years bring resolutions, resolve to do or not do things that have become part of our habits. Most resolutions do not last very long unfortunately. It is so very hard to change our habits, our lifestyles, the things we like and don't like, especially about our "selves." Some things cannot be changed - ever. This I know, but we can improve, or progress if we try.
The above painting is one I did about how I see myself. I have always felt like a fish out of water, a square peg in a round hole. I didn't seem to get a rule book to life when they were passed out. There are many things I just don't understand. As an introvert, I am not a particularly social person. Yes, I can get up in front of hundreds of people and sing, or give a talk, but I am a wreck at one on one. Please don't make me go to a party where I don't know anyone. Chances are I still won't know anyone when I leave, because I have been outside, or in the other room where it's quiet. I turn to jelly inside at the thought of interaction with people I don't know. If it's loud, noisy, boisterous, please take me home. That's just the way I am and I can accept that. Now. Thank you, Jim.
My time is spent creating, reading, and with those I love. It takes me a good long while to let others know "me." When we become friends, I will be the most loyal and generous person you have ever known. I love doing things for those that I love. It gives me great pleasure and joy. Until then, I will be trying to swim in that stream in the picture.
If you are not familiar with Dr. Christiane Northrup, you might want to look her up. She is a very spiritual physician who writes amazing books. She posts inspiring blogs and statuses on Facebook. Friend her, you will like what she writes. Anyway, she wrote about "My One Word" last year as did Brene Brown (get to know her too!). There is a blog and a book called My One Word and it is about choosing a word for the year that will inspire you, help you make changes, think, look at the world in a new way.
The other day I came upon the word "marvel" and knew it was my word for this year. It struck me like a thunderbolt. The definition of the word marvel is:
mar·vel
ˈmärvəl/
verb
1.
be filled with wonder or astonishment.
"she marveled at Jeffrey's composure"
synonyms:
be amazed, be astonished, be surprised, be awed, stand in awe,wonder; More
noun
1.
a wonderful or astonishing person or thing.
"the marvels of technology"
When we look at the world and people around us, we become desensitized to all its glory, majesty and beauty. We keep our heads down, nose to the grindstone, trying to stay afloat with life. Paying the bills, feeding our family, and repetition become the norm, while all around us there is unimaginable beauty, joy, happiness, wonder, and majesty. Do we see it? Do we think about it? Do we meditate on it? Do we share it? Perhaps not. I am here to do my share to change that for myself this year and hopefully for you too!
I plan to marvel at all the wonder of this world, to share it in kindness, compassion, generosity, and love. If we all did our small part, we could change the course of this world. There would be no hunger, no sorrow, no pain, no anger, no hatred, no war, just peace. We all could use a lot of peace couldn't we?
Perhaps it's time to forgive all the past hurts and move on. Perhaps it's time to accept our brothers and sisters of the world for who they are and hope they accept us in return. Perhaps its time to share all that we have been blessed with. You know, there is plenty for everyone in this world and if we share in gratitude, there will always be more. Perhaps its time to forget the perceived "differences" such as race and religion and marvel at ALL the amazing differences there are in the world. There are thousands of species, plants, and people who are all alike and yet different. What is the reason to hate them for who or what they are? I marvel at the chance for change and acceptance.
Today my friend Claire posted a video on Facebook made by a woman who said she had never had any self esteem, didn't think she was lovable, was never going to be married because she was so heavy and unattractive. It was heartbreaking, BUT she did something about it. She determined to try to lose some weight, to exercise and get herself in better condition. She made a video of herself for 100 days, exercising, losing weight, becoming who she wanted to be. At the end of the video, she challenged everyone to do something for 100 days. Anything you wanted. My friend, Claire, asked who was interested. I said I was in!
I have always wanted to be a visual artist - a painter really. Now, don't get me wrong. I do a lot of creative, crafty things. I owned a costume shop for 10 years and created many amazing theatrical costumes and the work gave me great pleasure. I am a trained floral designer and balloon artist. Creating is what brings me joy. But, always nagging was the desire to paint even though I never thought of myself as a painter or being a painter.
This past year, I was fortunate to be able to do a one on one session with a life coach thanks to the extreme generosity of a friend. We finally worked around to "what" I wanted to do and I talked about creativity, even wrote a paper for him about my thoughts on creativity. I believe that everyone is creative in some way. There is something each of us does like no other person - the way we cook, dress, decorate our home, do our job. It's doesn't necessarily mean making something although it is a blessing to be able to create in that manner.
While discussing my desire to paint, he asked why I didn't paint. I said I really didn't know, somehow it frightened me because I was afraid I couldn't. I used a Van Gogh quote to him about "If you hear a voice within you say you cannot paint, by all means paint and the voice will be silenced." I think about it often. His asked if I could paint my life? I said I didn't know, but I would try. And so, it began. My journey to paint.
Now, don't get me wrong. I am no Van Gogh (my favorite painter), nor Monet, nor Matisse, or Grandma Moses. I am me and I do what I do. But, I marvel at what I am doing. Yes, marvel. I get better with each painting. Today, I was watching a YouTube video on painting and the instructor suggested painting 5 minutes every day in order to improve and learn. Hmmmm, just 5 minutes a day. So, when the 100 day challenge came along, I knew what I would do. I am going to paint for at least 5 minutes a day for the next 100 days and see where I am at that point in time. Coincidence? Maybe. Serendipity. Definitely.
Now, I want to challenge you to find something you want to do for 100 days and begin. Also, find a word that will be your mantra for the year. If you want to share your challenge or word, please do. If we are all joined in this together, we can inspire each other in a marvelous way. See what I did there? Marvelous? From the word marvel? Yes.
It's only January 9 and we have many days to go. Please join us in this challenge and let's all marvel at the changes that occur in our lives. Here's wishing you all good things in this year of the horse, 2014.
Everyday Donna
Things to Remember:
Practice isn't the thing you do once you're good. It's the thing you do that makes you good.
Malcolm Gladwell, Outliers: The Story of Success
Hey everyone. The thaw has begun. The polar vortex is on the wane - hip hip hooray! It was in the high 30's today and is supposed to be 60 on Saturday. Yes! We will take it.
Yesterday, I posted a recipe for a soup that I made and hinted at the fabulous dessert we were having with the promise of a recipe today. Well, it's your lucky day and here it is. It is a dessert that I have made for years with a slight modification.
My friend Joyce sent me a recipe the other day and commented on how good it looked. It did indeed look wonderful. I told her I had been making one quite similar for many years. The recipe she sent used a strawberry cake mix, but I have always made mine with a white cake. I love white cake. Sometimes, strawberry flavored things sort of overwhelm me with "too much" strawberry flavor. It can be too sweet and somewhat cloying, but that is just me. Otherwise, the recipe was pretty similar except it used frozen strawberries in syrup instead of strawberry jello. This was one of the first "poke" cakes I ever made. Is it good? You bet it is!
While making soup, I decided we needed a fabulous dessert to go along with it. We were stuck in the house after all, and that calls for fabulousness somehow, don't you think? So, I thought of the strawberry cake. I didn't have a strawberry cake mix, but I did have a white cake mix. I didn't have frozen strawberries in syrup, but I did have a bag of whole frozen strawberries from Aldi's and a box of strawberry jello. I didn't have Cool Whip, but I did have heavy whipping cream. I also had the necessary box of vanilla instant pudding and milk. Everyone makes sure they have milk when there is a winter weather warning right? Everything was a go!
This is a really easy cake to make, but I did make the modification of adding the frozen berries to the jello. Wow, what an addition! How did I never think of that? This cake is like eating the lightest, airiest, fluffiest strawberry shortcake you can imagine. It was a taste of sunshine, of summer, of warm days and bare feet. Oh my goodness and Yummmy Yum Yum. Here is what you need:
1 white cake mix, baked according to directions on the box(or a strawberry cake mix if you desire)
1 20 oz. bag frozen strawberries, thawed, no sugar added
1 small box strawberry jello
1 cup boiling water
1 box vanilla instant pudding, made with only 1 cup of milk, not 2
8 ounces Cool Whip thawed, or 1 and 1/2 pints heavy whipping cream
Bake the cake according to directions. Let cool. Poke all over with the handle of a wooden spoon.
Pour 1 cup boiling water over the contents of a small box of strawberry jello which you place in a bowl. Stir to dissolve completely. Place the thawed strawberries in a blender or food processor and pour the hot jello over the berries. Place the lid tightly on the blender/processor and cover with a tea towel while blending. Blend until you still have some chunks of berries left, not totally liquid. Pour this over the cake.
Sorry, the color is so artificial looking. It was the lighting when I took the picture. Using a spatula, smooth the strawberry mixture over the cake so it will soak into the holes.
Make the instant pudding with only 1 cup of milk, not 2 as the box calls for. Cover the strawberries with the pudding.
If you are using heavy whipping cream, whip the cream using a mixer adding just a little sugar and vanilla until it forms stiff peaks. Spread over the pudding. If you are using Cool Whip, simply cover the pudding with the Cool Whip. Refrigerate until ready to serve - IF you can resist diving right in. This cake should be refrigerated at all times.
Cake descriptions - Heavenly. Ethereal. Fabulous. Delicious. Amazing. And, I just finished a piece while typing this blog. So good with coffee. So, so good. If you use a white cake, you will notice how light and airy the dessert is. It's like eating heavenly strawberry air with so many layers of flavor with a hint of cake. I don't know how it would be with a strawberry cake - very strawberry is my guess. It's up to you. Take your pick. You do want to make this cake. Let me know what you think.
Everyday Donna
Things to Remember:
Doubtless God could have made a better berry (than the strawberry), but doubtless God never did. William Allen Butler
Happy New Year everyone. I have finally rested and recouped from the holidays. How about you? Hope yours was as much fun as ours. There were good friends, gifts, grandsons, and lots of fabulous food. What more could you ask for?
We received a marvelous gift from our children that brought us into the present century - a flat screen television! Yes, we still had a big old dinosaur television. The funny thing is, we had bought one for ourselves as a Christmas gift to us the morning of Christmas Eve. We decided it was time. (Ya think?) As our two daughters and I were preparing to put food on the table for Christmas Eve I casually said, "Hey, guess what we got today." They both turned and looked at me and asked, "What?" They had that look on their face. You know the one - like something's up? Anyway, I said a flat screen television. They looked at each other and then looked at me and one of them said, "Well, now you have two I guess." We laughed hysterically. It was a truly funny moment. Our second daughter said, "We waited until yesterday to get it for you because we were afraid this would happen. When you hadn't gotten one by yesterday, we went ahead and got it." Oops. How did I know? The good thing is, we took the one back that we had bought and now we can get something else with the money. That, my friends, is a good thing. We have a new television and a choice to get something else. We're still thinking.
The other spectacular gift we received was a Keurig coffee maker. We have really come into the present century, let me tell you! Coffee on demand, one cup at a time and a flat screen television. Could life get any better?
I suppose you all are experiencing the polar vortex (a new weather term for me) just like the rest of us? Cold? No thanks. Not a fan at all. It can leave and not return for the rest of the winter and it will not hurt my feelings in the least. It was 2 degrees this morning. Ugh. Hasn't been this cold in Nashville for 20 years. It's supposed to be 60 on Saturday. Now that's what I'm talking about!! I'll take all of that I can get. Maybe a sweater in the evening, no heavy coats, hats, gloves, scarves, boots and whatever else you have to put on to stay warm. I. Am. Over. It.
In case it's not going to warm up that much where you are, I have a great soup for you that I made for dinner tonight. To us, cold weather means soup - really hot soup. Do you like your soup really hot? Please, don't serve me luke warm soup. Ew. Hot. Hot. Hot. The only way to eat soup. Sorry, I digressed. Actually, I could eat soup every day - even in hot weather. I know. I'm weird that way.
We had chili on Sunday and Monday, because I make lots of soup when I make it. It gets better each day AND you don't have to cook again. That is a super benefit for making a big pot of delicious soup. Tonight, I was going to make potato soup. Yum. One of our favorites. I peeled the potatoes, and chopped an onion. When I got the onion out of the fridge (yes, I keep my onions there), I noticed there was a pound of breakfast sausage that needed to be used. Okay, I'll throw it in the soup. So, I browned it up in a saute pan. Oh, and there was a 10 ounce box of spinach I had thawed for another recipe that I didn't make. It needed to be used. Okay, I'll throw it in the soup. Why not?
I didn't want the soup to be bland, so I added a can of Ro-Tel for a little zip. Well, why not add some cannellini beans too? Sure, drain and rinse a can of cannellini beans and throw them in. Yes, there was a parmesan cheese rind in the fridge too. Toss it in. Add a box of chicken stock and enough water to cover everything. Add a couple pinches of red pepper flakes, and let it all cook until the potatoes were done. Dynamite!
When I was ready to serve the soup, I poured a drizzle of olive oil over the soup and added some freshly grated parmesan cheese. For the coup de gras, we had big pieces of crusty garlic bread drizzled with olive oil to mop up that delicious broth. If I do say so myself, it was one fantastic meal! Yum. Yum.
If you wanted to make this soup vegetarian, just leave out the sausage and use vegetable stock instead of chicken stock. It is also gluten free for all of you who have to watch your gluten intake. Don't you love one pot meals? I sure do. Here is what you need to make this soup. I really don't know what to call it. If you have an idea, let me know.
1 large onion, chopped
2 garlic cloves, minced
3 TBSP butter
1 pound breakfast sausage, hot or mild, or 1 pound Italian sausage, browned
1 10 ounce box frozen spinach, thawed and squeezed dry*
1 14 ounce can cannellini beans (or you could use kidney beans)
as many potatoes as you would like, peeled and cut in chunks - I used about 2 pounds
1 32 ounce box low sodium chicken stock
1 can Ro-Tel
parmesan cheese rind optional
salt and pepper to taste
a couple pinches crushed red pepper flakes
olive oil for drizzling
freshly grated parmesan cheese
*If you don't want to use spinach, you could use chopped kale or swiss chard. Either one would be delicious. I used the spinach because I had it.
In a large dutch oven, melt the butter and saute the onions until translucent. Add the minced garlic. While you are cooking the onions, brown the sausage in a saute skillet and drain. Add the sausage, cannellini beans, spinach, Ro-Tel, and chicken stock to the onions and garlic. Use enough water to completely cover all the vegetables. Add a couple pinches of crushed red pepper flakes. Cook until the potatoes are fork tender. Taste and season with salt if needed. I used freshly ground black pepper in each bowl when served or you can add it to the soup pot.
When you serve the soup, drizzle a little olive oil over each bowl and grate some fresh parmesan cheese on top. Serve with some crusty bread and ENJOY!
This soup was so hearty and delicious and really good for a "throw together" soup. I really wish you could have shared a bowl with us because it sure hit the spot on this frigid arctic night. And then, you should have seen what we had for dessert. Oh my. Come back tomorrow and I will show you and give you the recipe. It's fantabulous.
Everyday Donna
Things to Remember:
Winter is the time for comfort, for good food and warmth, for the touch of a friendly hand and for a talk beside the fire: it is the time for home. Edith Sitwell