Monday, October 14, 2013

Pumpkin Poppers!

 Happy Monday to you one and all!  Hoping your weekend was fabulous, restful, and all that you wanted it to be.  Ours was busy as usual.  We had little league games on Saturday and a birthday party for our seven year old grandson on Sunday.  I baked his cake and cupcakes and that was quite an affair.  I am not a cake decorator, but I do my best.  Will share his baseball glove cake and baseball cupcakes with you one of these days.

Well, fall is upon us and it is time for all things pumpkin.  It is amazing to me how the groceries now turn October in to "pumpkin" month with everything pumpkin you can think of.  I must say we do enjoy some good pumpkin treats, so I thought I would share one with you today that I found on Domestically Speaking.  She calls them Pumpkin Poppers and they are deliciously delectable morsels of pumpkin that are kind of like donut balls only baked in a mini muffin tin.  Yum!

This recipe made 24 of these Poppers in my mini muffin pan.  It's an easy recipe and SOOOO good, especially with coffee.  Then again, what isn't good with coffee?  Here is what you need:

1 3/4 cups all purpose flour
2 tsp baking powder
1/2 tsp salt
1  1/2 tsp cinnamon
1/4 tsp ground cloves
1/2 tsp allspice
1/3 cup vegetable oil
1/2 cup brown sugar
1 egg
1 tsp vanilla
3/4 cup pumpkin (not pie filling)
1/2 cup milk
This is how they look when they come out of the oven before you coat them in the cinnamon/sugar mix.


Coating

1/2 stick butter, melted
1/2 cup granulated sugar and 1 1/2 TBSP cinnamon combined in a bowl

Preheat oven to 350 degrees fahrenheit.   Spray mini muffin pan with cooking spray.

Combine all dry ingredients.  Mix with a whisk until combined.  Mix all wet ingredients and pour into dry ingredients.  Just combine.   Do not over mix.

Fill muffin tins almost full.  Bake 8-12 minutes.  Let cool.  (I baked mine 8 minutes)

Roll in melted butter, then sugar/cinnamon mix.  Serve!

Oh, my.  These are really, really good and it's tempting to not eat all of them at one time.  Restrain yourself if you can - you will want some of these for breakfast, a mid afternoon snack, and evening treat.  They are two bites, three at the most and it's easy to just keep popping them in your mouth.  Yum.  Yum.  Yum.

Give this recipe a try.  It's a great fall treat and super easy.  You are going to love these!

Everyday Donna

Things to Remember:

"Oh how we love pumpkin season.  You did know this gourd-ish squash has its own season, right?  Winter, Spring, Summer, pumpkin....We anxiously anticipate it every year."     Unknown


Thursday, October 10, 2013

Loaded Chicken and Potato Casserole Is Superb!

Ever have those days when you are tired of making the same old recipes and  you want something different - something delicious?  You look in the refrigerator to see what's there to use.  Looking back at you are three boneless, skinless chicken breasts.  We all know how it goes with chicken.  It can be fabulous or it can be totally blah.  I wanted fabulous.

I had pinned this recipe on my Pinterest board some time ago because it sounded amazing.  Tonight was the night to give it a try.  I actually had all the ingredients for once.  No trip to the grocery was necessary.  Yay!

This recipe is like a big loaded baked potato with some slightly spicy chicken.  When I say spicy, I mean just a hint.  You could make it much more spicy if you preferred, but our grandsons were coming over so I went with the recipe as written.  It was perfect.  Here is what you need.

3 boneless, skinless chicken breasts cut in approximately 1 inch cubes
6-8 medium russet potatoes, cut in 1/2 inch cubes
1/3 cup live oil
1 1/2 tsp salt
1 tsp black pepper
1 TBSP paprika
2 cloves garlic, minced
2 TBSPS hot sauce (I used Tapatio)

Topping

2 cups grated cheese - cheddar, jack,  or pepper jack (I used Monterrey Jack)
1 cup crumbled bacon  - about 1/2 pound (fry crisp and crumble)
1 cup diced green onions - whites and greens

Preheat oven to 400 degrees Fahrenheit.  Spray a 9 x 13 baking dish with cooking spray.

Mix the salt, pepper, paprika, garlic, and hot sauce together.  Add the cubed chicken and potatoes, stir to coat.

Pour into the prepared baking dish and spread it out evenly.  Cook for 55-60 minutes, stirring EVERY 20 minutes.  Fry the bacon while the casserole cooks.  Set aside until cool.  Crumble.

Once the chicken and potatoes are fully cooked (potatoes fork tender), remove the casserole from the oven.  Top with cheese, bacon, and onions.  Return to the oven and bake until the cheese melts.  Took about 5 minutes.

Remove from oven and serve.

I put some sour cream on the table to add to the dish if wanted and extra hot sauce.  This is a dynamite recipe, is so easy to make and could easily be halved and baked in a 9" casserole if you wanted.

Thanks to Singing Through the Rain for this recipe.  Everyone LOVED it.  We will be having it again and it reheats very nicely in the microwave.  Great leftovers for lunch the next day.

Give this recipe a try the next time you want something truly superb and easy to make.  Add a green salad and you are good to go.

Everyday Donna

Things to Remember:

Try one new recipe a week just for some variety in your dinner routine.  They are not all keepers, but when they are it is great to have something new to add to the rotation.  donna


Tuesday, October 8, 2013

How To Decorate Potted Plants With Burlap


 Yesterday was a perfectly gorgeous fall day and we spent most of it working outside.  I worked on Halloween decorations and Dan painted our new chairs.  (I am so excited about them, can't wait to show you.)  These are the days that inspire me and my creativity soars.

I had purchased some fall mums to replace some of my waning summer plants.  You know how potted plants look when you buy them - plain.  Just plain.  We have no in ground planting space on our patio, so everything is planted in pots.  I like for things to look as much like a garden as possible.  This is how the patio looked in summer.
Many of the plants are fading and it was time to go with fall plants.  Mums are great flowering fall plants and they are readily available this time of year.  There are also plenty of pumpkins available which will last until Christmas if they are not carved.
Plants come in utilitarian pots and I have been known to use them that way, but not on our patio.  Big planters and baskets are expensive.  I am a "make do" kind of girl.  So, I had an inspiration to cover the pots with burlap which is inexpensive, comes in colors, and will withstand lots of water if it rains.  It also has a very fall look to it.

I spent many years working as a floral designer and have covered literally thousands of potted plants with pot foil.  You know that stuff florists use when you receive a potted plant?  It is shiny, comes in different colors,  and usually has a bit of a brocade look to it.  It is sealed on the inside to be waterproof.  I'm here to tell you I can cover potted plants in my sleep.  Then, they are usually decorated with a big bow.  I can make those in my sleep too.  Mercy me the hours I have spent covering pots and making bows.  Whew.

I wanted to jazz up the patio for fall/Halloween and didn't really want plain black pots.  Burlap was the answer and I happened to have a couple of yards on hand.  Pot sizes are measured in inches.  The pot in the picture above is a 10 inch pot, I had two  8" pots of mums and two 6" pots of mums.   Here is how to cover a potted plant.

You will need burlap and some wooden skewers to use with the burlap.  Remember, this is for outside use.  The burlap is not waterproof like pot foil and will leak if you water an indoor plant.  You will need a plastic saucer under the plant if you do this for indoor use.

 I also used jute twine in place of ribbon.  I just really like it because it is rustic looking.  Feel free to use ribbon if you prefer.  I also had some fall berries that I got at the Dollar Tree and added those as a little something extra.  Here is what you do.

Set your pot on the burlap and pull up the burlap on each side until you know the pot will be covered.  I couldn't do that and take a picture at the same time.  Hope you understand what I mean.  You should have a large square when finished.  Then, pull a thread horizontally and vertically so you can cut the burlap straight.  Just grab a thread on the side of the burlap where you need to cut and pull it all the way across.  You will have an opening between the threads that allows you to cut the fabric straight.
Now, set the pot in the middle of the burlap square.  Pull the front side up to the edge of the pot with just a little overhang, and put one of the wooden skewers through the burlap to hold it in place.
Do the same on the back side of the pot half way around.  Now, do the left and right quarter sides.  You will have 4 skewers in the pot.

Next, cut a long piece of jute twine, more than enough to go around the pot and tie in a bow.  Pull the extra burlap up close to the pot and wrap the twine tightly around the pot and tie it behind the front skewer pulling the twine as tight as you can get it to hold the burlap up on the pot.
Tie the twine in a knot around the skewer.

Next, I cut some stems of the berries and tied them with the twine, then made a shoestring bow.  The finished pot looks like this.
You wil have 4 corners that hang down like in the picture.  Doesn't that look better than a plain black pot?  A yard of burlap is $2.97 at Wal Mart and one yard will cover a 10 " pot with left over fabric and a yard will cover two 8 " pots with a little left over.  I used the extra white to cover my small 6" mums.  They are purple and I can't wait for them to pop!
I used natural burlap to cover the two 8" mums.
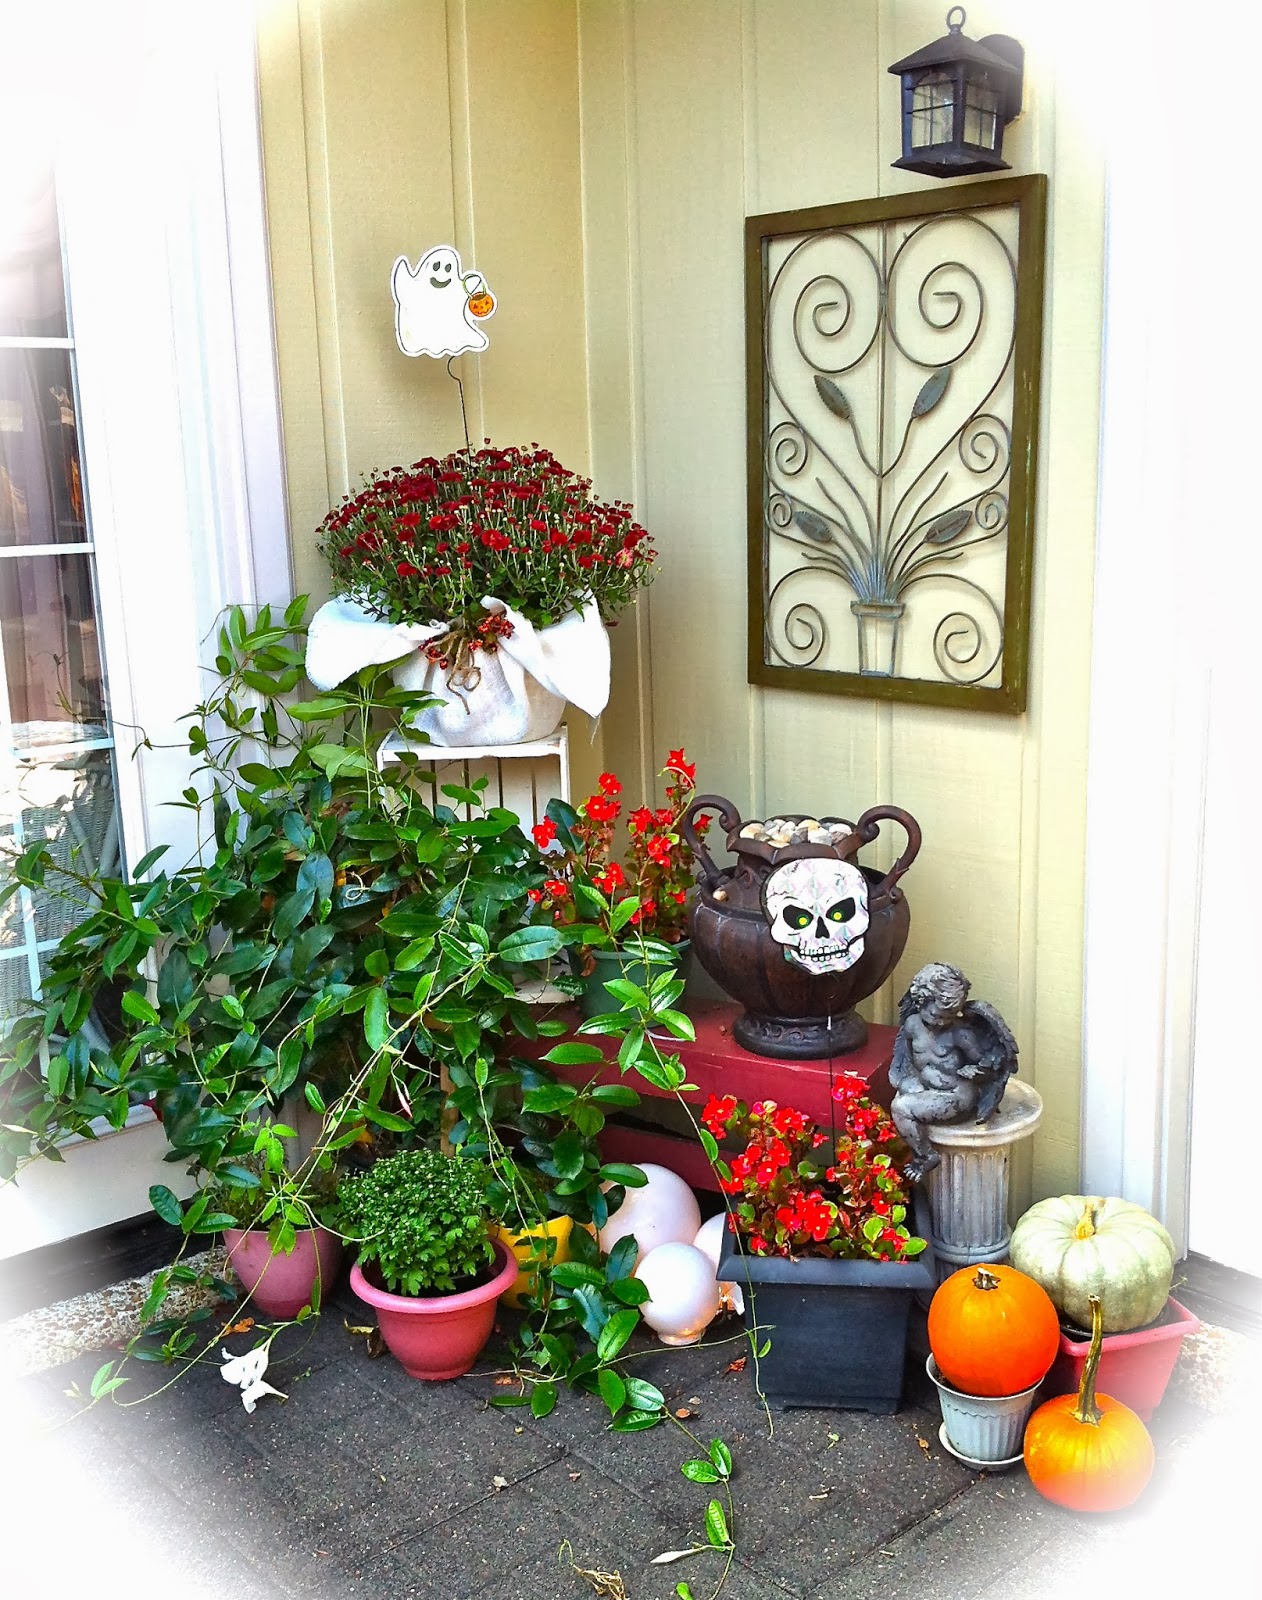
I placed some pumpkins around the patio and carport, hung my Halloween wreath and added the ghost and skeleton reflectors I got at Michael's for a whopping 50 cents each.  They look so cute in the pots!

Here is a picture of the little corner garden on the patio.  Everything is in pots, so it is easily changed with the season.  Can't wait for Christmas!
The white globes in the middle have white Christmas lights in them.  They are so pretty at night.
You can add extras to the pots like the Happy Halloween sign, the reflectors, cat tails, wheat - just use your imagination.  They add another level of interest to the potted flower.

Tomorrow, I think I may go get some pansies to replace the begonias around the patio because they won't last through the winter.  Pansies will bloom here most of the winter.  They like cool weather.

Have you decorated for fall or Halloween?  If you haven't started yet, give this inexpensive way to cover your pots a try.  It really is easy and makes them look so much better!  Have fun!!

Everyday Donna

Things to Remember:

A garden is a delight to the eye and a solace for the soul.  -- Sadi


Monday, October 7, 2013

Pumpkin Streusel Coffee Cake


Oh what a glorious Monday today.  It was a perfect 66 degrees with amazing cerulean skies and it really felt like fall for the first time.  I could do this weather every day.  What's not to love about it?  We worked outside all day and it was absolutely perfect.  Pure bliss.
 
This weather definitely puts me in the mood to bake and cook.  I had the urge for something sweet, perhaps made with pumpkin (it is fall after all) and I  used this recipe that I found on Allrecipes.com.   This is an amazing coffee cake with a lovely streusel on the bottom and a brown sugar glaze on the top.  It has the taste of a pumpkin spice cake which is one of my all time favorite cakes and it is easy to bake.  Yes, the perfect recipe.

This cake can be baked in a tube pan or a bundt pan, whichever you may have.  I love bundt cakes, so I went that route.  Easy peasy.  Here is what you need.

1/2 cup butter, softened
1 1/2 cups sugar
1 15 oz. can pumpkin
3 large eggs
2 1/2 cups flour
2 tsp baking powder
1 TBSP cinnamon
1/2 tsp ground cloves
1/2 tsp salt

Streusel Topping

1/4 cup flour
1/4 cup sugar
1/4 cup light brown sugar
1/2 tsp cinnamon
2 TBSP butter, melted
1/3 cup chopped nuts (I used walnuts)

Preheat the oven to 350 degrees Fahrenheit.  Spray the bundt pan with cooking spray and set aside.

Beat the butter and sugar on medium with a mixer until well blended.  Add the pumpkin and eggs.  Mix thoroughly.  In a medium bowl, combine the dry ingredients.  Add to the pumpkin mixture.  Mix on medium until combined.  Pour into prepared pan.

Make the streusel topping by combining all the ingredients.  Sprinkle over the cake batter.  Bake at 30 degrees for 50-55 minutes until a toothpick comes out clean.

Cool about 15 minutes.  Make the brown butter glaze while the cake cools.  Invert cake on a plate.

Brown Butter Icing
1 1/2 TBSP butter
1 1/2 cups powdered sugar
2 TBSP milk

Put the butter in a saucepan and melt on medium heat, letting it cook until it bubbles and browns, continuously stirring.  Don't let it scorch.  As soon as it browns, remove from the stove and pour into the powdered sugar.  Stir.  Add milk 1 TBSP at a time.  I only needed 1 TBSP.  Pour over cooled cake.  Serve.

This cake is soooooo delicious and it was very hard to eat only one piece.  It's perfect with a cup of coffee.  It would also be lovely with hot tea or hot apple cider and it just screams fall.  Mm mmm mmmm.
We ate this cake for dessert, not just for breakfast or with coffee.  Deeeeeelicious!  Our grandsons LOVED it.  It is worth making.  Give it a try and let me know what you think.

Everyday Donna

Things to Remember:

I'm pretty sure the secret to world peace is hidden somewhere in the smell of coffee and baked sweets.  Unknown

(What a great quote!)


Tuesday, October 1, 2013

Peanut Butter Cup Cookies - Super Easy, Super Yummy!

 Hello October 1st!!  Isn't it exciting to see the sun a bit lower in the sky, the hint of color beginning to show in the trees, the coolness of the early mornings and late evenings letting us know that full blown glorious fall is just around the corner?  Can't wait, can't wait, can't wait!!  How about you?  Are you excited?

We have mums and pumpkins and Indian corn at the ready to begin our fall/Halloween decorating.  We made a trip to the Farmer's Market today and everything is good to go.   Now, I just hope it doesn't rain tomorrow.  If it does, we will just work on it another day.  Sometime's the inner child in me gets excited and doesn't want to wait.  Another lesson in patience comes in the form of fall decorating.  Patience is NOT my middle name.

Fall weather also brings out the "nester" in me.  I want to cook and bake and make ready for the coming cold weather.  Sunday, after fixing brunch for all the moving helpers, I made these cookies that I had seen on the Pioneer Woman's show on Food Network.

One of my guilty pleasures is watching the Food Network shows on Saturday morning, dreaming of all the recipes I want to make.  Are you a Food Network/Cooking Channel watcher?  Actually, this is about the only television I watch.  That, and the Voice.  Another guilty pleasure.

Saturday morning, Ree Drummond made these cookies and I was like - oh wow, easiest cookie ever and they have to be fantastic.  I mean, it's peanut butter cookie dough with a peanut butter cup in the middle.  What could possibly be any better than that?

Here is what you need:

1 refrigerated roll  Peanut Butter Cookie Dough (see, easiest cookie ever!)
1 package peanut butter cups (extras  - you will eat some)
1 mini muffin pan

Yeah, that's it.  Anyone can do this!

This is what I used.  There are other brands available - take your pick!  Remove the wrapper and cut the dough with a sharp knife in about 1 to 1.5 inch sections.  I got 8 sections from this dough.

Take each round and cut it into quarters.
Lay each section in a cup of the mini muffin pan that has been greased for easy cookie removal.  Somehow I missed taking a picture of this.  Oops.

Preheat your oven to 350 degrees Fahrenheit.  When oven has reached temperature, put the pan in the oven for 6 - 8 minutes, only until the cookies are lightly browned.  Watch them closely!  Mine were done at 6 minutes.  Remove pan from oven.
While the cookies are baking, remove the paper wrappers from as many peanut butter cups as you will need.  Work fast and don't stop to eat, you will not be done by the time the cookies are baked.  You will put 1 cup in the middle of each cookie.  I unwrapped 24 since that is how many cookies I had in the pan.

Simply push an unwrapped peanut butter cup in the center of each cookie and watch them get all ooey gooey in the hot cookies fresh from the oven and do your dead level best not to eat every one of them as fast as you can!

Let the cookies cool.  Remove from the pan.  I am here to tell you these didn't last very long at all!  They are a perfect 2 bite cookie.  At least for me.  I don't think some took 2 bites.  They just popped the whole delectable morsel in their mouth.  (You know who you are!)

Luckily, I have enough stuff to make more because I knew there would be no leftovers.  (This is not my first rodeo.)  Dan is not a big peanut butter cup fan (I know, I know), but he sure did like these!  Melty chocolate, peanut butter, cookie dough.  Mm, mmm, mmmm.  It was the melty chocolate that won him over.

These cookies would be easy for your children to help you make IF you can keep them from eating all the peanut butter cups before the cookies bake.  That is the real challenge.  Ergo, buy extra peanut butter cups.

Now, think about the options here.  You could make chocolate chip cookies with a chocolate kiss in the middle or a Rolo (note to self), sugar cookies with your favorite mini candy bar or some chocolate covered candies (aka M&M's) in the middle, the options are endless!   How about peanut butter cookies with a miniature Snicker's bar in the middle.  Oh my.

Be creative.  Give these a try.  You will be dreaming up options, believe me.  I mean what could be better than a cookie with your favorite candy in the middle and you don't have to make the cookie dough!  I don't know about you, but there are many more of these in my future.  Welcome, October!

Everyday Donna

Things to Remember:

You got peanut butter in my chocolate!
No, you got chocolate in my peanut butter!
Two great tastes that taste great together!    Reese's Peanut Butter Cups

Am I showing my age here?  Remember these ads?  donna


Monday, September 30, 2013

Apple Praline Bread - Double Yum!

 Monday, Monday.....you know what the song says. (Bet you are singing it right now.)   I looked up the top 10 songs about Monday and not one of them has a positive title.  The closest one is Manic Monday.  The rest are pretty much downers.  On top of that, it is the last day of September.  Where did that month go?  Wow. Welcome October!

We are tired today.  We spent Sunday helping our best friends from our home town move into their new place right down the street from us.  (Yay!)  Thankfully, it did not pour down rain all day as predicted.  There were a couple of light showers off and on and that was it!  There was plenty of good help and things went fast and smooth.  Awesome.

In order to make their day easier, I fixed brunch for everyone.  We had Chinese Eggs, fruit salad, sausage gravy and biscuits, hash brown potatoes fried with onions, Amish cinnamon bread and this wonderful apple praline bread.  (You can find several of these recipes on my blog.)  I had never made this recipe before, but had pinned it to my Pinterest board for a future "must try." Apples are starting to come in now and I had some fresh from the Farmer's Market so I gave the recipe a try.  Yes, it is a keeper.

It is soooooooo good.  The only thing I would add to the recipe is some cinnamon - mainly because I like the taste of cinnamon and it goes quite nicely with apples, but it is not necessary.  Here is what you need to make this super yummy bread:

1 cup sour cream
1 cup brown sugar
2 eggs
2 tsp vanilla
2 cups flour
2 tsp baking powder
1 1/2 cups peeled apples, finely chopped
1 cup nuts - walnuts or pecans, chopped
*Optional, 1.5 tsp ground cinnamon

Praline Sauce

1/4 cup brown sugar
1/4 cup butter
1/4 cup chopped nuts

Preheat oven to 350 degrees Fahrenheit.

Grease and flour a 9x5 loaf pan.  Set aside.

Use an electric mixer to mix sour cream and brown sugar until well blended.  Add eggs and vanilla.  Mix.  Add flour and baking powder.  Add apples* and nuts.  Pour into prepared loaf pan.

Bake for 1 hour until brown and toothpick inserted in center comes out clean.  (My oven bakes right to temp and it took 1.5 hours for this bread to bake.  Just a little FYI so you don't panic if it's not done at 1 hour.)

After the bread cools, remove from pan and make the praline sauce by putting the butter and brown sugar in a sauce pan.  Cook over medium heat until it bubbles for about 1 minute.  Remove from stove and add nuts.  Pour over cooled loaf of apple bread.  Try not to eat it all at once.


* Be sure and drain any liquid from the chopped apples before adding to the bread.
Yum, yum, yum, yum, YUM!  So good.  This recipe was from a site called Ziplist.com.  You really might want to give this recipe a try, especially while apples are so good and plentiful.  Dan loves apples but doesn't like cooked apples.  He did like this bread a lot.  (He called it cake.)   Whatever you want to call it, I call it delicious!  This is one more recipe that will go in the fall/winter rotation of breads that are delicious for breakfast, brunch, or anytime - especially with a good cup of coffee.  Come on October!

Everyday Donna

Things to Remember:

I can't tell you enough about cinnamon.  Cinnamon is an awesome spice to use and it goes great with something like apples in the morning, or in a mixture of fruit, or in your oatmeal, or even in your cereal.  Emeril Lagasse  

- or in your apple praline bread!  It would kick it up a notch for sure.  donna


Thursday, September 26, 2013

What Can Peroxide And Baking Soda Do? This!


Our best friends from our home town will be moving to Nashville this weekend.  Finally!  After many starts and set backs.  It's been an ordeal.  They had rented a condo 1.6 miles from us which we cleaned and scrubbed spic and span.  There was a major water leak before they moved in, things raveled apart and we had to find them another place to live stat!  That was the down side.  The up side is they now will live 1.6 blocks from us!  That's right!  We can walk back and forth to each other's abodes.  How awesome is that!  We are all super pumped!!

In the interim, there have been many things to deal with.  They are trying to get everything packed, Jeff is finishing up his job, which leaves Tonya to do many of the other things necessary for arranging a major move.  She has had to make several quick trips down here to take care of condo hell.  And then there was finding a new place.  Dan and I were the scouts.  When we found this place, that was another trip down to approve it.  Each one of those trips was one less day spent packing.  Makes you not want to get up in the morning sometimes.

However, the new place is a nice town house condominium which they are going to enjoy a lot!  Like most places, it needed some good old cleaning.  Dan and I volunteered to do said job for them because it was not going to get done before the move otherwise.

These condominiums were built in the 70's, but most of them have been updated maybe several times.  The biggest problem I encountered were orange rust stains in the bathtub and unknown stains on the cultured marble sinks.  Ugh.  I don't know about you, but rust stains gross me out.  Even if the fixture is clean, it doesn't look clean.  The previous occupants were evidently not bothered by said stains because they had done nothing to fix the issue.  Plain old bathtub cleaner was NOT doing the trick.  So, I went on Google and looked for solutions by typing in "stain removal bathtubs".  The tub is porcelain, so EHow said to use at least 3% peroxide and baking soda.  Okay, why not give it a try?  They are both super cheap so I was more than willing to see what happened.

Well, this is what happened!
It was a complete miracle as far as I am concerned.  Who knows how old those rust stains were?  There were stains on the other end of the tub also, like something metal had gotten wet and left rusty marks in the tub and all around the edges.   Quite a few of them which made the tub look terrible.  All I did was sprinkle them with some baking soda and pour a little hydrogen peroxide over the baking soda to make a paste.  I let it sit for about 15 minutes and started scrubbing with a micro fiber cleaning cloth.  I could NOT believe by eyes when that stain just absolutely disappeared.  Wow!  No more expensive chemicals for me!  I'll take $.97 cent hydrogen peroxide and $.99 cent baking soda any day of the week and there is nothing toxic in either of them, just don't drink the peroxide.

The sink in the downstairs half bath had some serious stains.  The sink is cultured marble and the EHow article said the peroxide/baking soda mixture was safe to use, but do not use bleach.  The sink looked like someone had washed paint brushes in it or something and just left it and it had stained the sink.  It looked really ugly.  One stain was an off white (upper left) and the other was black (middle front).
 I didn't want Tonya and Jeff to have to live with these ugly stains that made the sink look totally unclean.  The EHow article said to soak a soft cloth in at least 3% peroxide and let it lay on the stains as long as overnight.  I did it for about 20 minutes.  Then, I sprinkled on the baking soda and added enough peroxide to make a paste.  Using the micro fiber cleaning cloth, I started to scrub.  As the paste soaked into the cloth and sort of disappeared, I rinsed the cloth and put more baking soda and peroxide on the stains.  I did this 3 times.  And this is the final result.
Another miracle.  Bye bye stains!  It looks totally renewed!  The black and off white stains are gone.  The cultured marble does have natural color variations in it, but those ugly "whatever they were" stains are gone, gone, gone.  I was one happy camper and I know Tonya and Jeff will be too.

Now, I am super stoked to try this method on lots of hard to clean stains.  We could save ourselves so much money and toxic exposure to chemicals by using these inexpensive ingredients.  I love Google.  Thanks EHow for the handy dandy tips!  Give this a try the next time you need a cleaning miracle because it truly works.

Everyday Donna

Things to Remember:

If you type in hydrogen peroxide in Google search, there are many web sites touting all the uses for hydrogen peroxide.  Check them out the next time you need a good stain remover!  donna