
Recently my friend Linda and I were talking about crocheting (which we both do) and she was hunting for her crochet hook (which we all do), so I decided I would make her a crochet hook caddy so she would be able to find her crochet hooks whenever she needed them. I am also making one for myself because I am always hunting for just the hook I need and they are everywhere - in boxes, in my bag of yarn, in my paint brush caddy - yes, I know, go figure. It's worse than trying to find my cell phone.
I asked Linda what her favorite colors were and she told me yellow and lavender. I also happen to know that she loves all things "beach" because she spends time with her sister at her beach house. We talk about craft projects and things she can make with shells from time to time and she does a fabulous job. So, my little surprise project was under way.
Linda and I go WAAAAAY back to high school. We are both Bosse Bulldogs, class of 1966. Yes, you read that right. We are both grandmas, but we are still young in spirit. Linda lives in Texas and I live in Tennessee. When our oldest daughter was living in Dallas, I would get to see Linda for a lunch when we visited Holly and her family. Now, Holly lives in Tennessee and I don't get to see Linda as often as I did. But, we do talk online and on the phone and hopefully, she is coming to visit next year. Yeehaa, as they would say in Texas. Boy, are we going to have some fun. Anyway, I am getting totally off the subject. Today is Linda's birthday, and I wanted to feature this little project I made for her.
Even if you are not the world's best seamstress, you can make one of these. It is just simple machine sewing and is really not hard. I just made it up as I went. You will need 3 fat quarters in your favorite colors (or fabric scraps if you have them) and a 9 x 12 piece of felt and some ribbon. That's it. I can hear you asking why I used felt. Simple. Because I wanted the caddy to have more body and it would enhance the quilted look I planned to use to finish the caddy.
I tried to find some "beach" fabric here in Tennessee, but had absolutely no luck, so I went with stars which are my favorite and very symbolic of Texas. The inside pieces looks like water color swirls in yellow and lavender.
Here is how I started out. Fat quarters are 18 x 21 inches. I laid the two yellow pieces with the right sides facing. I then placed the felt piece 1/2 in from the top and left edges of the fabric and cut the right and bottom seams 1/2 from the edge of the felt.

Pin the felt to the wrong side of the cotton fabric and stitch just inside the edge of the felt, leaving about a 4 or 5 inch opening in the bottom so you can turn the piece. I used clear nylon thread so I didn't have to keep changing colors.

Trim the corners at an angle so you will have nice points when you turn this piece.

Now, turn the piece right side out. Turn the unstitched opening to match the rest of the seam line, press, and stitch shut on the right side of the fabric.
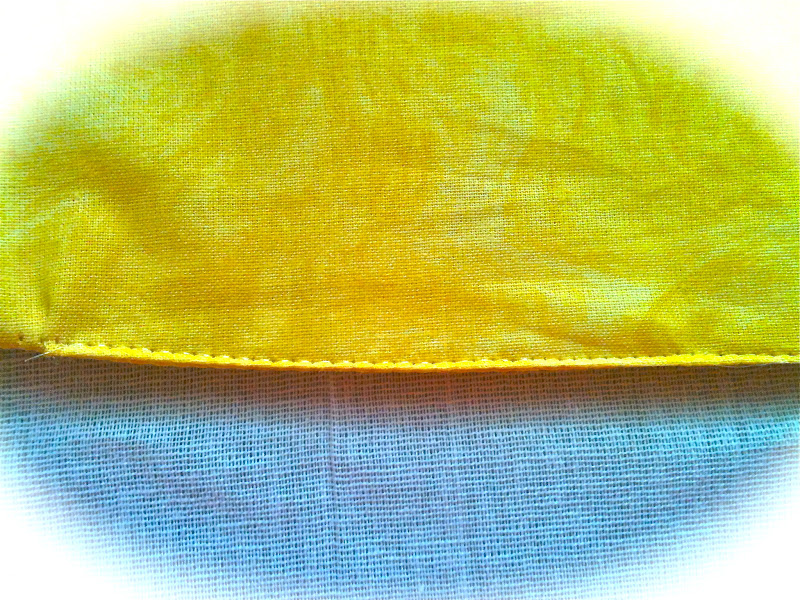
Now, you are going to cut the pocket that will hold the crochet hooks. Lay your "pocket" fabric (which was the lavender in my case) at least 1/2 way up from the bottom of the piece you just finished. Allow 1/2 inch seam allowance on the top, bottom, and both sides and cut a rectangle from the fabric. Fold each seam allowance under 1/4 inch two times so you will not have any raw edges. Press.

Stitch the top edge of the rectangle all the way across. Turn and pin to what will be the inside of your hook caddy. Stitch down one side, across the bottom and back up the other side. Now, take your smallest hood and place it inside the pocket next to the left seam. Measure, allowing enough room to slide the hook in easily. Mark the seam with a disappearing sewing marker if needed. I just free stitched mine. On the right hand side, place your biggest hook and do the same thing. Now, make several small pockets on the left, more medium sized pockets in the middle (because most of us use yard hooks which are medium sized) and then allow a couple of large pockets for big hooks like a P or a Q on the right side. Stitch each seam from the top of the pocket to the bottom, sewing in a straight line. This gives you a really nice quilted effect on the inside and outside of the caddy.


Cut two 12 inch pieces of ribbon and sew them to the right side of the caddy just above the pocket.

Roll your caddy from the left to the right and tie one piece of the ribbon around the outside of the closed caddy and tie a bow using the remaining ribbon. You will probably have to trim your ribbon so it with be the same length when tied. Ta da! You are finished. Now, you can organize all your crochet hooks easily and keep them in one place. You can carry them with you in your purse or project bag and they are easily at hand when needed.
Linda said she was going to take hers to the beach so she could work on projects while relaxing. That was my hope when I made this. Now, I have to get busy and finish mine. Crochet hooks are calling.
This project is quick and easy. You could also use the same process and make crayon or colored pencil carriers for your grandchildren. I always try to have crayons with me when we go out to eat just in case the restaurant doesn't have them. Your children would love you for this thoughtful gift. And, if you start now you can have a bunch of these made in time for Christmas. All those crafters and kids in your life will be so grateful for such a thoughtful gift that can be personalized individually.
Happy Birthday Linda. Hope your day was great and that you are enjoying your crochet hook caddy! Now, everybody get busy and give this project a try.
Everyday Donna
Things to Remember:
Every gift from a friend is a wish for your happiness.
Richard Bach


