Showing posts with label garlic cloves. Show all posts

Thursday, January 30, 2014

Cuban Style Pork Butt In The Slow Cooker

Super Bowl is coming up fast - like this Sunday.  Are you having a party, going to a party?  Do you need to fix something for guests or take something to someone else's party?  Well, I have got a super delicious recommendation for you.  How about a pork butt or shoulder cooked Cuban style in a slow cooker?  It cooks all day and the meat literally falls apart when it is done.  It is easy, super delicious, and this recipe is a keeper!

You can use the meat as pulled pork, you can make a sandwich, eat it plain, you can make a Cuban style sandwich with it, you can add barbeque sauce or hot sauce, whatever you like.  How about sliders or carnitas which are pork tacos?  All you do for carnitas is put a little oil in a pan and cook the pork until it starts to crisp on the outside.  Serve with tortillas and your favorite toppings.  So good!

This recipe came from the Huffington post.  Yesterday I was in the house because of "the" cold and "a" cold, and I had this pork butt that I needed to cook.  I was going to do it low and slow in the oven and finish it on the grill.  Well, it was too dang cold, so I looked up some recipe options and found this slow cooker one.  Lucky me, because it is awesome and we will be having this again and again!

Here is what you need:

1 pork shoulder or butt, about 4 pounds
6 large garlic cloves, more if they are small
1 TBS coarse kosher salt (1 1/2 tsps table salt if that is what you have)
1 TBSP ground cumin
1 TBSP dried oregano
1/2 cup lime juice
1 cup orange juice

First, you are going to make a paste out of the garlic, salt, and herbs.  Using the flat side of a big knife, mash the garlic into the salt until you have a paste.  Add the cumin and oregano.

Lightly salt and pepper the outside of the pork butt.   Cut 2 inch slices into the skin side of the pork butt or shoulder.  Make them about 2 inches deep and 2 inches apart.  Rub the garlic/herb paste into the slits all over the pork.

Put the pork into the slow cooker and add the lime and orange juice.  Cook on high for 6 to 7 hours.

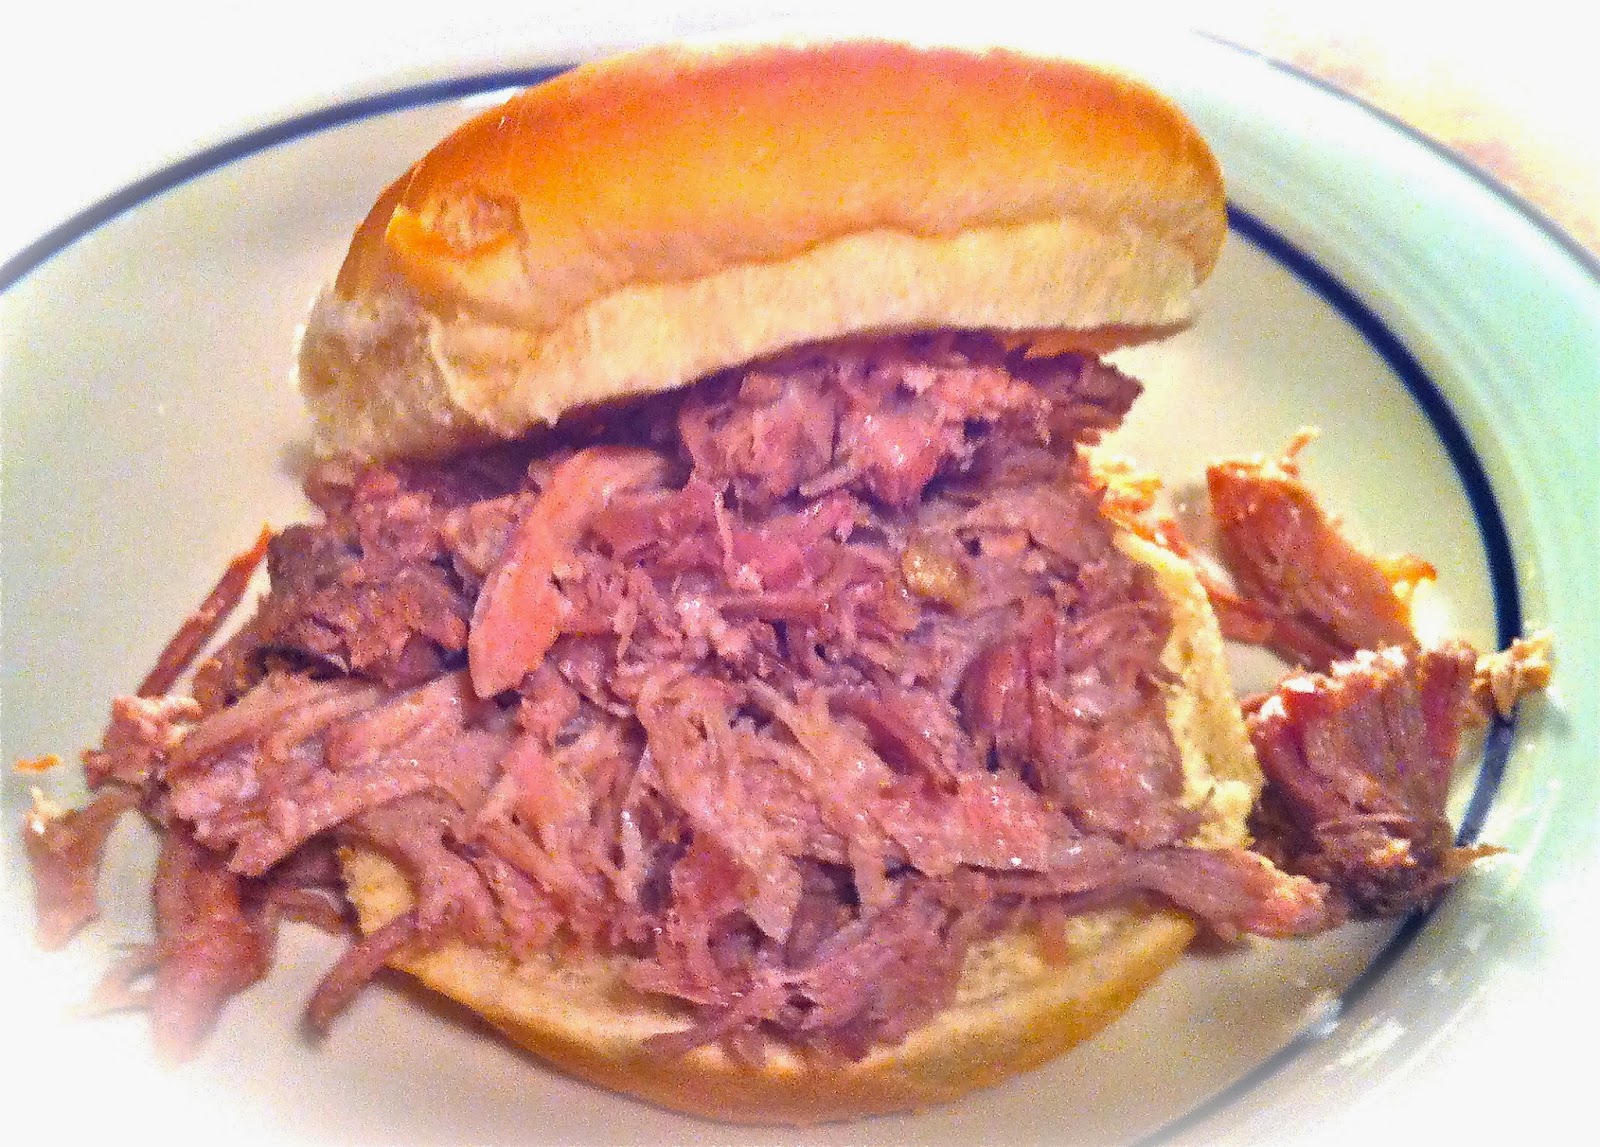
Carefully remove the pork from the slow cooker.  I had to remove it in pieces because it literally fell apart.  I put it in a 9 x 13 baking dish and pulled it with a fork to make smaller pieces.  Easiest pulled pork ever!  Is it good?  You bet it is!  Amazing flavor and texture - so tender and delicious.

We had guests for dinner last night and everyone truly enjoyed every last bite of this fabulous pork.  That is why I know it would be a major hit for a Super Bowl party.  You can do so many things with it or enjoy it in a simple fashion by spooning some of the au jus over the meat.

Have you ever had a Cuban sandwich?  They are DEEEEEElicious.  They have pork, deli ham, mustard, pickles, and swiss cheese on Cuban style bread (if you can find it).  If not, use an Italian loaf or something a little crusty like ciabatta .  You could use a baguette and make smaller sandwiches.  We simply ate this flavorful, tender pork like a barbecue sandwich on a bun.  Eat it any way you like and it will be delicious.

If you are not attending or hosting a Super Bowl party, you can still enjoy this recipe this weekend.  It is easy and worth every minute of those 6 hours cooking time.  Your house will smell amazing and you will be pacing the floor waiting for it to be done so you can dig in.  Yes, it's that good.  Dan highly endorses it.

Everyday Donna

Things to Remember:

The Super Bowl is Americana at its most kitsch and fun.  Sting


Tuesday, January 21, 2014

Brown Sugar Glazed Pork Loin

 Yes, it is really still winter.  No, we don't want it to be winter, we want the 60 degree weather we had yesterday, not the 30 degree and slipping kind of weather we are having today - with snow flurries.  No, this weather is not my favorite and never will be.  Gray, gloomy days make me gray and gloomy if I am not careful.  Tomorrow is supposed to be sunny - still cold - but sunny.  That is a good thing.

Since it is still winter, we truly appreciate some good comfort food.  I describe comfort food as things that make you feel comforted, satisfied, and feel good.  Sunday evening, the Nashville family came over for dinner and I made this fabulous pork roast with a brown sugar glaze.  It is SOOOO good and really quite easy.  I also made parmesan chicken sticks for the kids which they simply devoured.  You can find the recipe on my blog.

We have six adults and five grandsons who live in town, and food preparation requires some considerations.  We have one really picky eater who happens to be the oldest grandson at 10.  We have a son in love with Celiac, so that is another consideration.  Now, our second daughter has to eat gluten free also.  In the end, we all benefit from gluten free to some degree I am sure, but do you know how many recipes contain gluten?  Way too many.  We don't want anyone falling ill or feeling bad, so we do our best to accommodate.  The good news is there are so many more gluten free products on the market and recipes available.  This recipe called for flour, but I simply substituted corn starch.  To make that accommodation, you simply use 1/2 the amount of flour called for and substitute corn starch.  The recipe called for 2 tablespoons of flour, so simply substitute 1 tablespoon of corn starch.  Easy peasy.

I had a five pound pork roast and knew I wanted to fix it for dinner.  The chicken sticks were easy, but I wanted a different, yet delicious, recipe for the pork.  I found a hum dinger on About.Com in the Southern Food section.  It was easy, I had all the ingredients, so it was a go.  Here is what you need:

1 4.5 to 5 pound boneless pork loin
4 large cloves of garlic, peeled and cut in half
salt and pepper

Glaze

1 and 1/2 cups light brown sugar
1 TBSP corn starch
2 tsp Dijon mustard
3 TBSP balsamic or cider vinegar (I used cider vinegar)

Combine the ingredients in a saucepan, mixing well.  Cook over medium low heat until bubbly.  Stir and set aside.  You may have to reheat slightly before glazing the pork.  It becomes sort of crystalized, so I just spread it on with a spoon.  It will melt in the oven.

Pat the pork loin with paper towels to dry.  Cut the garlic cloves in half.  Make slits on the fat side of the pork loin and push the garlic cloves into the slits.  Lightly salt and pepper on all sides.  Place in a roasting pan, fat side up.  Heat the oven to 325 degrees fahrenheit.  Roast the pork loin for approximately 2 hours.  Remove the pan from the oven and coat the pork loin with the glaze.  Return to the oven for an additional 30 minutes, occasionally spooning the glaze over the pork until the internal temperature on a meat thermometer is 145 degrees for medium, 160 for well done.

The rule of thumb is to cook 1/2 hour for each pound, therefore, 2.5 hours.  Remove from the oven and let rest for at least 5 minutes before carving.  Spoon all the remaining glaze over the pork.  You don't want to waste a drop of it.

The pork was so juicy and tender, it was amazing.  The glaze provides a wonderful sweet flavor to the pork.  Yum.  Yum.  Dan LOVED this and our daughter asked for the recipe.  Nothing better than successful recipe choices.


Tonight, I used some of the left over pork to make Carnitas.  They were wonderful!!  What a great way to use some of that delicious left over pork and they are super easy to make.

FYI, rinse your roasting pan as soon as you have spooned the remaining glaze over the pork roast.  That stuff sets up like concrete otherwise.  To make cleaning the pan easier if that happens (don't ask me how I know this), reheat the pan and pour the remainder out.  I'm just trying to make your lives easier.  Experience is a good teacher.

There are still a lot of cold days ahead.  It's about 60 days until spring - sigh.  There is lots of time for a lot of good "comfort food" meals.  Give this recipe a try.  I really think you will like it.

Everyday Donna

Things to Remember:

Comfort food - food that reassures - is different things to different people.  David Tanis, A Platter of Figs and Other Recipes


Thursday, May 23, 2013

Restaurant Style Salsa Roja Made At Home

 Do you love Tex-Mex food as much as we do?  Especially the chips and salsa?  Oh, we always eat too many chips and way too much salsa and then are so full we can't eat our food.  Guess that's okay really, because then we have some leftovers for the next day.

Did you know that salsa is now the number one condiment in the United States?  We eat more salsa in this country than ketchup.  Hard to believe, but it's true.  Salsa is the spanish word for sauce and there are many, many kinds of salsa.  When we refer to salsa, we mean the red kind served at most Tex-Mex restaurants with chips.

Eating salsa at home is a different story.  The biggest problem for me is we don't like jarred salsa.   It always has green peppers in it and Dan can't eat green peppers.  It also doesn't taste like fresh salsa.  You can get some fresh salsa's that are pretty good in the fresh food aisle at the grocery store IF your grocery sells it.  If you can't get it, I have a solution for you!

I have been messing around trying to find a good home made recipe for salsa and I have finally hit upon it.  Dan LOVES this salsa (and he's kind of picky).  It's made with canned tomatoes which means the tomatoes have been cooked and that actually makes them better for you!  Did you know that?  Yes, there is more lycopene in cooked tomatoes.  Lycopene inhibits cancer and cardiovascular disease in humans.

This recipe is really quite easy to make, but you need a blender or food processor to make it.  It is not chopped like pico de gallo which is called salsa fresca and is made from fresh tomatoes, onions, chilies, and lime juice.  Good pico depends on good tomatoes which only happen in the summer around here.  It also takes a lot of chopping.  Salsa roja can be made year round because you can always get canned tomatoes and you can use a blender or food processor.  Guess which one I prefer?

Here is what you need for this salsa.
1 large can whole tomatoes, drained
1 can Ro-Tel original, undrained (unless you like it really spicy, then get the hot kind)
1 small onion, cut in half, chop 1/2 only
1 or 2 cloves of garlic, chopped
2 or 3 limes (depending on size)
1 bunch fresh cilantro
1/4 tsp salt
2 tsp sugar

To make the salsa, drain the can of large tomatoes and put them in the blender or food processor.  Add the Ro-Tel liquid and all.  Cut the onion in half and chop only one half of the onion and toss in the blender.  If your garlic cloves are large, start with 1, use 2 if small.  Peel, chop and toss in blender.  Now for the fun.  I use the "grate" setting on our blender.  Whir it around just until the ingredients are mixed.  You do not want ketchup consistency, but want some tomato pieces in the salsa.  Next, add the salt, sugar, and juice of two limes, and a large handful of cilantro rough chopped.  Whir one more time.   Now taste.  If it needs more salt, add just a pinch.  The sugar is important because it helps cut the acidity of the tomatoes, but don't make it too sweet.  Adjust lime and garlic to your tastes.

We had a big old bowl of this salsa with dinner tonight.  It's delicious.  Also, a serving of salsa counts as a serving of vegetables, so if you have children who are picky eaters but will eat salsa, let them eat away!!

This recipe makes about 4 cups of salsa.  I keep it in the fridge most of the time.  You never know when you might have some unexpected company, want a snack, or something to serve as an appetizer before dinner.  Salsa roja = perfect!  Give it a try.

Everyday Donna

Things to Remember:

A world without tomatoes is like a string quartet without violins.  Laurie Colwin


Wednesday, June 13, 2012

Pork Butt At It's Finest - Low and Slow

Pulled pork, slow roasted, with tons of flavor - is there anything better?  Perhaps not.  I made this pork butt on Memorial Day and used a recipe I found at Food.com.  It's a keeper and we will be having this again and again.  It's an easy recipe that produced wonderfully seasoned, super tender pork that made us sad when it was gone.  It may sound like an odd combination to you, but it creates a wonderful bark on the pork butt that has a sweet barbecue flavor.  Yum.  Yum.  Yum.  Wish I had some right now.

Recently while watching Bobby Flay, he gave an explanation of the difference between barbecuing and grilling.  Barbecuing is done low and slow, grilling is high heat and fast cooking.   Makes sense doesn't it?  This beautiful pork butt was cooked low and slow and was worth the time it took.  Here is what you need.

1 4 pound pork butt
whole garlic cloves (I used 5)
1/3 cup Worcestershire sauce
3/4 cup light brown sugar, packed
1 1/4 cups apple juice
1/2 tsp salt
1/2 tsp black pepper

First, make slits all over the pork butt and insert a whole garlic clove into each slit.  If you like lots of garlic, go for it and add more.  I like mild garlic flavor in barbecue, so I used 5 whole cloves.
Just peel off the paper wrapper on each clove and shove them down into the slits you made in the meat.

Now, place the pork butt in a dutch oven or greased casserole that has a lid.  Let it sit at room temperature for 1.5 hours.  After 1.5 hours, spoon any Worcestershire sauce in the bottom of the pan back over the pork butt.

Using your hands, press the brown sugar onto all sides of the butt making sure it sticks to the meat.  Go slow and press hard.

Pour the apple juice down the side of the pan so  you don't knock any of the brown sugar off the butt.  Cover tightly.

Preheat your oven to 425 degrees Fahrenheit for 15 minutes.  Place the pan with the pork butt in the oven and IMMEDIATELY reduce the temperature down to 200 degrees Fahrenheit.  Remember, LOW and slow.

The roast will take about 4 hours until the meat is fall apart tender.  *Here is where I did something a little different.  At 3.5 hours, I removed the pan from the oven.  We turned the gas grill on low heat and put a foil packet of hickory chips on the grill.  You soak the chips in water for several hours so they will smoke, then place them in aluminum foil and seal the top by folding the foil over.  Oh, it gives the meat such a good flavor.  Nothing like a good smoke flavor, like the barbecue we grew up with.  I put the whole butt on the grill and let it cook for about 45 minutes (low heat on one side, meat on the side with no flame) and then removed it to a platter.  At this point, you can pull the pork using two forks and sort of shredding it, or do as I did and slice it.

The pork butt was served with our favorite barbecue sauce, Sweet Baby Ray's, which is tomato based and has just an undertone of spice to it - not too much, just right.  The pork was so flavorful and delicious that it really didn't need any sauce as far as I was concerned.  Fantastic.

Summertime is a great time for serving meat that has been cooked low and slow.  You can make sandwiches or serve it sliced.  It's great for picnics or easy Sunday dinners.  Either way, it's worth the effort.  Give this recipe a try.  It has been approved by the whole family.

Everyday Donna

Things to Remember:

The memories of childhood summer swirl around cook outs, picnics, friends, swimming, laughter, ice cream and fireflies.   Games of tag and kick the can, hide and seek and whiffle ball.  Those were golden days.   donna