You are looking at a picture of the very last piece of one of the best pork loins I have ever made. I was in such a tizzy trying to get everything ready for dinner with starving grandsons running everywhere - some were crying they were so hungry - that I forgot to take a picture of that beautiful roast when it came out of the oven. I was VERY sad. Everyone had been served when I realized I didn't have one single picture of the finished product. Fortunately, when I looked in the pan there was one glorious piece left, so that is what you are looking at. See that glaze? Amazingly delicious!
The grocery had a special on pork roasts and I got a 5 pound roast for the outstanding price of $9.00. Wowza, I was excited. I like to fix dinner for the "in town" family and sometimes it is a challenge to come up with something that will feed everyone without breaking the budget. Do you ever have that problem? We have 6 adults and 6 children eating, so it takes quite a bit to fill everyone up, especially the men.
Consider pork loin. It is delicious, easy to prepare, feeds a lot of people and can be found at a good price if you watch the ads. There are lots and lots of ways to fix it. I happened upon this recipe online and didn't write down where I found it. I think it was at AllGoodRecipes.com and let me tell you, it's a keeper. First, you make a rub for the pork loin and then cover it with bacon. I mean, that should be enough right? But, you also make a wonderful brown sugar glaze to go over it and that just puts it over the top! The meat was so tender and juicy, just heavenly. And then the glaze, well you'll just have to make it to find out. Yummmmmo!
Here is what you need:
1 5 pound pork loin (or somewhere close)
about 5/6 slices of bacon, cut in half
1 tsp. chili powder
1/2 tsp paprika
2 tsp salt
1/2 tsp fresh cracked black pepper
1/2 tsp cumin
1 tsp cinnamon
Let your pork loin set out for about 1/2 hour to come to room temperature. Mix all the spices and rub over the entire pork loin. Place in a 9x13 baking pan or dish, fat side up, and cover the pork with the bacon slices. Try not to overlap the bacon too much so it will cook. Place in a 350 degree oven and cook for about 1.5 hours.
I did remember to take a picture of the roast just as I put it in the oven. It was a crazy day.
While the pork is cooking, make the glaze. Here is what you need:
1 cup light brown sugar, packed
1 TBSP flour (I used 1.5 tsp. corn starch so it is gluten free)
2 TBSP cider vinegar
1/2 tsp dijon mustard
Combine the ingredients in a saucepan and stir until the sugar has melted and everything is combined. Simmer for one (1) minute. Remove the loin from the oven after 1.5 hours. Pour the glaze over the entire roast and return the pan to the oven. Continue to cook for another 15 - 30 minutes until the internal temperature reaches 160 degrees F.
Remove the pan from the oven and let it sit for a few minutes before slicing and serving. (if you can wait that long) One look at that crispy bacon on top and you will want to dig right in.
This dish is so fantastic that it could be served at the most elegant dinner party or for a simple family meal. Oh my, it is so good. It made me hungry just looking at the picture. Everyone in the family loved it. We will be having this again.
Add this recipe to your repertoire. You will have requests to make it again. I know if there had been any left, it would have made fantastic leftovers. Maybe next time.
Everyday Donna
Things to Remember:
There is nothing like sitting around the dinner table with family enjoying good food, laughing, talking and making memories.
donna
Thursday, August 9, 2012
Wednesday, August 8, 2012
Donna's Fresh Green Beans With Bacon And New Potatoes
Let's talk about the humble green bean, perhaps the blandest of all vegetables. Unless you doctor those beans up with some real flavor, they really are quite tasteless, and boring, and tasteless. Did I say tasteless? So, let's make some green beans the way grandma did, except without all the bacon grease. Yeah, those things would slide right off your plate. They were so shiny from the bacon grease you could put your lipstick on looking in one of them. Did they taste good? Sure, but we know that is not the healthiest way to eat them even though grandma lived to the ripe old age of 96. Hmmm, there may be something in that bacon grease after all.
Grandma always classified green beans as bunch beans or pole beans. Actually, they are bush beans and pole beans. Did you know there was a difference? If you have family from Kentucky, you know the difference. Bush beans grow low to the ground on a bush like plant and are thin and not very stringy. Pole beans, otherwise known as shelly beans in the Kentucky vernacular, are the ones I really love. They were planted next to a tripod of poles with string staked to the ground and the beans would vine up the strings. They are thicker green beans and can be kind of stringy so you have to remove the strings when you snap the beans. Also, you can pop them open and let some of the beans inside the pod fall into the pot and they are super delicious. Those are known as shelly beans. Anybody know what I'm talking about? I know my cousin Linda does. When they are available in the summer, I would much rather have the pole beans than the bush beans. They have so much more flavor and personality than the bush beans. If bush beans are all that's available, I'm good with those.
Green beans were available fairly early in the summer at the farmer's market and I fixed a lot of them. Then the drought came along and there were no green beans because they need a lot of water. I am more than happy to report that they are available again at the farmer's market. We got enough rain in July that there are fresh green beans again. Yay!!!
If you have never prepared fresh green beans, you don't know what you are missing. Seriously. Canned or frozen green beans in no way compare to the fresh variety, especially if they are cooked the right way. Grandma's way. About the only way I will eat a canned green bean is if you fix a green bean casserole - what we always called the Indiana state casserole. You know, the one that shows up at every holiday and pot luck dinner. Yeah, that's the one.
Let's talk about fresh green beans and how to make them heavenly delicious. If I am going to go to the effort to cook green beans, I don't want just a handful when I'm done. I want left overs, several days worth of green beans because they actually get better each time you eat them. They just keep absorbing all the goodness from the onions and the smoked meat and the new potatoes. Okay, I just drooled on the keyboard. Time to get down to business.
You want to buy 3 to 4 pounds of green beans. Don't faint. You will eat them. If not, share them with friends and family. They are going to love you forever if you do. Now, you have to snap all those beans. That's right. Snap them all. I use it as a meditation practice. Our youngest son Tyler always loved to help me snap beans when he was a little guy. I really miss him helping me. We always had a lot of fun and that is such a good memory.
First, set up your snapping station. I use a colander, a bowl to hold the strings and bean ends, and the bag of green beans. Put another plastic bag down to catch any ends or strings that miss the bowl. Makes clean up easier. Trust me, this is not my first rodeo. You will be glad you did this.
If you've never really studied a fresh green bean, they have two distinct ends that must be removed.
If you are using bush beans, they are not very stringy so you will remove each end and snap the rest of the bean in several pieces. If you are using pole beans, they can be really stringy and the string will be attached to the end when you break it off. Just peel it all the way down to the end of the bean. Repeat with the other end, then snap into several pieces. This takes a little time, maybe a half hour. Put on some good music, clear your mind and snap away. Before you know it you have a colander full of green beans, an empty bag and a bowl with ends and strings. Clean up the bags, toss the ends in the trash, and take the colander to the sink to wash the beans. Let the colander drain in the sink while you get the seasoning ready in the big pot you will cook the beans in.
Lets talk about seasoning. You want something with a good smokey flavor like bacon, country bacon (like in the picture below), a smoked ham hock or a smoked turkey leg. All are delicious and impart wonderful flavor to the beans and the pot liquor. Pot liquor is the flavored water that remains from cooking the beans in case you didn't know. It's yummo.
For this batch of beans, I used this smoked bacon I get at the farmer's market.
It comes in a chunk and only costs about $3.00 and I use it for many, many things. I cut off some thick strips, about 3 or 4, and dice it. You can also use strips of bacon you buy in the grocery. Stack 4 or 5 strips on top of each other and cut into lardons (strips cut crossways) and do the same thing I am going to tell you about.
Get your dutch oven or big pot out (at least 10 quarts) and put it on the stove. Peel two big onions and cut them in half. Then cut them into big chunks. Put the diced bacon in the bottom of the pot to cook and render out the bacon fat. Grandma always kept a container with bacon grease in it and just spooned it into the pot. Most of us don't have those today, so this is the way to render out that scrumptious, flavorful fat. Don't let the bacon get very brown, it will continue to cook with the green beans. Take the pot off the heat and add all the drained green beans in the colander to the pot. Add the onion chunks and stir to mix the bacon and rendered fat into the green beans. Fill the pot with water so that about 3/4 of the beans are under water. They will release more water as they cook, so don't overfill. You can always add water. Put the pot back on medium heat, cover, and cook for at least an hour.
Now, we like new potatoes cooked with our beans. If you want to do that, buy about 2 pounds of small new potatoes, red or white, scrub them and cut the middle of the peel away from the potato. You will add these about the last 45 minutes of cook time. It's so worth doing.
At about an hour, season your green beans with salt. They take a lot of salt, but start with a small amount, about a tablespoon - you can always add! I taste and add, taste and add until I get where I want them to be. Add black pepper too. Lots. Put all the new potatoes on top of the green beans, cover the pot and continue to cook for 45 minutes to an hour, until the green beans are really soft and tender and the potatoes are too. They should look like the picture at the begging of the blog.
If you want to use a smoked turkey leg or ham hock, get the green beans ready to cook and just add either one on top of the beans. It's just a little different than using bacon.
For a complete meal, you can add corn on the cob on top of the potatoes. Shuck the corn, remove the silks and break the cobs in 1/2. Lay them on top of the potatoes and let cook for about 20 minutes. Ta da. You now have a complete meal. Add some sliced tomatoes, cornbread or biscuits and enjoy. If you used a smoked turkey leg or ham hock, cut the meat away from the bone and add to the beans. Super delicious! This is one of our all time favorite summer meals. Our kids always loved fresh green beans. My Grandma sure knew what she was doing. This grandma has been fixing green beans the same way for 43 years. No complaints yet!
I wish I could give you an exact recipe, but cooking green beans is not an exact science. It is a flavor and a feeling and a taste that suits you. Don't be afraid to give this a try, you'll never want canned beans again. Let me know how they turn out and Good luck!
Everyday Donna
Things to Remember:
Botanically speaking, tomatoes are the fruit of a vine, just as are cucumbers, squashes, beans and peas.
Horace Gray
Grandma always classified green beans as bunch beans or pole beans. Actually, they are bush beans and pole beans. Did you know there was a difference? If you have family from Kentucky, you know the difference. Bush beans grow low to the ground on a bush like plant and are thin and not very stringy. Pole beans, otherwise known as shelly beans in the Kentucky vernacular, are the ones I really love. They were planted next to a tripod of poles with string staked to the ground and the beans would vine up the strings. They are thicker green beans and can be kind of stringy so you have to remove the strings when you snap the beans. Also, you can pop them open and let some of the beans inside the pod fall into the pot and they are super delicious. Those are known as shelly beans. Anybody know what I'm talking about? I know my cousin Linda does. When they are available in the summer, I would much rather have the pole beans than the bush beans. They have so much more flavor and personality than the bush beans. If bush beans are all that's available, I'm good with those.
Green beans were available fairly early in the summer at the farmer's market and I fixed a lot of them. Then the drought came along and there were no green beans because they need a lot of water. I am more than happy to report that they are available again at the farmer's market. We got enough rain in July that there are fresh green beans again. Yay!!!
If you have never prepared fresh green beans, you don't know what you are missing. Seriously. Canned or frozen green beans in no way compare to the fresh variety, especially if they are cooked the right way. Grandma's way. About the only way I will eat a canned green bean is if you fix a green bean casserole - what we always called the Indiana state casserole. You know, the one that shows up at every holiday and pot luck dinner. Yeah, that's the one.
Let's talk about fresh green beans and how to make them heavenly delicious. If I am going to go to the effort to cook green beans, I don't want just a handful when I'm done. I want left overs, several days worth of green beans because they actually get better each time you eat them. They just keep absorbing all the goodness from the onions and the smoked meat and the new potatoes. Okay, I just drooled on the keyboard. Time to get down to business.
You want to buy 3 to 4 pounds of green beans. Don't faint. You will eat them. If not, share them with friends and family. They are going to love you forever if you do. Now, you have to snap all those beans. That's right. Snap them all. I use it as a meditation practice. Our youngest son Tyler always loved to help me snap beans when he was a little guy. I really miss him helping me. We always had a lot of fun and that is such a good memory.
First, set up your snapping station. I use a colander, a bowl to hold the strings and bean ends, and the bag of green beans. Put another plastic bag down to catch any ends or strings that miss the bowl. Makes clean up easier. Trust me, this is not my first rodeo. You will be glad you did this.
If you've never really studied a fresh green bean, they have two distinct ends that must be removed.
If you are using bush beans, they are not very stringy so you will remove each end and snap the rest of the bean in several pieces. If you are using pole beans, they can be really stringy and the string will be attached to the end when you break it off. Just peel it all the way down to the end of the bean. Repeat with the other end, then snap into several pieces. This takes a little time, maybe a half hour. Put on some good music, clear your mind and snap away. Before you know it you have a colander full of green beans, an empty bag and a bowl with ends and strings. Clean up the bags, toss the ends in the trash, and take the colander to the sink to wash the beans. Let the colander drain in the sink while you get the seasoning ready in the big pot you will cook the beans in.
Lets talk about seasoning. You want something with a good smokey flavor like bacon, country bacon (like in the picture below), a smoked ham hock or a smoked turkey leg. All are delicious and impart wonderful flavor to the beans and the pot liquor. Pot liquor is the flavored water that remains from cooking the beans in case you didn't know. It's yummo.
For this batch of beans, I used this smoked bacon I get at the farmer's market.
It comes in a chunk and only costs about $3.00 and I use it for many, many things. I cut off some thick strips, about 3 or 4, and dice it. You can also use strips of bacon you buy in the grocery. Stack 4 or 5 strips on top of each other and cut into lardons (strips cut crossways) and do the same thing I am going to tell you about.
Get your dutch oven or big pot out (at least 10 quarts) and put it on the stove. Peel two big onions and cut them in half. Then cut them into big chunks. Put the diced bacon in the bottom of the pot to cook and render out the bacon fat. Grandma always kept a container with bacon grease in it and just spooned it into the pot. Most of us don't have those today, so this is the way to render out that scrumptious, flavorful fat. Don't let the bacon get very brown, it will continue to cook with the green beans. Take the pot off the heat and add all the drained green beans in the colander to the pot. Add the onion chunks and stir to mix the bacon and rendered fat into the green beans. Fill the pot with water so that about 3/4 of the beans are under water. They will release more water as they cook, so don't overfill. You can always add water. Put the pot back on medium heat, cover, and cook for at least an hour.
Now, we like new potatoes cooked with our beans. If you want to do that, buy about 2 pounds of small new potatoes, red or white, scrub them and cut the middle of the peel away from the potato. You will add these about the last 45 minutes of cook time. It's so worth doing.
At about an hour, season your green beans with salt. They take a lot of salt, but start with a small amount, about a tablespoon - you can always add! I taste and add, taste and add until I get where I want them to be. Add black pepper too. Lots. Put all the new potatoes on top of the green beans, cover the pot and continue to cook for 45 minutes to an hour, until the green beans are really soft and tender and the potatoes are too. They should look like the picture at the begging of the blog.
If you want to use a smoked turkey leg or ham hock, get the green beans ready to cook and just add either one on top of the beans. It's just a little different than using bacon.
For a complete meal, you can add corn on the cob on top of the potatoes. Shuck the corn, remove the silks and break the cobs in 1/2. Lay them on top of the potatoes and let cook for about 20 minutes. Ta da. You now have a complete meal. Add some sliced tomatoes, cornbread or biscuits and enjoy. If you used a smoked turkey leg or ham hock, cut the meat away from the bone and add to the beans. Super delicious! This is one of our all time favorite summer meals. Our kids always loved fresh green beans. My Grandma sure knew what she was doing. This grandma has been fixing green beans the same way for 43 years. No complaints yet!
I wish I could give you an exact recipe, but cooking green beans is not an exact science. It is a flavor and a feeling and a taste that suits you. Don't be afraid to give this a try, you'll never want canned beans again. Let me know how they turn out and Good luck!
Everyday Donna
Things to Remember:
Botanically speaking, tomatoes are the fruit of a vine, just as are cucumbers, squashes, beans and peas.
Horace Gray
Tuesday, August 7, 2012
A Chocolate Emergency Kind of Day
Today was "one of those days." Had to make a visit to the opthalmologist for a six month check up. Time for a pressure test for glaucoma - both eyes. I have been doing this for 28 years. The good news is, I am now "eligible" for a laser procedure to open the drainage passages from my eyes because the 4 medications I use just aren't keeping my pressures where they want them to be. High pressures cause irreversible damage to the optic nerve. Damage to the optic nerve leads to blindness. I really don't want to go there. Now, I get to fight with my insurance company to see if they will pay for the procedures. Ugh.
Since Dan and I were out and about, we had lunch at PFChang's because it's near the doctor's office. Lettuce wraps - yum! He had cashew chicken, oh and I ate his hot and sour soup because he doesn't like it. Lucky me.
You know how there is "something" you want to eat sometimes? PFChang's was good, but that wasn't it. So we drove through Starbucks and he had a mocha with whipped cream. (I could hear his arteries screaming). I had my usual Americana, one shot decaf. I know, I know. I just can't do caffeine. Getting old sucks sometimes. But, the Americana wasn't it either. That rich coffee usually does the trick. Not today.
We headed home. I tried. I really tried. I looked at the cabinet and turned away. I did a few things, but that red cabinet was calling my name like a siren's song. In that cabinet is our emergency stash. Emergency stash of what? Why chocolate of course. Yes, I needed chocolate. So I walked to the cabinet and opened the doors. There in the corner is our stash of different kinds of chocolate. Yes, different kinds. Shameful, I know. (I know chocolate has some caffeine, but not as much as coffee.)
First, I had a couple of these.
See how rumpled the sack is? It's been opened and closed several times. I played a few word games on Facebook while I ate a Godiva Gem or two. Good. Yeah. But, that wasn't it. I kept looking at the red cabinet. Should I? Shouldn't I? Okay, I'm going back in.
I put the Godiva sack back in it's special place and I stood there and stood there looking at the last package in the cabinet. The. Very. Last. Trader Joe's. Dark. Chocolate. Bar. With Caramel. And black sea salt. Best. Candy. Bar. EVER!!!!
If I ate the last one, we would not be going back across town to Trader Joe's until next week. What if there was another emergency and there was no Trader Joe's Dark Chocolate? Decisions. Decisions. You guessed it, I pulled that candy bar out of the cabinet and sat down at the table.
Oh divine bar of rich, dark chocolate with caramel in the center and that lovely black sea salt. Look, it has 70% cacao. Glorious.
I mean seriously, look at the description on the package. Exotic Hawaiian Black Sea Salt from the Pacific seawater that surrounds the Hawaiian Islands. We have never been to Hawaii (count yourself fortunate if you have), but this black sea salt of which they speak is divine. Simply divine.
Then, it is paired with that caramel and super dark chocolate - OH MY - is all I can say. I didn't even have my lei, Hawaiian shirt or grass skirt on and it still tasted outstandingly fabulous. And, look, no artificial colors, flavors or preservatives so it has to be good for you right? Another bonus? Check it out.
Mm hm. No gluten ingredients used. Bingo! All you people with gluten intolerance or allergies, this candy bar is for you!
So I opened the package up and someone has been eating on this candy bar. Goldilocks? I think not. Oh Daaaaan! Now I like chocolate on occasion and definitely in an emergency situation, but this guy is a complete chocoholic. Thank goodness he had not eaten it all or we would have been trekking back across town today.
Yup. It was him all right. At least he didn't eat it all or it could have been downright ugly. I pinched off a few pieces of that heavenly dark chocolate with the ooey, gooey caramel in the center and that was all I needed. Emergency abated. This was what I wanted to eat all along. Rich, dark chocolate. Pure comfort food.
I wrapped the remaining bar back up and put it back in the chocolate stash for another day. (That's if he doesn't get to it first). Happiness for a mere $1.79. Who could ask for more?
We will definitely have to stock up next week when we trek back across town to do our Trader Joe's shopping. If you don't have a Trader Joe's near you, make a drive to find one and get yourself some of these fabulous candy bars. Stock Up. Buy lots! Ask for some for your birthday or Christmas or just because. Give them for gifts. Everyone will thank you. You will be happy you did, because this candy bar is that good! No, it's better than good. It's amazing. It's a life saver. It's necessary. It's chocolate - dark chocolate with caramel and sea salt. You're going to thank me for this.
Hope your day was good. It could be better if you had one of these candy bars. Just sayin'.
Everyday Donna
Things to Remember:
Who was the person that decided to put sea salt with caramel and chocolate? Thank you whoever you are!
PS: Get your eye pressures checked! Glaucoma is a silent disease with no symptoms. It's worth it.
Monday, August 6, 2012
Gluten Free Lasagna Made With Zucchini - Fantastic!
Greetings friends! Yes, I have been absent for a week due to a little hiatus. We had to make a trip to the old home town to help my sister after she had some surgery. Then, we were without internet and television for a few days due to some unknown reason that AT&T had trouble figuring out. Do you know what it's like to have no television during the Olympics? Holy gymnastics, Batman, it is NOT fun. After 5 days, many phone calls and several repairmen later, they finally got everything working. Hallelujah! I did get to see that sweet Gabby Douglas win her gold medal. Awesome.
Our oldest daughter and her family have been on vacation for the last 10 days and just returned this afternoon. I knew she would not feel like cooking after spending all day in airports with 3 young sons, so I offered to fix dinner. Dan took them to the airport for their departure so their van had lived at our house during their trip. He went to pick them up at 4:30 and I fixed dinner so they could literally eat and run. The boys were F R I E D! They got up at 5 am eastern time to get to Boston in time to catch their flight home. They are very brave people. During dinner, the two year old melted down and then the 5 year old was right behind him. Mom and dad looked like they might cry. Grandma and Pawpaw just laughed - been there, done that.
Our son in love has Celiac so I always fix something that is gluten free. I was in the mood for lasagna (and who doesn't love lasagna?), but decided to make it with zucchini instead of pasta noodles. Let me tell you, it's absolutely fantastic and I may like it this was better than with noodles. This would be great for a meatless dish also. Just leave the meat out of the sauce. Easy peasy.
Here is what you need:
3-4 zucchini about 8 inches long, sliced longways in 1/4 inch slices
1 pound ground beef, turkey or sausage (I used beef)
2 jars of your favorite spaghetti sauce (I use Trader Joe's tomato basil - it's gluten free and delicious)
1 medium onion, peeled and chopped
2 cloves garlic, minced
8-10 cremini mushrooms (baby bellas)
1.5 containers fresh ricotta (15 ounce each)
3 eggs
1 16 ounce package shredded mozzarella cheese
1 fresh mozzarella ball
salt
pepper
First, slice the zucchini longways in 1/4 inch slices, salt on both sides and let drain in a colander. Zucchini has a lot of water in it and you don't want it in your lasagna.
Brown the ground beef (turkey or sausage) with the chopped onion and garlic, salt and pepper to taste. Throw in the sliced mushrooms and the two jars of pasta sauce. Heat until it bubbles, remove from heat.
Mix 1.5 containers of fresh ricotta cheese in a bowl with 3 eggs. Set aside.
Spray a 9x13 casserole with cooking spray. Press the zucchini slices between paper towels to remove any excess moisture. Line the bottom of the casserole with a layer of zucchini. See, it works just like noodles.
Cover the zucchini with 1/2 of the meat sauce.
Put 1/2 the ricotta mixture over the meat sauce in large dollops and then spread with a spoon.
Sprinkle 1/2 of the 16 ounce package of shredded mozzarella over the ricotta mixture.
Add another layer of zucchini over the mozzarella layer and repeat the layers - meat sauce, ricotta and shredded mozzarella. Cover the last layer of shredded mozzarella with slices from the fresh mozzarella ball.
Cover the casserole with aluminum foil and put it in a preheated 325 degree oven for 45 minutes. Remove the foil and increase the temperature to 350 degrees for another 15 minutes until all the cheese is melted. Remove from the oven and let rest for 5-10 minutes. Serve. Super D-licious.
I would recommend putting your casserole on a baking sheet while baking, because now I get to clean my oven since the ooey gooey cheese and sauce dripped all over the bottom. Ugh. Oh well, it was time to do that anyway.
We had a lovely green salad and crusty bread with this lasagna. I have to say, I think I may be a zucchini lasagna convert at this point. It's also a great way to use bounty from your summer garden! One more delicious way to use up that zucchini!
If you are gluten sensitive or allergic, this is a great way to enjoy lasagna without having to find gluten free noodles. It is so worth the effort to slice those zucchini and you get the extra nutrition from that delicious squash. Give it a try and see what you think. You may become a convert too!
Everyday donna
Things to Remember:
“Once again, my life has been saved by the miracle of lasagna.”
'Garfield' (Jim Davis)
Our oldest daughter and her family have been on vacation for the last 10 days and just returned this afternoon. I knew she would not feel like cooking after spending all day in airports with 3 young sons, so I offered to fix dinner. Dan took them to the airport for their departure so their van had lived at our house during their trip. He went to pick them up at 4:30 and I fixed dinner so they could literally eat and run. The boys were F R I E D! They got up at 5 am eastern time to get to Boston in time to catch their flight home. They are very brave people. During dinner, the two year old melted down and then the 5 year old was right behind him. Mom and dad looked like they might cry. Grandma and Pawpaw just laughed - been there, done that.
Our son in love has Celiac so I always fix something that is gluten free. I was in the mood for lasagna (and who doesn't love lasagna?), but decided to make it with zucchini instead of pasta noodles. Let me tell you, it's absolutely fantastic and I may like it this was better than with noodles. This would be great for a meatless dish also. Just leave the meat out of the sauce. Easy peasy.
Here is what you need:
3-4 zucchini about 8 inches long, sliced longways in 1/4 inch slices
1 pound ground beef, turkey or sausage (I used beef)
2 jars of your favorite spaghetti sauce (I use Trader Joe's tomato basil - it's gluten free and delicious)
1 medium onion, peeled and chopped
2 cloves garlic, minced
8-10 cremini mushrooms (baby bellas)
1.5 containers fresh ricotta (15 ounce each)
3 eggs
1 16 ounce package shredded mozzarella cheese
1 fresh mozzarella ball
salt
pepper
First, slice the zucchini longways in 1/4 inch slices, salt on both sides and let drain in a colander. Zucchini has a lot of water in it and you don't want it in your lasagna.
Brown the ground beef (turkey or sausage) with the chopped onion and garlic, salt and pepper to taste. Throw in the sliced mushrooms and the two jars of pasta sauce. Heat until it bubbles, remove from heat.
Mix 1.5 containers of fresh ricotta cheese in a bowl with 3 eggs. Set aside.
Spray a 9x13 casserole with cooking spray. Press the zucchini slices between paper towels to remove any excess moisture. Line the bottom of the casserole with a layer of zucchini. See, it works just like noodles.
Cover the zucchini with 1/2 of the meat sauce.
Put 1/2 the ricotta mixture over the meat sauce in large dollops and then spread with a spoon.
Sprinkle 1/2 of the 16 ounce package of shredded mozzarella over the ricotta mixture.
Add another layer of zucchini over the mozzarella layer and repeat the layers - meat sauce, ricotta and shredded mozzarella. Cover the last layer of shredded mozzarella with slices from the fresh mozzarella ball.
Cover the casserole with aluminum foil and put it in a preheated 325 degree oven for 45 minutes. Remove the foil and increase the temperature to 350 degrees for another 15 minutes until all the cheese is melted. Remove from the oven and let rest for 5-10 minutes. Serve. Super D-licious.
I would recommend putting your casserole on a baking sheet while baking, because now I get to clean my oven since the ooey gooey cheese and sauce dripped all over the bottom. Ugh. Oh well, it was time to do that anyway.
We had a lovely green salad and crusty bread with this lasagna. I have to say, I think I may be a zucchini lasagna convert at this point. It's also a great way to use bounty from your summer garden! One more delicious way to use up that zucchini!
If you are gluten sensitive or allergic, this is a great way to enjoy lasagna without having to find gluten free noodles. It is so worth the effort to slice those zucchini and you get the extra nutrition from that delicious squash. Give it a try and see what you think. You may become a convert too!
Everyday donna
Things to Remember:
“Once again, my life has been saved by the miracle of lasagna.”
'Garfield' (Jim Davis)
Wednesday, July 25, 2012
Salad Made With Romaine, Fresh Peaches, Blackberries, Mozzarella, Candied Pecans and Home Made Poppy Seed Dressing - This Is For You Jaley!
A very talented young friend of mine posted on Facebook that she had gone to the grocery last night and gone a little overboard on buying peaches and wondered what she could do with them. I told her it looked like there was a cobbler or crisp in her future. Or perhaps, a salad with peaches.
Jaley, this is for you! I created this salad recently when our family came over for dinner. I had lots of South Carolina peaches on hand and a pint of fresh blackberries. I am always trying to think up new ways to makes salads because, let's face it, the same old vegetable salads get old and bo-ring!
This salad has romaine lettuce, fresh peaches, fresh blackberries, candied pecans and fresh mozzarella cheese that has been cut into bite sized cubes. To go with it, I made a home made poppy seed dressing that is so good I could probably drink it with a straw.
Here is what you need for the salad:
1 head romaine lettuce
2 fresh peaches, peeled, pitted and sliced (or more if desired)
3/4 cups fresh blackberries (or a couple of handfuls if you don't want to measure)
1/2 cup pecans
1 Tbsp butter
2 Tbsp light brown sugar
1 ball fresh mozzarella cheese, cut into bite sized cubes
First, you want to candy your pecans. Melt the butter in a non-stick pan over medium to low heat. Add the brown sugar, stirring with a wooden spoon until it melts. Add the pecans and stir until the sugar starts to cling to the pecans. Remove pan from heat and let cool. Be careful not to burn your pecans. They take on a wonderful toasted caramel flavor that is divine. Just don't eat them all before you add them to the salad.
Cut or tear your romaine lettuce and add to a large salad bowl. Peel, pit and slice the peaces, add to the greens. Add the blackberries and the pecans. Cut the mozzarella into bite sized cubes and add to the salad. Toss.
Now, you will definitely want to make this fabulous poppy seed dressing. Here is what you need:
1/4 cup extra virgin olive oil
3 Tbsp champagne vinegar (available at most groceries)
2 Tbsp granulated sugar
1 tsp poppy seeds (available in the spice aisle, most groceries)
1/2 tsp dijon mustard
2 Tbsp grated sweet onion
Mix the ingredients in a jar with a tight fitting lid and shake, shake, shake. Or whisk together in a bowl. Serve in a small pitcher or bowl, or you could pass out straws.
The crunch of those little poppy seeds with the tangy sweetness of the dressing is the perfect compliment to this salad. Also, there are no preservatives or msg. like you get in bottled dressings.
If you have other greens instead of romaine, feel free to substitute. Just don't overwhelm the fruit with greens. You want a nice balance. You could also substitute feta, blue cheese, or a nice smoked gouda for the mozzarella, but the creamy goodness of the mozzarella is so good with the fruit, you might want to reconsider. It's your choice.
Who doesn't appreciate cool and crunchy food in this hot, muggy, humid weather? This salad fits the bill. There is no cooking required except for the pecans and you could leave them plain if you wanted - it just wouldn't be quite the same if you know what I mean.
So Jaley, give this salad a try. I think you will really like it and let me know what you think. I've got your back girl!
Everyday Donna
Things to Remember:
"An apple is an excellent thing -- until you have tried a peach."
George du Maurier (1834-1896)
Jaley, this is for you! I created this salad recently when our family came over for dinner. I had lots of South Carolina peaches on hand and a pint of fresh blackberries. I am always trying to think up new ways to makes salads because, let's face it, the same old vegetable salads get old and bo-ring!
This salad has romaine lettuce, fresh peaches, fresh blackberries, candied pecans and fresh mozzarella cheese that has been cut into bite sized cubes. To go with it, I made a home made poppy seed dressing that is so good I could probably drink it with a straw.
Here is what you need for the salad:
1 head romaine lettuce
2 fresh peaches, peeled, pitted and sliced (or more if desired)
3/4 cups fresh blackberries (or a couple of handfuls if you don't want to measure)
1/2 cup pecans
1 Tbsp butter
2 Tbsp light brown sugar
1 ball fresh mozzarella cheese, cut into bite sized cubes
First, you want to candy your pecans. Melt the butter in a non-stick pan over medium to low heat. Add the brown sugar, stirring with a wooden spoon until it melts. Add the pecans and stir until the sugar starts to cling to the pecans. Remove pan from heat and let cool. Be careful not to burn your pecans. They take on a wonderful toasted caramel flavor that is divine. Just don't eat them all before you add them to the salad.
Cut or tear your romaine lettuce and add to a large salad bowl. Peel, pit and slice the peaces, add to the greens. Add the blackberries and the pecans. Cut the mozzarella into bite sized cubes and add to the salad. Toss.
Now, you will definitely want to make this fabulous poppy seed dressing. Here is what you need:
1/4 cup extra virgin olive oil
3 Tbsp champagne vinegar (available at most groceries)
2 Tbsp granulated sugar
1 tsp poppy seeds (available in the spice aisle, most groceries)
1/2 tsp dijon mustard
2 Tbsp grated sweet onion
Mix the ingredients in a jar with a tight fitting lid and shake, shake, shake. Or whisk together in a bowl. Serve in a small pitcher or bowl, or you could pass out straws.
The crunch of those little poppy seeds with the tangy sweetness of the dressing is the perfect compliment to this salad. Also, there are no preservatives or msg. like you get in bottled dressings.
If you have other greens instead of romaine, feel free to substitute. Just don't overwhelm the fruit with greens. You want a nice balance. You could also substitute feta, blue cheese, or a nice smoked gouda for the mozzarella, but the creamy goodness of the mozzarella is so good with the fruit, you might want to reconsider. It's your choice.
Who doesn't appreciate cool and crunchy food in this hot, muggy, humid weather? This salad fits the bill. There is no cooking required except for the pecans and you could leave them plain if you wanted - it just wouldn't be quite the same if you know what I mean.
So Jaley, give this salad a try. I think you will really like it and let me know what you think. I've got your back girl!
Everyday Donna
Things to Remember:
"An apple is an excellent thing -- until you have tried a peach."
George du Maurier (1834-1896)
Tuesday, July 24, 2012
A Thoughtful Gift You Can Make
Recently my friend Linda and I were talking about crocheting (which we both do) and she was hunting for her crochet hook (which we all do), so I decided I would make her a crochet hook caddy so she would be able to find her crochet hooks whenever she needed them. I am also making one for myself because I am always hunting for just the hook I need and they are everywhere - in boxes, in my bag of yarn, in my paint brush caddy - yes, I know, go figure. It's worse than trying to find my cell phone.
I asked Linda what her favorite colors were and she told me yellow and lavender. I also happen to know that she loves all things "beach" because she spends time with her sister at her beach house. We talk about craft projects and things she can make with shells from time to time and she does a fabulous job. So, my little surprise project was under way.
Linda and I go WAAAAAY back to high school. We are both Bosse Bulldogs, class of 1966. Yes, you read that right. We are both grandmas, but we are still young in spirit. Linda lives in Texas and I live in Tennessee. When our oldest daughter was living in Dallas, I would get to see Linda for a lunch when we visited Holly and her family. Now, Holly lives in Tennessee and I don't get to see Linda as often as I did. But, we do talk online and on the phone and hopefully, she is coming to visit next year. Yeehaa, as they would say in Texas. Boy, are we going to have some fun. Anyway, I am getting totally off the subject. Today is Linda's birthday, and I wanted to feature this little project I made for her.
Even if you are not the world's best seamstress, you can make one of these. It is just simple machine sewing and is really not hard. I just made it up as I went. You will need 3 fat quarters in your favorite colors (or fabric scraps if you have them) and a 9 x 12 piece of felt and some ribbon. That's it. I can hear you asking why I used felt. Simple. Because I wanted the caddy to have more body and it would enhance the quilted look I planned to use to finish the caddy.
I tried to find some "beach" fabric here in Tennessee, but had absolutely no luck, so I went with stars which are my favorite and very symbolic of Texas. The inside pieces looks like water color swirls in yellow and lavender.
Here is how I started out. Fat quarters are 18 x 21 inches. I laid the two yellow pieces with the right sides facing. I then placed the felt piece 1/2 in from the top and left edges of the fabric and cut the right and bottom seams 1/2 from the edge of the felt.
Pin the felt to the wrong side of the cotton fabric and stitch just inside the edge of the felt, leaving about a 4 or 5 inch opening in the bottom so you can turn the piece. I used clear nylon thread so I didn't have to keep changing colors.
Trim the corners at an angle so you will have nice points when you turn this piece.
Now, turn the piece right side out. Turn the unstitched opening to match the rest of the seam line, press, and stitch shut on the right side of the fabric.
Now, you are going to cut the pocket that will hold the crochet hooks. Lay your "pocket" fabric (which was the lavender in my case) at least 1/2 way up from the bottom of the piece you just finished. Allow 1/2 inch seam allowance on the top, bottom, and both sides and cut a rectangle from the fabric. Fold each seam allowance under 1/4 inch two times so you will not have any raw edges. Press.
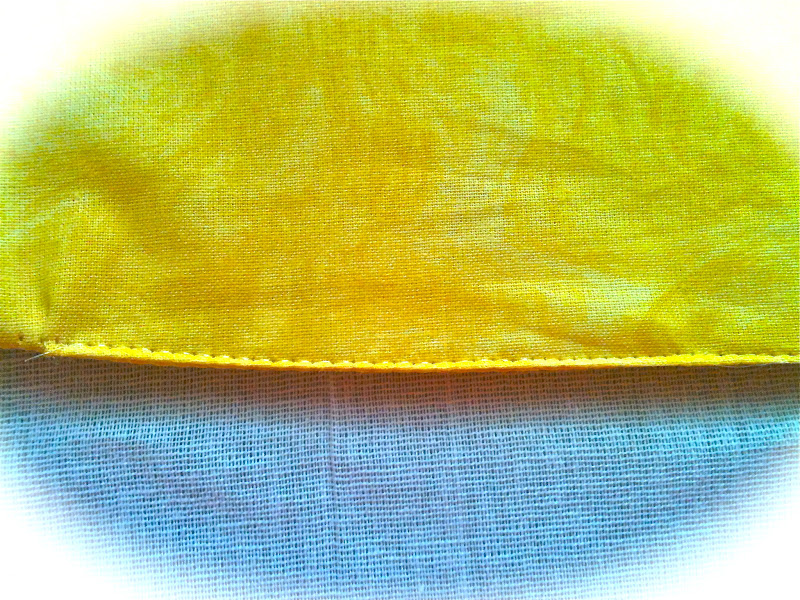
Stitch the top edge of the rectangle all the way across. Turn and pin to what will be the inside of your hook caddy. Stitch down one side, across the bottom and back up the other side. Now, take your smallest hood and place it inside the pocket next to the left seam. Measure, allowing enough room to slide the hook in easily. Mark the seam with a disappearing sewing marker if needed. I just free stitched mine. On the right hand side, place your biggest hook and do the same thing. Now, make several small pockets on the left, more medium sized pockets in the middle (because most of us use yard hooks which are medium sized) and then allow a couple of large pockets for big hooks like a P or a Q on the right side. Stitch each seam from the top of the pocket to the bottom, sewing in a straight line. This gives you a really nice quilted effect on the inside and outside of the caddy.
Cut two 12 inch pieces of ribbon and sew them to the right side of the caddy just above the pocket.
Roll your caddy from the left to the right and tie one piece of the ribbon around the outside of the closed caddy and tie a bow using the remaining ribbon. You will probably have to trim your ribbon so it with be the same length when tied. Ta da! You are finished. Now, you can organize all your crochet hooks easily and keep them in one place. You can carry them with you in your purse or project bag and they are easily at hand when needed.
Linda said she was going to take hers to the beach so she could work on projects while relaxing. That was my hope when I made this. Now, I have to get busy and finish mine. Crochet hooks are calling.
This project is quick and easy. You could also use the same process and make crayon or colored pencil carriers for your grandchildren. I always try to have crayons with me when we go out to eat just in case the restaurant doesn't have them. Your children would love you for this thoughtful gift. And, if you start now you can have a bunch of these made in time for Christmas. All those crafters and kids in your life will be so grateful for such a thoughtful gift that can be personalized individually.
Happy Birthday Linda. Hope your day was great and that you are enjoying your crochet hook caddy! Now, everybody get busy and give this project a try.
Everyday Donna
Things to Remember:
Every gift from a friend is a wish for your happiness.
Richard BachMonday, July 23, 2012
Grilled Zucchini And Bean Salad Is Outstanding!
It continues to be a hot, hot summer and no one wants to spend time over a hot stove, so how about a hot grill? Just thought I'd throw that in. I was looking for recipes that would utilize our abundance of zucchini coming in from our garden. Did you know that zucchini and squash are very prolific plants? They produce a LOT of produce per plant which is good, but then you want to use it and not prepare it the same way over and over.
Not only is zucchini super delicious and can be prepared in a great variety of ways, it is very good for you. It has vitamins, minerals, fiber and even protein.
One raw medium zucchini, including its skin, boasts 56 percent of your daily recommended value of vitamin C. It also delivers 11 percent of your daily value of vitamin K, 16 percent of riboflavin, 21 percent of vitamin B-6 and 14 percent of folate. Other vitamins present in lesser quantities include vitamin A, vitamin E, thiamin, niacin and pantothenic acid.
livestrong.com
Who knew such a humble vegetable could be so good for you and taste so good at the same time?
This recipe is from a show on the Food Network called Mexican Made Easy. It's one of my favorite shows and I love to watch it on Saturday mornings. I know I'm a nerd, but I love recipes and food shows and watching people prepare awesome recipes. It inspires me to the "nth" degree and encourages me to make better food for us and our extended family. The host of the show is Marcela Valladolid and she makes amazing food and I have used several of her recipes. This is one of the best ways ever to use zucchini and it's very easy too. Everyone LOVED this recipe.
Here is what you need:
3 zucchini, cut lengthwise in 1/2 inch thick slices
1 15 ounce can white kidney beans, drained and rinsed
1 15 ounce can red kidney beans, drained and rinsed
2 TBSP fresh lime juice (1 lime)
2 TBSP red wine vinegar
1/4 cup olive oil plus additional for brushing on the zucchini for grilling
salt and pepper
1/2 cup finely chopped onion
1/4 cup fresh cilantro, chopped
2 serrano chilis, stemmed, seeded, chopped (I left these out because we have little ones eating. Serranos are hotter than jalapenos.)
2 cloves garlic, minced
Cut the ends off the zucchini and cut into 1/2 inch thick slices longways. Brush both sides with olive oil, salt and pepper. Grill, turning once - about 4 minutes per side. Cut into 1 inch pieces. They will look like this.
Not only is zucchini super delicious and can be prepared in a great variety of ways, it is very good for you. It has vitamins, minerals, fiber and even protein.
One raw medium zucchini, including its skin, boasts 56 percent of your daily recommended value of vitamin C. It also delivers 11 percent of your daily value of vitamin K, 16 percent of riboflavin, 21 percent of vitamin B-6 and 14 percent of folate. Other vitamins present in lesser quantities include vitamin A, vitamin E, thiamin, niacin and pantothenic acid.
livestrong.com
Who knew such a humble vegetable could be so good for you and taste so good at the same time?
This recipe is from a show on the Food Network called Mexican Made Easy. It's one of my favorite shows and I love to watch it on Saturday mornings. I know I'm a nerd, but I love recipes and food shows and watching people prepare awesome recipes. It inspires me to the "nth" degree and encourages me to make better food for us and our extended family. The host of the show is Marcela Valladolid and she makes amazing food and I have used several of her recipes. This is one of the best ways ever to use zucchini and it's very easy too. Everyone LOVED this recipe.
Here is what you need:
3 zucchini, cut lengthwise in 1/2 inch thick slices
1 15 ounce can white kidney beans, drained and rinsed
1 15 ounce can red kidney beans, drained and rinsed
2 TBSP fresh lime juice (1 lime)
2 TBSP red wine vinegar
1/4 cup olive oil plus additional for brushing on the zucchini for grilling
salt and pepper
1/2 cup finely chopped onion
1/4 cup fresh cilantro, chopped
2 serrano chilis, stemmed, seeded, chopped (I left these out because we have little ones eating. Serranos are hotter than jalapenos.)
2 cloves garlic, minced
Cut the ends off the zucchini and cut into 1/2 inch thick slices longways. Brush both sides with olive oil, salt and pepper. Grill, turning once - about 4 minutes per side. Cut into 1 inch pieces. They will look like this.
By the way, zucchini are delicious eaten just like this!
Next, make the dressing by whisking the lime juice, vinegar and oil. Add the onion, cilantro, peppers (if using) and garlic. Toss to coat the veggies. Add the beans, stir to combine. Salt and pepper to taste. Add the zucchini which has been cut into bite sized cubes. Stir once more to combine. Serve.
The combination of flavors and textures is so, so good. Add the serrano peppers if you like heat in your salad. Or, you could use a small can of diced chilis, or even diced bell pepper. It would be your choice. It was delicious with no peppers.
This is a great side dish, but could also be eaten as a main dish because it is full of protein, fiber and deliciousness. The beans provide protein and the zucchini, which is one of my favorite vegetables, exudes that wonderful grilled flavor. Outstanding.
You can make a big bowl of this (I doubled the recipe) and enjoy it again and again. You will be sad when it's gone. If you have zucchini growing in your garden, you are in luck and can make it again and again. The farmer's market is also flush with zucchini and squash at this time of the year so load up. Here is another way you can use some of that summertime goodness. Thank you Marcela for this fabulous recipe. Enjoy!
Everyday Donna
Things to Remember:
Zucchinis terrific!
Like bunnies, prolific!
- Author Unknown
Like bunnies, prolific!
- Author Unknown
Subscribe to:
Posts (Atom)